Organising products with categories
Create a category in your Orbit dashboard, pick the products it holds or set rules that add them for you, publish it, then fill in custom fields and choose who can view it.
Categories group your products so shoppers can browse your store. You create them in your Orbit dashboard under Products. A manual category holds products you pick yourself. An automated category fills itself from rules you set.
Considerations
- The Title is the only field you must fill in. Everything else can wait.
- A category is either manual or automated. Pick one type per category.
- Products you pick are not saved until you click Save draft or Publish.
- A category can have one image, up to 5MB, as PNG, JPEG or WebP.
Create a category
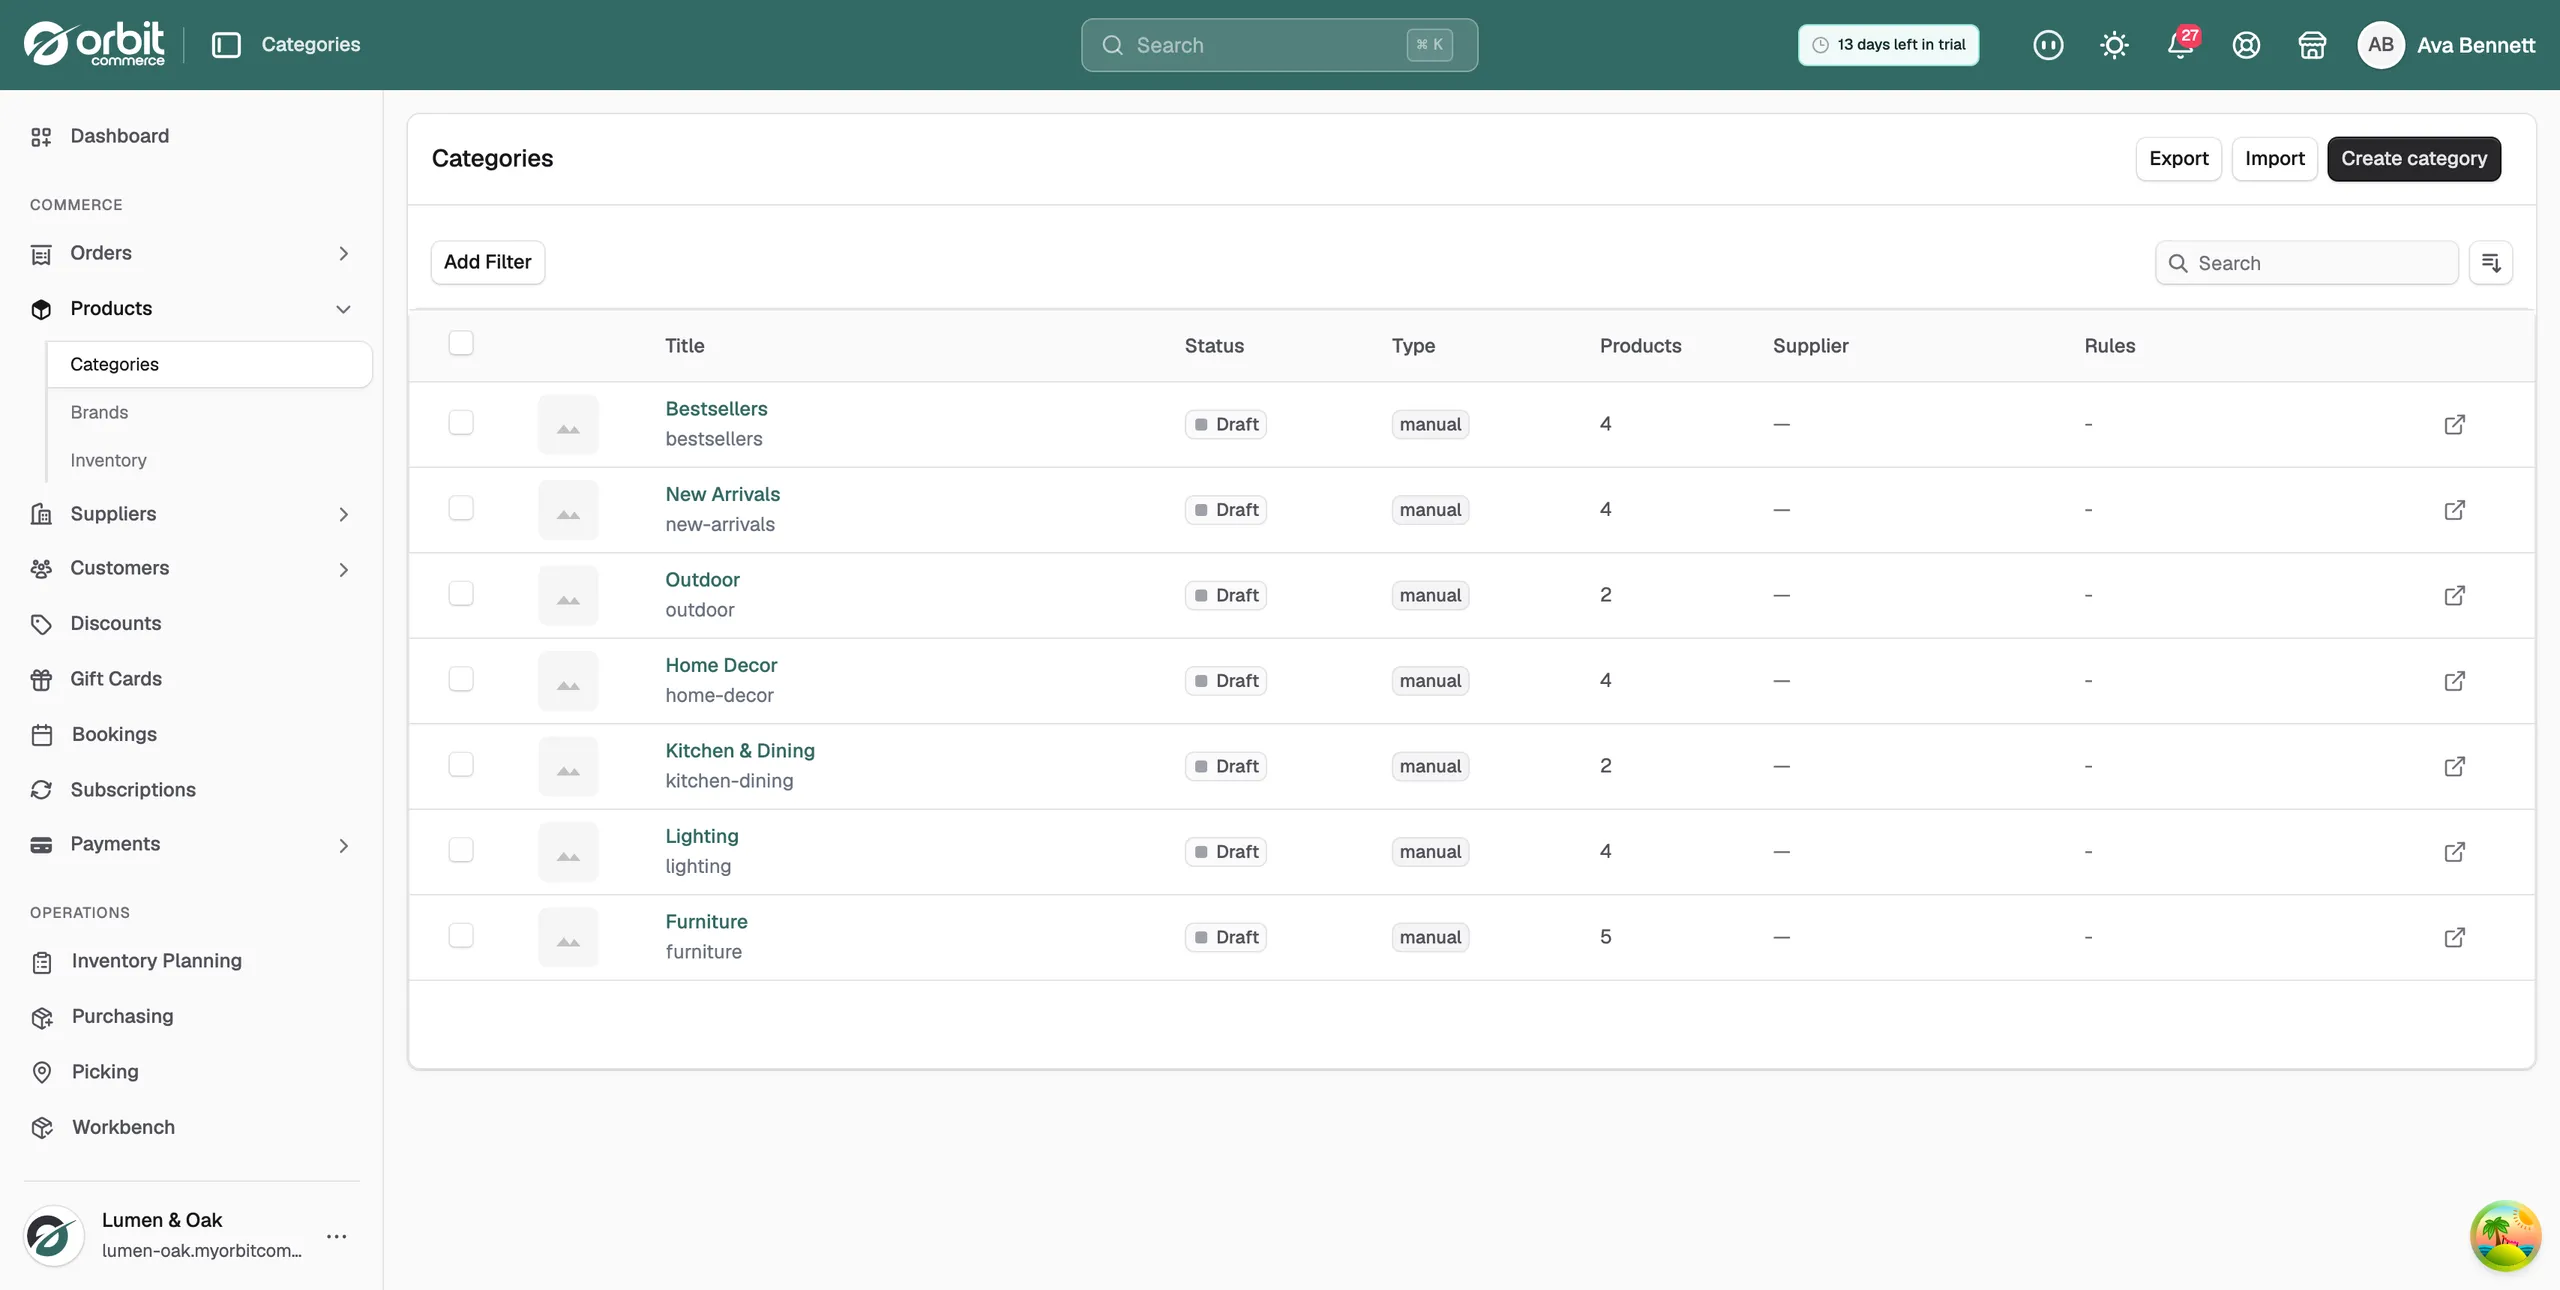
- From your Orbit dashboard, go to Products, then Categories.
- Click Create category. The New Category page opens.
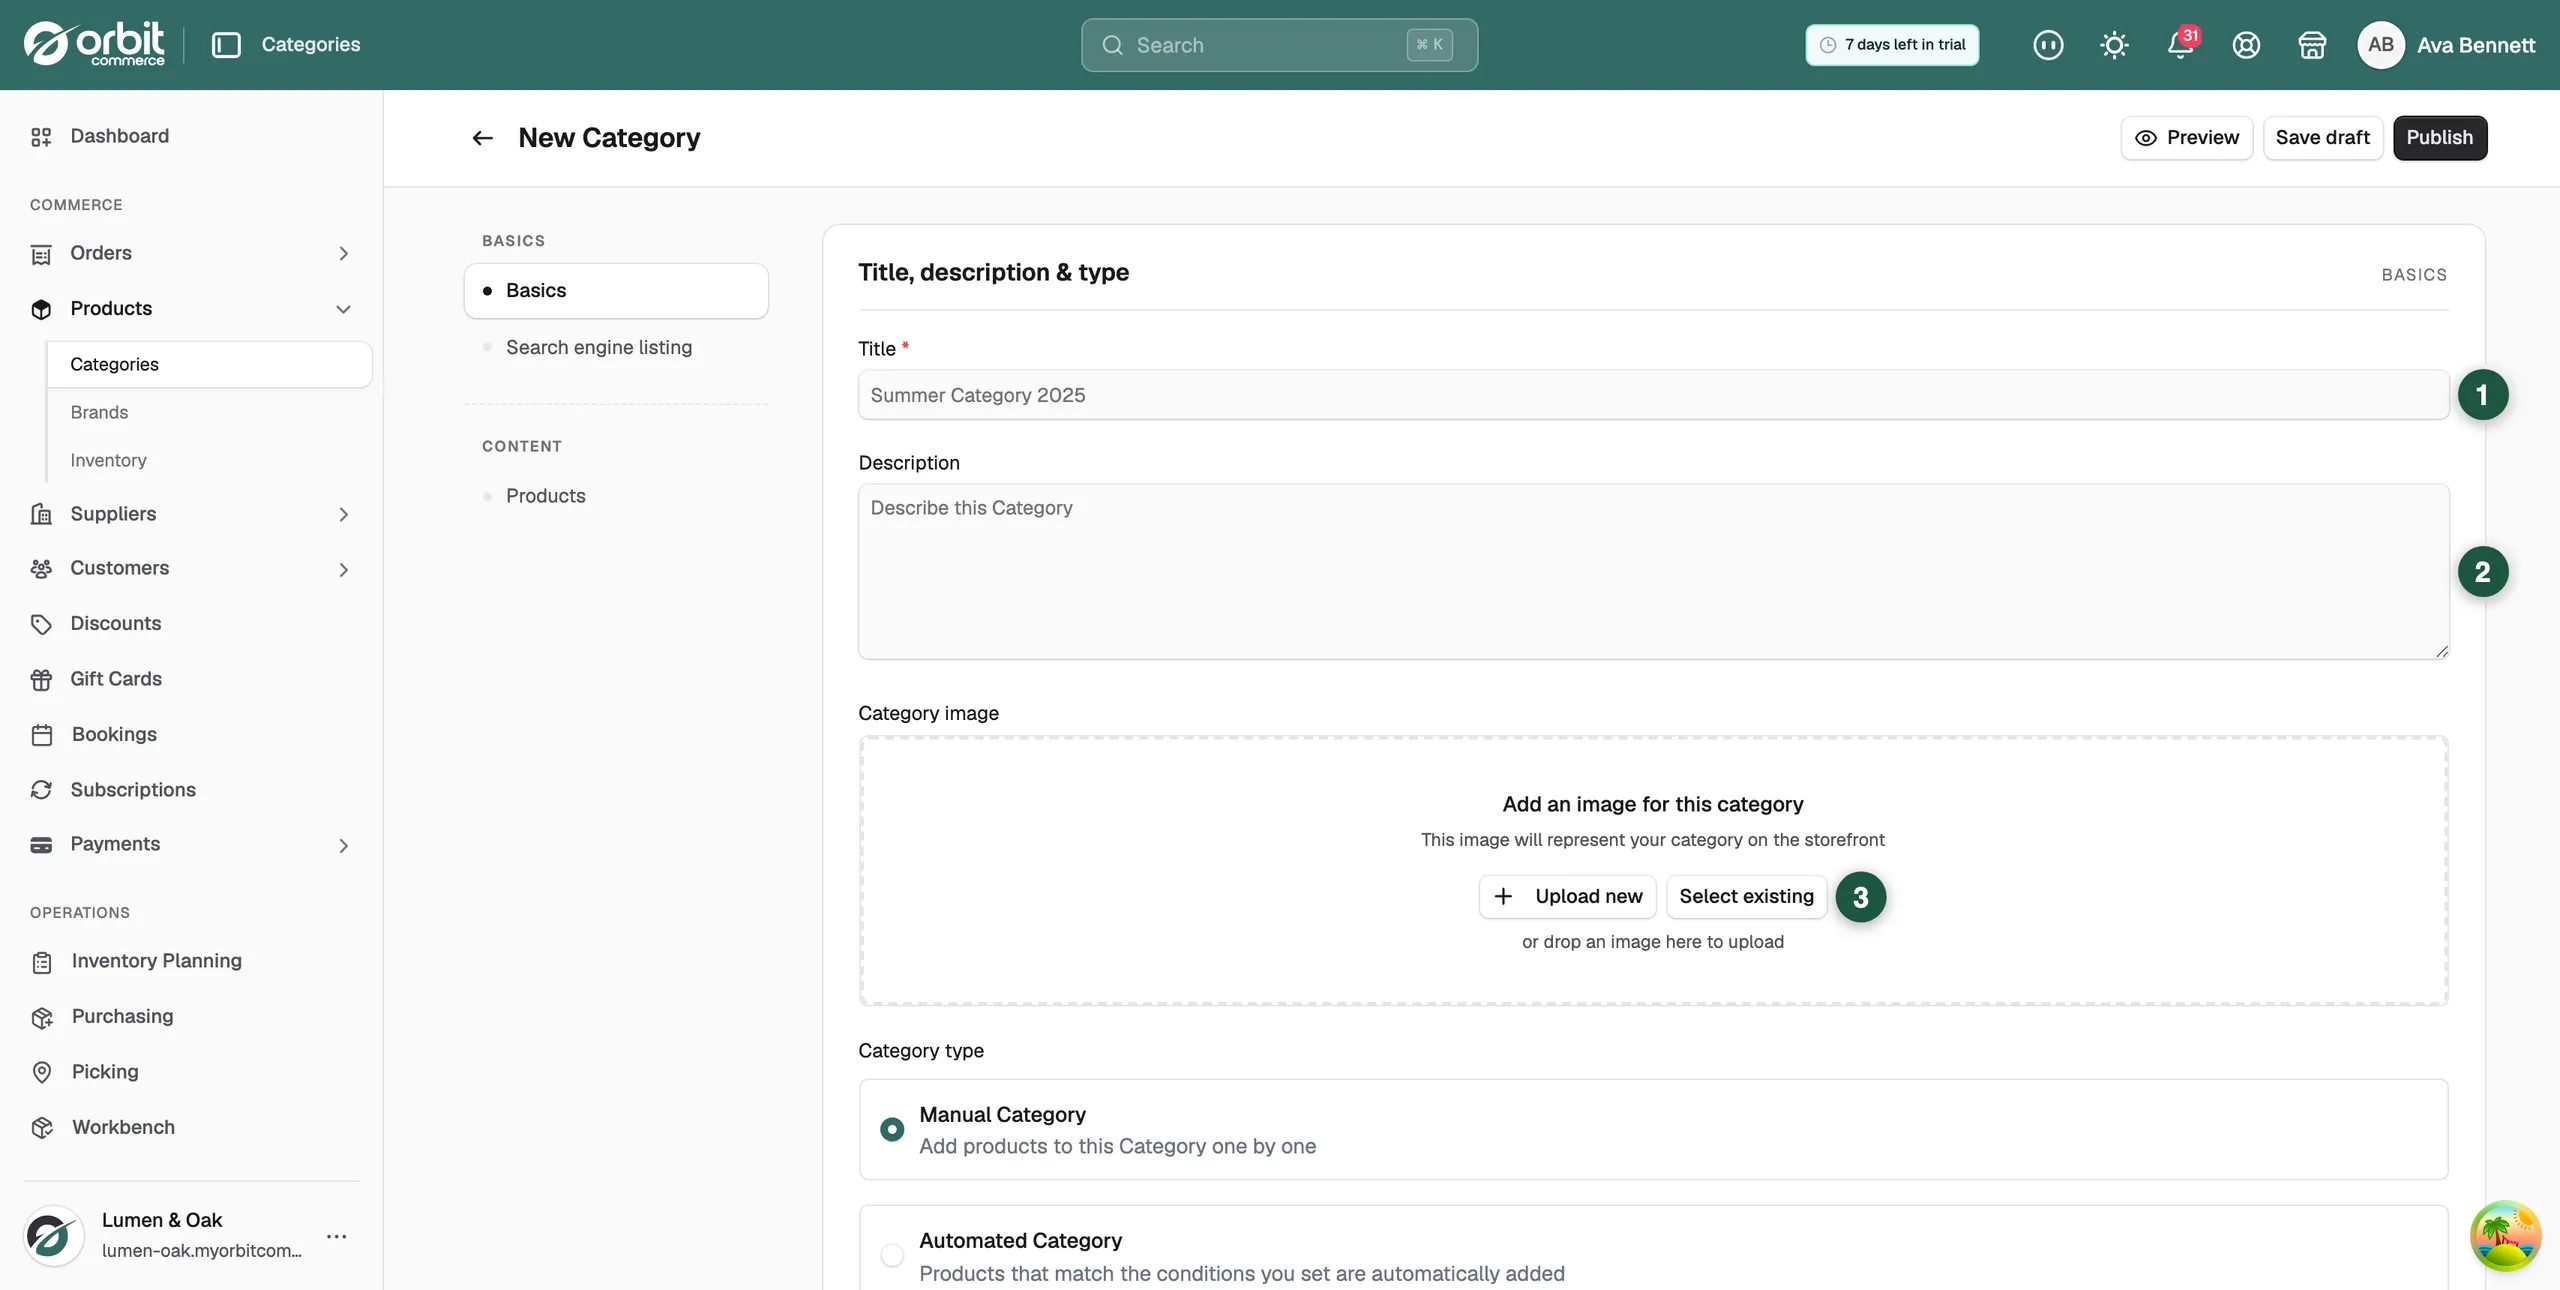
- In Title, type the category name. Shoppers see this name on your storefront.
- In Description, say what the category holds. Search engines read this text too.
- Under Category image, click Upload new to upload a file, or Select existing to reuse an image from your media library. You can also drop an image into the box.
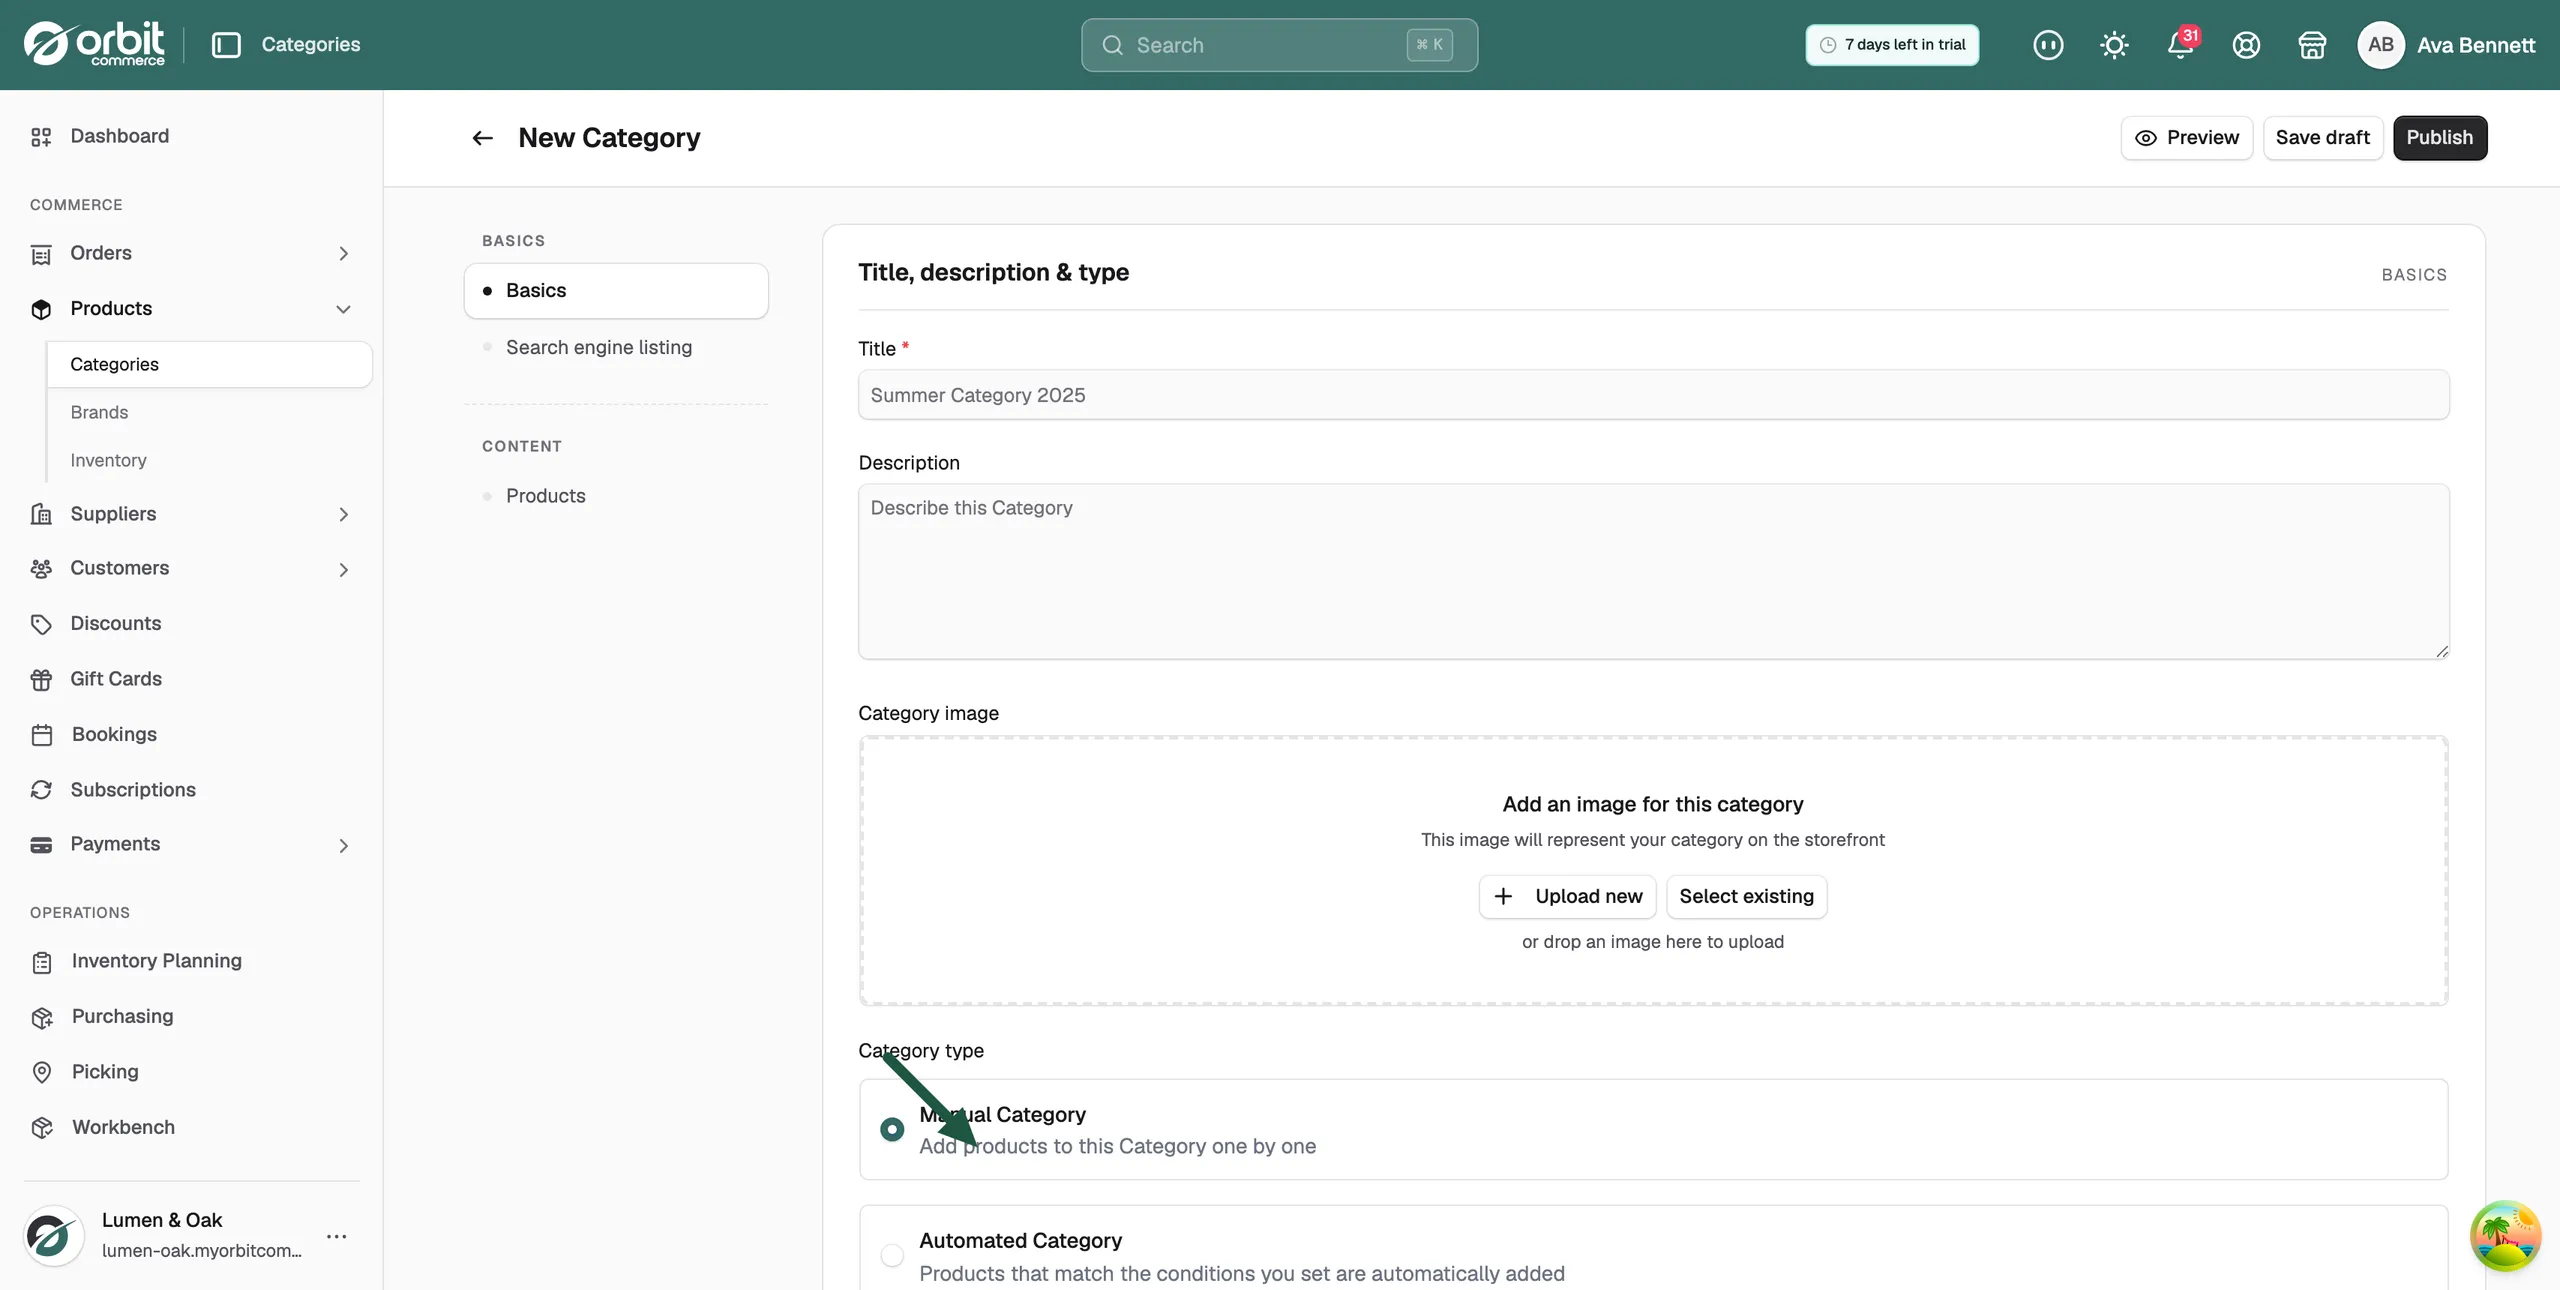
- Under Category type, choose Manual Category or Automated Category. Then follow the matching section below.
Add products to a manual category
- Under Category type, select Manual Category.
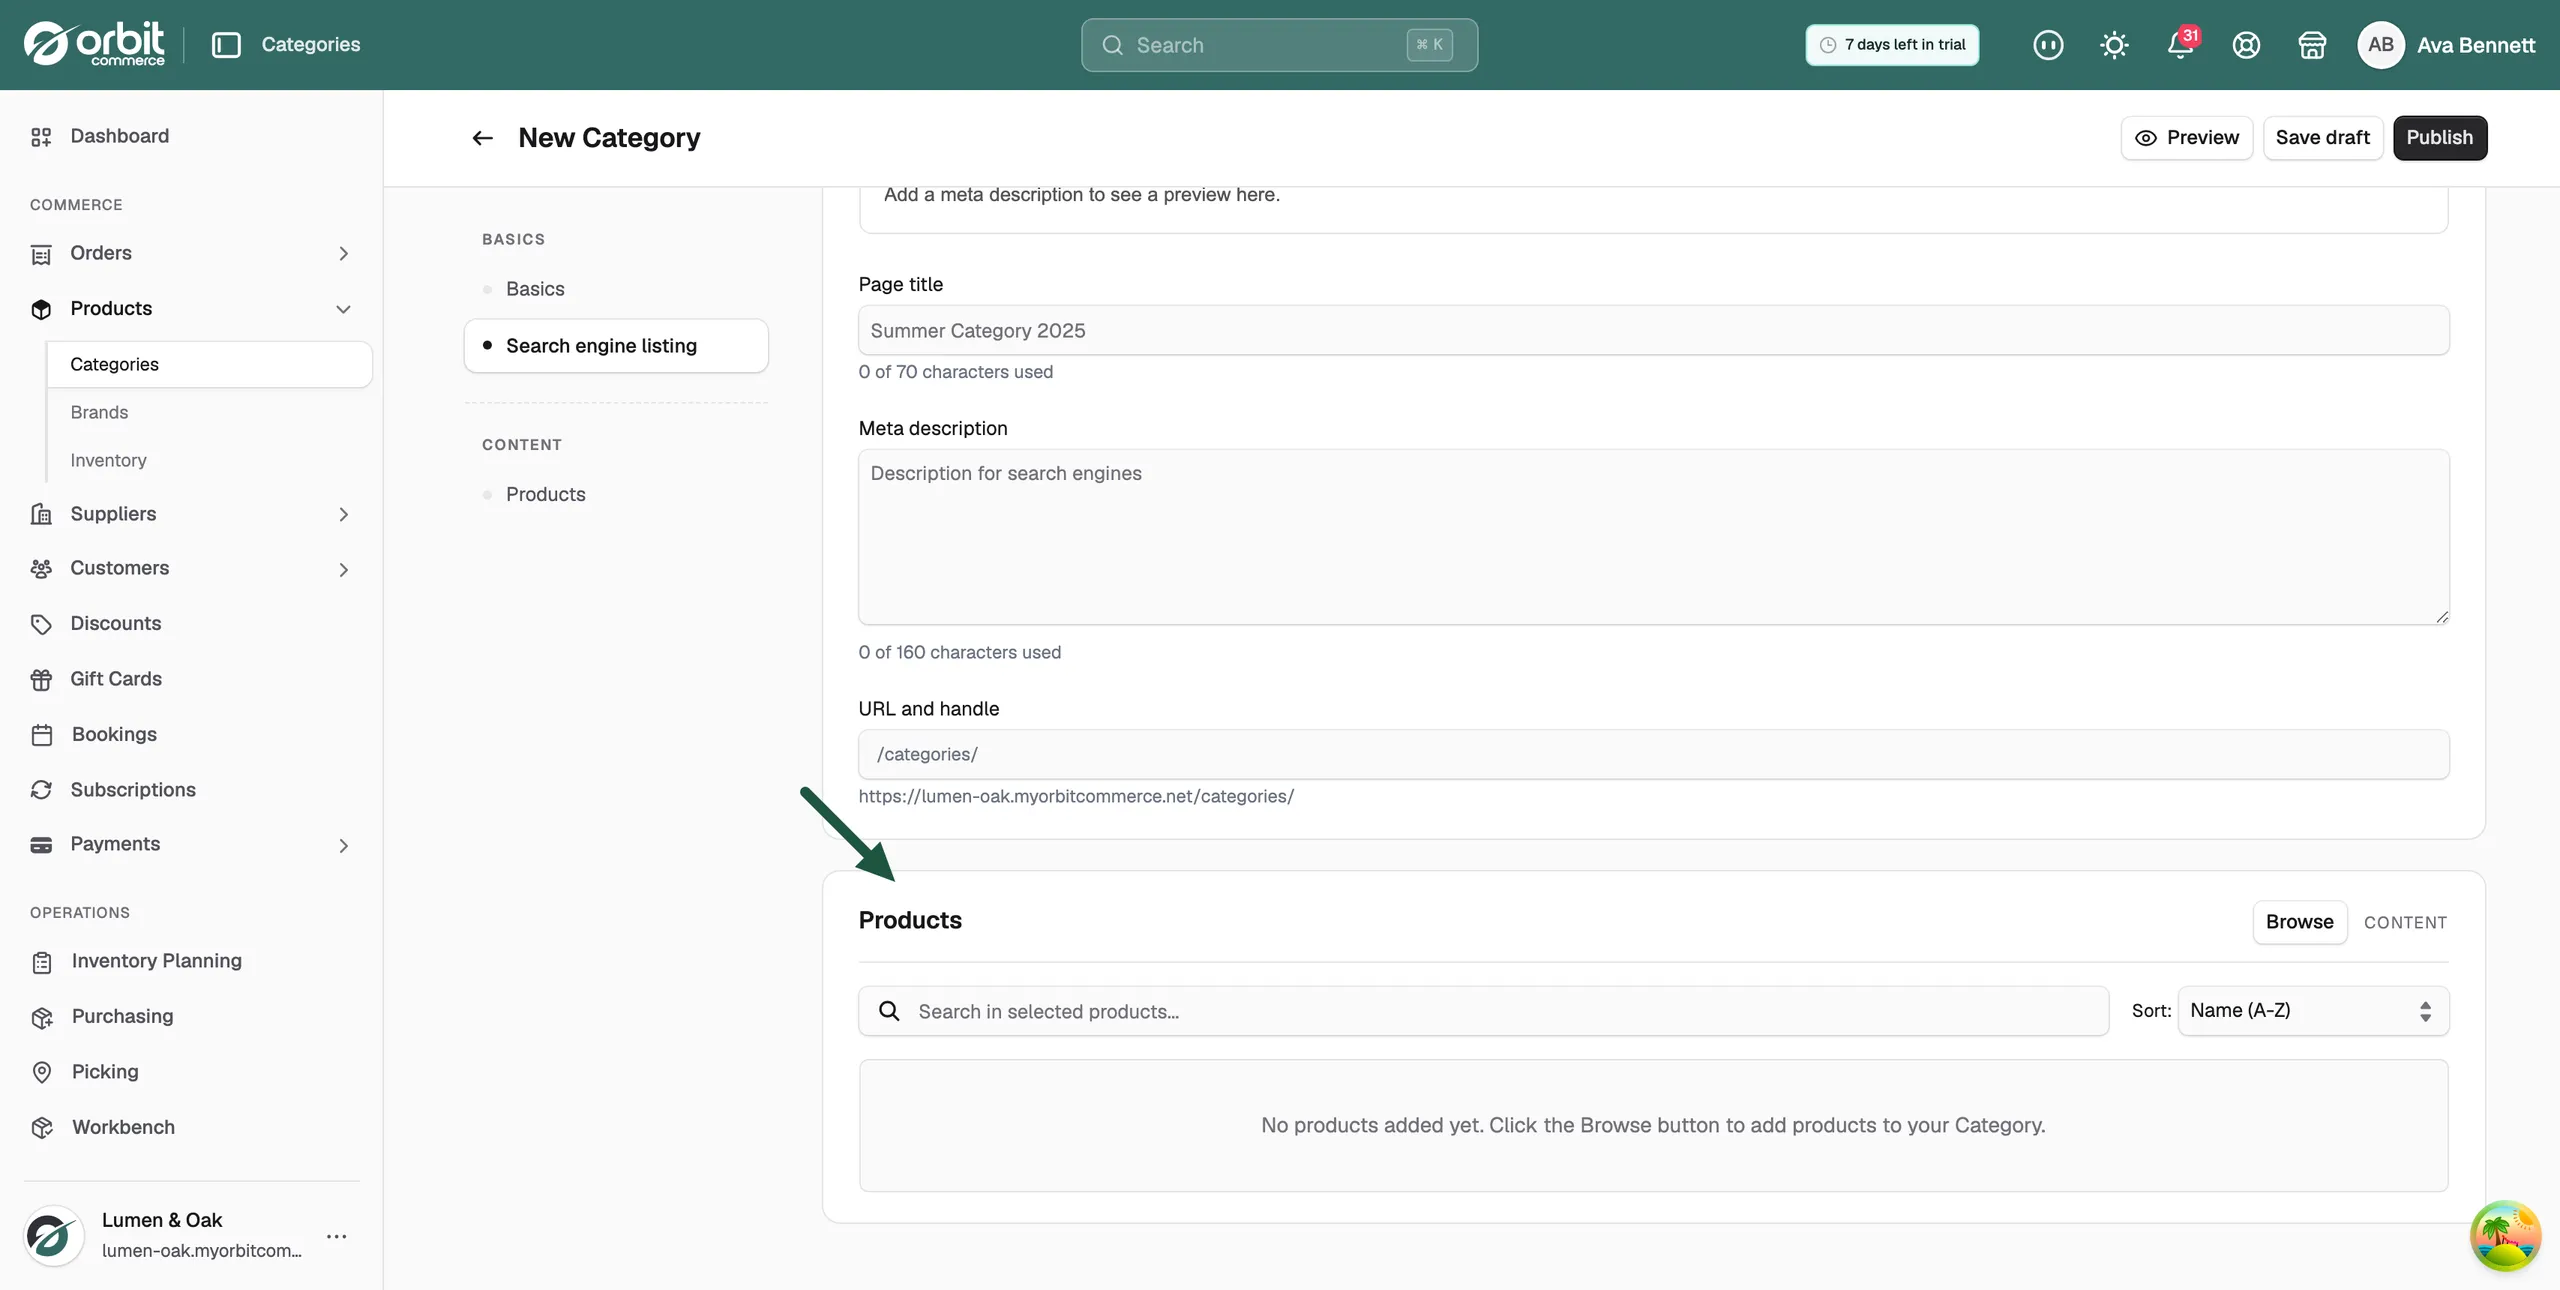
- Scroll down to the Products card and click Browse. The Select products window opens.
- Tick each product you want to add. To add every product in your store, click the Select all link. It shows how many products it will add.
- Click Done. The products appear in the Products card, sorted by name from A to Z.
- To remove a product from the list, click the cross next to it.
Tip: You can publish an empty category and add products later.
Set up an automated category
- Under Category type, select Automated Category. The Products card is replaced by a Conditions card.
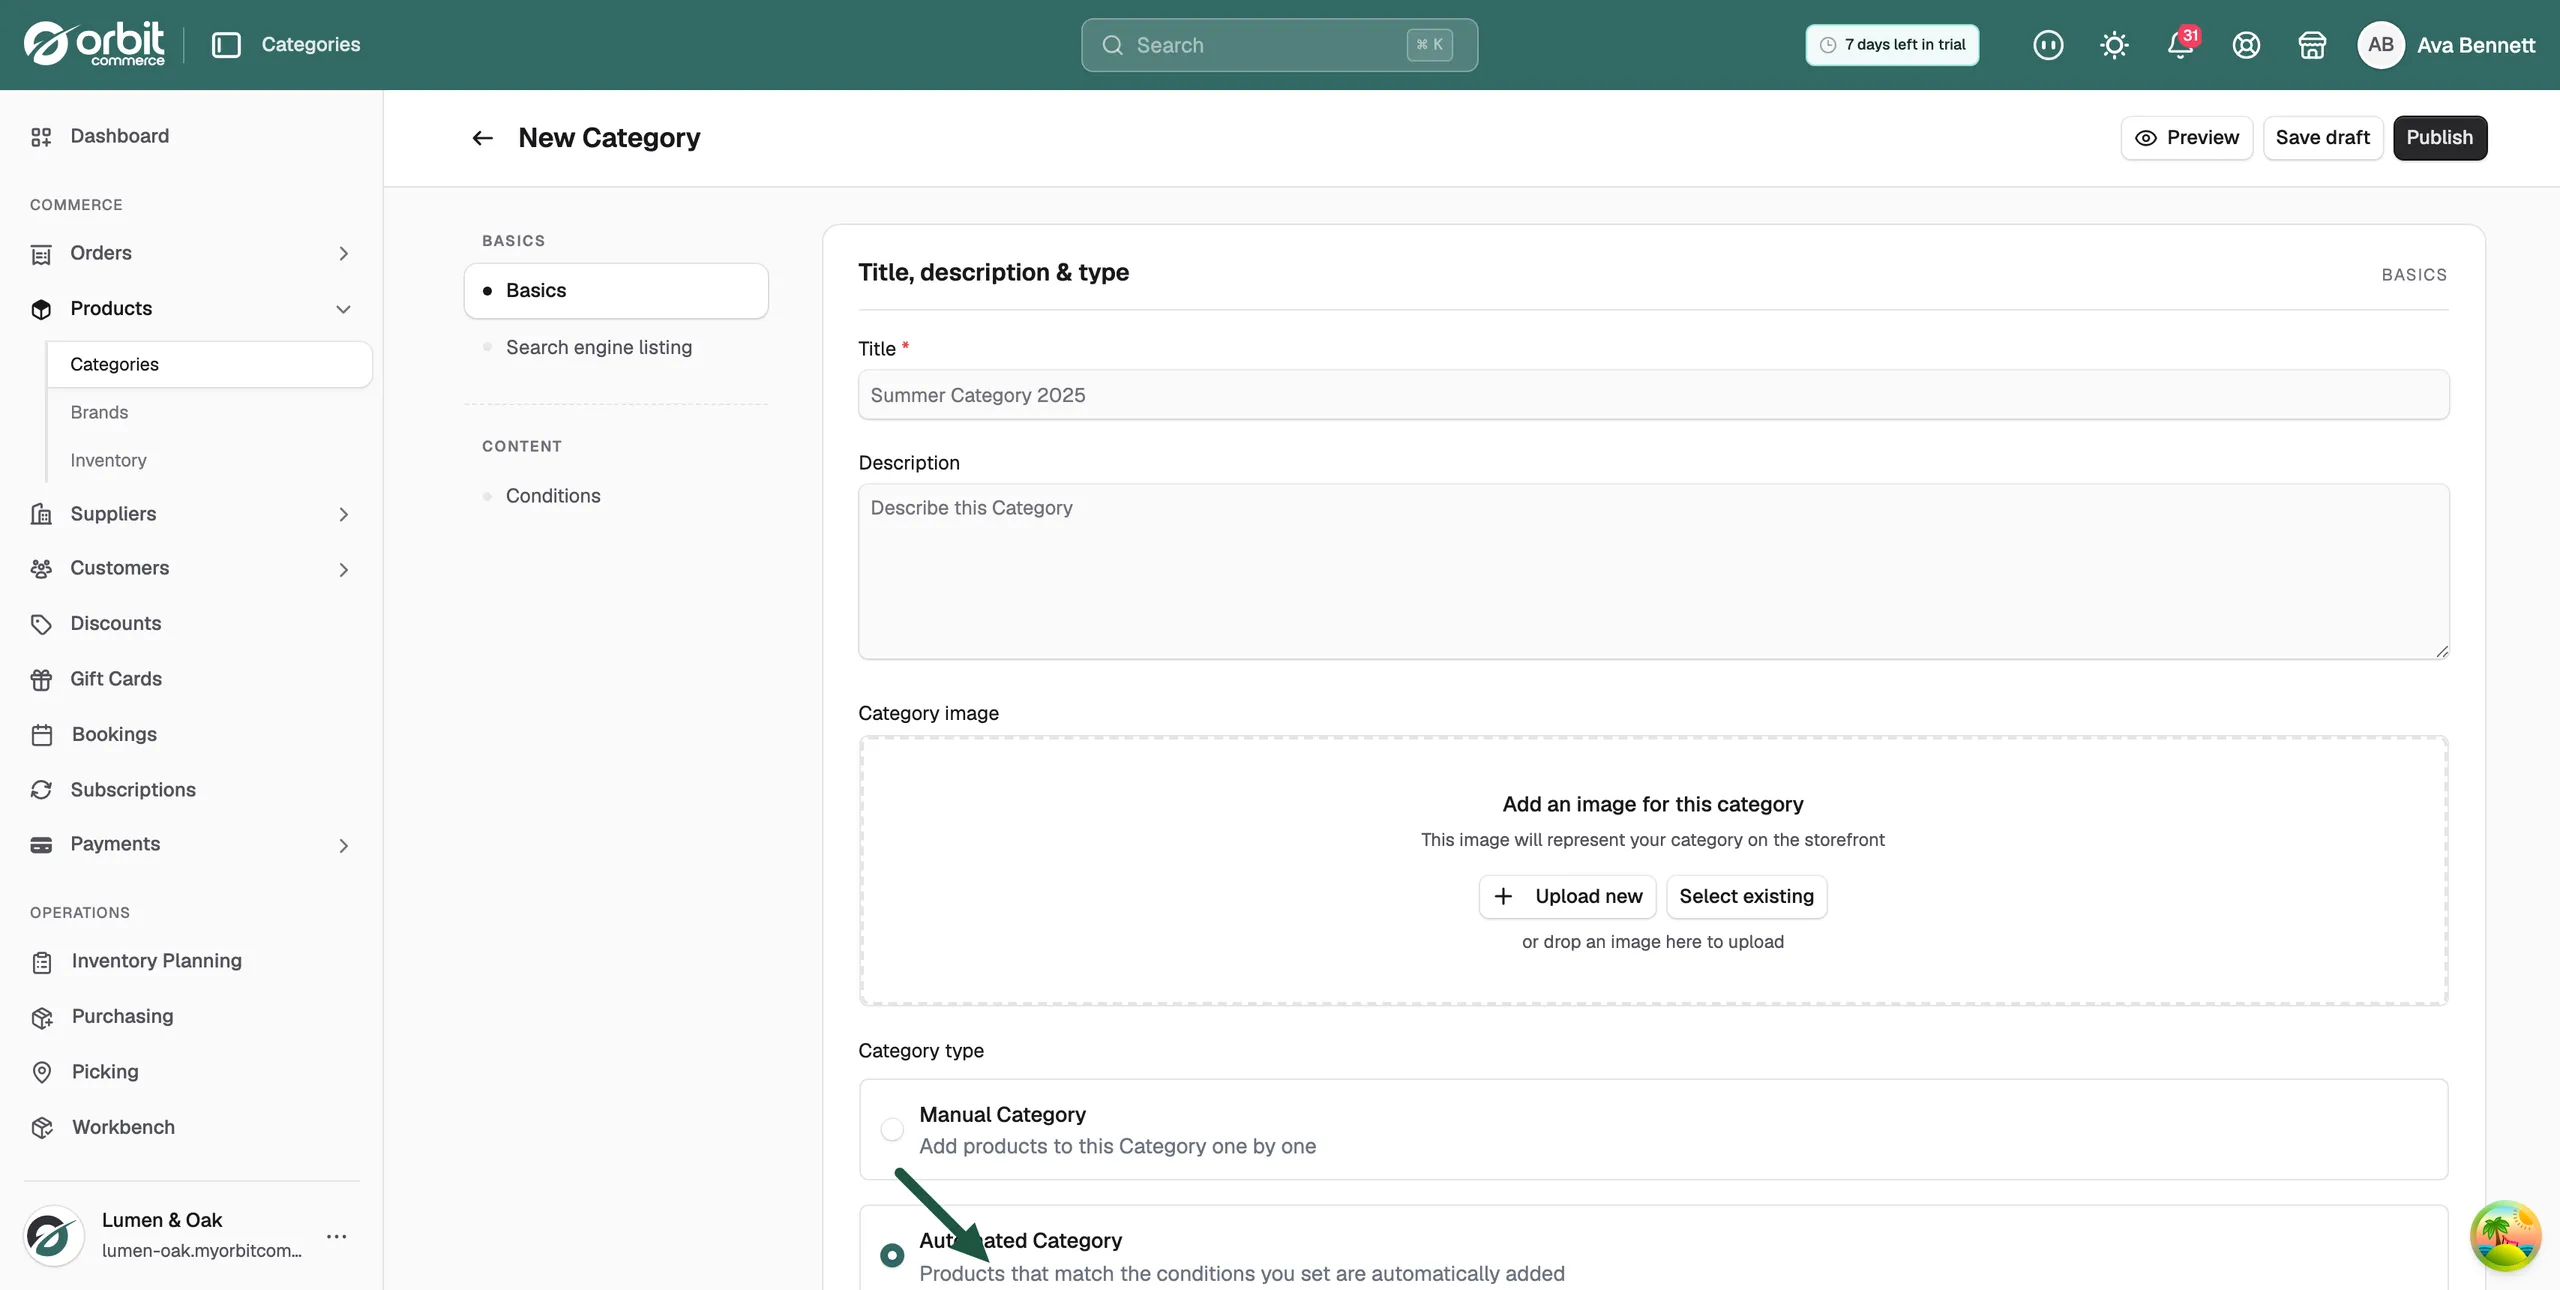
- Scroll down to the Conditions card.
- Next to Products must match, choose All conditions or Any condition.
- Set up the first condition. Choose a Field, such as Product Name, Tag or Price. Choose an Operator, such as contains or is equal to. Then type or pick a Value.
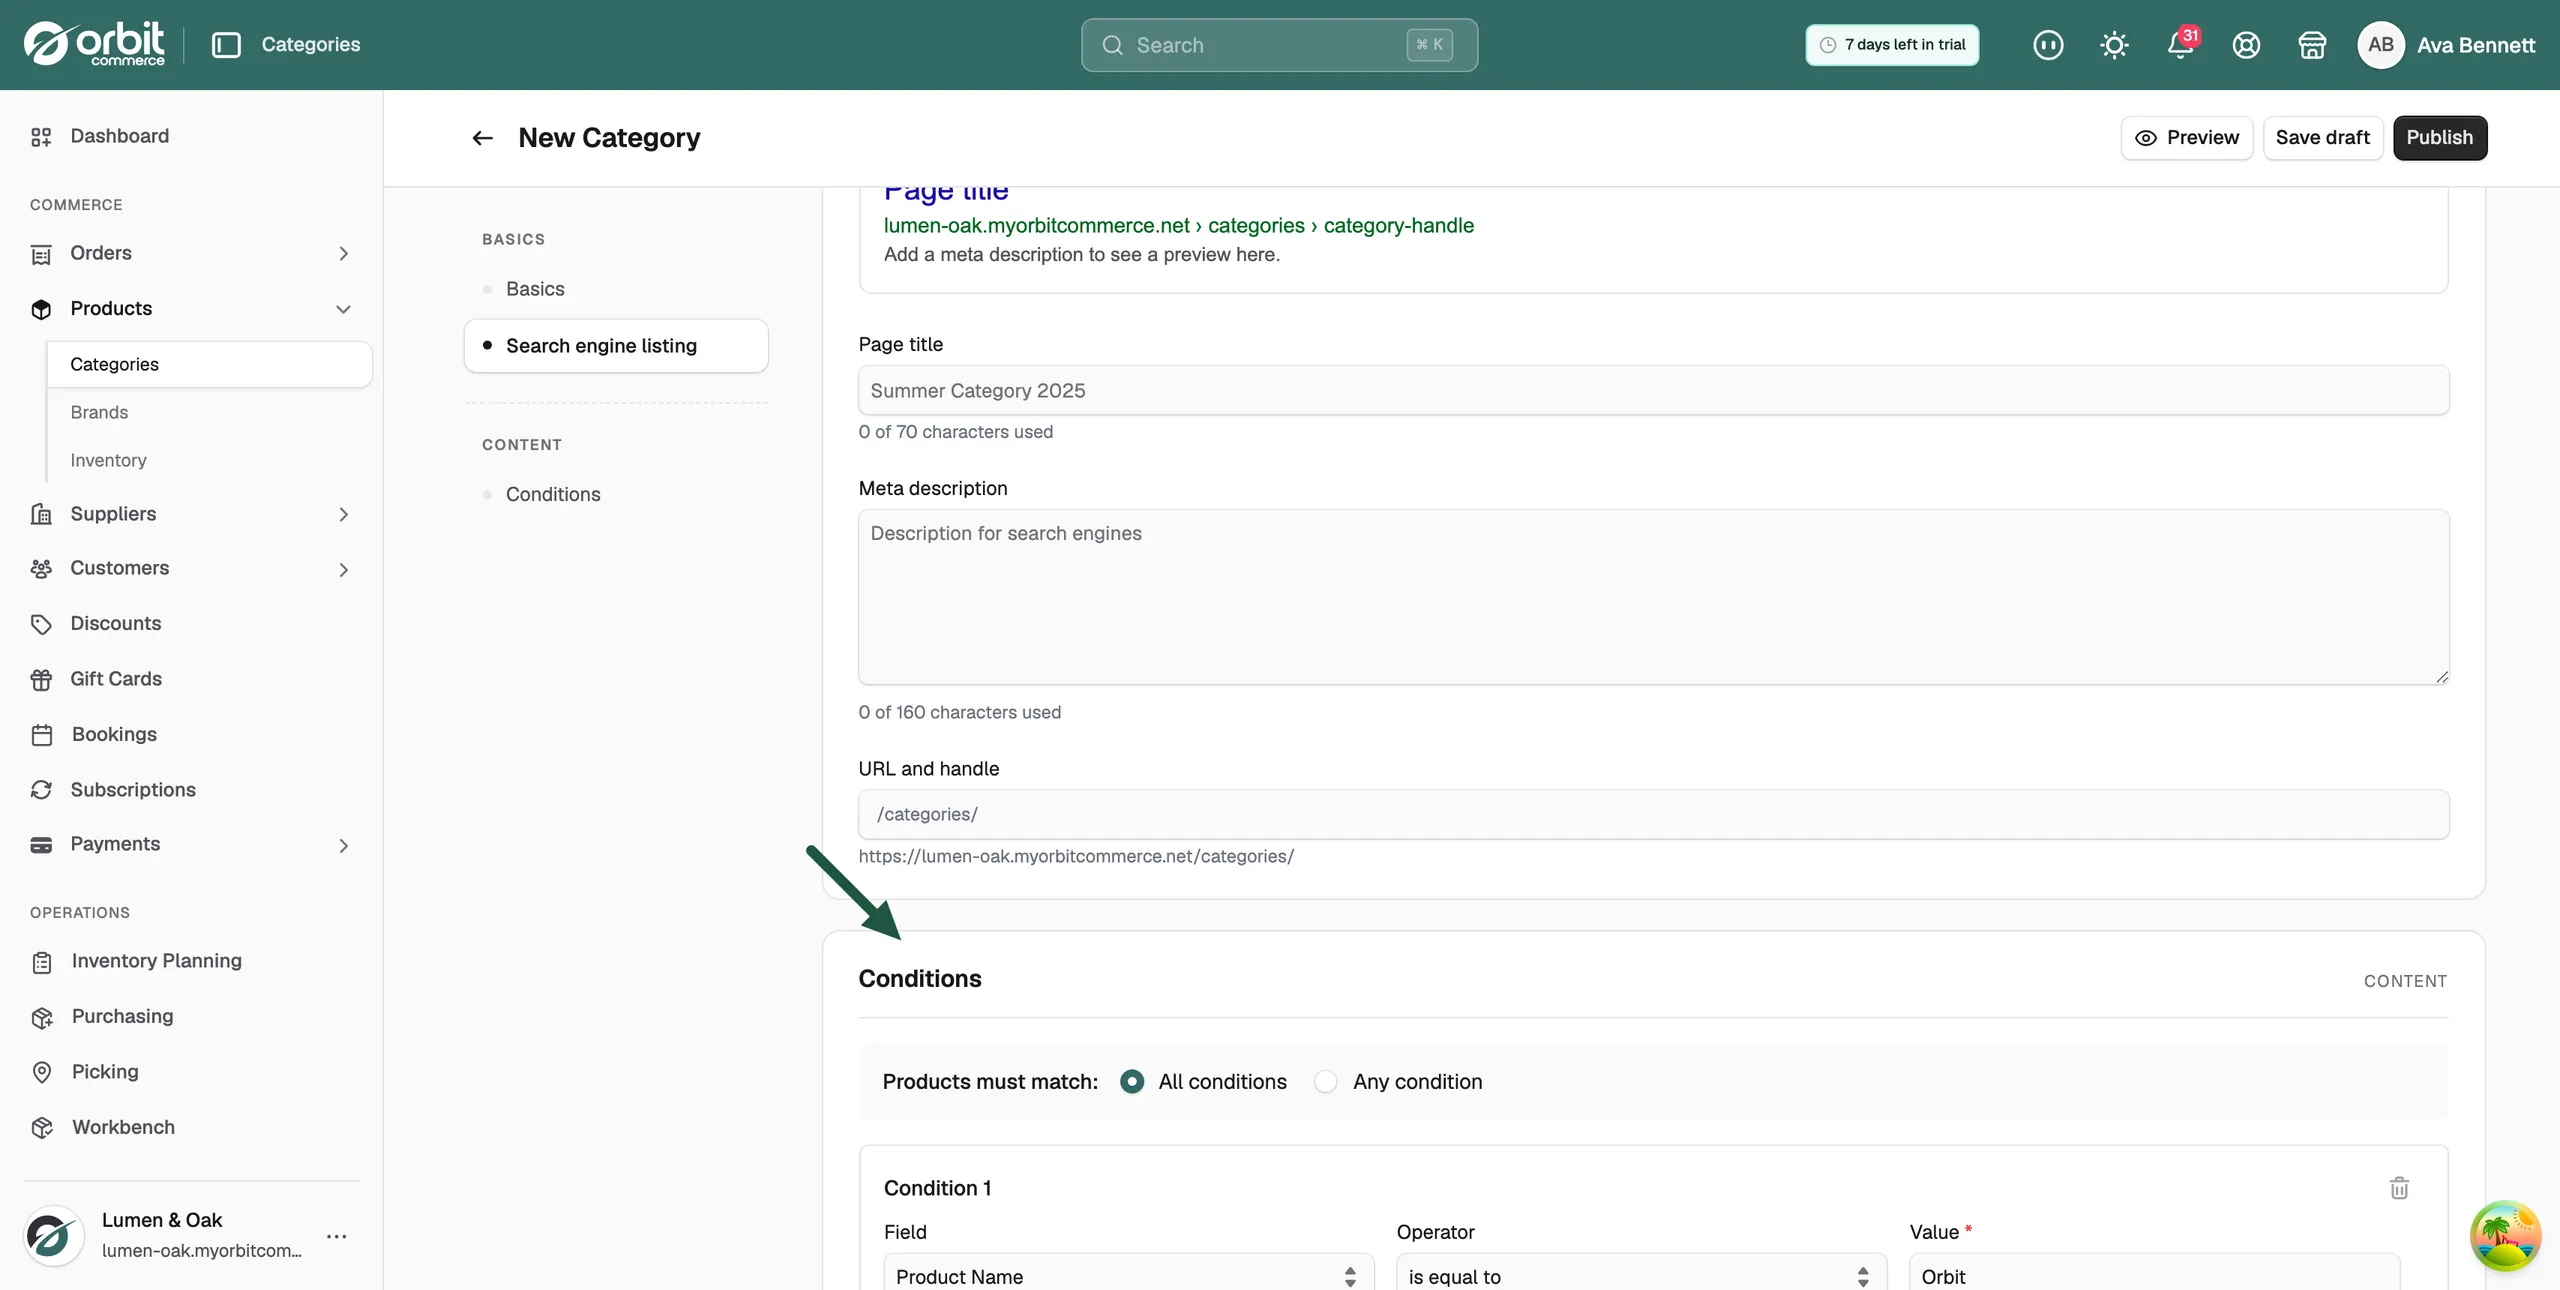
- To add another rule, click + Add another condition. To remove a rule, click the bin icon on it.
Every product that matches your rules is added when you publish. New products that match join on their own.
- All conditions: a product must match every rule. For example, name contains "Orbit" and tag is "BAND10".
- Any condition: a product needs to match only one rule.
Edit the search engine listing
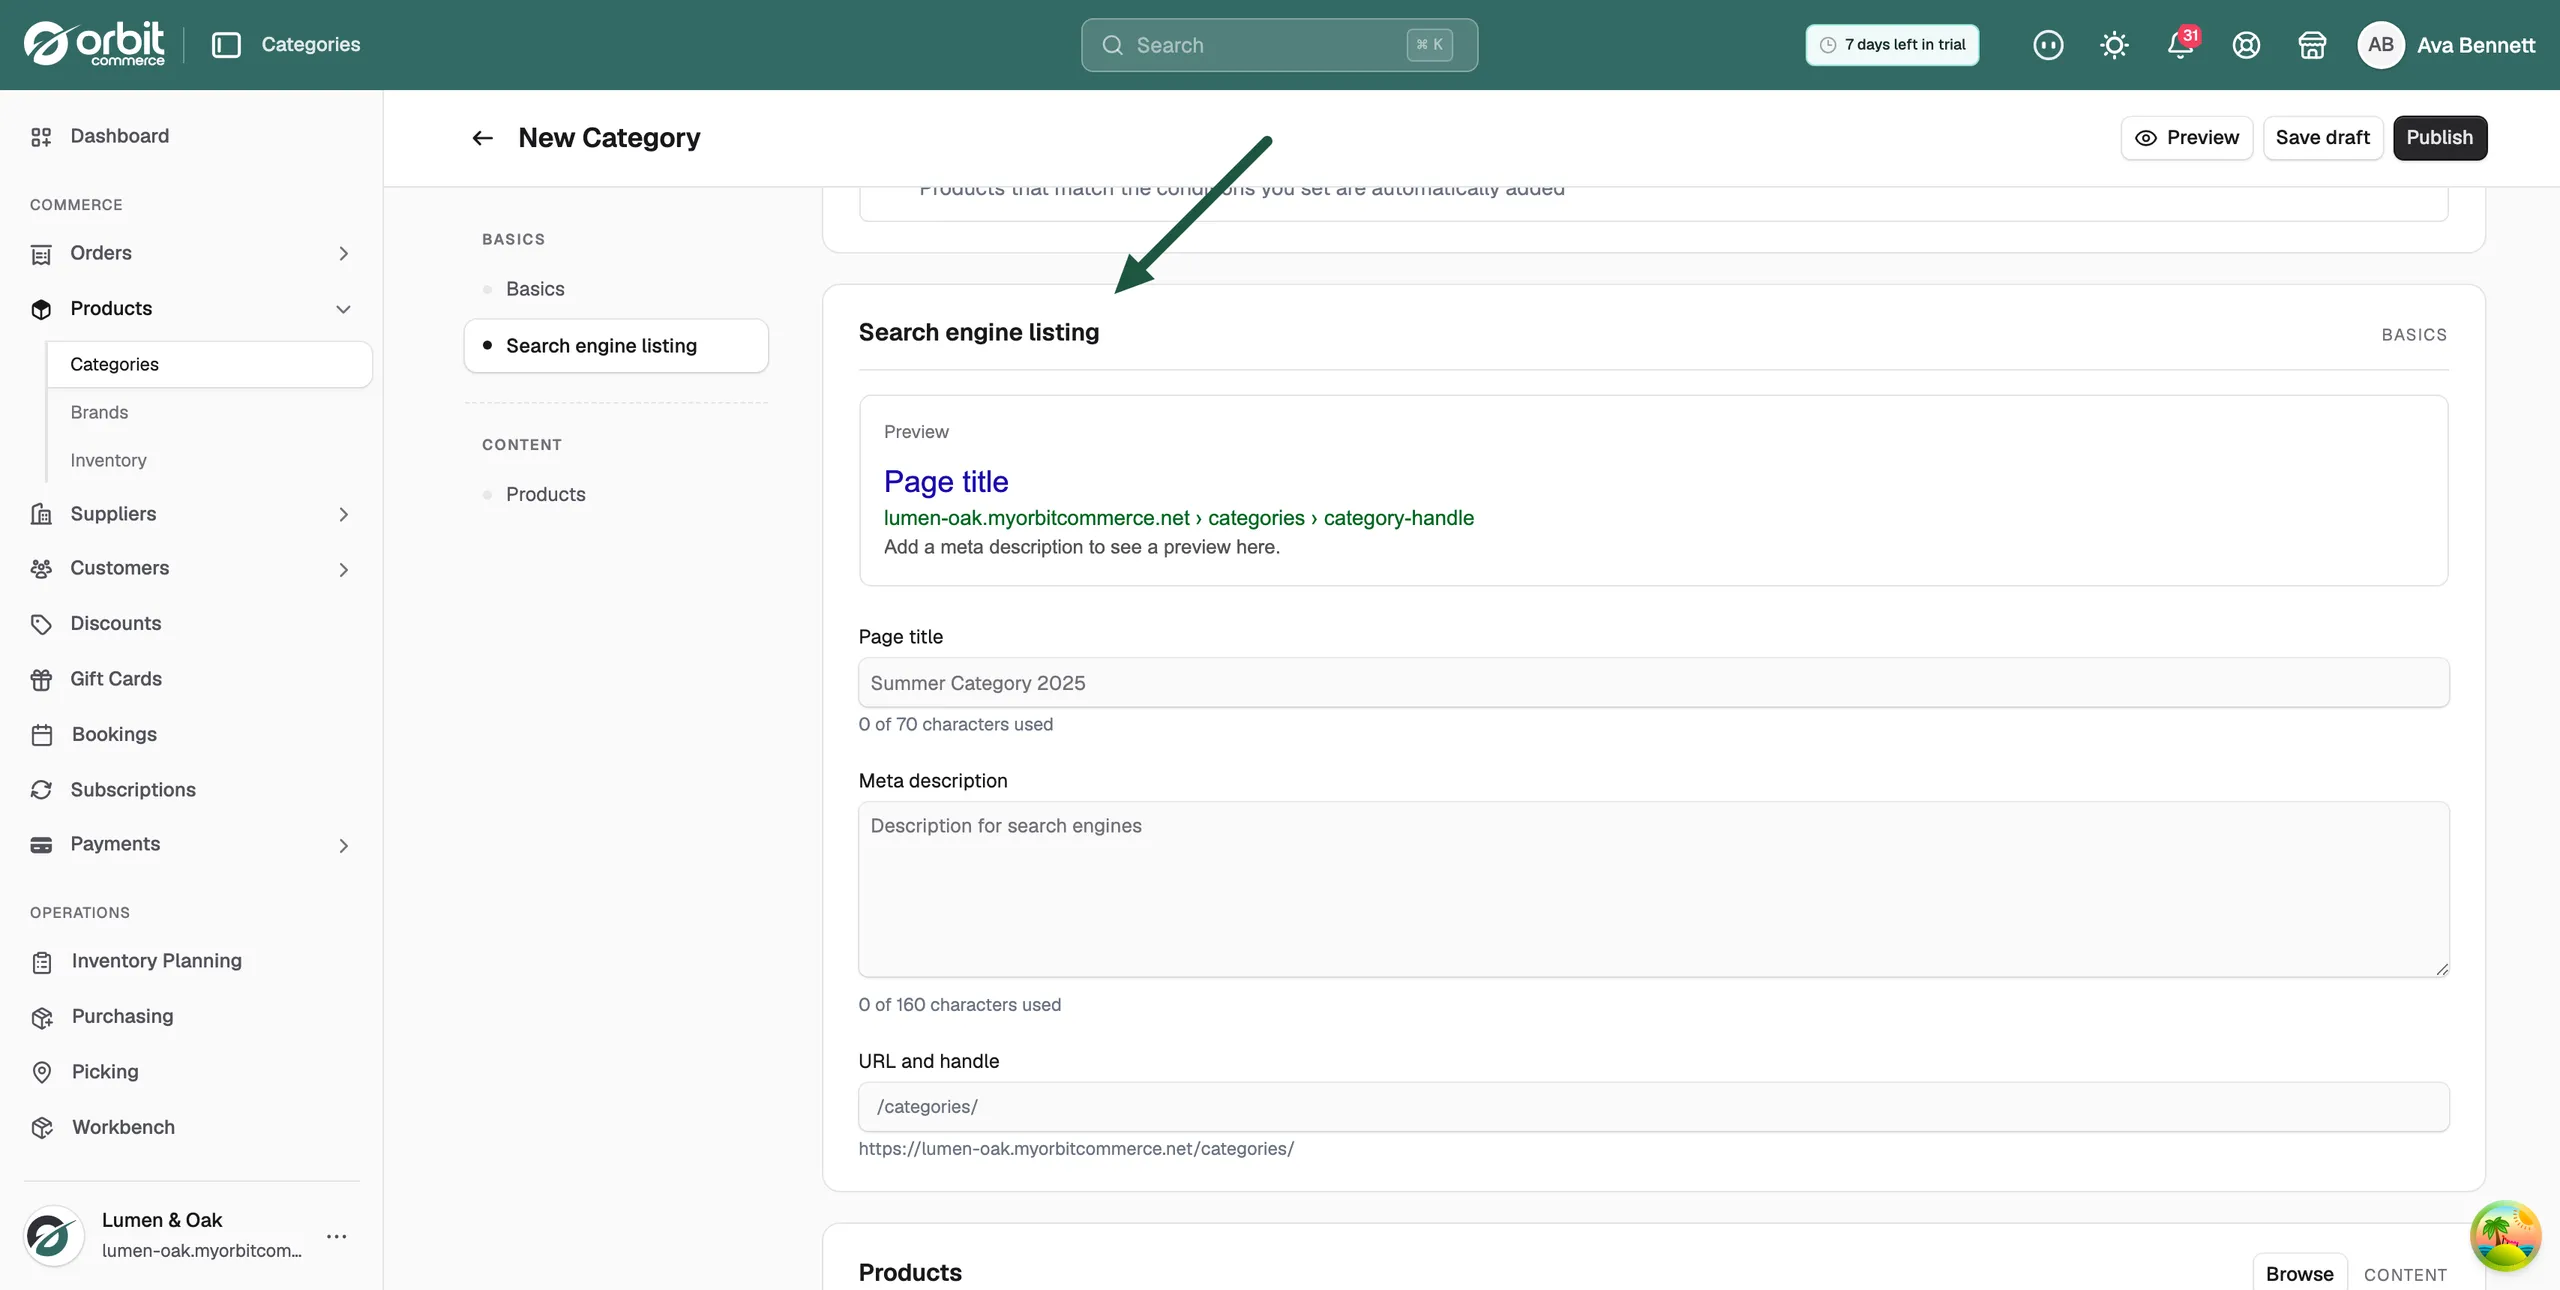
Orbit fills in the Search engine listing card for you from the title and description. Change it only if you want something different.
- Scroll to the Search engine listing card.
- In Page title, type the title for search results. Up to 70 characters.
- In Meta description, type the short text search engines show. Up to 160 characters.
- In URL and handle, change the last part of the category's web address if you need to.
Save or publish the category
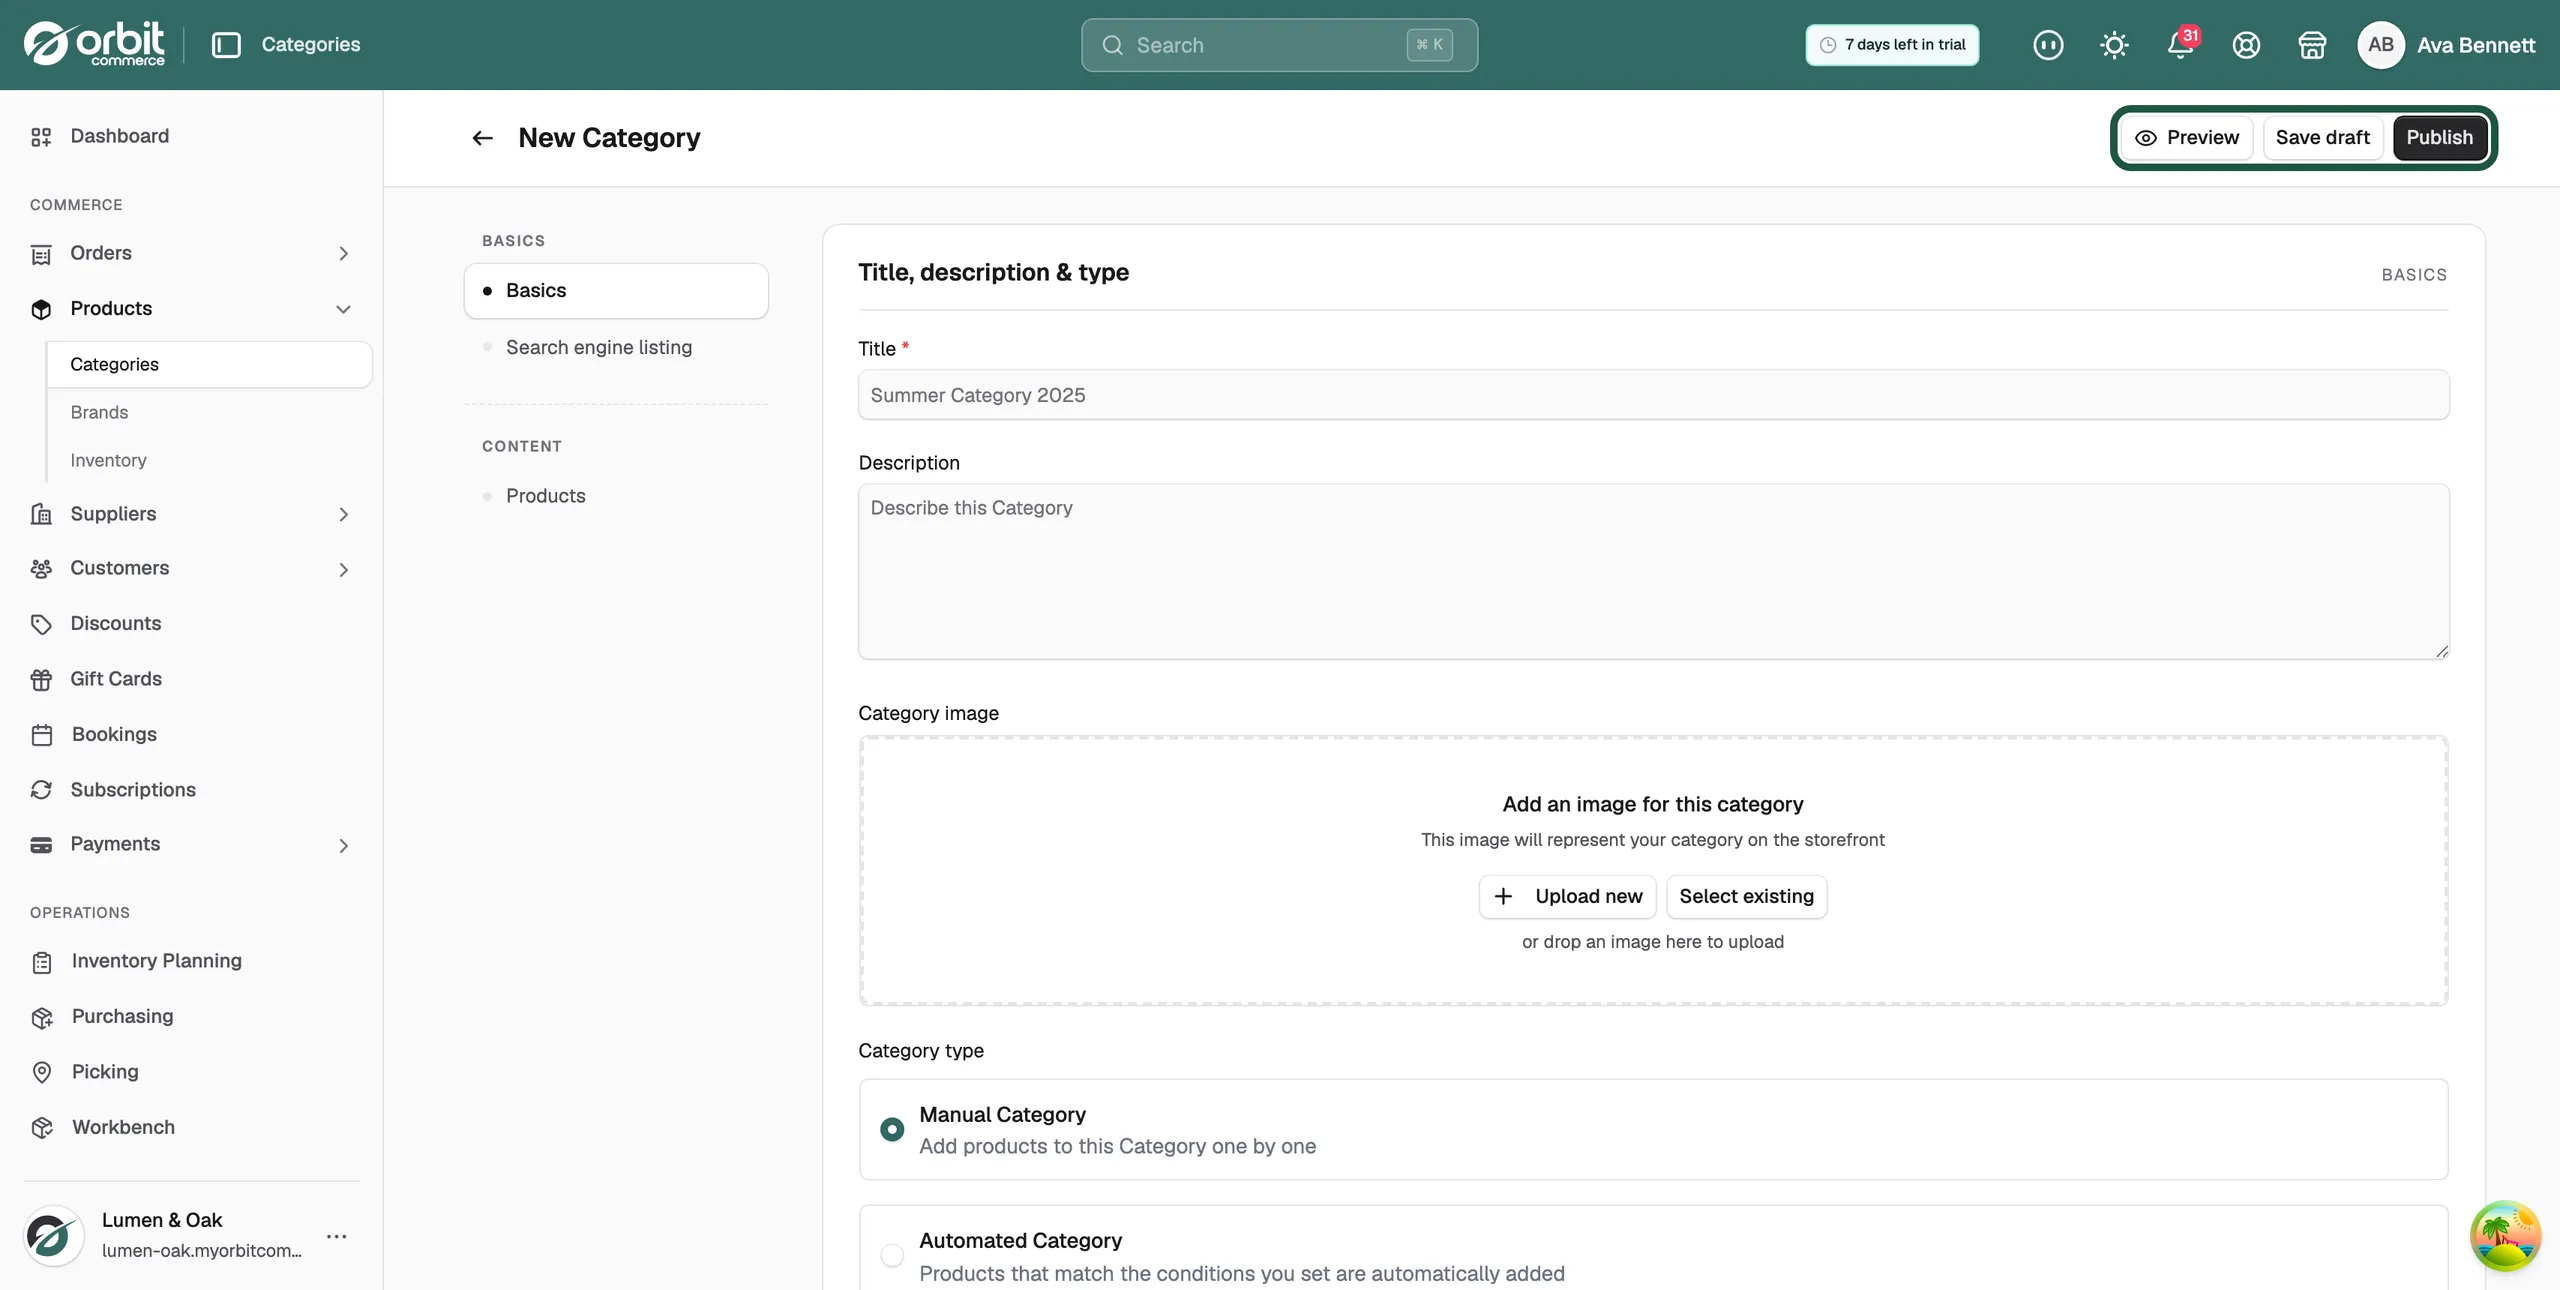
- At the top right, click Save draft to keep the category hidden for now, or Publish to make it live on your storefront.
After you publish, Orbit shows Category created and opens the category on the Edit Category page. Click View at the top to see it on your storefront.
Note: A category must be saved before you can see it on your storefront. Use View on the Edit Category page rather than Preview on the new category page.
Fill in category custom fields
Custom fields hold extra details about a category that Orbit does not ask for, such as a care note or a banner line. You decide which fields exist in your store settings. Each category then has a place to fill them in.
- From your Orbit dashboard, go to Products, then Categories.
- Click the category you want to change.
- Go to the Custom fields section, listed under Advanced.
- Fill in each field. You see only the fields set up for categories in your store, so the list is different in every store.
- Save the category. The values are saved with it.
The section sits on a saved category, so create the category first. To add a field, change what it asks for, or remove one, see Adding custom fields.
Choose who can view a category
A category is open to everyone by default. You can limit it to customers who sign in, or to customers with tags you pick. The options are on a saved category, so create it first.
- From your Orbit dashboard, go to Products, then Categories.
- Click the category you want to change.
- Go to the Who can view section, under Basics.
- Choose one option:
- Everyone: anyone can view this category.
- Logged-in customers: visitors must sign in to view this category.
- Customers with tags: only signed-in customers with at least one of the chosen tags can view this category.
- If you picked Customers with tags, pick the tags under Required customer tags. A customer needs any one of them, not all.
- Save the category.
A customer who is not allowed in is asked to sign in. The category also drops out of storefront search and category lists for them.
Note: Who can view is part of the Enterprise plan. On other plans the options do not appear. For the same rules on pages and brands, see Restricting who can see a page, category or brand.
Related guides
Was this helpful?
0 people found this helpful