Choosing a product type
What each product type in Orbit is for, and which sections of the product editor appear when you pick physical, digital, subscription, service, gift card or bundle.
Every product in Orbit has a type. You choose it when you create the product. The type decides how the product is sold and delivered, and which sections appear in the product editor.
Considerations
- The type is set when you create the product and cannot be changed afterwards. If a product has the wrong type, create it again with the right one.
- Physical Product is selected by default on a new product.
- Digital and gift card products are not shipped, so checkout does not ask for delivery on them.
Choose a type
- From your Orbit dashboard, go to Products.
- Click Add product.
- Under Product Type, click the type you want. The sections in the list on the left change to match.
- Fill in the rest of the product and click Publish, or Save draft to finish later.
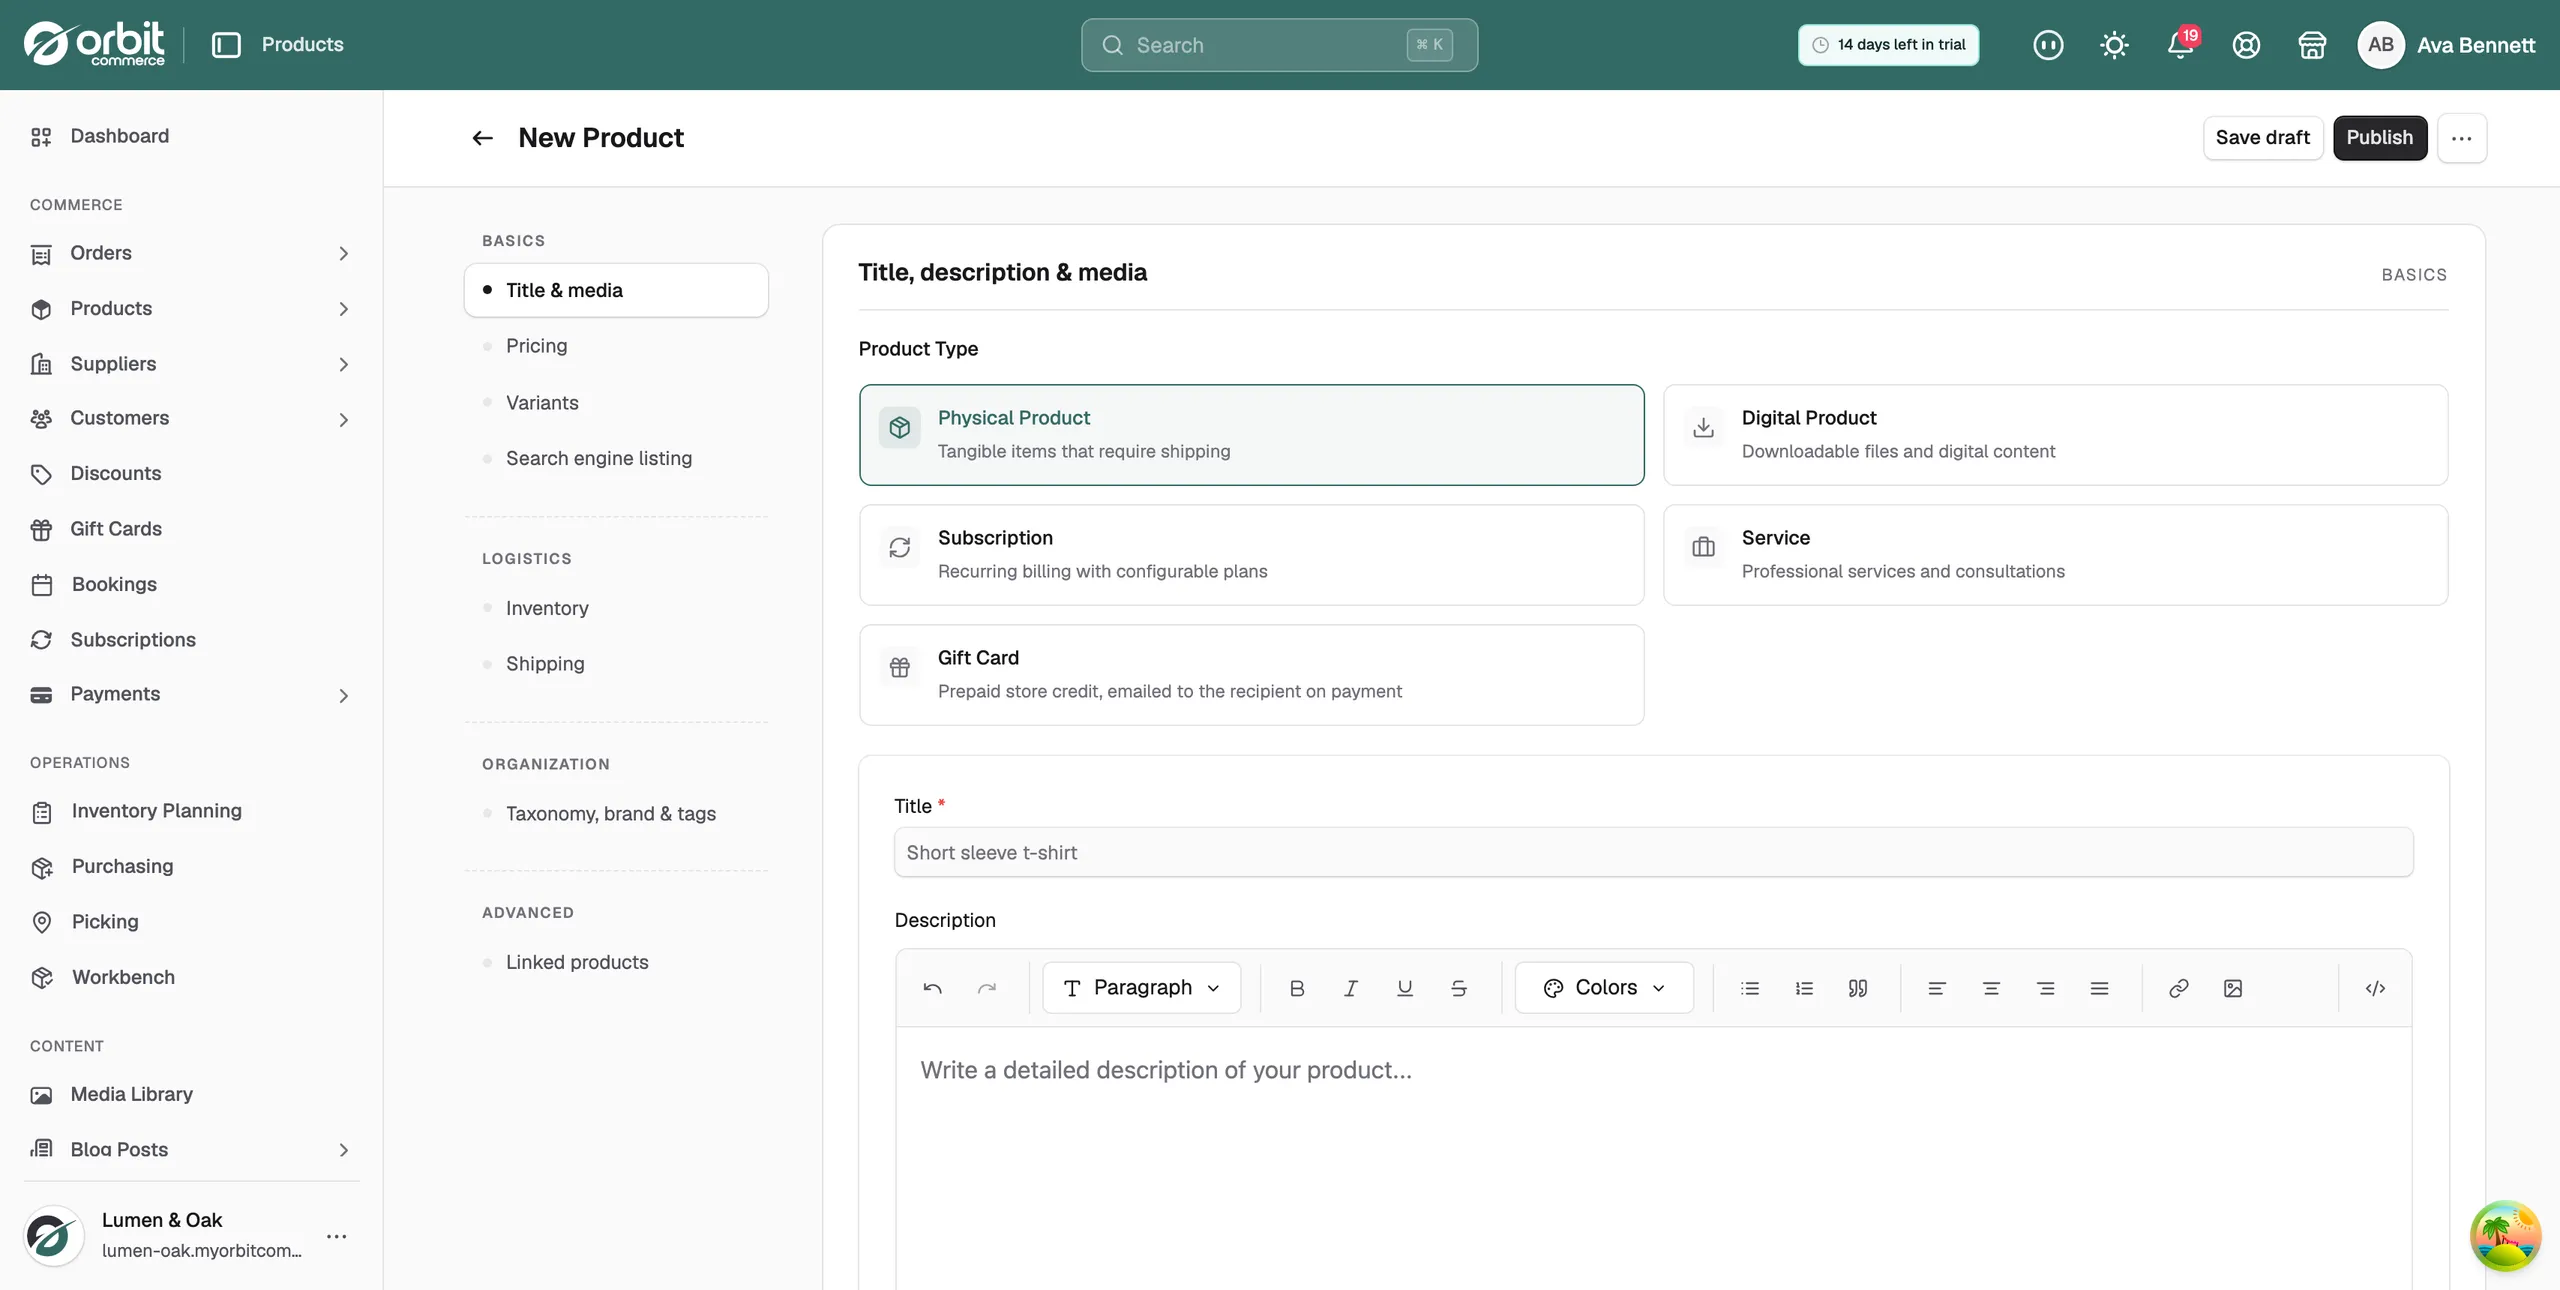
The product types
- Physical Product: items you post or deliver. Adds Inventory and Shipping sections.
- Digital Product: files customers download after they pay, such as an e-book or a template. Adds a Digital files section.
- Subscription: recurring billing. The customer is charged on the interval you set until they cancel. Adds a Subscription plans section.
- Service: work booked by time slot, such as a consultation. Adds a Service details section.
- Gift Card: prepaid store credit, emailed to the recipient when the order is paid.
- Bundle: a fixed kit of products you already sell, sold as one item. Its stock comes from the products inside it.
What changes when you pick a type
The list on the left of the product editor groups its sections under headings. Every type has Basics (Title & media, Pricing, Variants, Search engine listing), Organization and Advanced. The type adds or removes the rest.
Physical products
- A Logistics group appears with Inventory and Shipping.
- Stock, weight and delivery details are entered here. See Managing inventory.
Digital products
- The Logistics group is removed. There is nothing to ship.
- A Type extras group appears with Digital files. Attach the files customers download with Add File, or Pick from library on a saved product.
- The License Keys panel sits under the files. Save the product first to manage keys.
- Variants work for editions of the same file, for example a PDF and an EPUB.
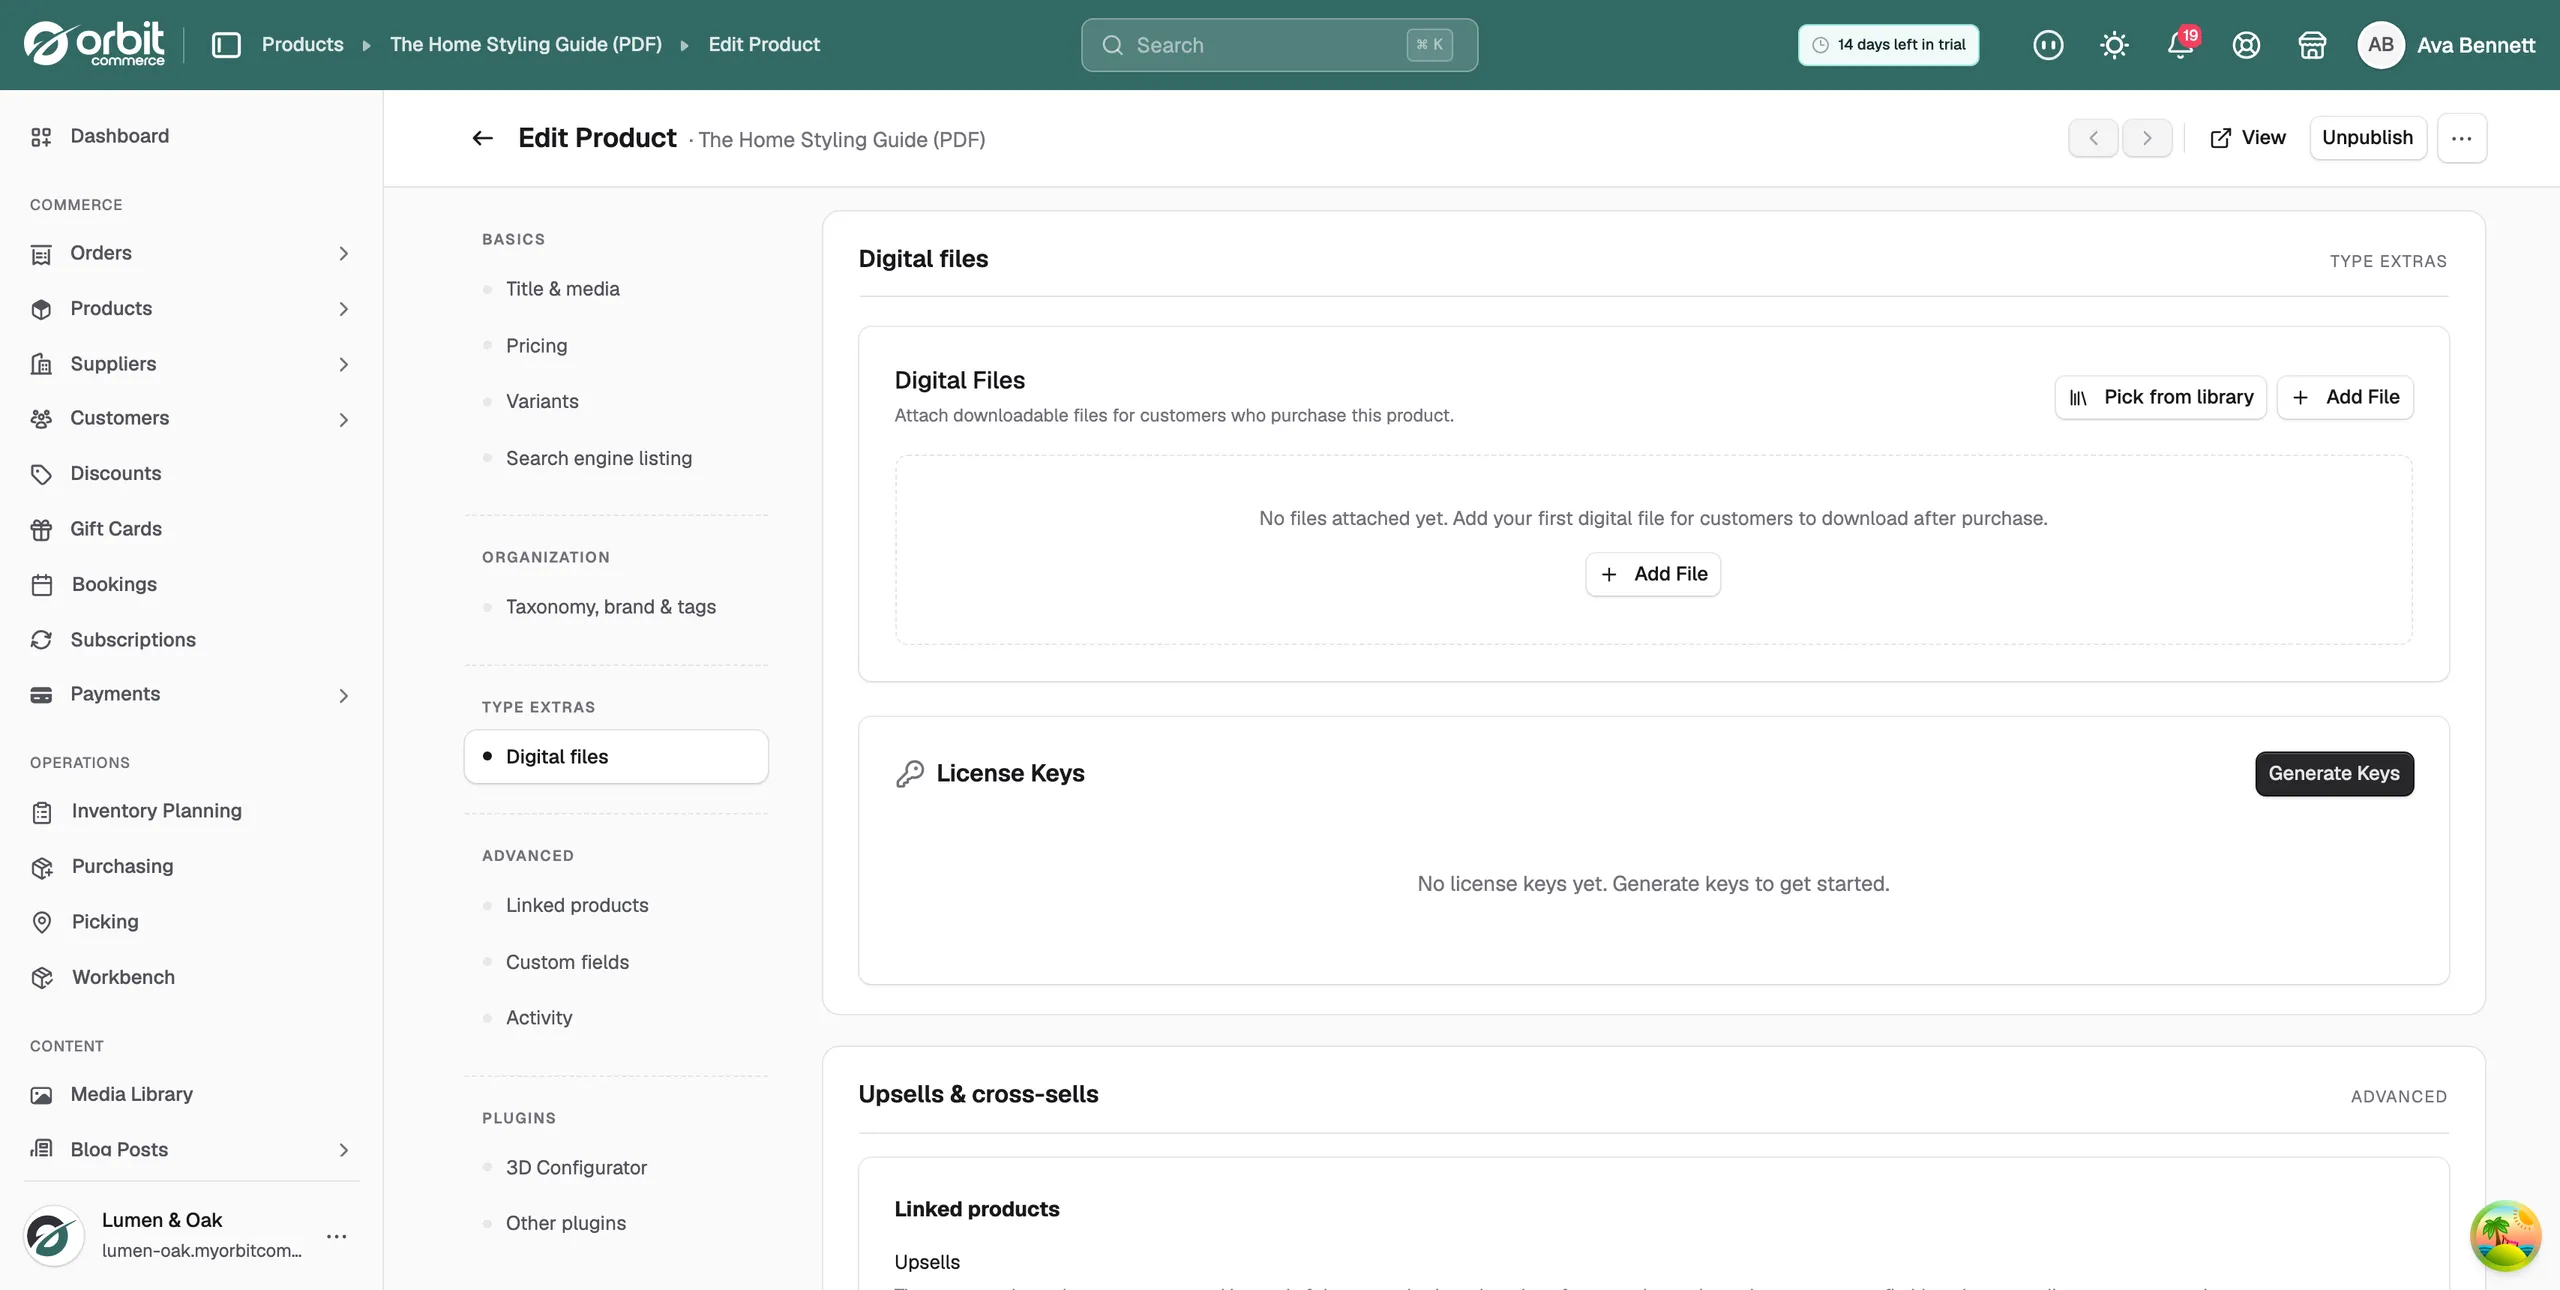
For the full steps, see Attaching files to a digital product.
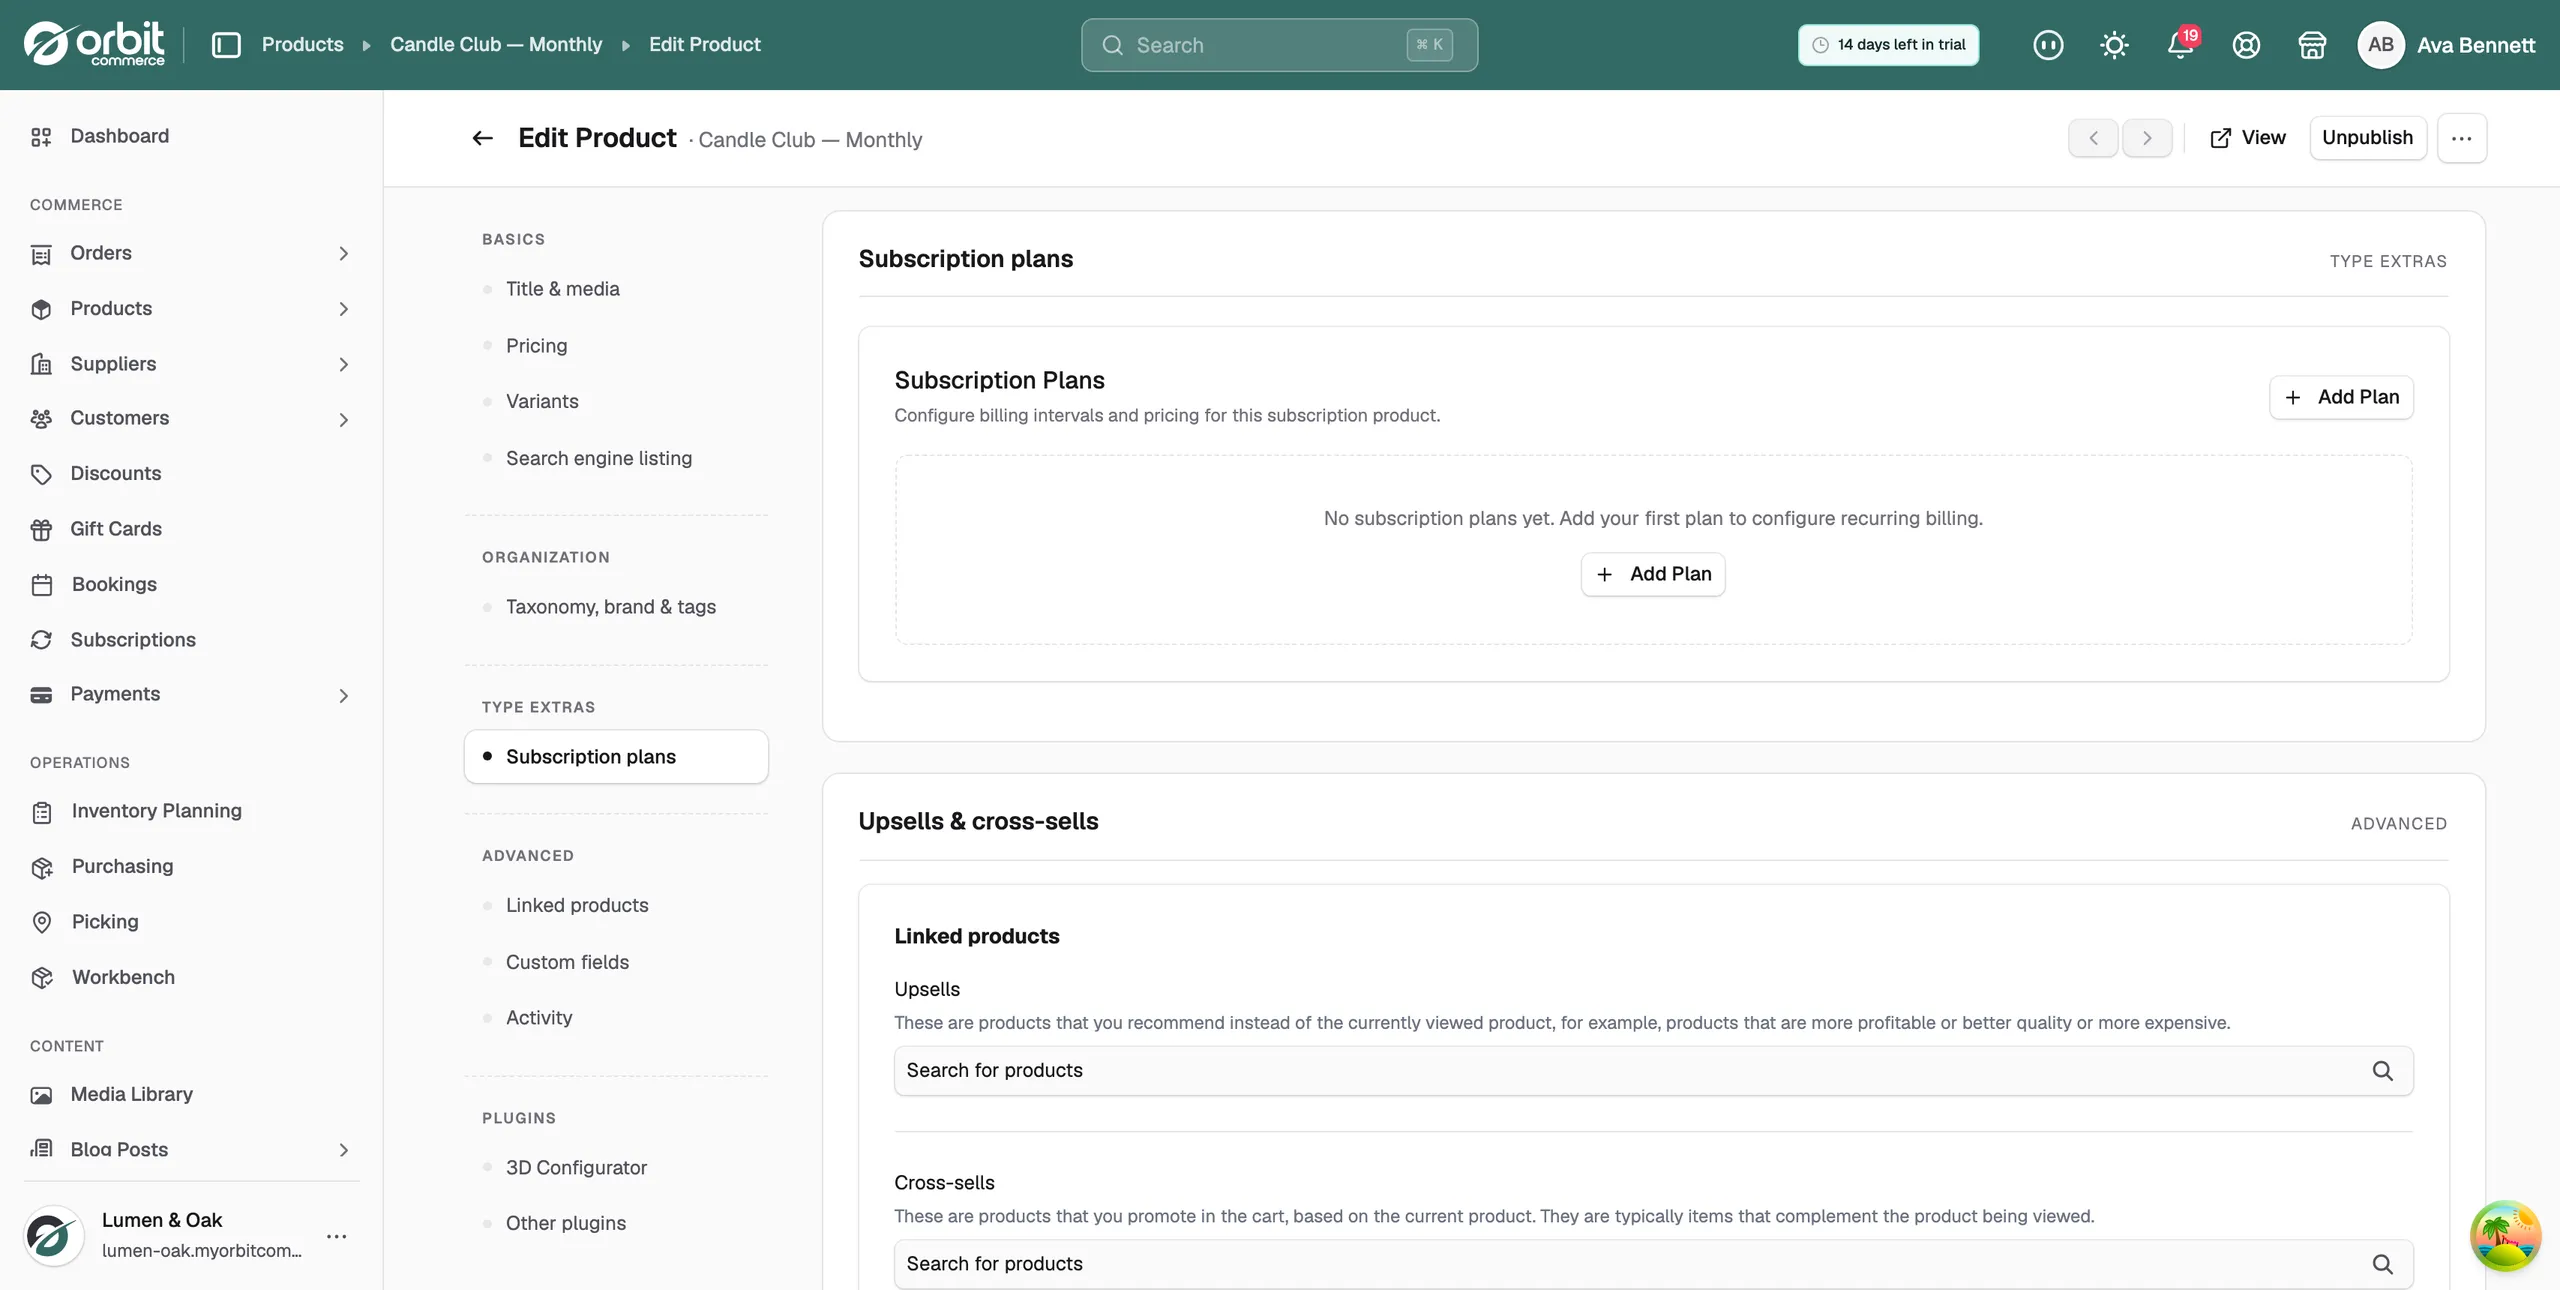
Subscription products
- A Type extras group appears with Subscription plans.
- Click Add Plan to set a billing interval and price. You can add more than one plan, for example monthly and yearly.
- Customers manage their subscription from their account. You manage them under Subscriptions in your dashboard.
Service products
A Type extras group appears with Service details. This is where you set how customers book and pay. The fields are:
- Session duration and Unit: the length of one booking slot, for example 60 minutes.
- Capacity per slot: how many bookings one slot can hold. Use 1 for one-to-one work and more for group sessions.
- Lead time (hours): the least notice you need before a booking.
- Buffer between bookings (mins): the gap between slots for setup or changeover.
- Payment type: pay in full at checkout, or take a deposit.
- Cancellation policy: shown to customers at checkout and on the order confirmation.
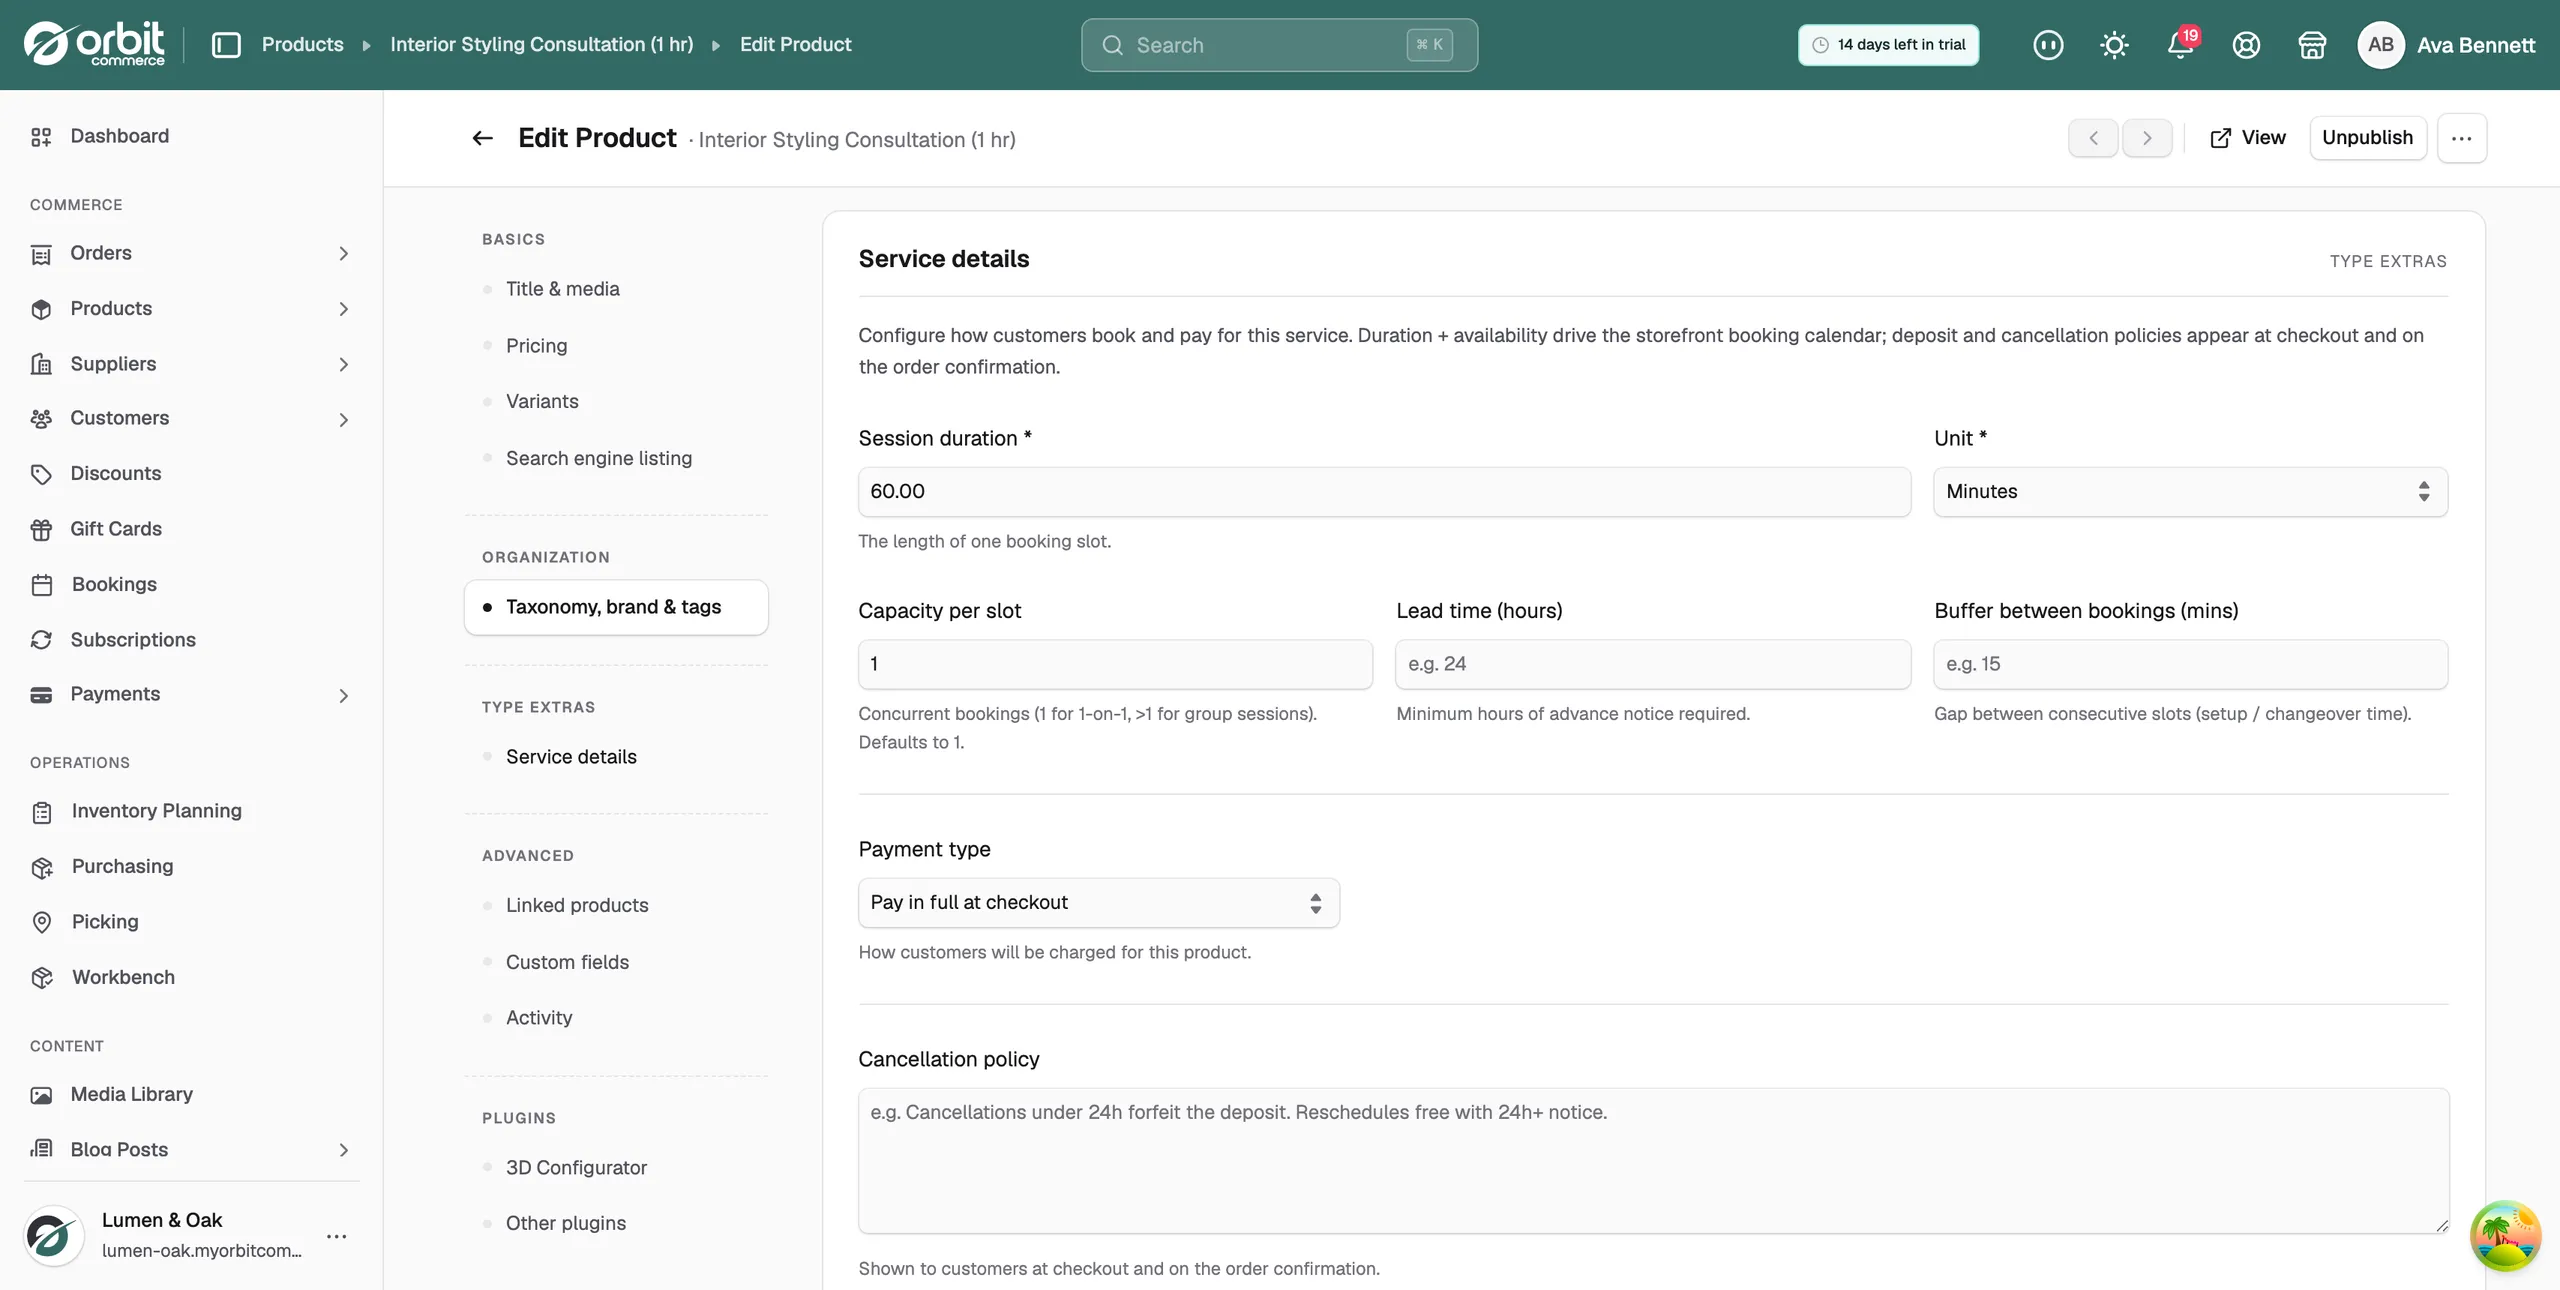
The session duration and your opening hours (Settings, then Service Hours) build the booking calendar on your storefront. Bookings appear under Bookings in your dashboard.
Gift cards
- The Logistics group is removed. The card is emailed to the recipient when the order is paid.
- Gift cards are managed under Gift Cards in your dashboard.
Related guides
Was this helpful?
0 people found this helpful