Finishing your store setup
Work through the five-step setup wizard: business details, bank transfer, a shipping method, tax and your store logo. You only get one run at it.
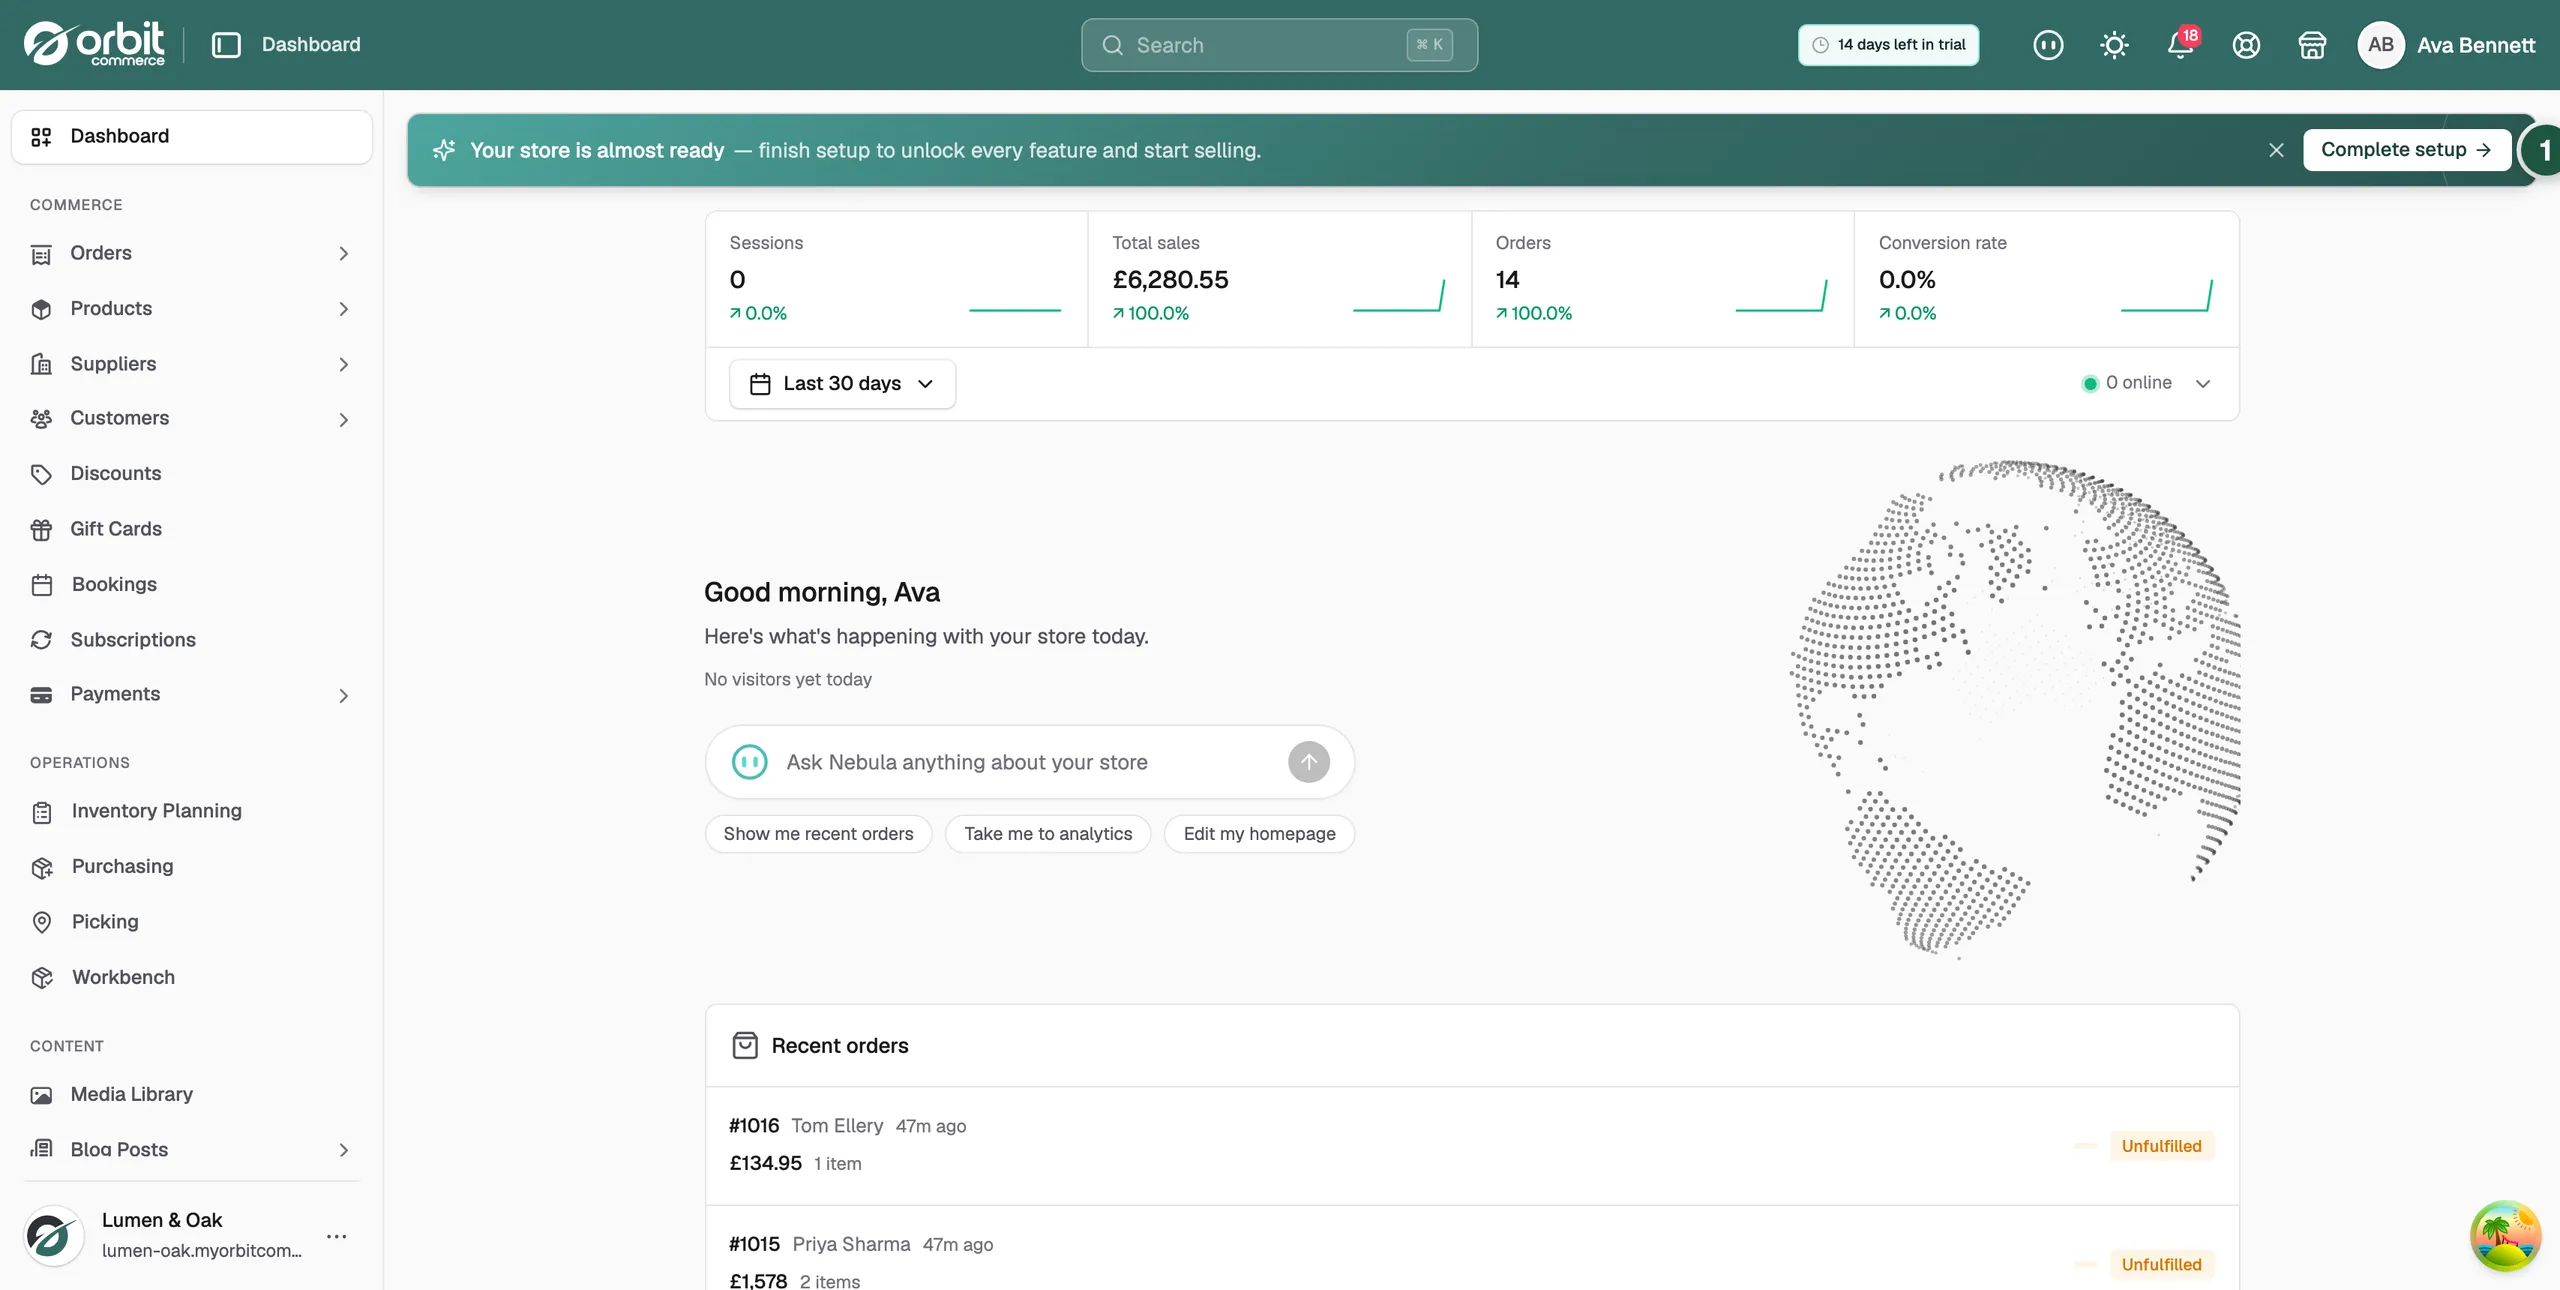
When you create a store, Orbit gives you a five-step setup wizard: Business, Payment, Shipping, Tax and Finalize. It puts the basics in place before you start selling. You reach it from the banner on your dashboard that reads Your store is almost ready.
Considerations
- You can only walk the wizard once. After you select Complete Setup it closes for good, and you change these settings under Settings instead.
- Step 1 is required. Steps 2, 3 and 4 have a Skip this button.
- The country in your business address is where your payment account is registered. It cannot be changed later.
- Your answers are saved in the browser you are using, so you can close the tab and come back on the same device.
Open the wizard
- From your Orbit dashboard, find the banner that reads Your store is almost ready.
- Click Complete setup. The sidebar and the top bar disappear and the wizard fills the page.
Step 1: Business
- Answer What type of business do you run? Pick the closest match.
- Answer How many products do you plan to sell? A rough range is fine.
- Scroll down to Business address. Your address from sign-up is already filled in.
- Check Country, Street Address and ZIP/Postal Code. All three are required.
- Click Continue.
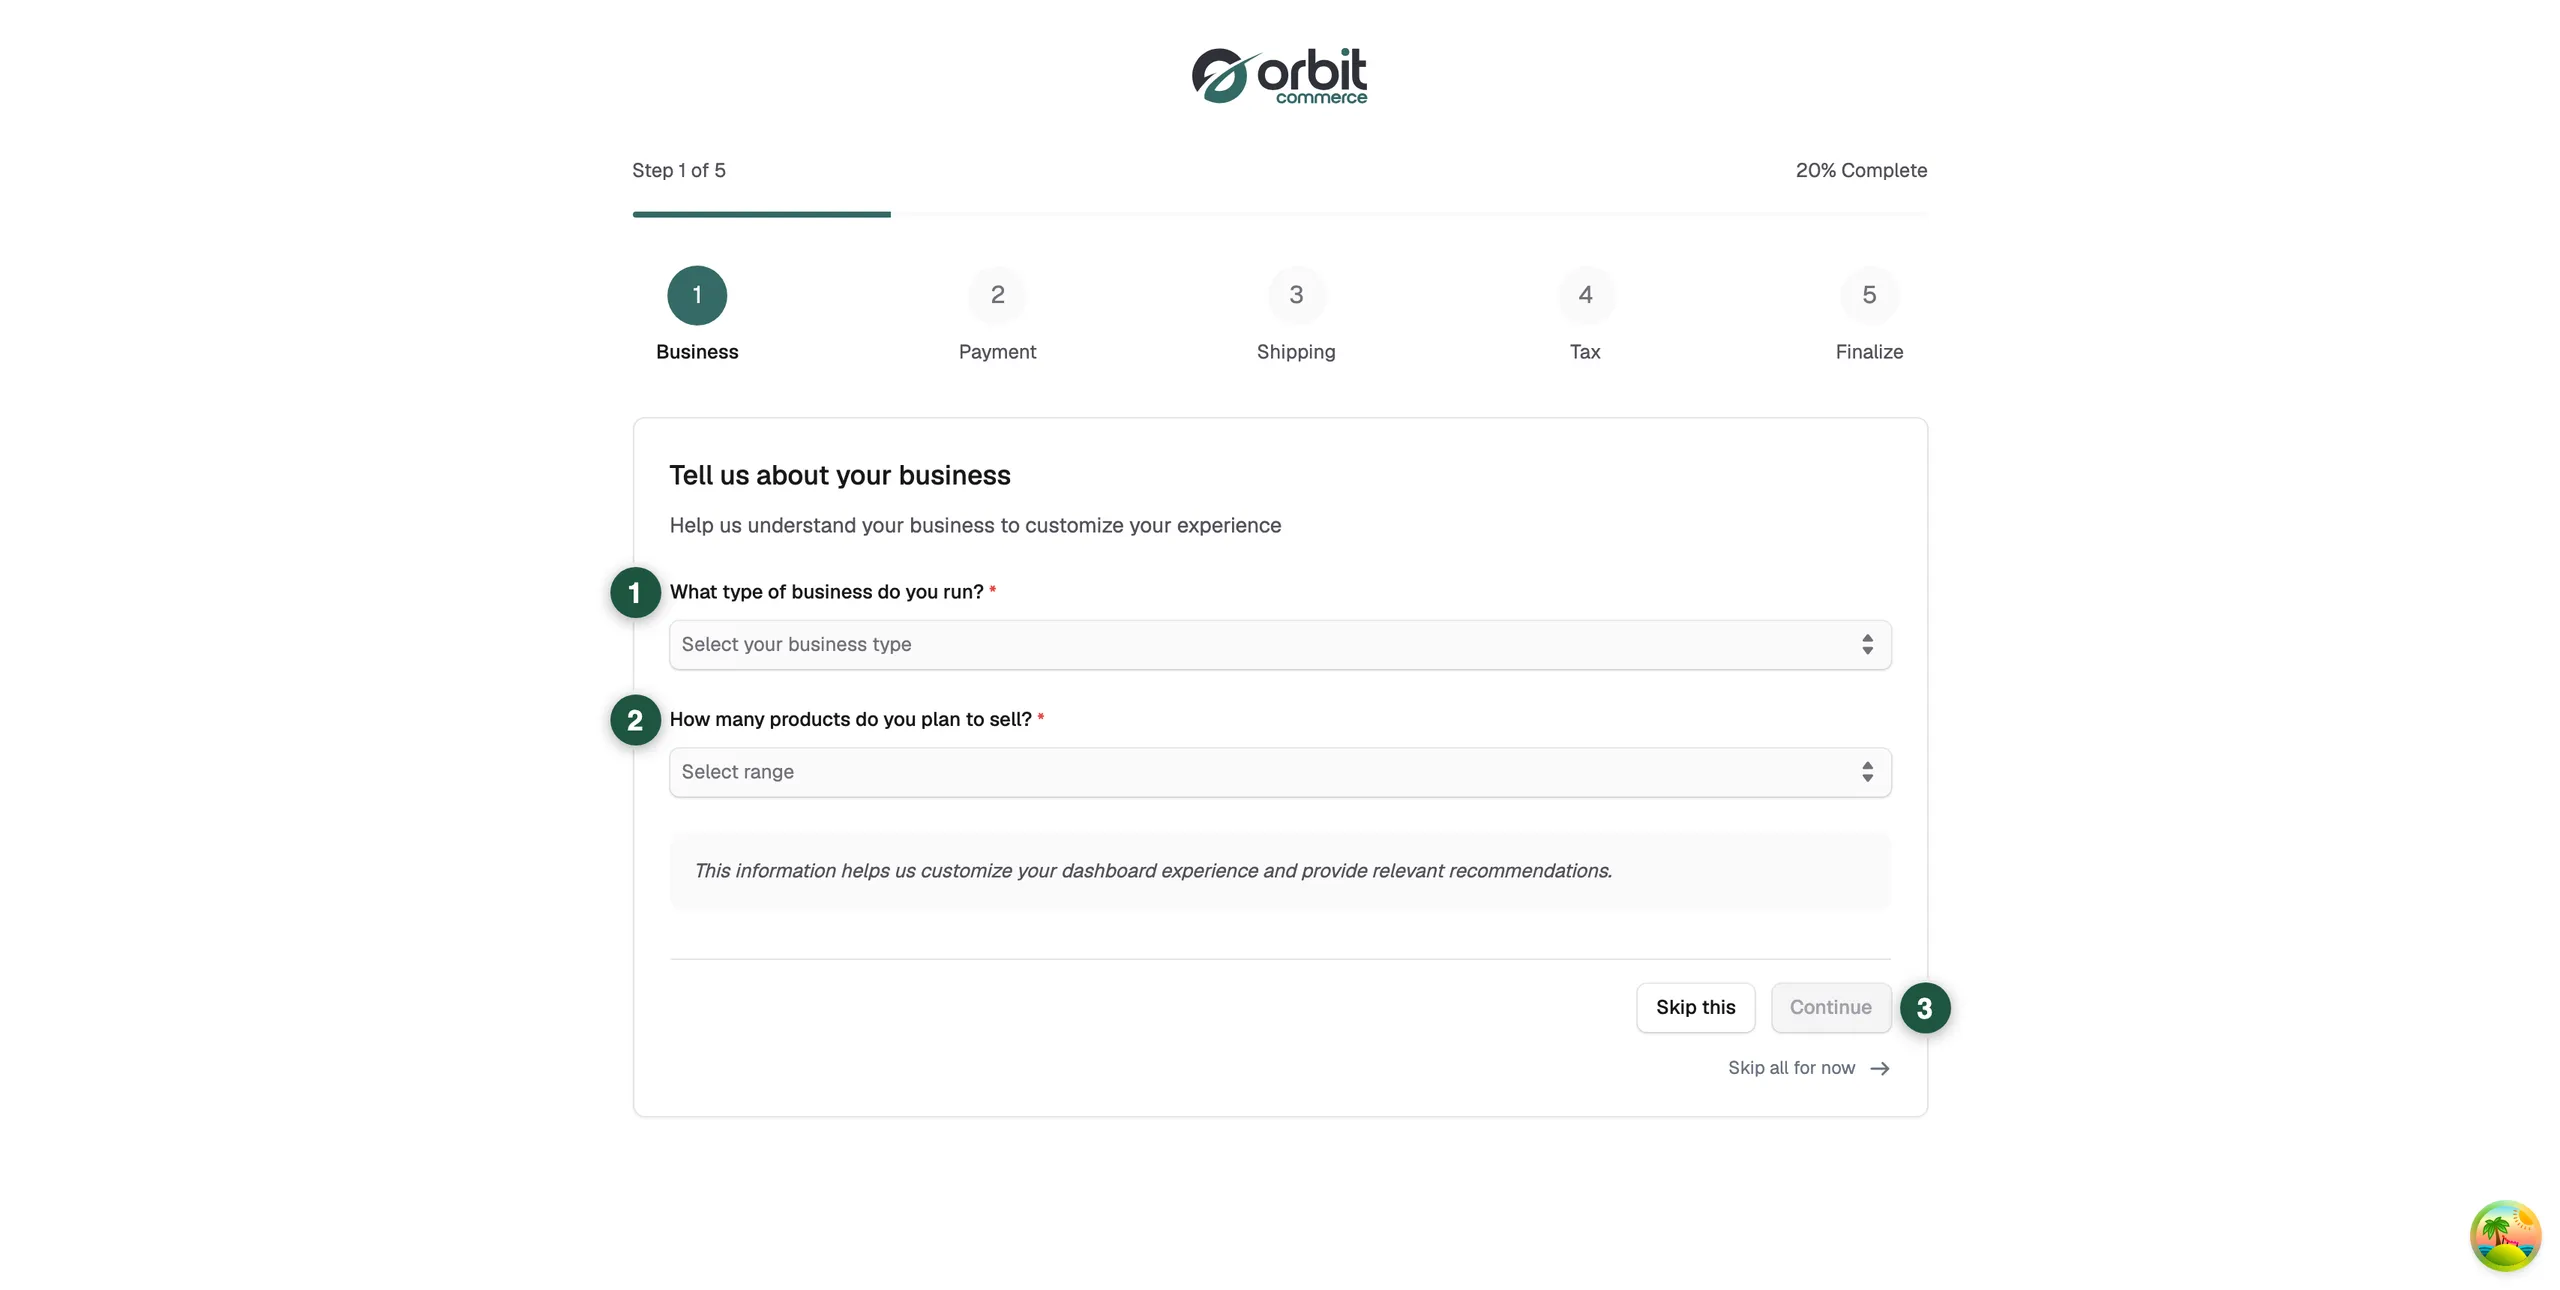
Warning: The help line under Country says your payment account is registered in that country permanently. Get it right before you carry on.
Step 2: Payment
This step adds a Bank Transfer option to your checkout. Customers who pick it see these details and pay you directly. It is not your card payout account. Card payments are set up later under Settings, then Store Settings, then Payment Settings.
- Enter your Bank name.
- Enter your Account holder name.
- Enter your Account number.
- Click Continue.
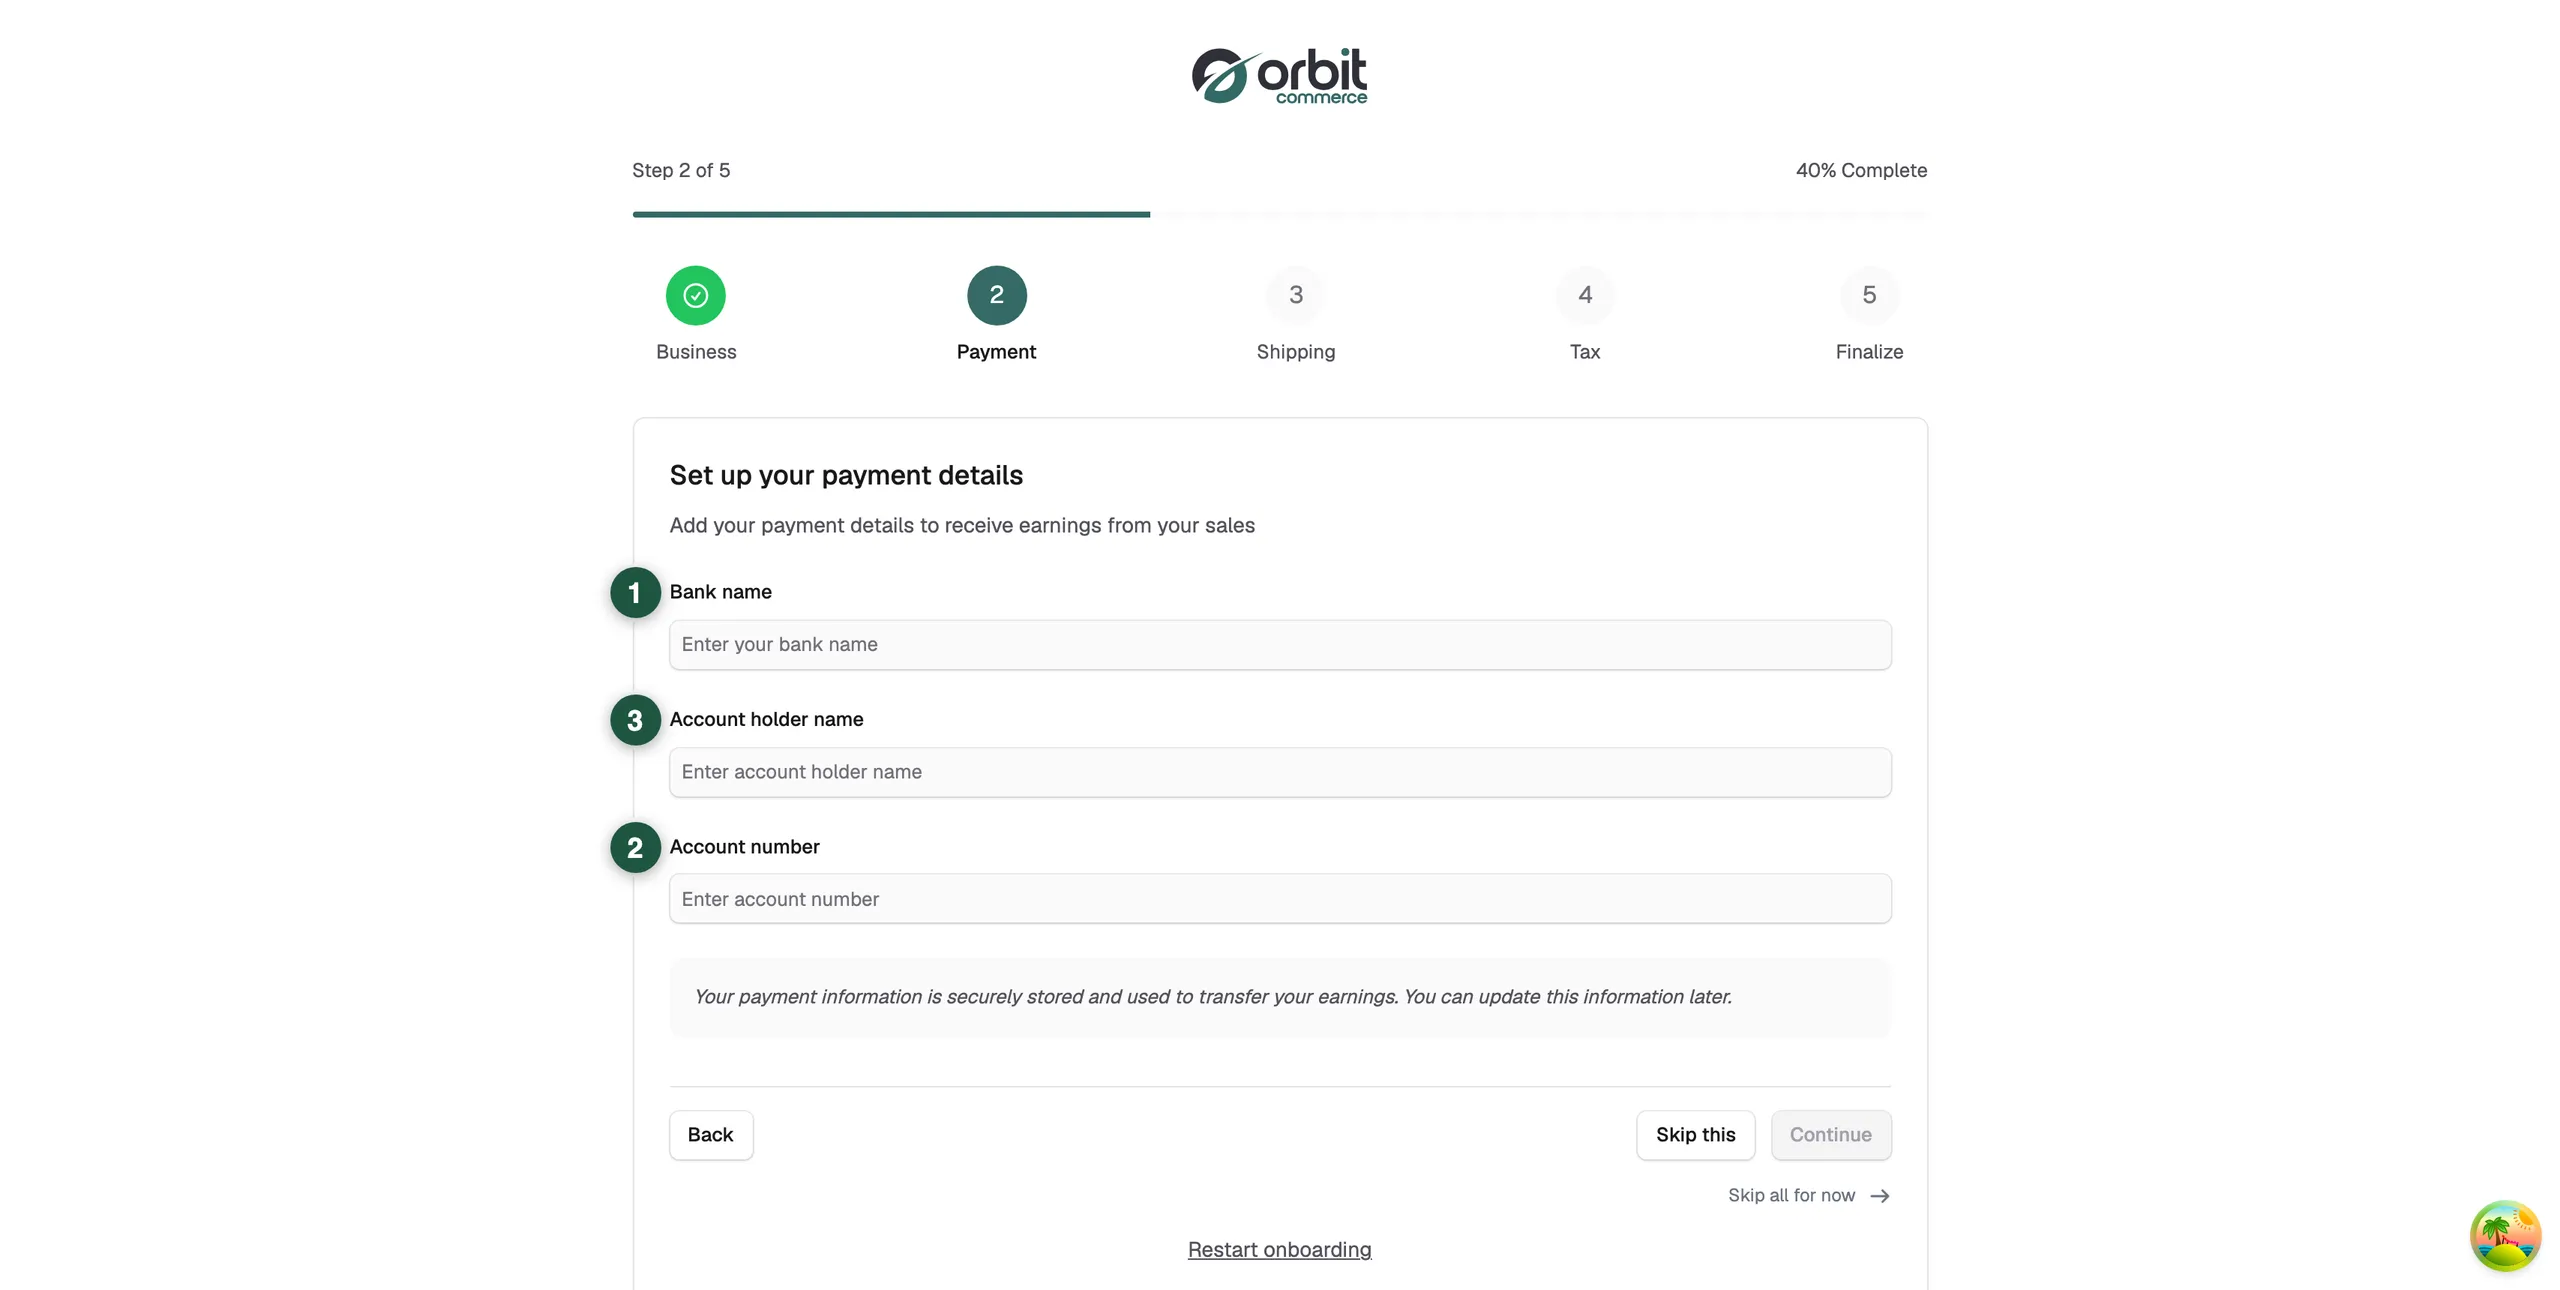
Note: Continue stays greyed out until Bank name and Account number both have something in them. Neither field is marked as required. If you do not want to offer Bank Transfer, use Skip this.
Step 3: Shipping
- Open Default shipping method.
- Choose Flat Rate, Free Shipping or Local Pickup. Flat Rate asks for a cost, which every order pays.
- Read the Shipping tips box.
- Click Continue.
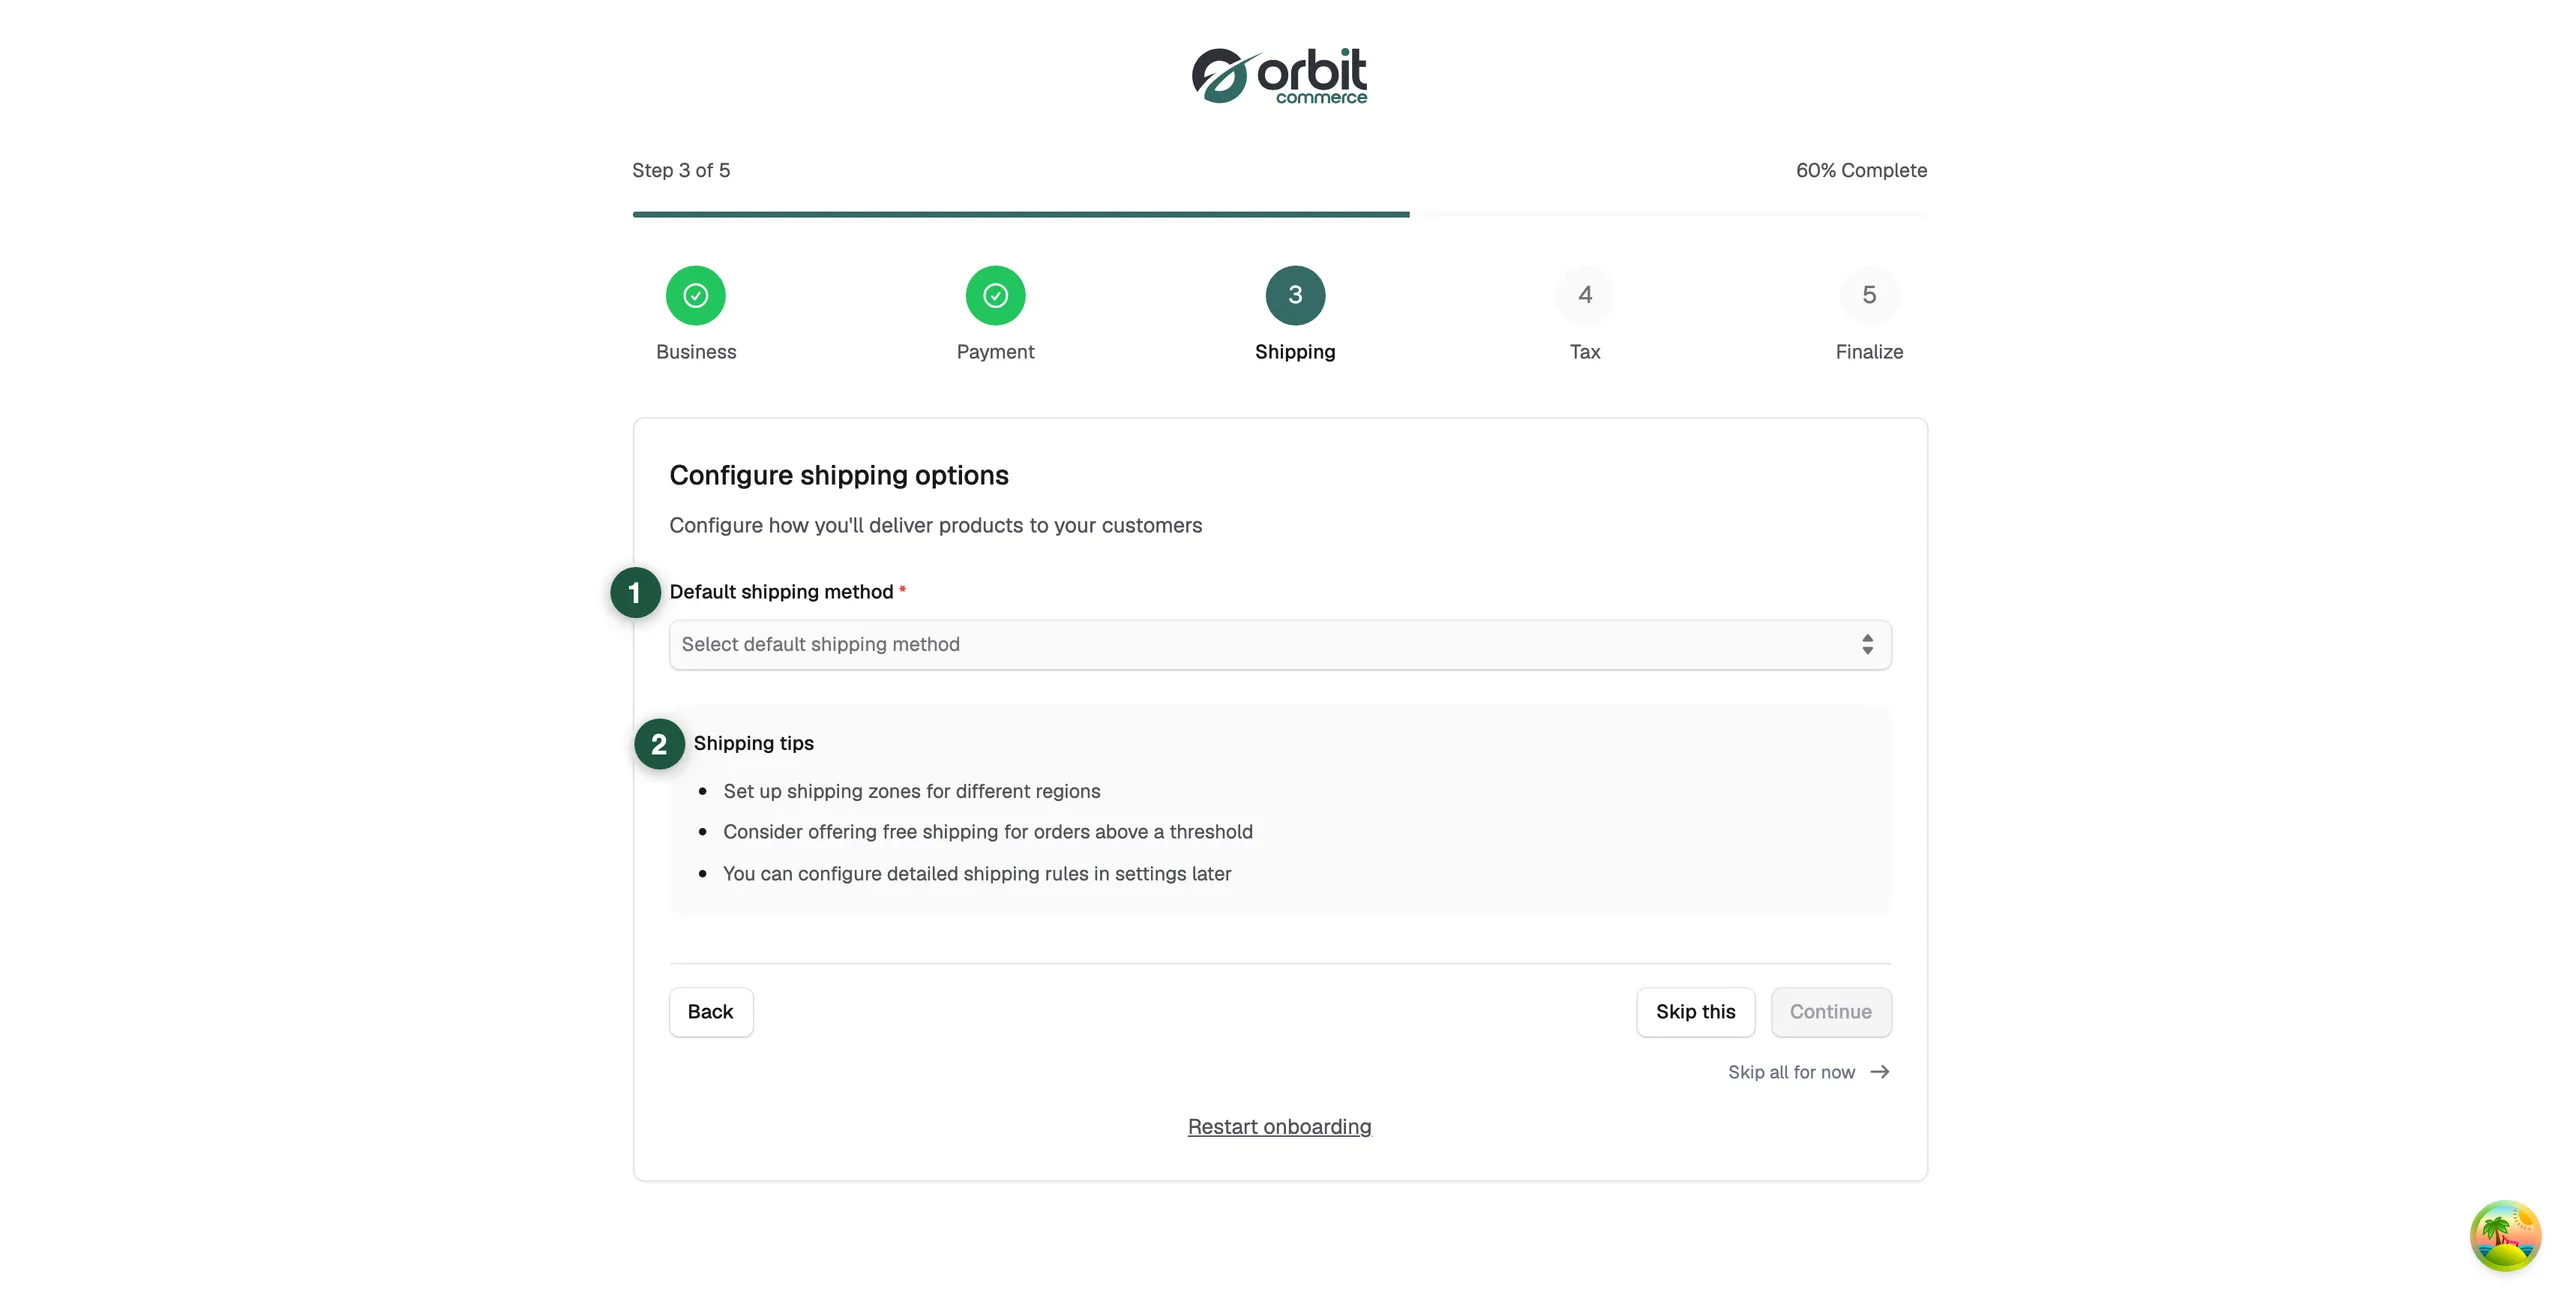
Orbit creates one shipping zone called Everywhere, covering the whole world, with the method you picked. It applies to every order from every country until you edit your zones under Settings, then Shipping.
Step 4: Tax
- Leave Enable automatic tax calculation ticked. It is ticked when the step opens.
- Enter your Tax registration number if you have one. It is optional.
- Click Continue.
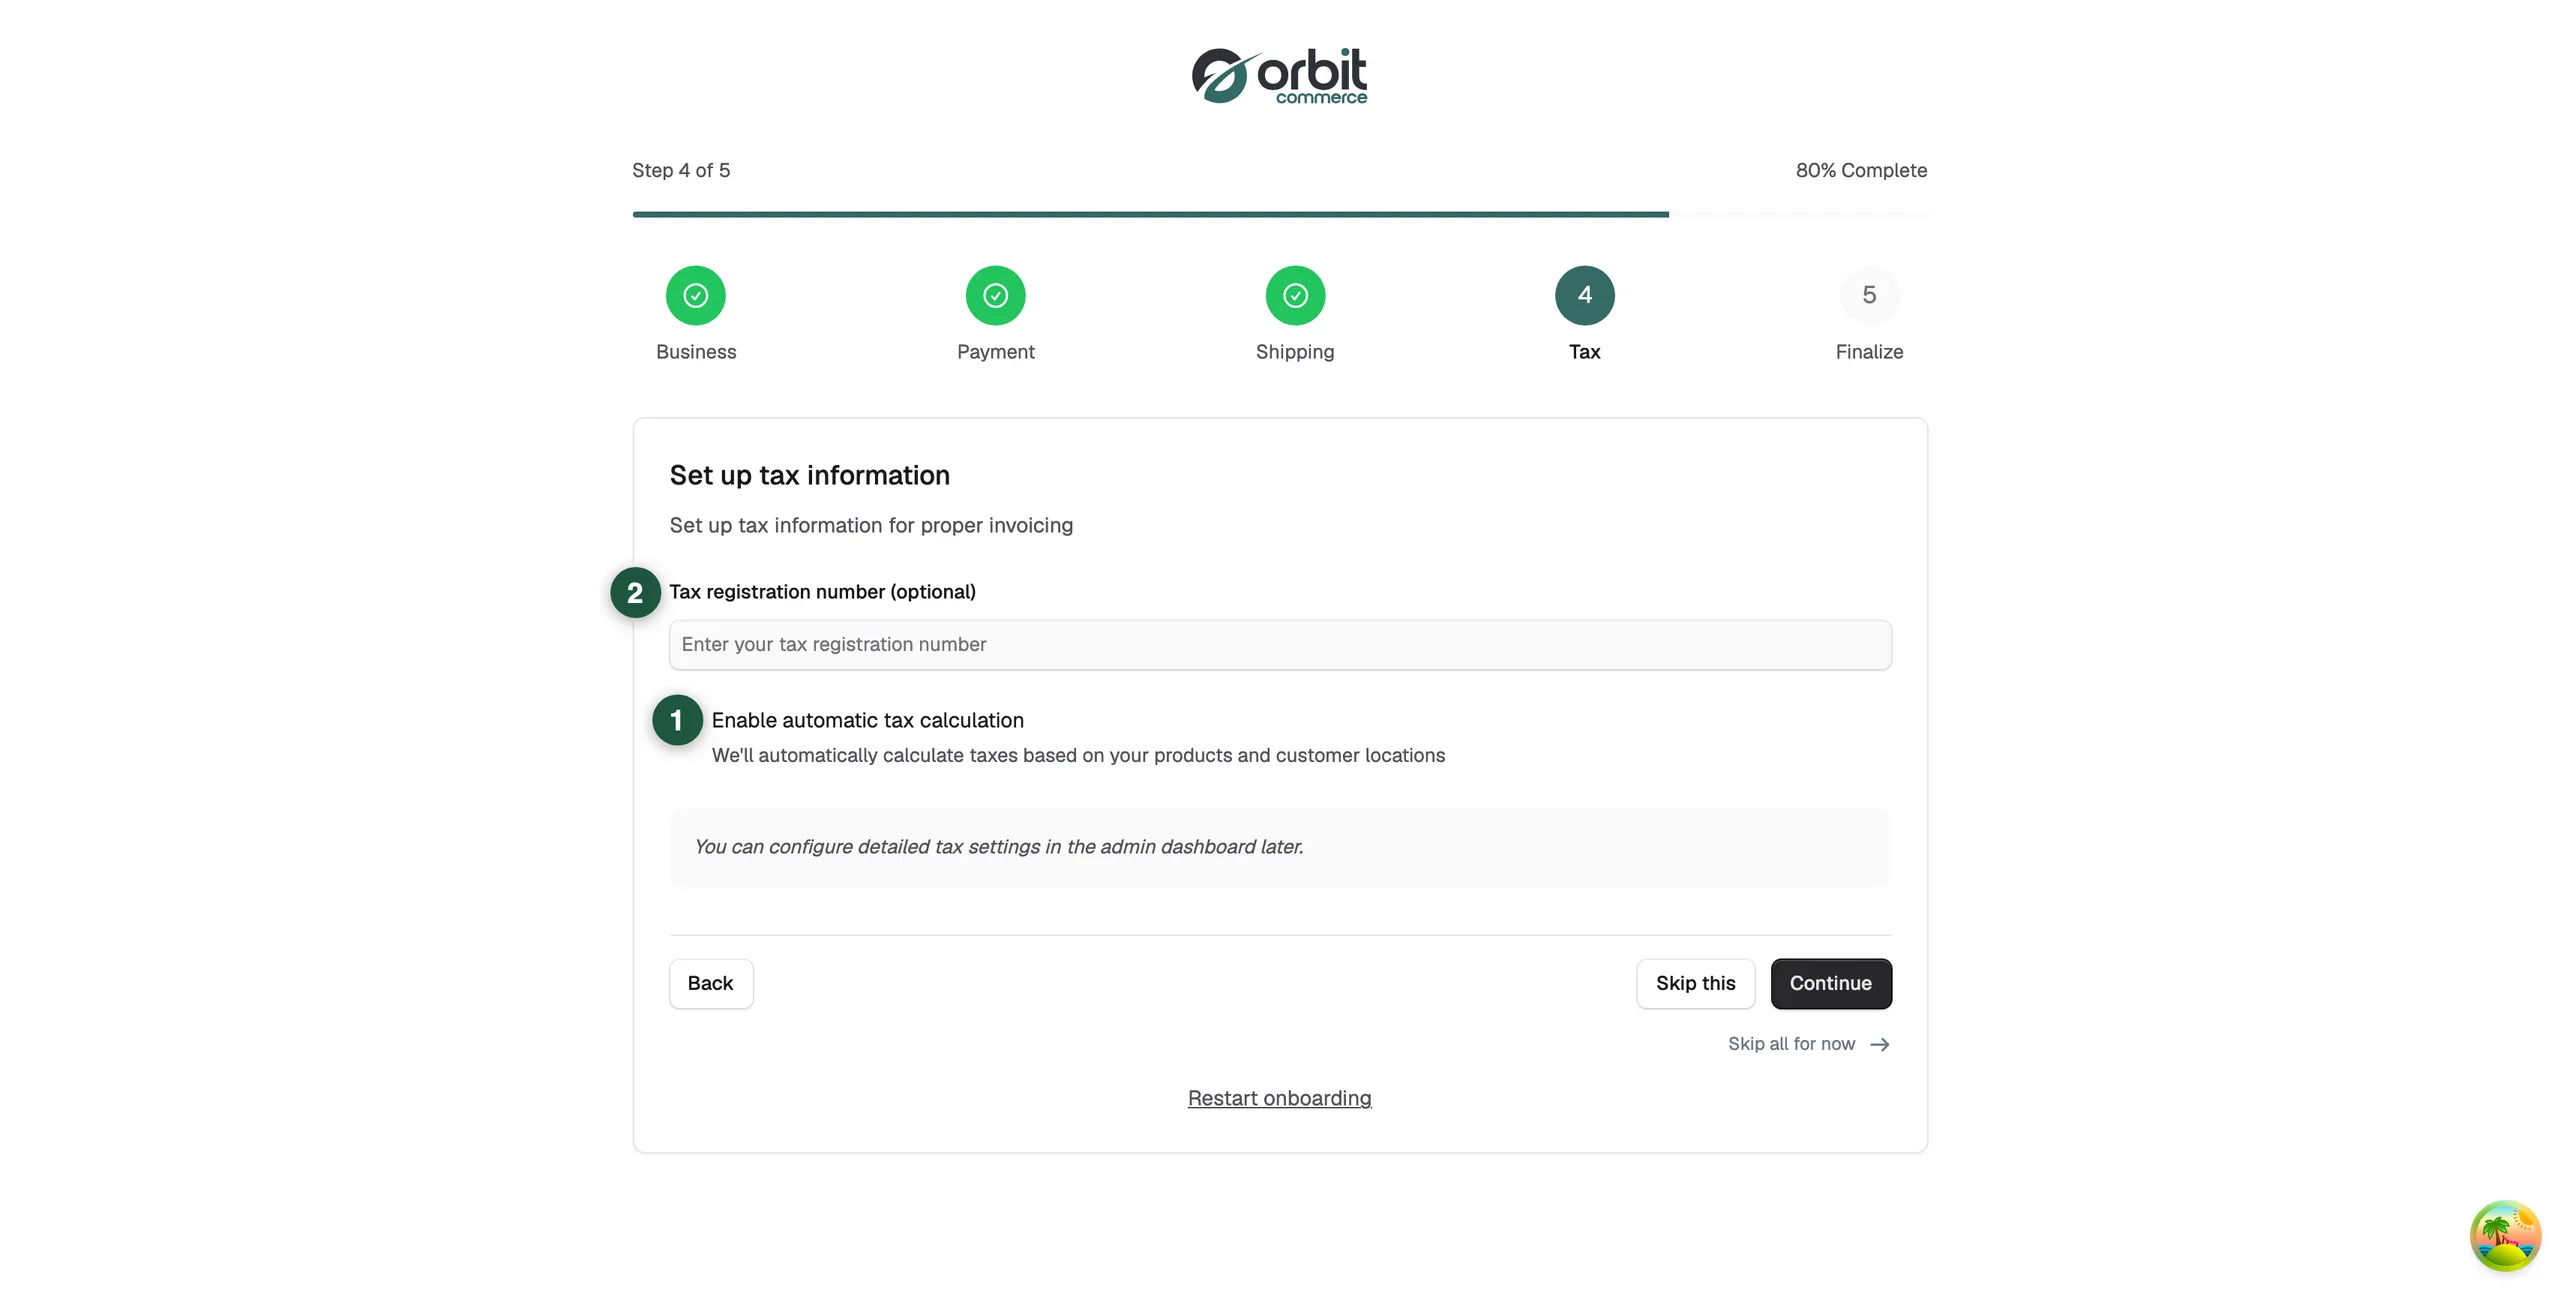
Automatic tax works for the UK, the EU, the US, Canada and Australia. For other countries, add your tax zones under Settings, then Store Settings, then Tax Settings. No tax is charged until you do.
Step 5: Finalize
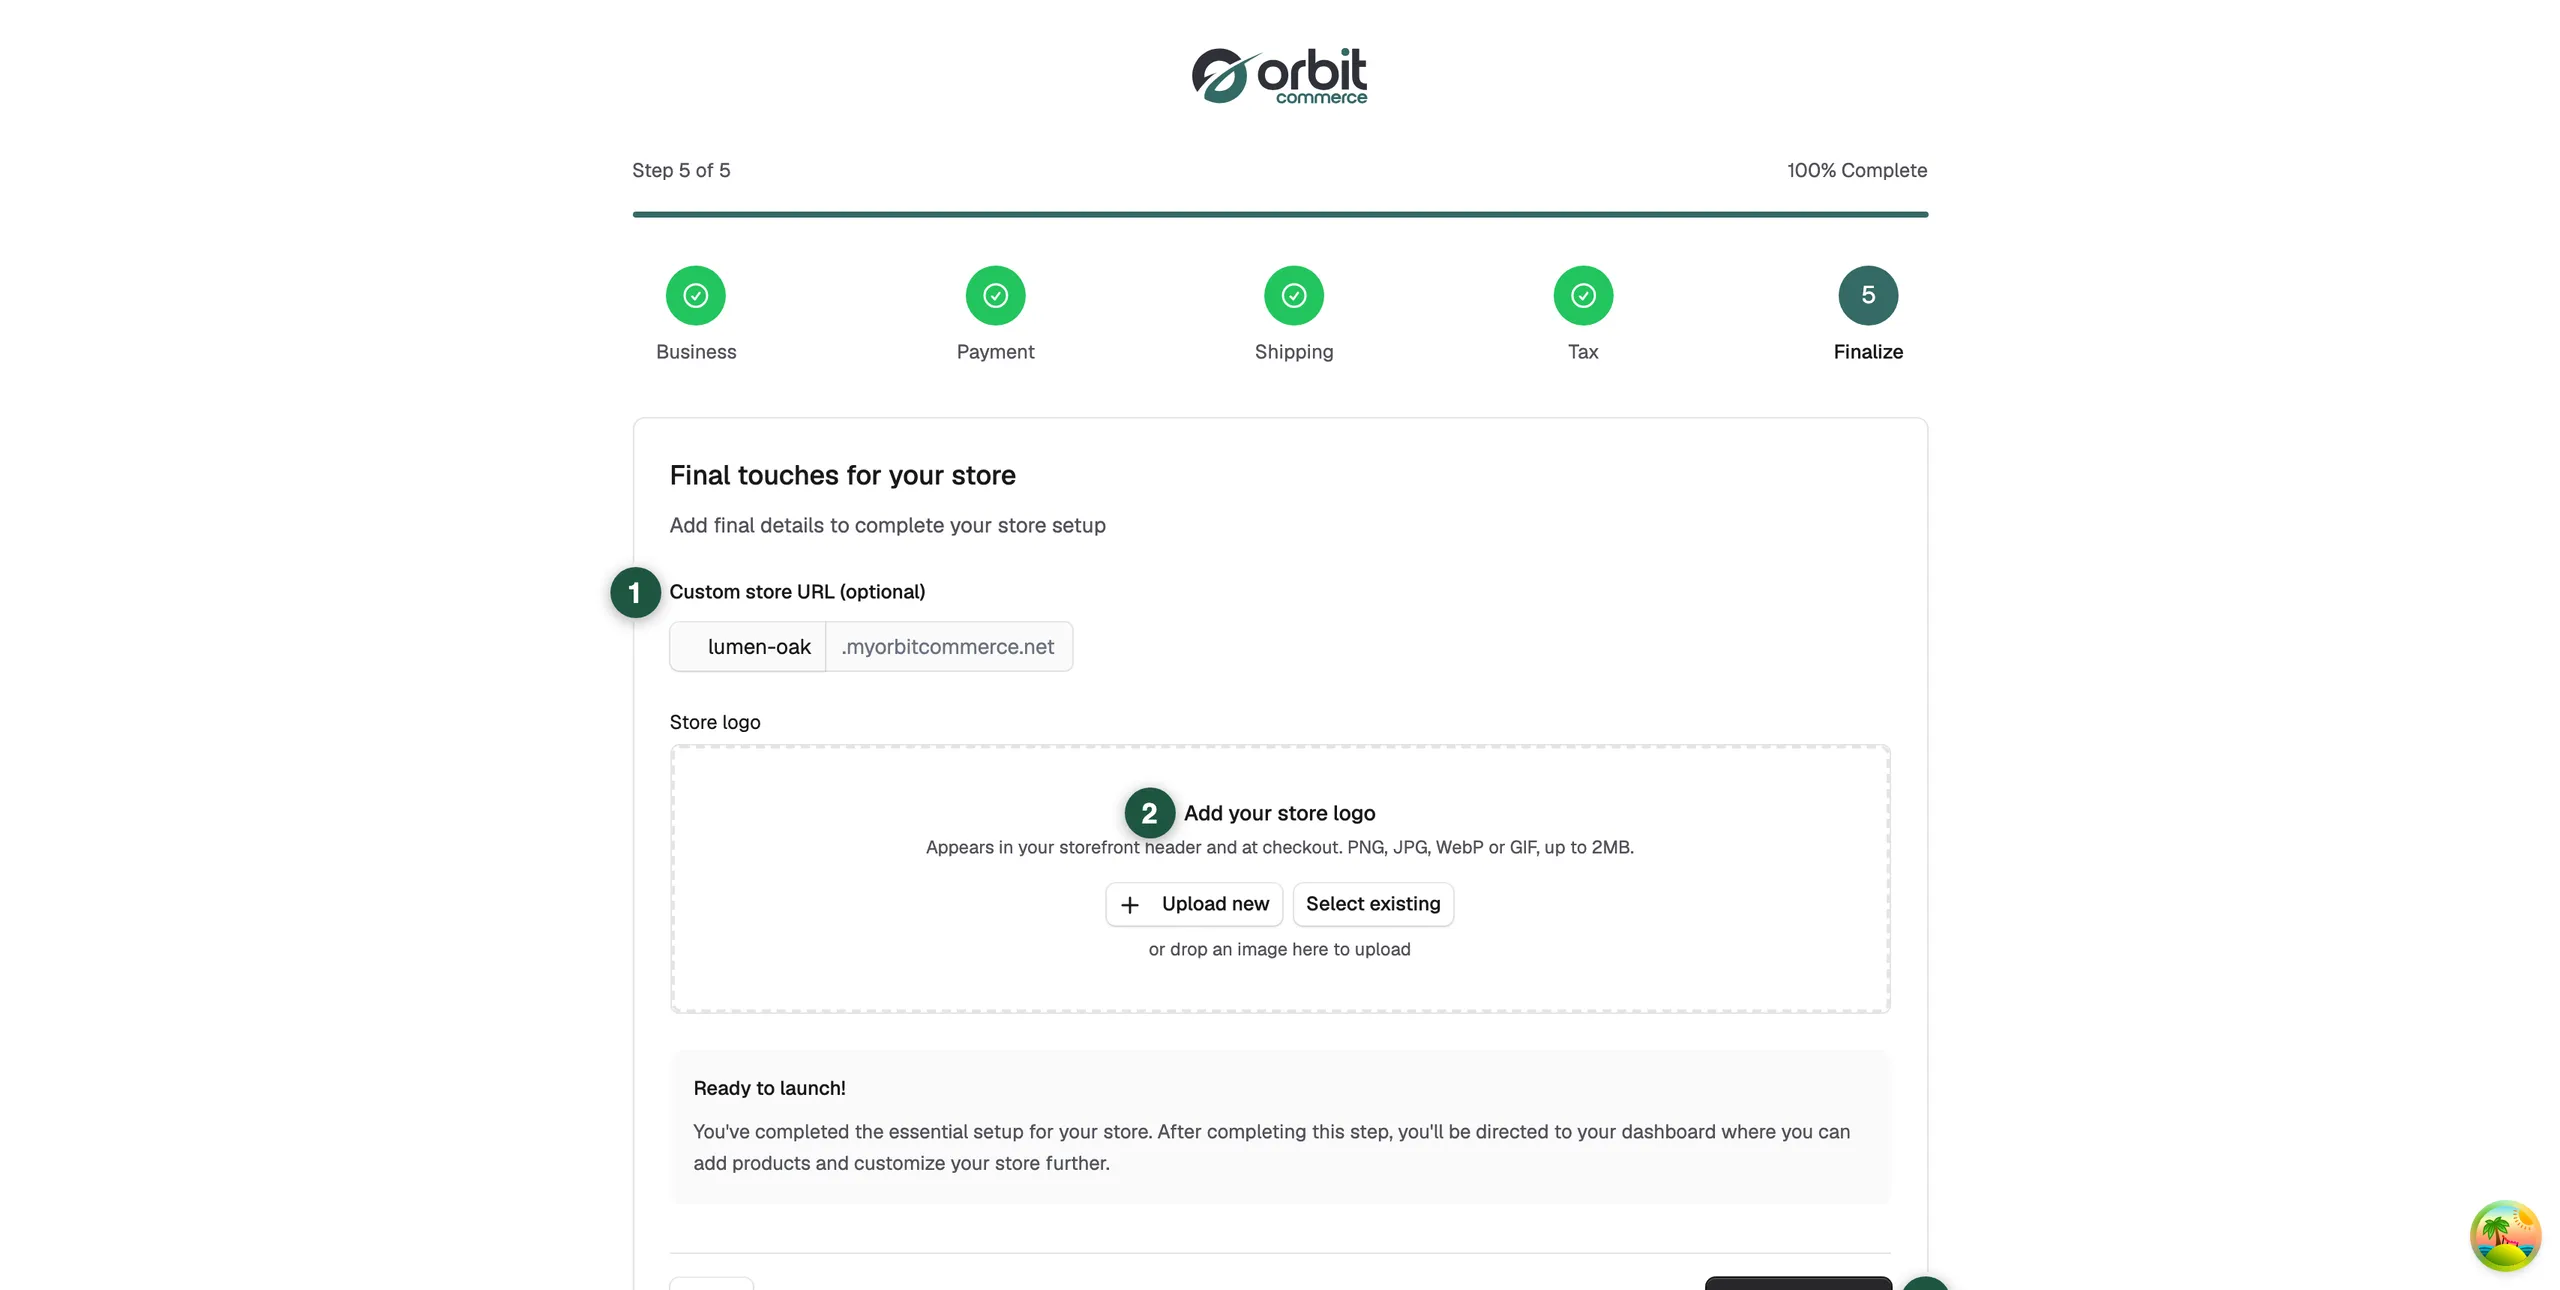
- Check Custom store URL. It is filled in for you and it gives your shop its address on myorbitcommerce.net. Leave it filled in.
- Under Store logo, click Upload new or Select existing. Your logo appears in your storefront header and at checkout.
- Click Complete Setup. The button reads Processing... while it saves.
- The message Onboarding completed successfully! appears and you land on your dashboard.
Tip: On the Get started with Orbit checklist on your dashboard, Set up payments and Set up shipping are now ticked. The wizard did both for you.
Leave and come back
- Skip this: moves past steps 2, 3 and 4. Step 1 does not have it.
- Skip all for now: leaves the wizard without saving what you entered.
- Restart onboarding: takes you back to step 1. It asks you to confirm, and you lose what you have entered.
- Closing the tab keeps your answers in that browser.
Until you finish, the banner stays at the top of your dashboard. Click Complete setup on it to pick up where you left off.
Related guides
Was this helpful?
0 people found this helpful