Adding and managing brands
Add a brand, put your products under it, and give shoppers a page where they can browse everything you sell from that maker.
You can add brands to your store and assign them to your products. Each brand gets its own page on your storefront, so customers can browse everything you sell from that maker. You manage brands from Products > Brands in your Orbit dashboard.
Considerations
- Brand name is the only field you have to fill in.
- A brand holds one image. Use a PNG, JPEG or WebP file up to 5MB.
- A brand is Active as soon as you save it. There is no publish step.
- A product can have one brand.
- Each brand needs its own handle. Orbit will not save a handle another brand already uses.
Add a brand
- From your Orbit dashboard, go to Products, then Brands.
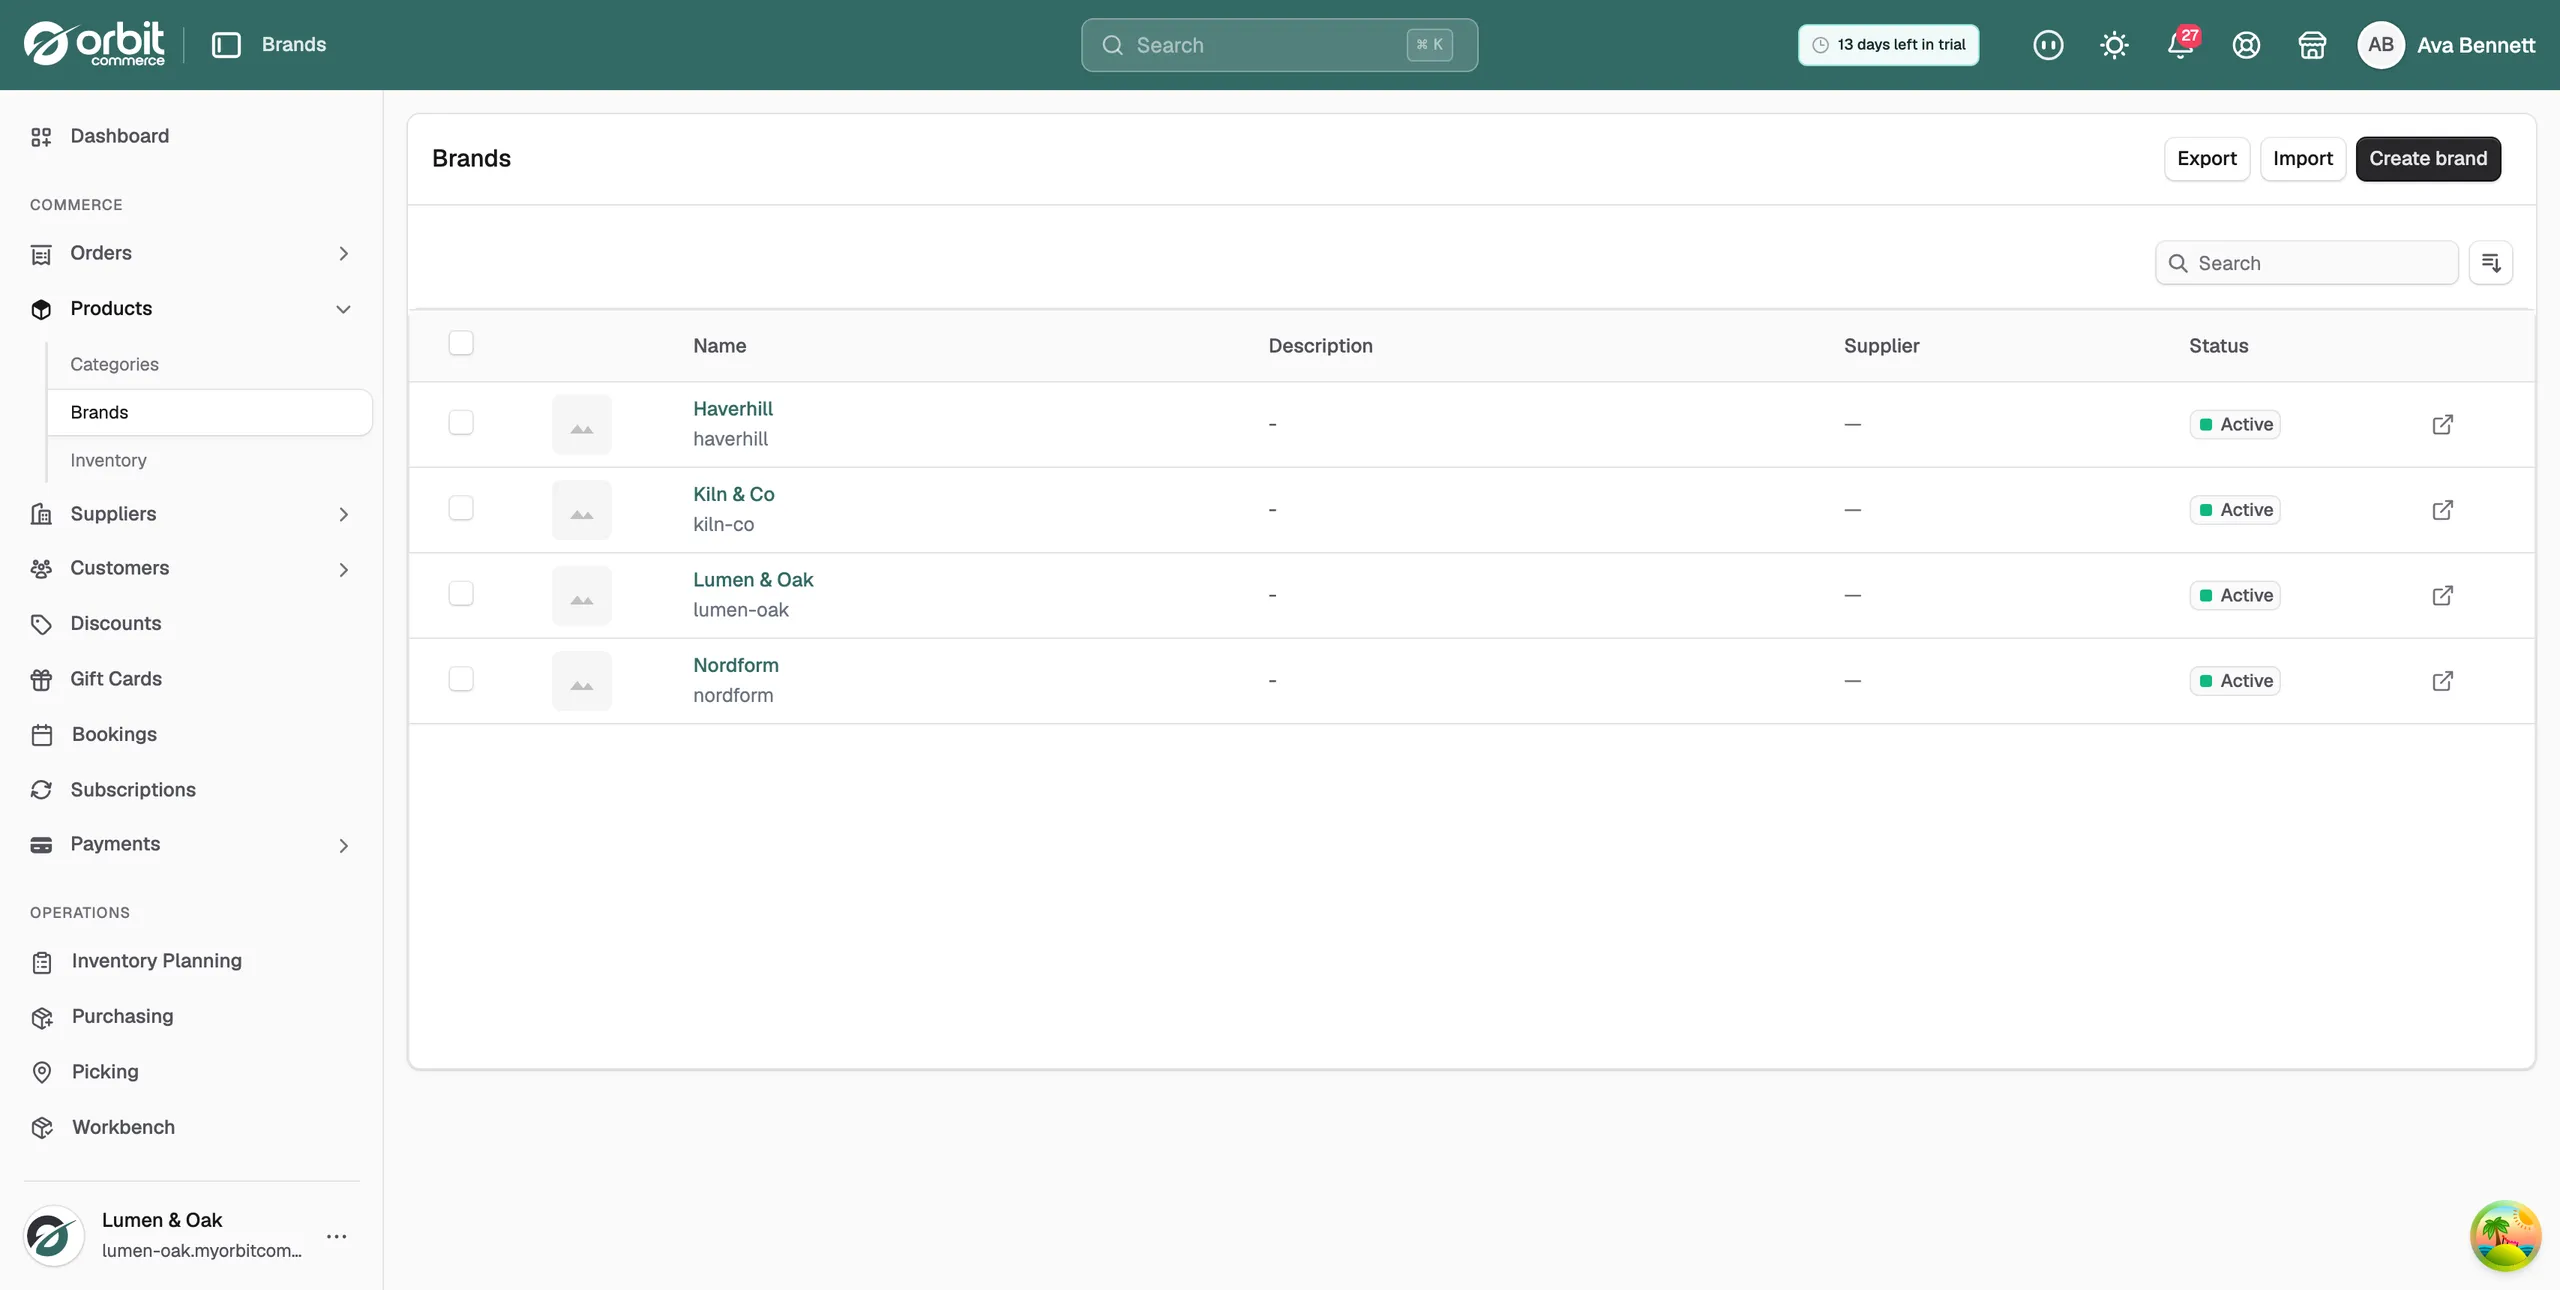
- Click Create brand. The New Brand page opens.
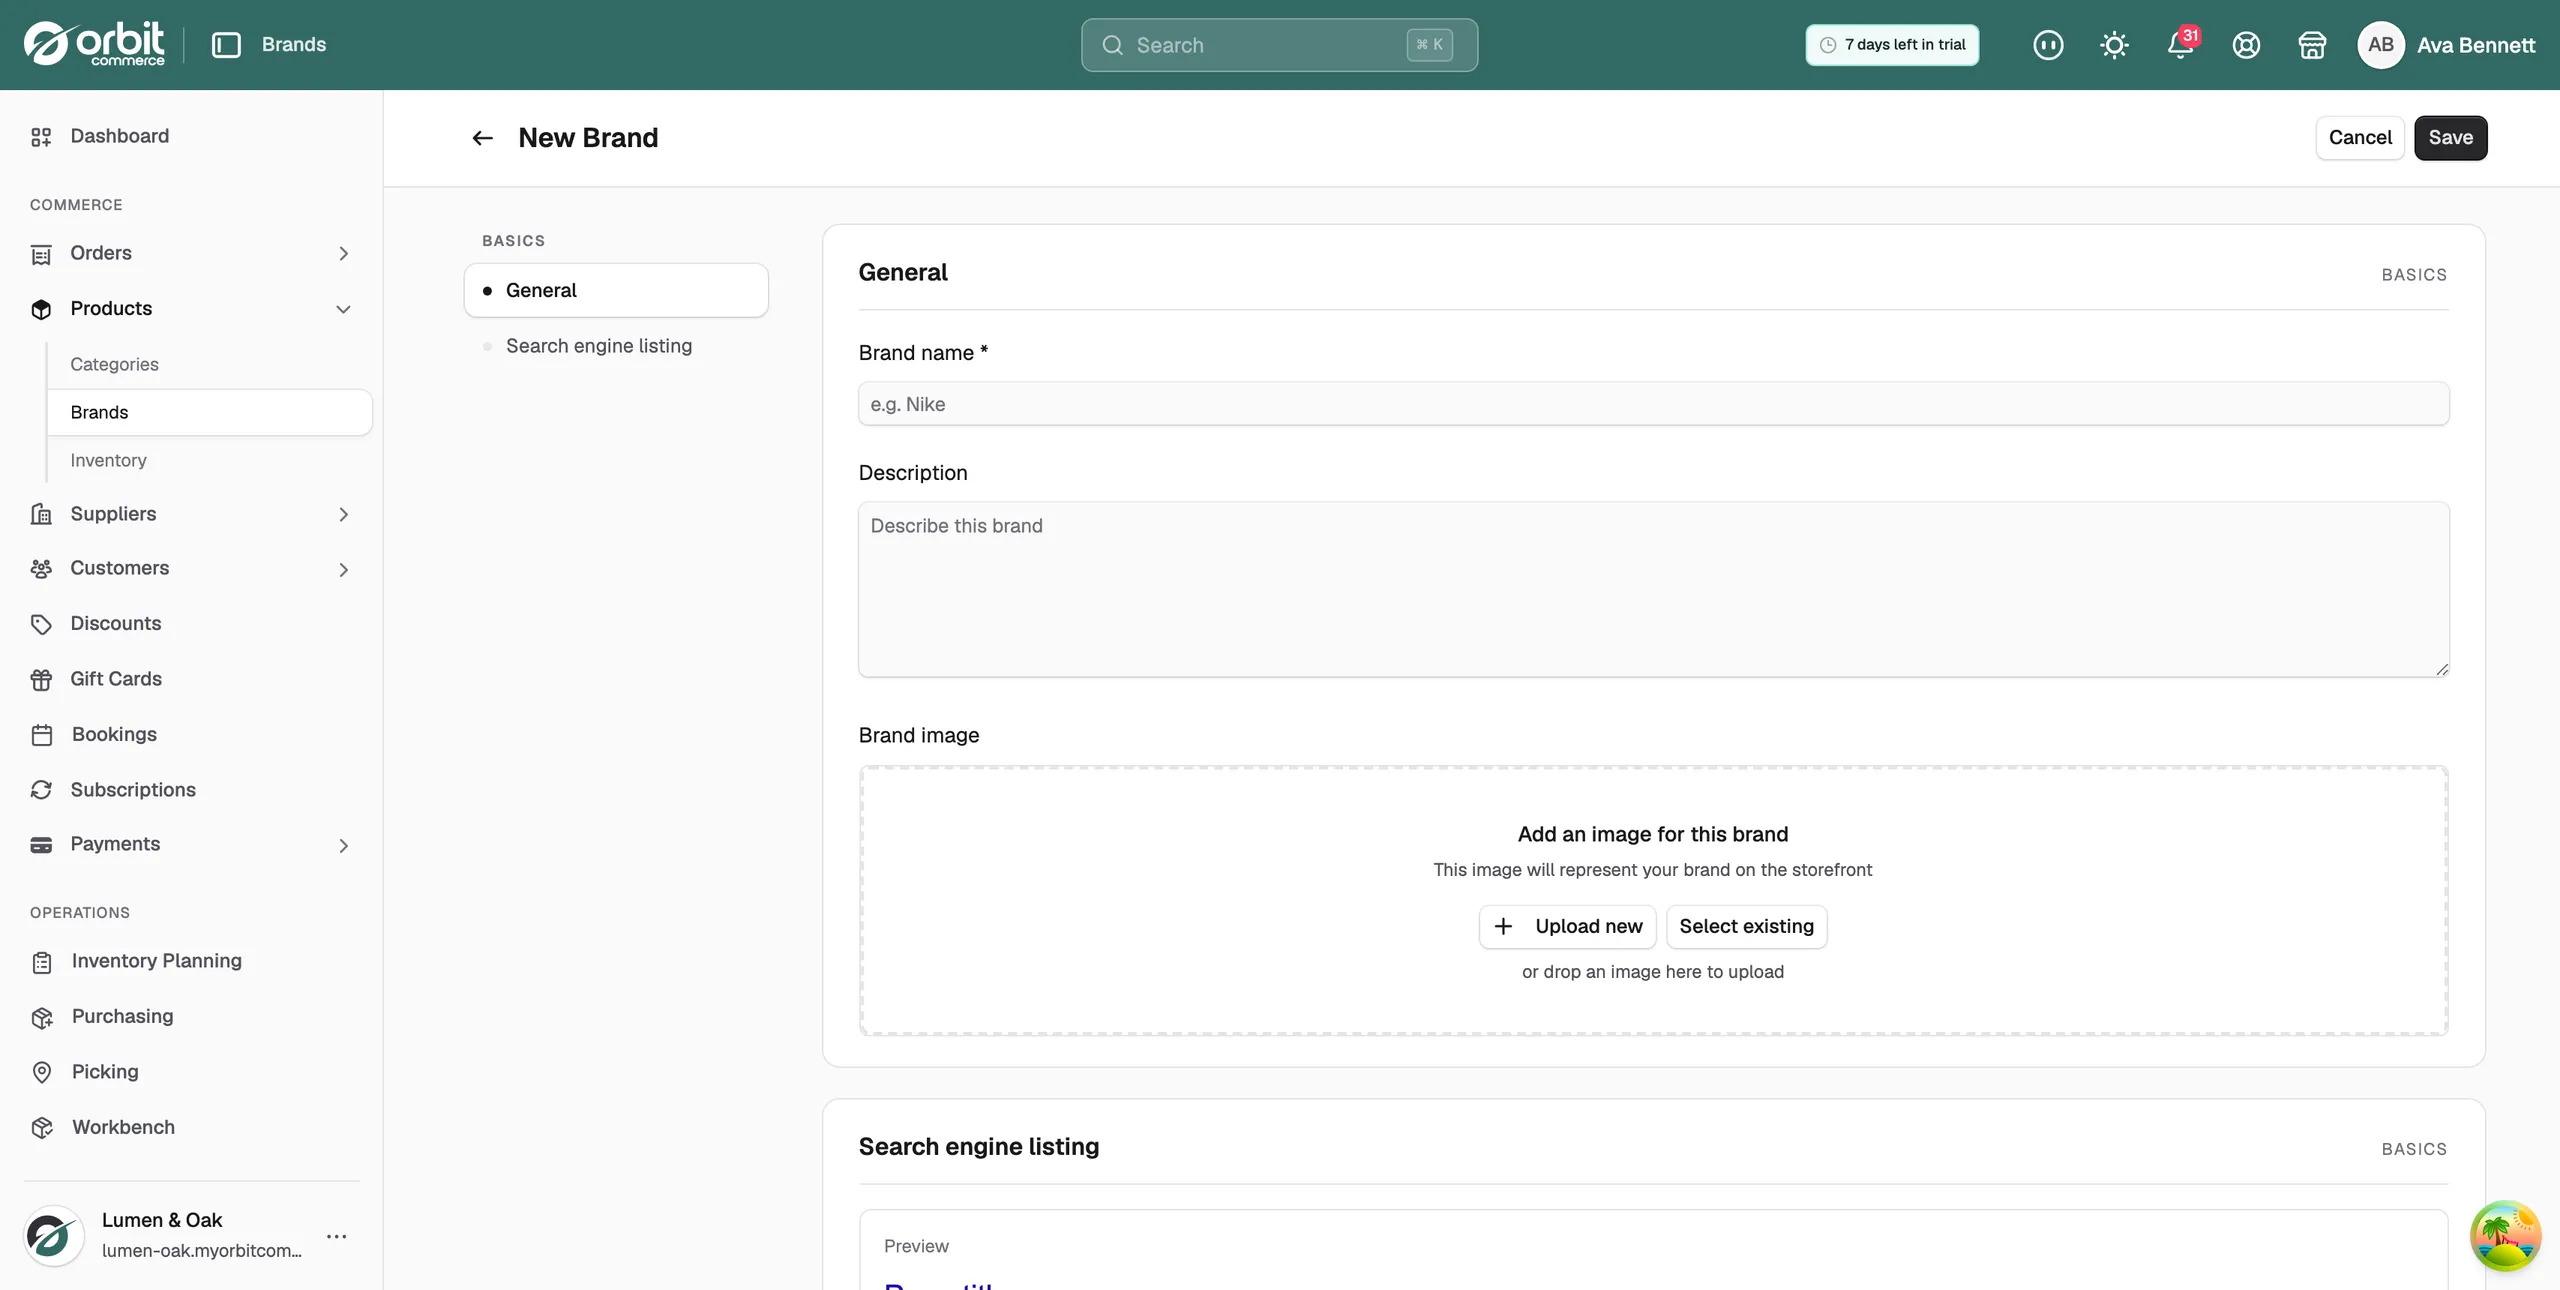
- In Brand name, type the name shoppers already know.
- In Description, describe the brand. Search engines use this text.
- Under Brand image, click Upload new to pick a file from your computer, or Select existing to open your media library.
- If you opened the media library, pick a picture, then click Replace.
- Scroll to Search engine listing. Orbit fills in Page title, Meta description and URL and handle from what you typed. Change any of them if you want to.
- Click Save.
The new brand appears in the Brands list with the message Brand created successfully. Its status is Active.
Tip: Orbit keeps the search engine fields in step with the brand name and description until you edit a field by hand. After that, the field keeps what you typed.
Assign a brand to a product
- From your Orbit dashboard, go to Products.
- Click the product you want to change.
- Open the Taxonomy, brand & tags section.
- In Brand, search for the brand and pick it. You can also create a new brand from here.
- Click Save.
The product now shows on that brand's storefront page.
Tip: To set the brand on many products at once, use the bulk editor. See Bulk editing products.
Edit a brand
- From your Orbit dashboard, go to Products, then Brands.
- Click the name of the brand. The Edit Brand page opens.
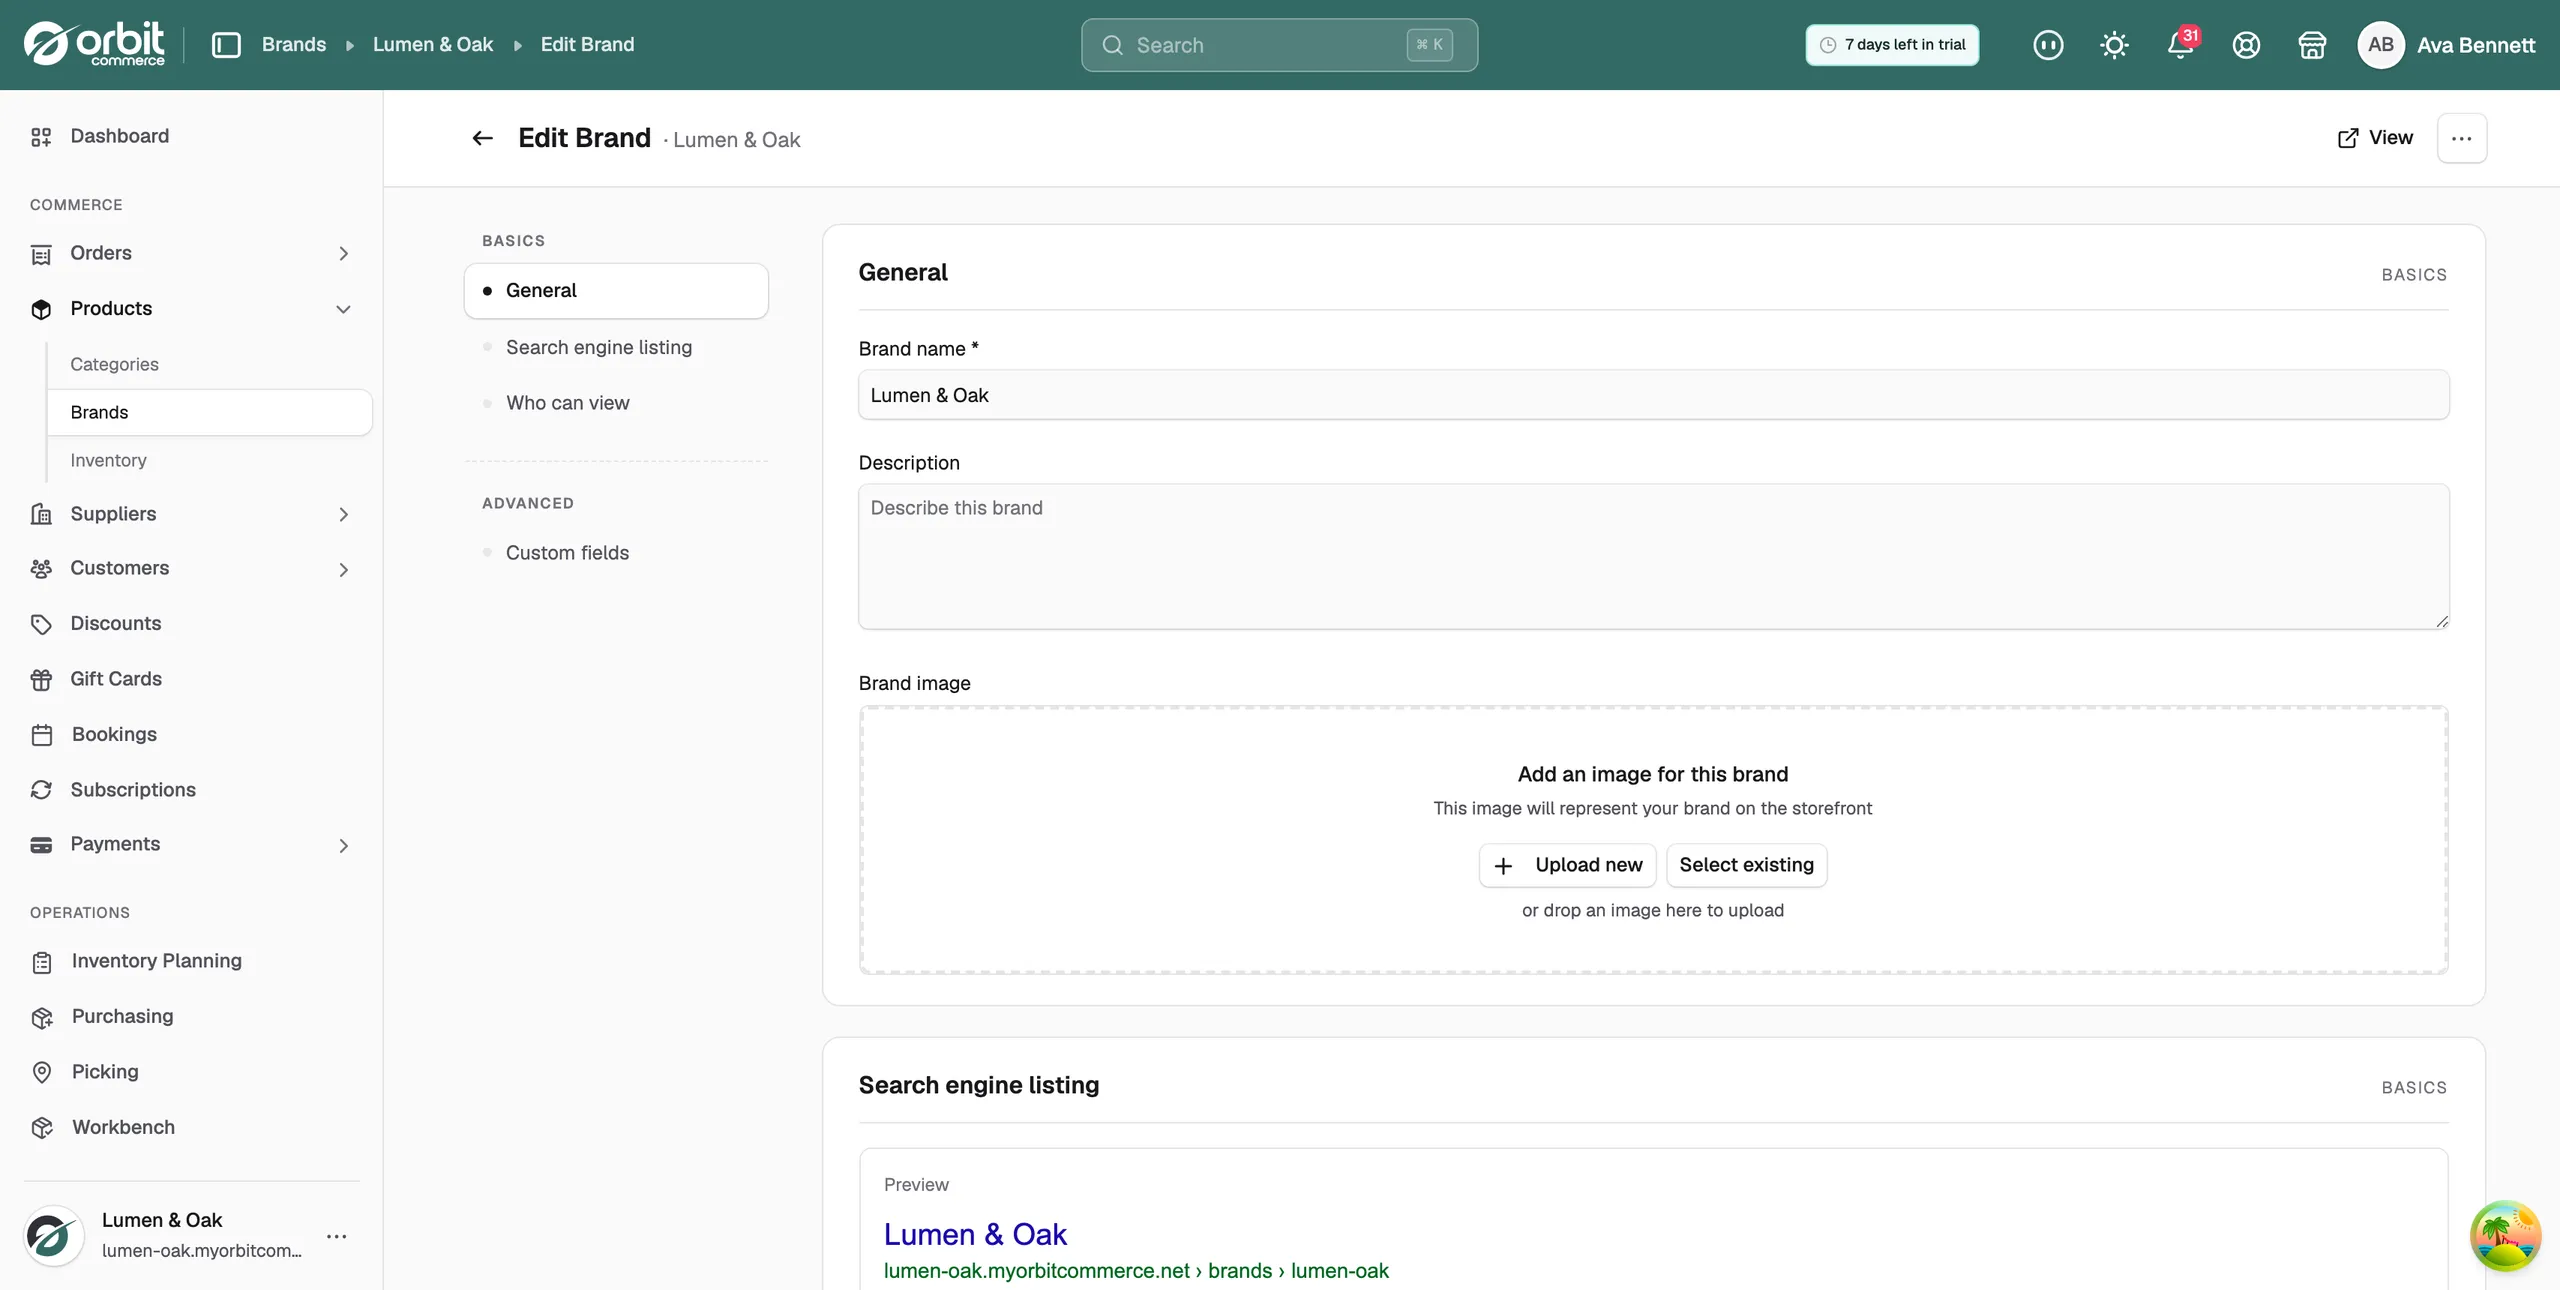
- Make your changes.
- Click Save.
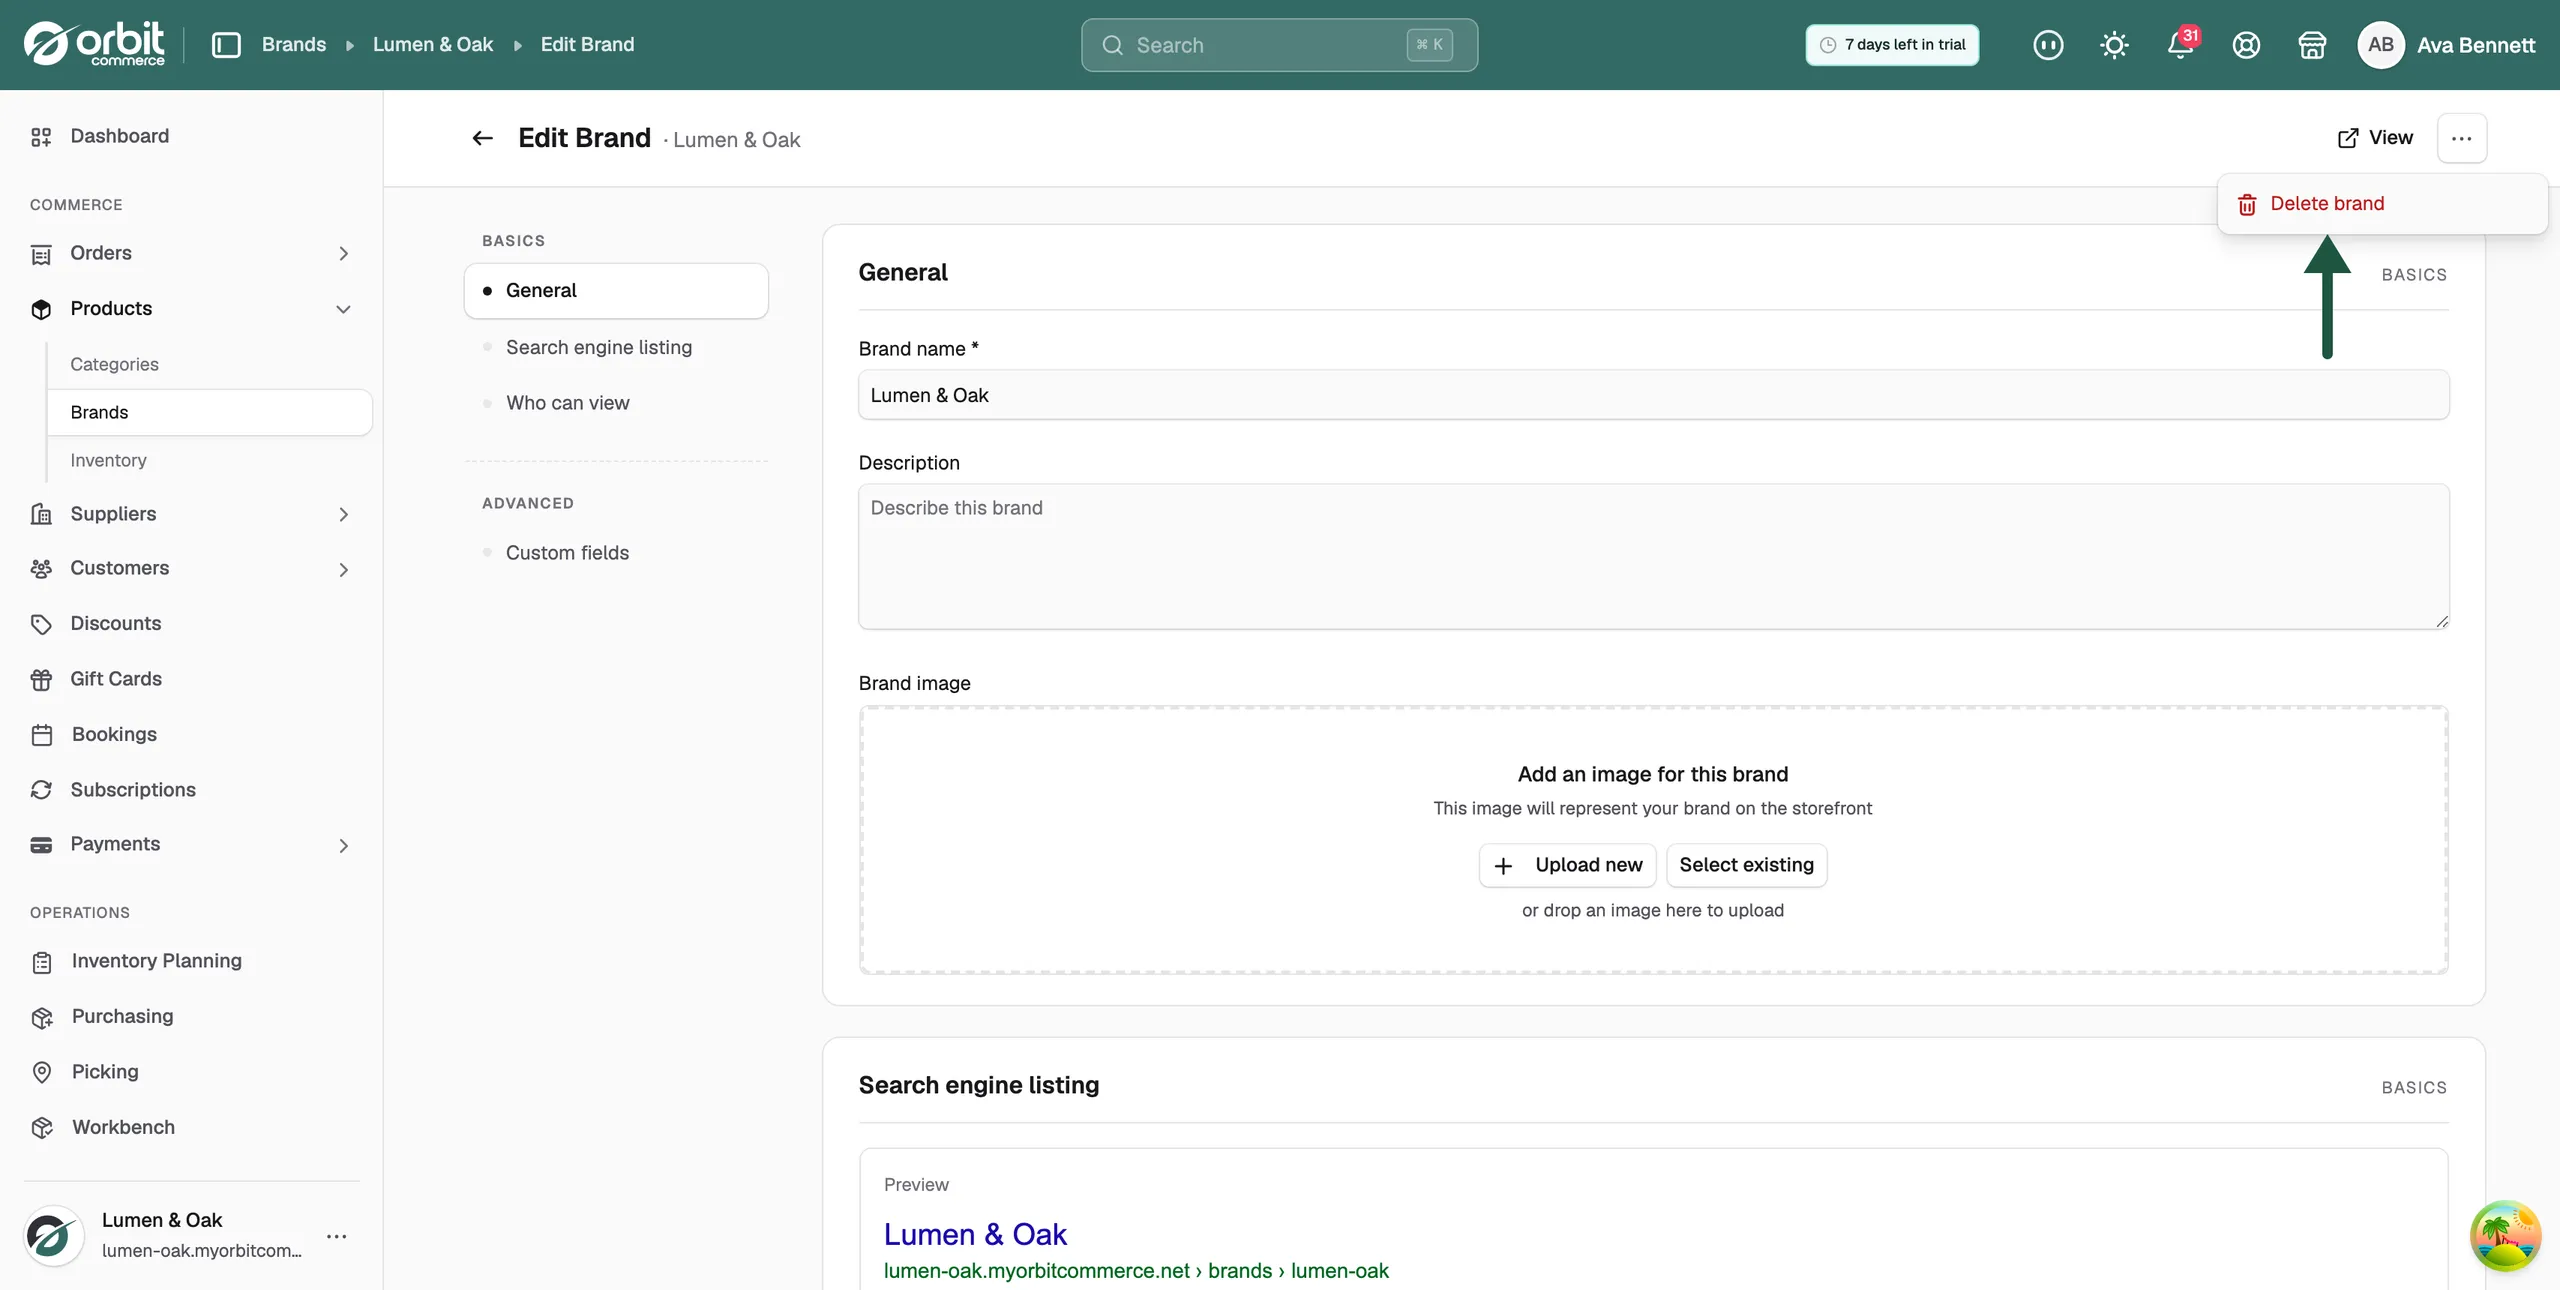
The Edit Brand page has these sections:
- General: the brand name, description and image.
- Search engine listing: the page title, meta description and handle, with a preview of how the brand page may look in search results.
- Custom fields: any custom fields you have set up for brands. If there are none, Orbit says so here.
To find a brand in a long list, use the Search box on the Brands page.
Delete a brand
You can delete a brand from the Brands list or from its Edit Brand page.
Warning: Check that you no longer need the brand before you delete it.
Delete from the Brands list
- From your Orbit dashboard, go to Products, then Brands.
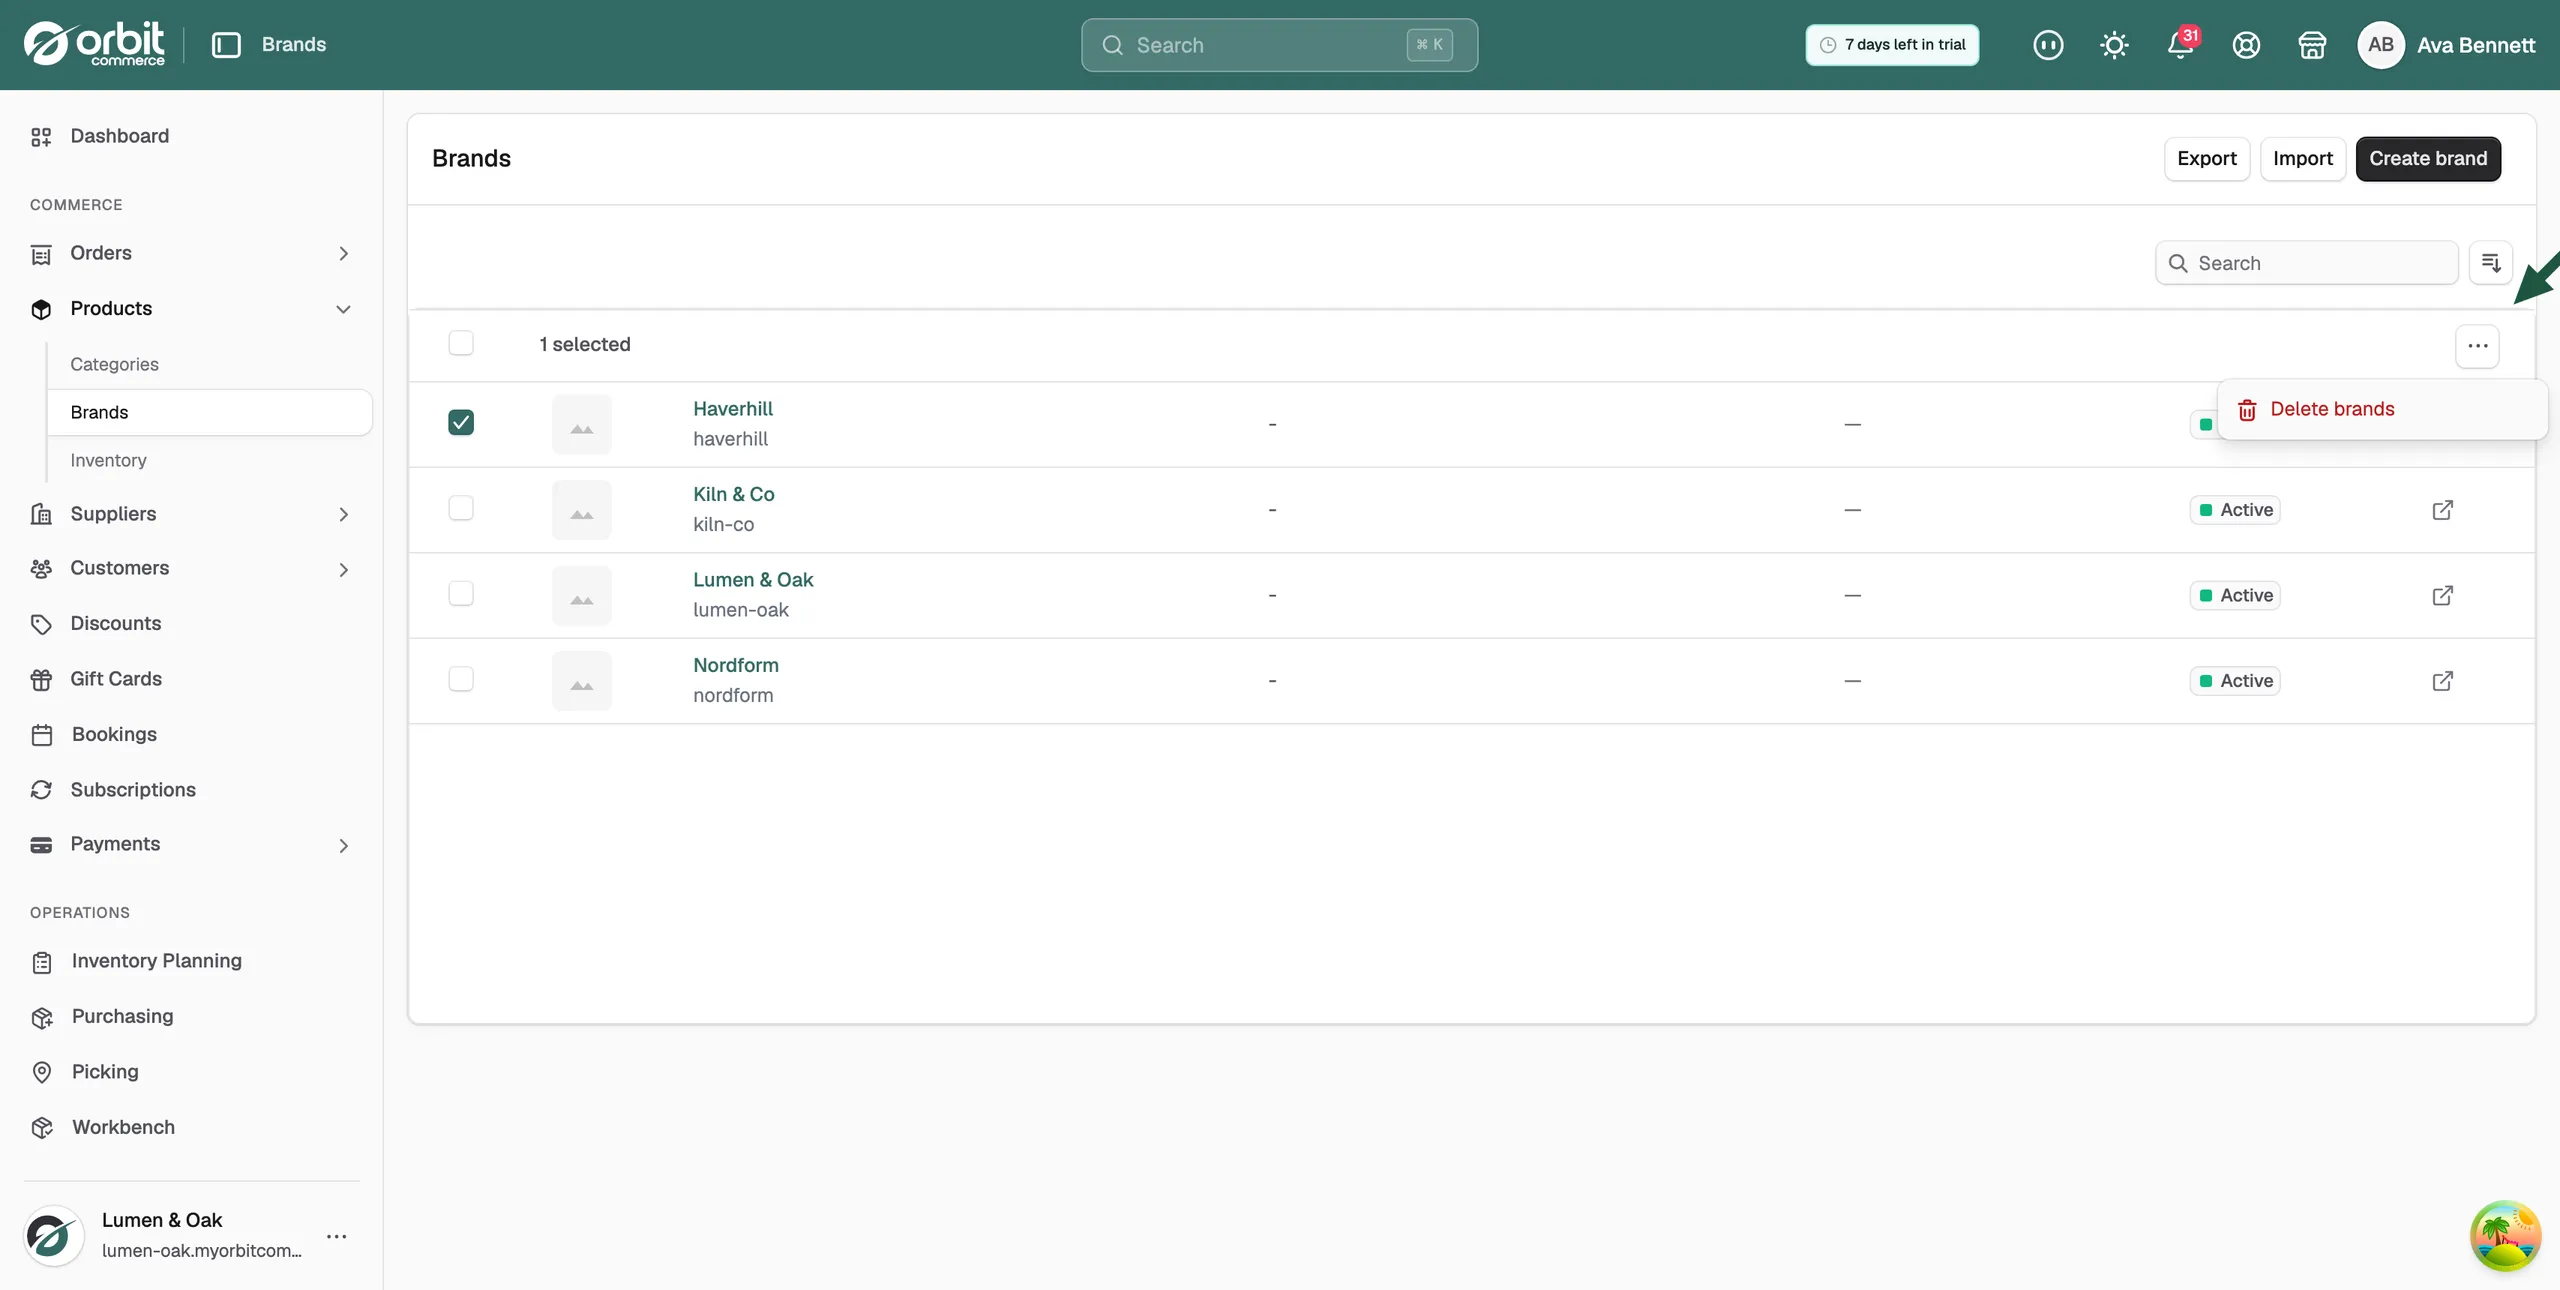
- Tick the checkbox next to the brand.
- Click the ... menu at the right of the header row.
- Click Delete brands.
Delete from the Edit Brand page
- Open the brand.
- Click the ... menu at the top right of the page.
- Click Delete brand.
Where brands show on your storefront
Each brand has its own page on your storefront. It lists every product assigned to that brand. Customers can filter and sort the products on it. Product cards also show the brand name.
To open a brand page:
- From your Orbit dashboard, go to Products, then Brands.
- Click the brand name, then click View at the top right of the Edit Brand page.
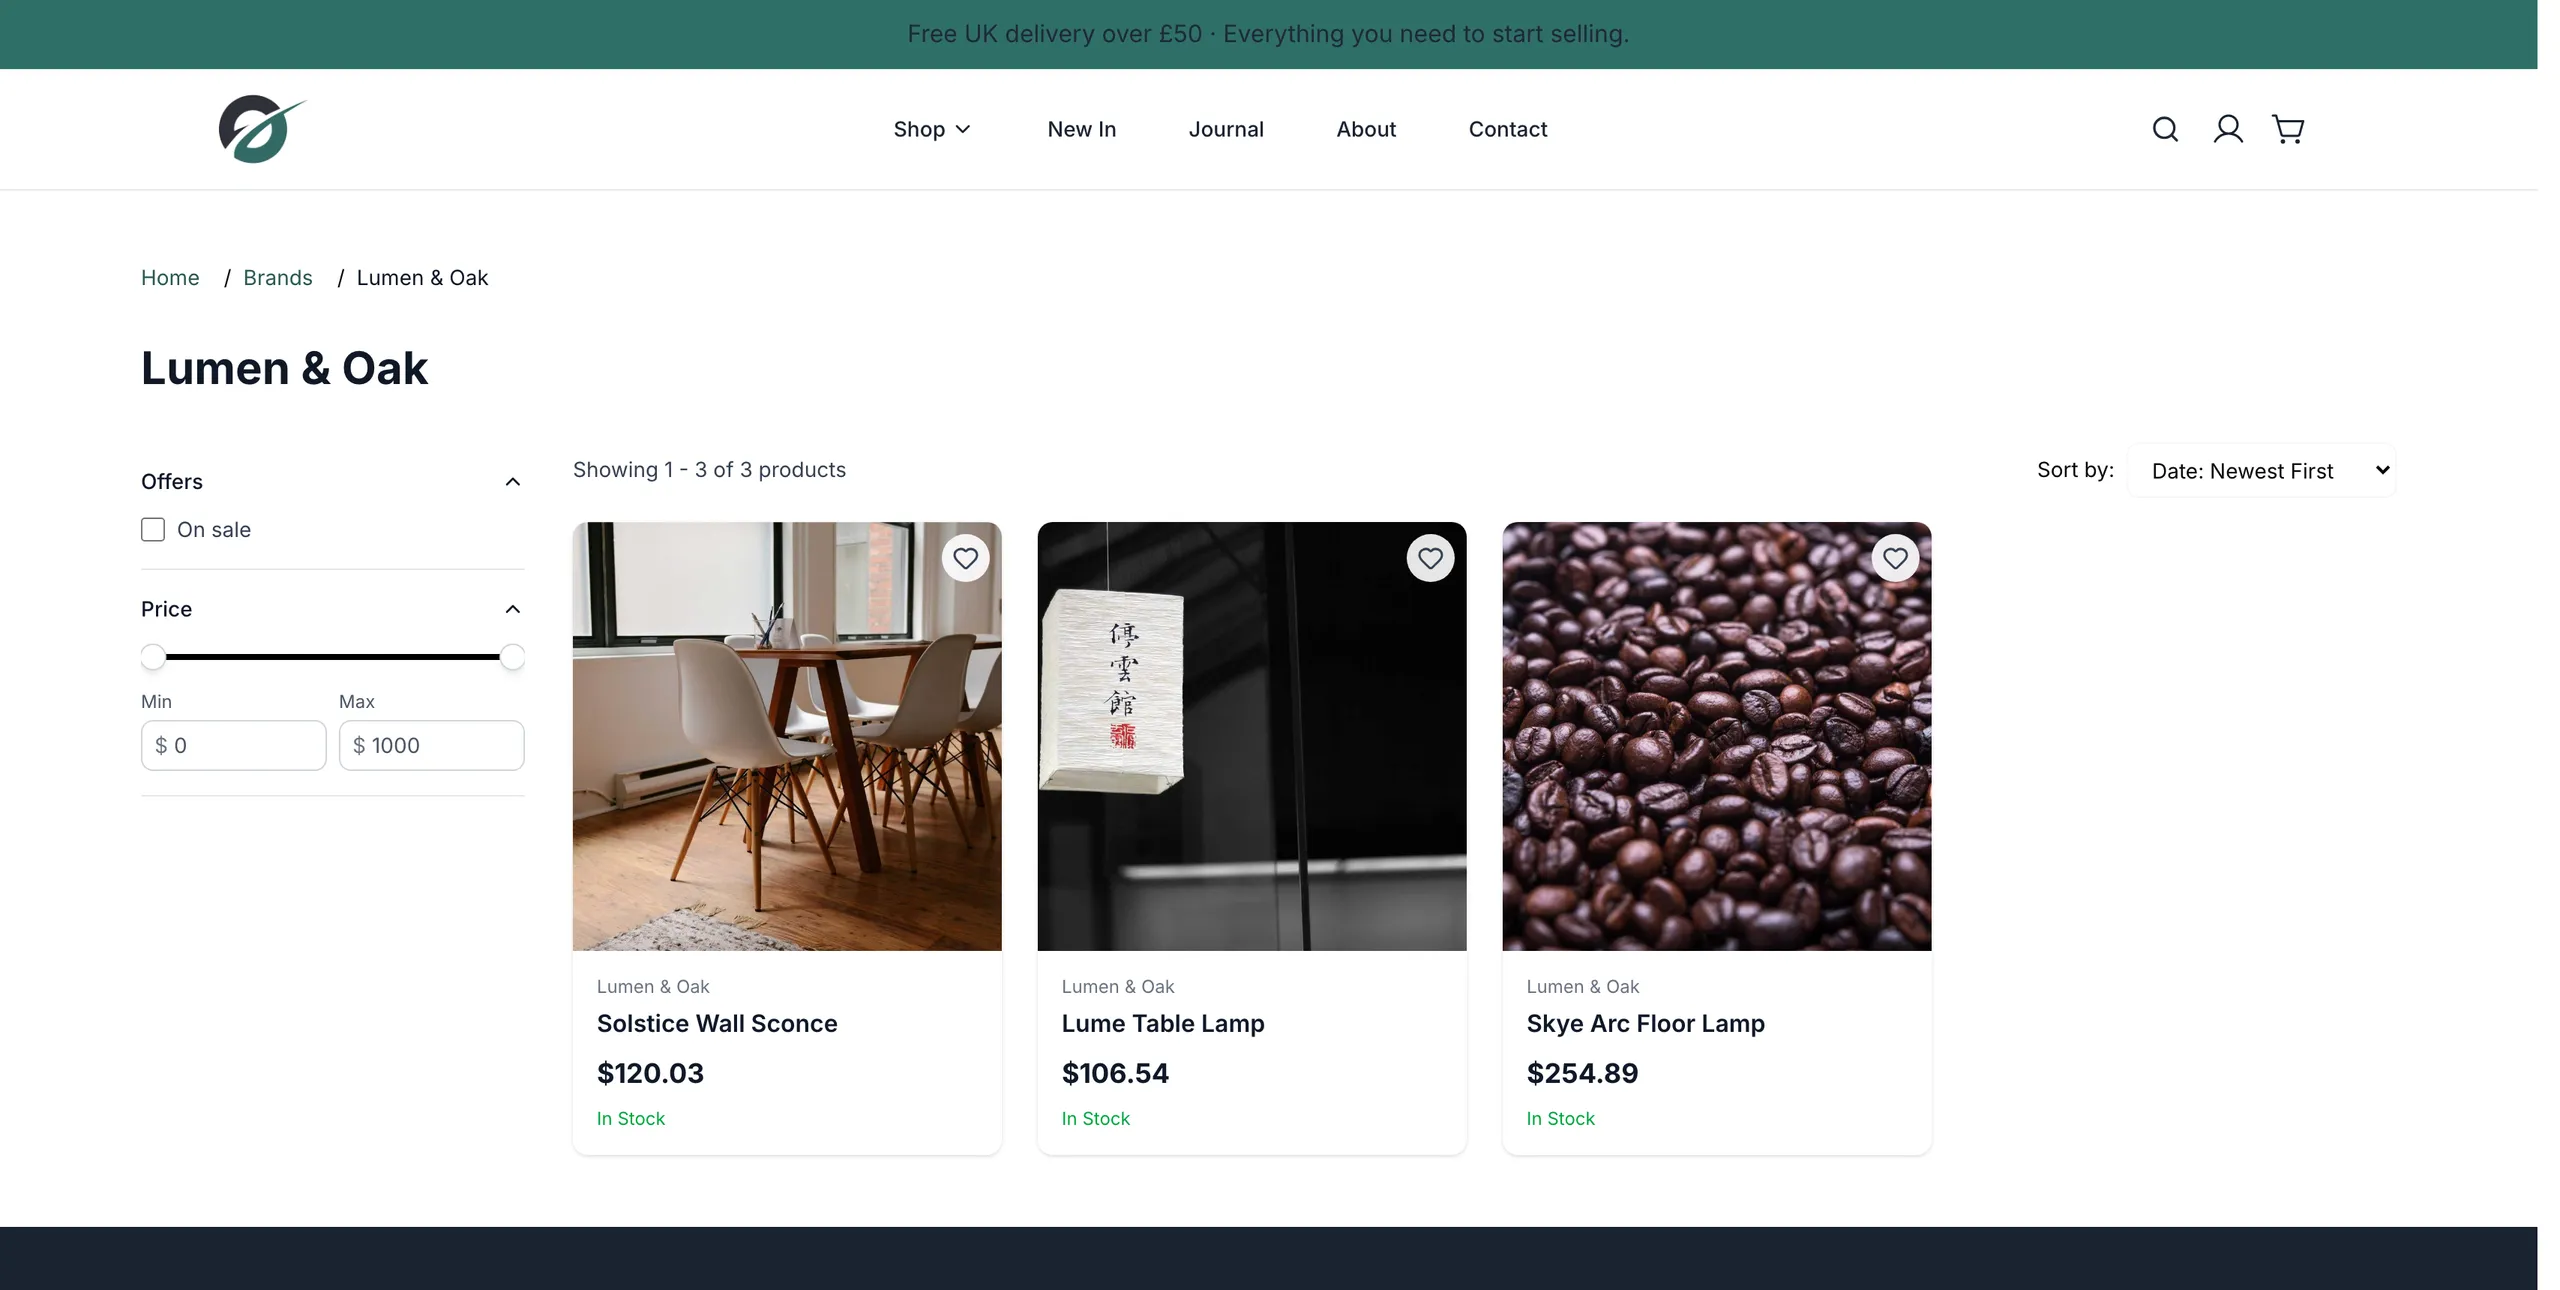
Note: The brand's handle sets the address of its storefront page. The page shows the Page title and Meta description from the Search engine listing section in search results.
Choose who can view a brand page
You can limit a brand page to signed-in customers, or to customers who carry certain tags. Who can view is part of the Enterprise plan. On other plans the options do not appear.
- From your Orbit dashboard, go to Products, then Brands.
- Click the brand name, then click Who can view in the left-hand list on the Edit Brand page.
- Choose one:
- Everyone: anyone can view this brand.
- Logged-in customers: visitors must sign in to view this brand.
- Customers with tags: only signed-in customers with at least one of the chosen tags can view this brand.
- If you chose Customers with tags, pick the tags under Required customer tags.
- Click Save. The message Brand updated successfully appears.
A visitor who is not signed in is sent to your store's sign-in page, and a signed-in customer without a matching tag sees the message This page is private. The brand also drops out of storefront search for anyone who cannot view it. For the same setting on pages and categories, see Restricting who can see a page, category or brand.
Related guides
Was this helpful?
0 people found this helpful