Adding license keys to a digital product
Generate or import a pool of license keys for a digital product, let Orbit hand one to each paid order, top up the pool and see which keys are in use.
You can add license keys to a digital product, such as software, an app or a membership. Orbit gives each paid order its own key from the pool. You manage the pool in the License keys section of the product editor.
Considerations
- License keys are only available on products with the type set to Digital. The License keys section does not show on other product types.
- Save a new product before you add keys. Until you do, the section shows Save the product first to manage license keys.
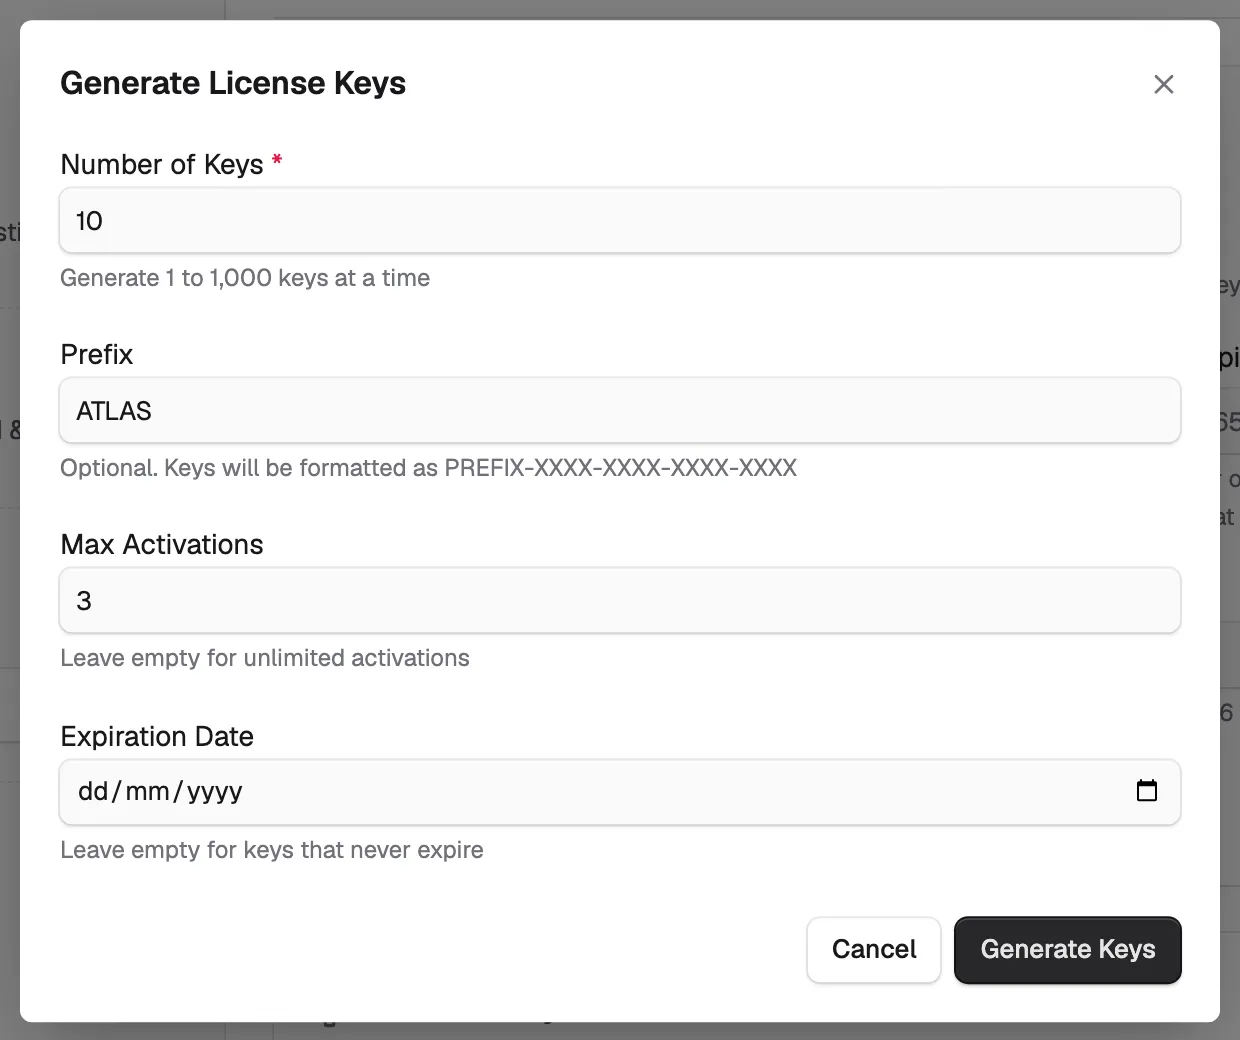
- You can generate 1 to 1,000 keys at a time.
- Revoking a key cannot be undone.
- Keys are separate from the files a customer downloads. To attach files, see Attaching files to a digital product.
Add license keys to a digital product
- From your Orbit dashboard, go to Products.
- Open the digital product.
- Under Type extras, click License keys. The page scrolls to the License keys section.
- Click Generate Keys.
- In Number of Keys, enter how many keys you want. The default is 10.
- Optional: fill in the other fields.
- Prefix: text added to the start of each key, such as MYAPP. Orbit changes it to upper case.
- Max Activations: how many times a customer can activate one key. Leave it empty for unlimited activations.
- Expiration Date: the day the keys stop working. Leave it empty for keys that never expire.
- Click Generate Keys. Orbit creates the keys and shows a message such as Generated 10 license keys.
The new keys appear in the table with the status available. Each key is a unique code: an optional prefix followed by four groups of six letters and numbers.
Import keys you already have
If your software vendor gave you a list of keys, you can paste them in instead of generating new ones.
- In the License keys section, click Import Keys.
- In the Import License Keys dialog, paste your keys, one key per line.
- Confirm the import. The keys join the pool as available.
How keys are handed out on purchase
You do not hand out keys by hand. Orbit does it when an order is paid.
- When a customer pays for the product, Orbit takes the oldest available key and assigns it to that order.
- The key changes to assigned. The customer's name shows in the Assigned to column.
- One order gets one key per product. A key is never given to two orders.
- The customer can see the key in their account and on their order.
Warning: If the pool is empty, a paid order gets no key. The section shows No available keys remaining. New purchases will not receive a license key. Top up before you run a promotion.
Top up keys
When five or fewer keys are left, an amber notice appears in the License keys section: Only 5 keys remaining. Generate more to avoid running out when customers purchase.
To add more keys, click Generate Keys or Import Keys and follow the steps above. New keys join the pool straight away.
Let Orbit top up for you
You can set Orbit to make a new key on its own when the pool runs out.
- In the License keys section, find the Licensing settings card.
- Tick Automatically generate a new key when the pool runs out.
- Optional: set Activation limit, Key expiry (days) and Key prefix. Keys made this way use these values.
- Click Save settings.
Tip: Turn this on if Orbit makes your keys. Leave it off if your keys come from a vendor list, as a made-up key would not work in their software.
See which keys are used
The License keys section shows four counts at the top: Available, Assigned, Revoked and Expired. Below them, the table lists every key.
- License Key: the code. Click the copy icon next to it to copy the key.
- Status: available, assigned, revoked or expired.
- Assigned to: the customer who holds the key. Unused keys show a dash.
- Activations: how many times the key has been activated, out of its limit. ∞ means unlimited.
- Expires: the expiry date, or Never.
- Created: the date the key was made or imported.
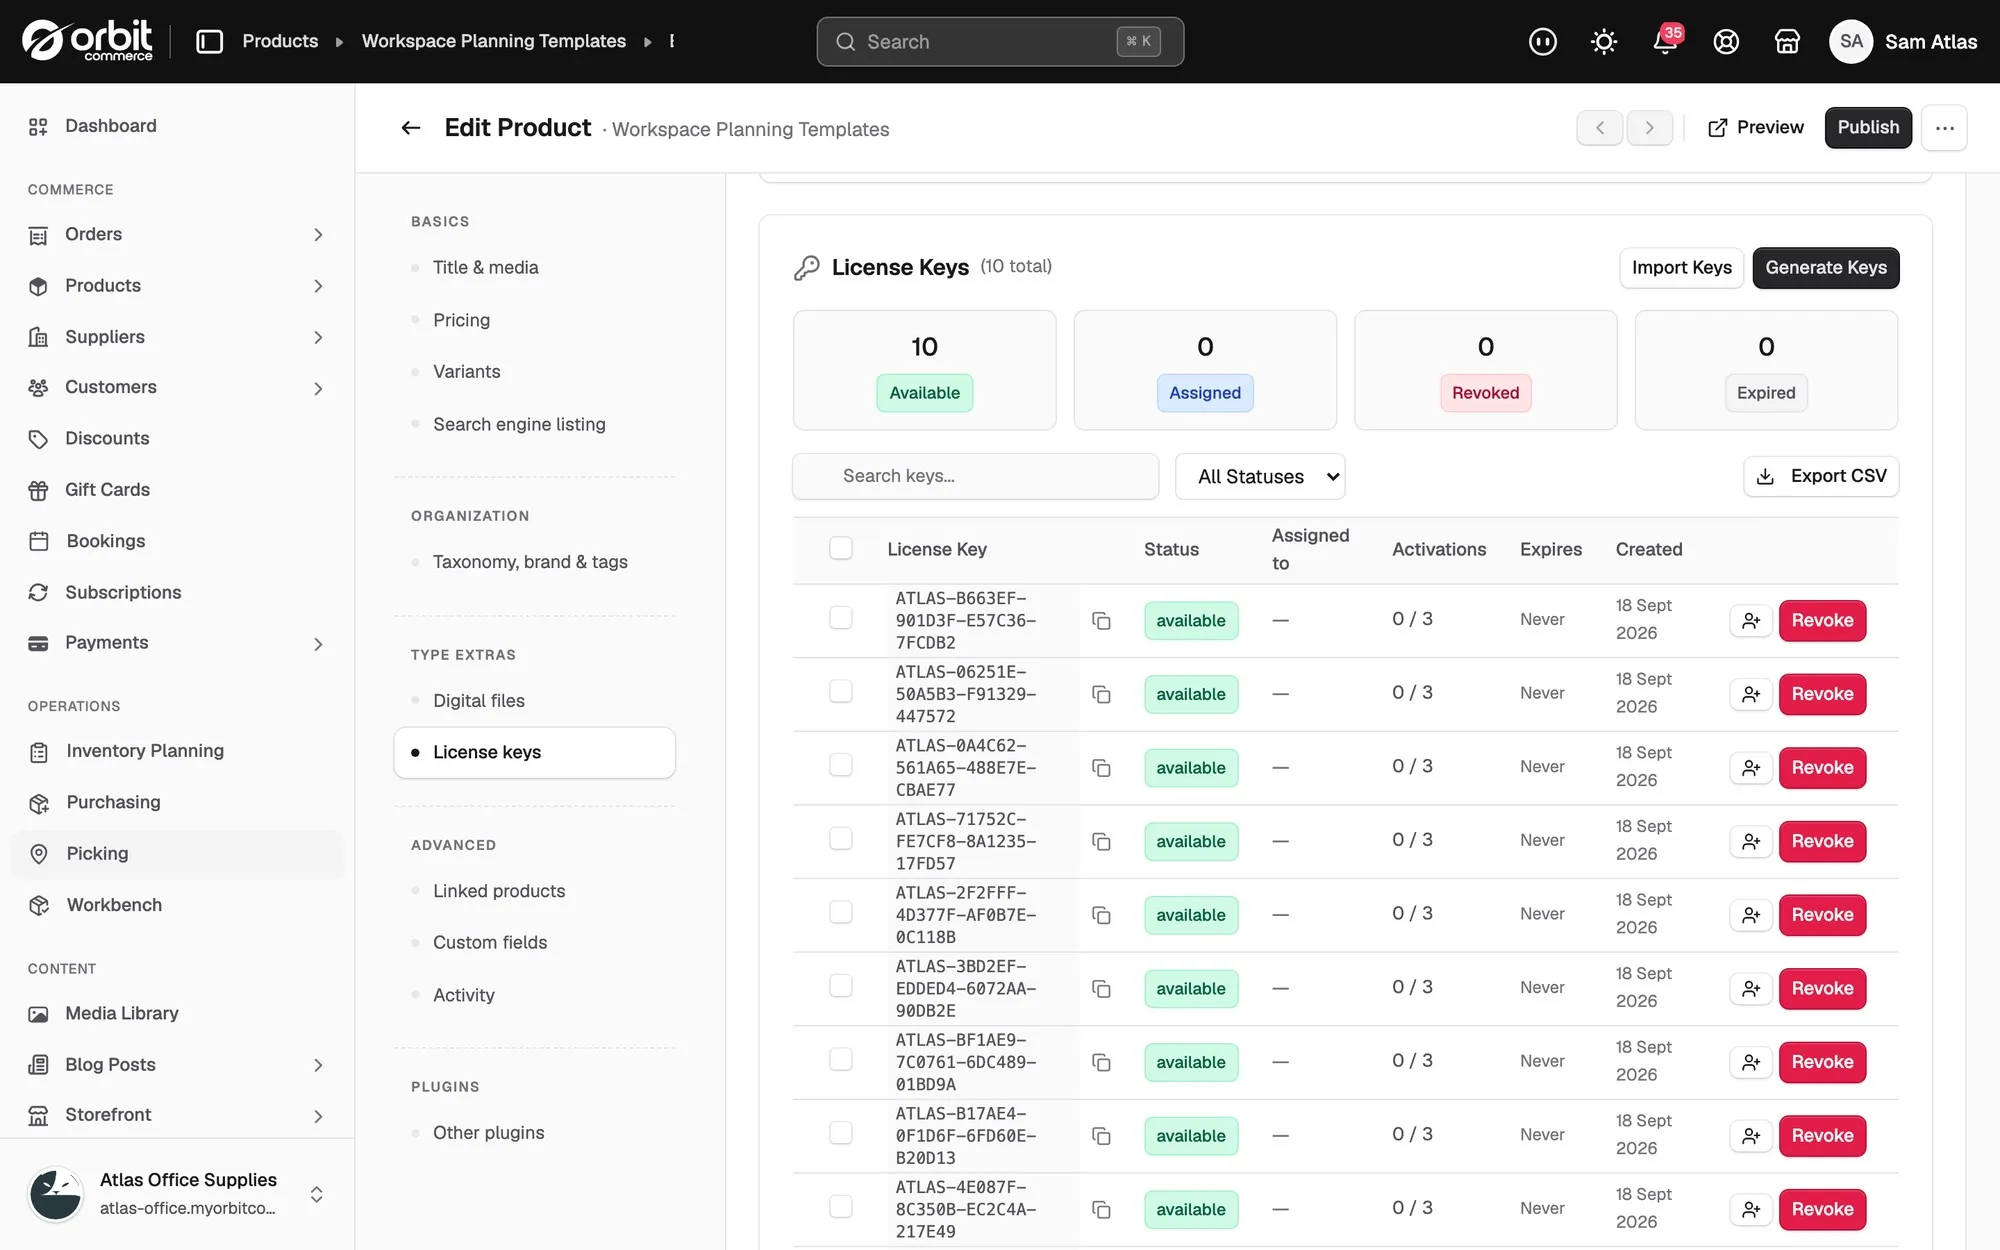
To find a key, type in Search keys or use the status list to show only Assigned keys, for example. Click Export CSV to download the keys shown.
Revoke a key
Revoke a key that has leaked or that a customer should no longer use.
- Find the key in the table.
- Click Revoke at the end of the row.
- Confirm. The key changes to revoked and drops out of the customer's account.
To revoke several keys at once, tick them and click Revoke Selected.
Related guides
Was this helpful?
0 people found this helpful