Designing your product page template
Open or create a product template, choose a Basic or Advanced layout, and add the Single Product elements that fill in each product's details.
Your product page template decides how every product in your store looks. You design it once in the page builder. Each product then fills in its own title, price, images and options. You find your templates under Storefront, then Templates.
Considerations
- Your store already has a product template. The one marked Primary is the one shoppers see. Only one template per type can be primary.
- A product template is the only kind that opens the page builder as soon as you create it.
- The Single Product group of elements only appears when you are editing a product page.
Open your product page template
- From your Orbit dashboard, go to Storefront, then Templates.
- Click the Products tab to see only your product templates.
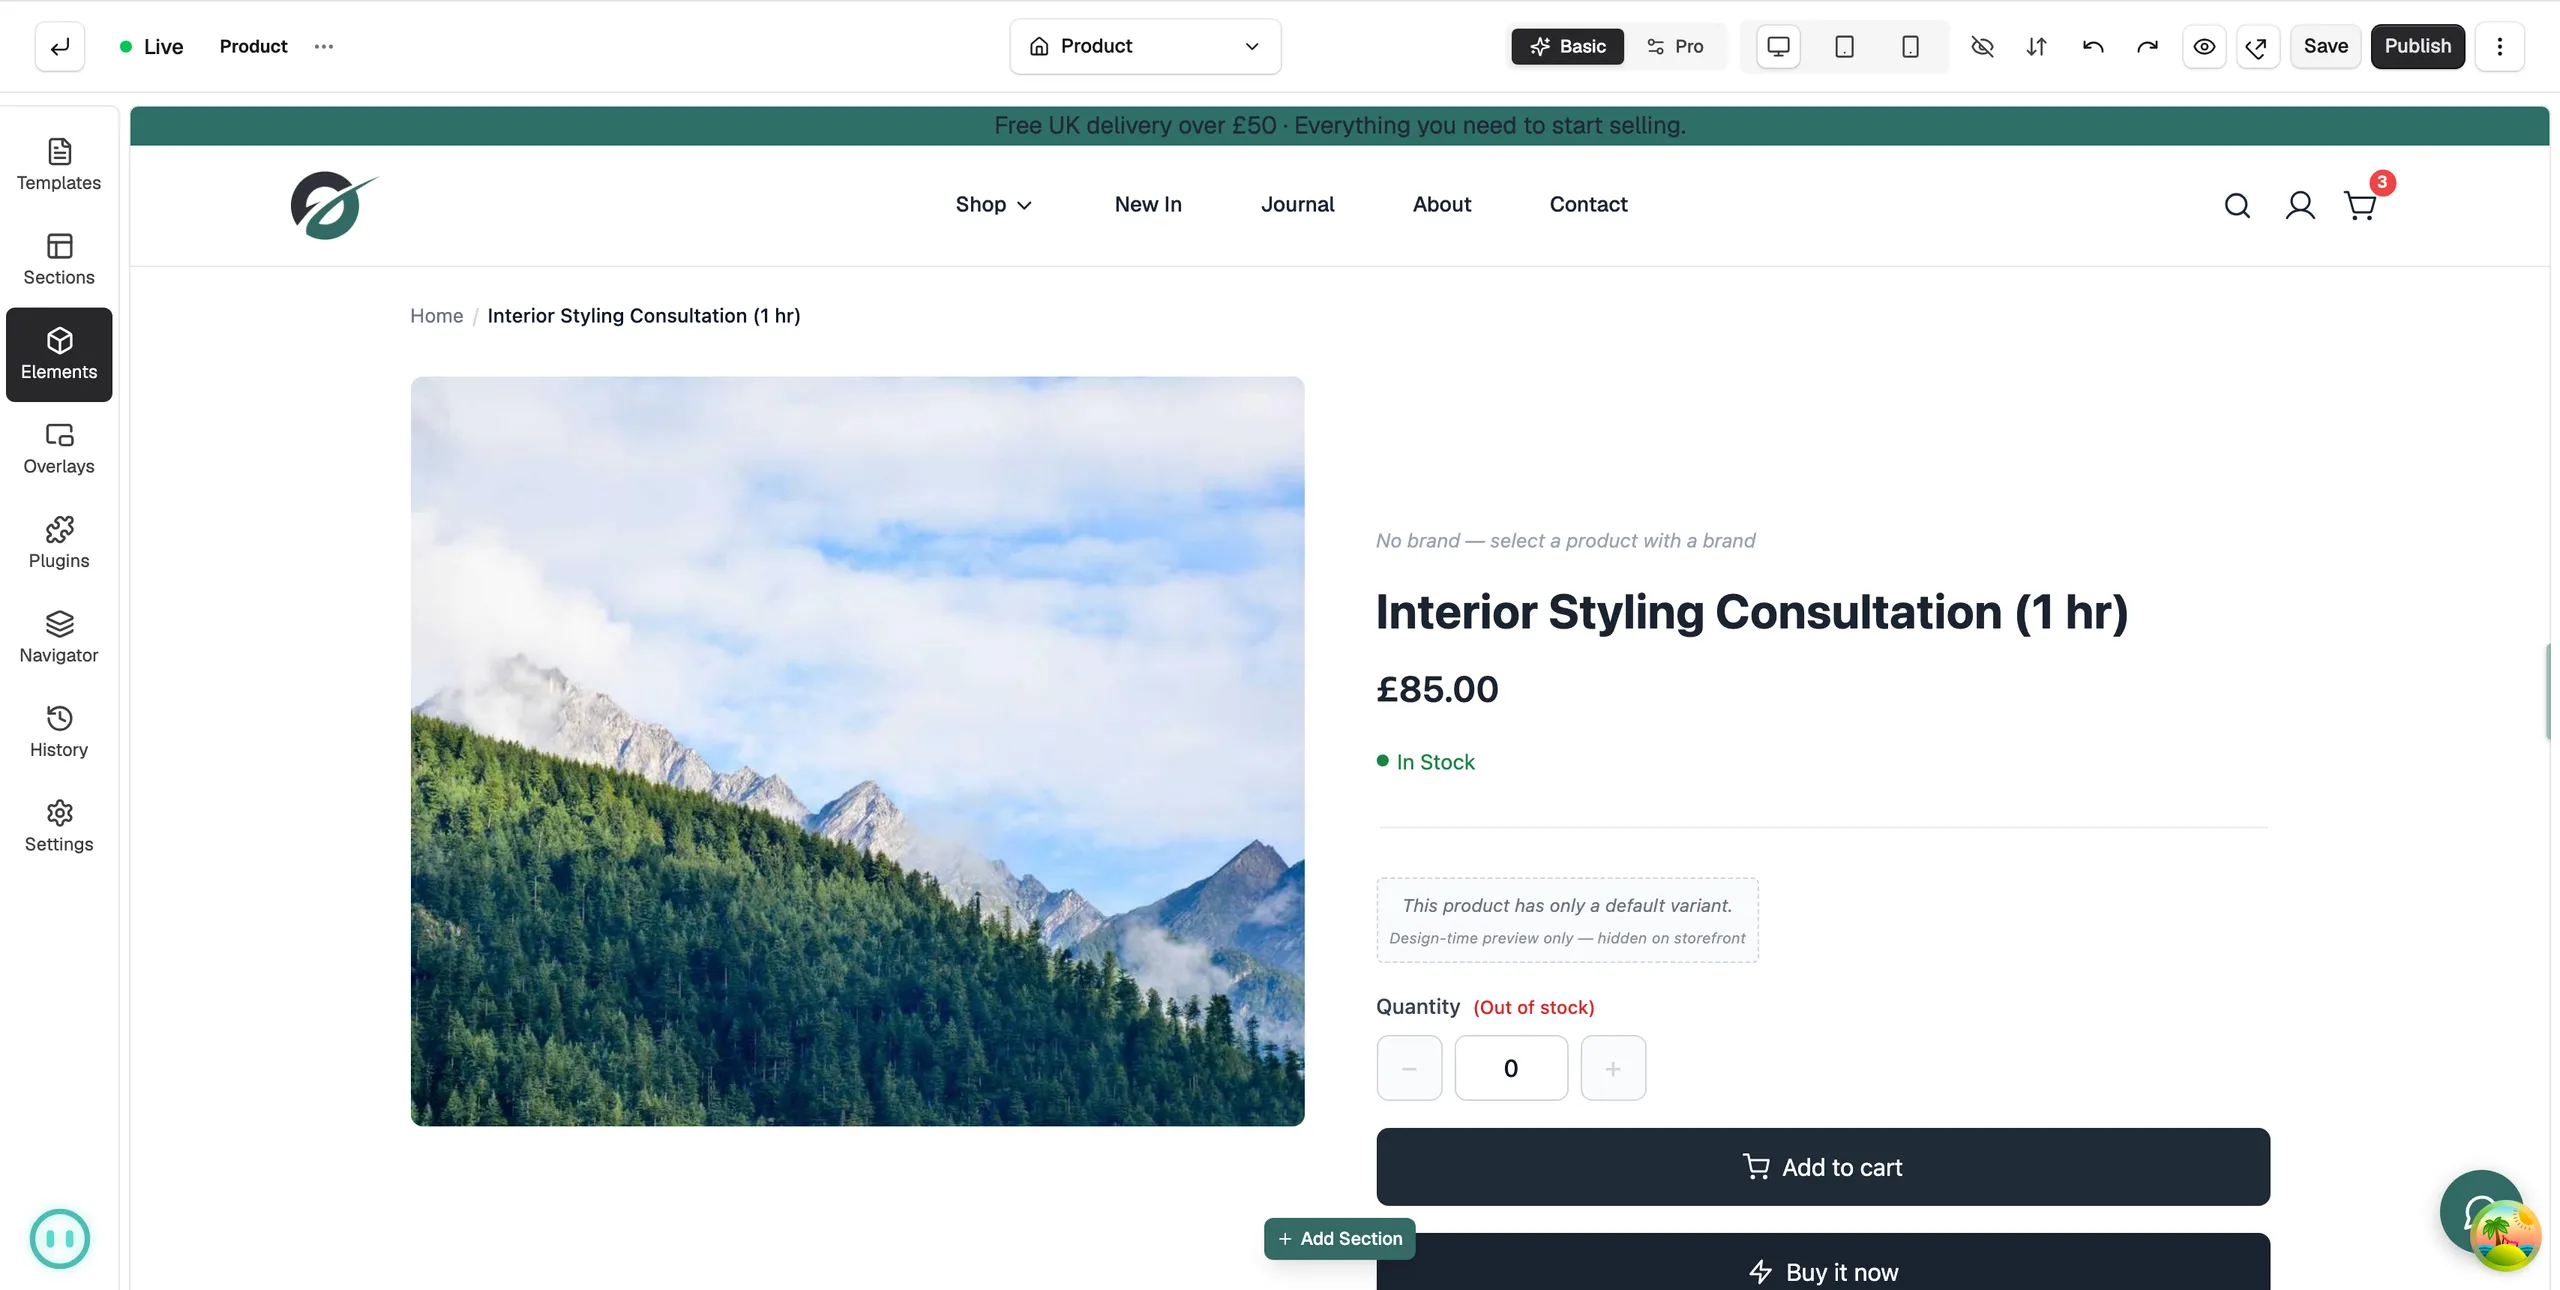
- Hover over the template you want and click Edit design. The page builder opens, with one of your products shown in the layout so you can see how it looks.
Create a new product template
- On the Templates page, click Create template.
- Give it a name, such as Detailed product page.
- Under Type, pick Products.
- Tick Set as primary template for this type if you want shoppers to see it straight away. This takes Primary away from your current product template.
- Click Create Template. The page builder opens and asks How do you want to build this page?
- Pick Basic for a single Product Page element with built-in settings, or Advanced for individual product elements placed on the page. Orbit saves your choice on its own. You can change everything later.
Tip: Advanced puts a breadcrumb at the top, the gallery on the left, then the brand, title, stock, price, variants, delivery estimate, quantity and Add to Cart on the right, and a Description and Delivery Info tab underneath. It is a good starting point to rearrange.
Add product elements
- In the toolbox on the left, click Elements.
- Click the Single Product tab. You can also type in Search elements... to find one.
- Drag the element onto the page.
- Click the element to open its settings on the right and style it.
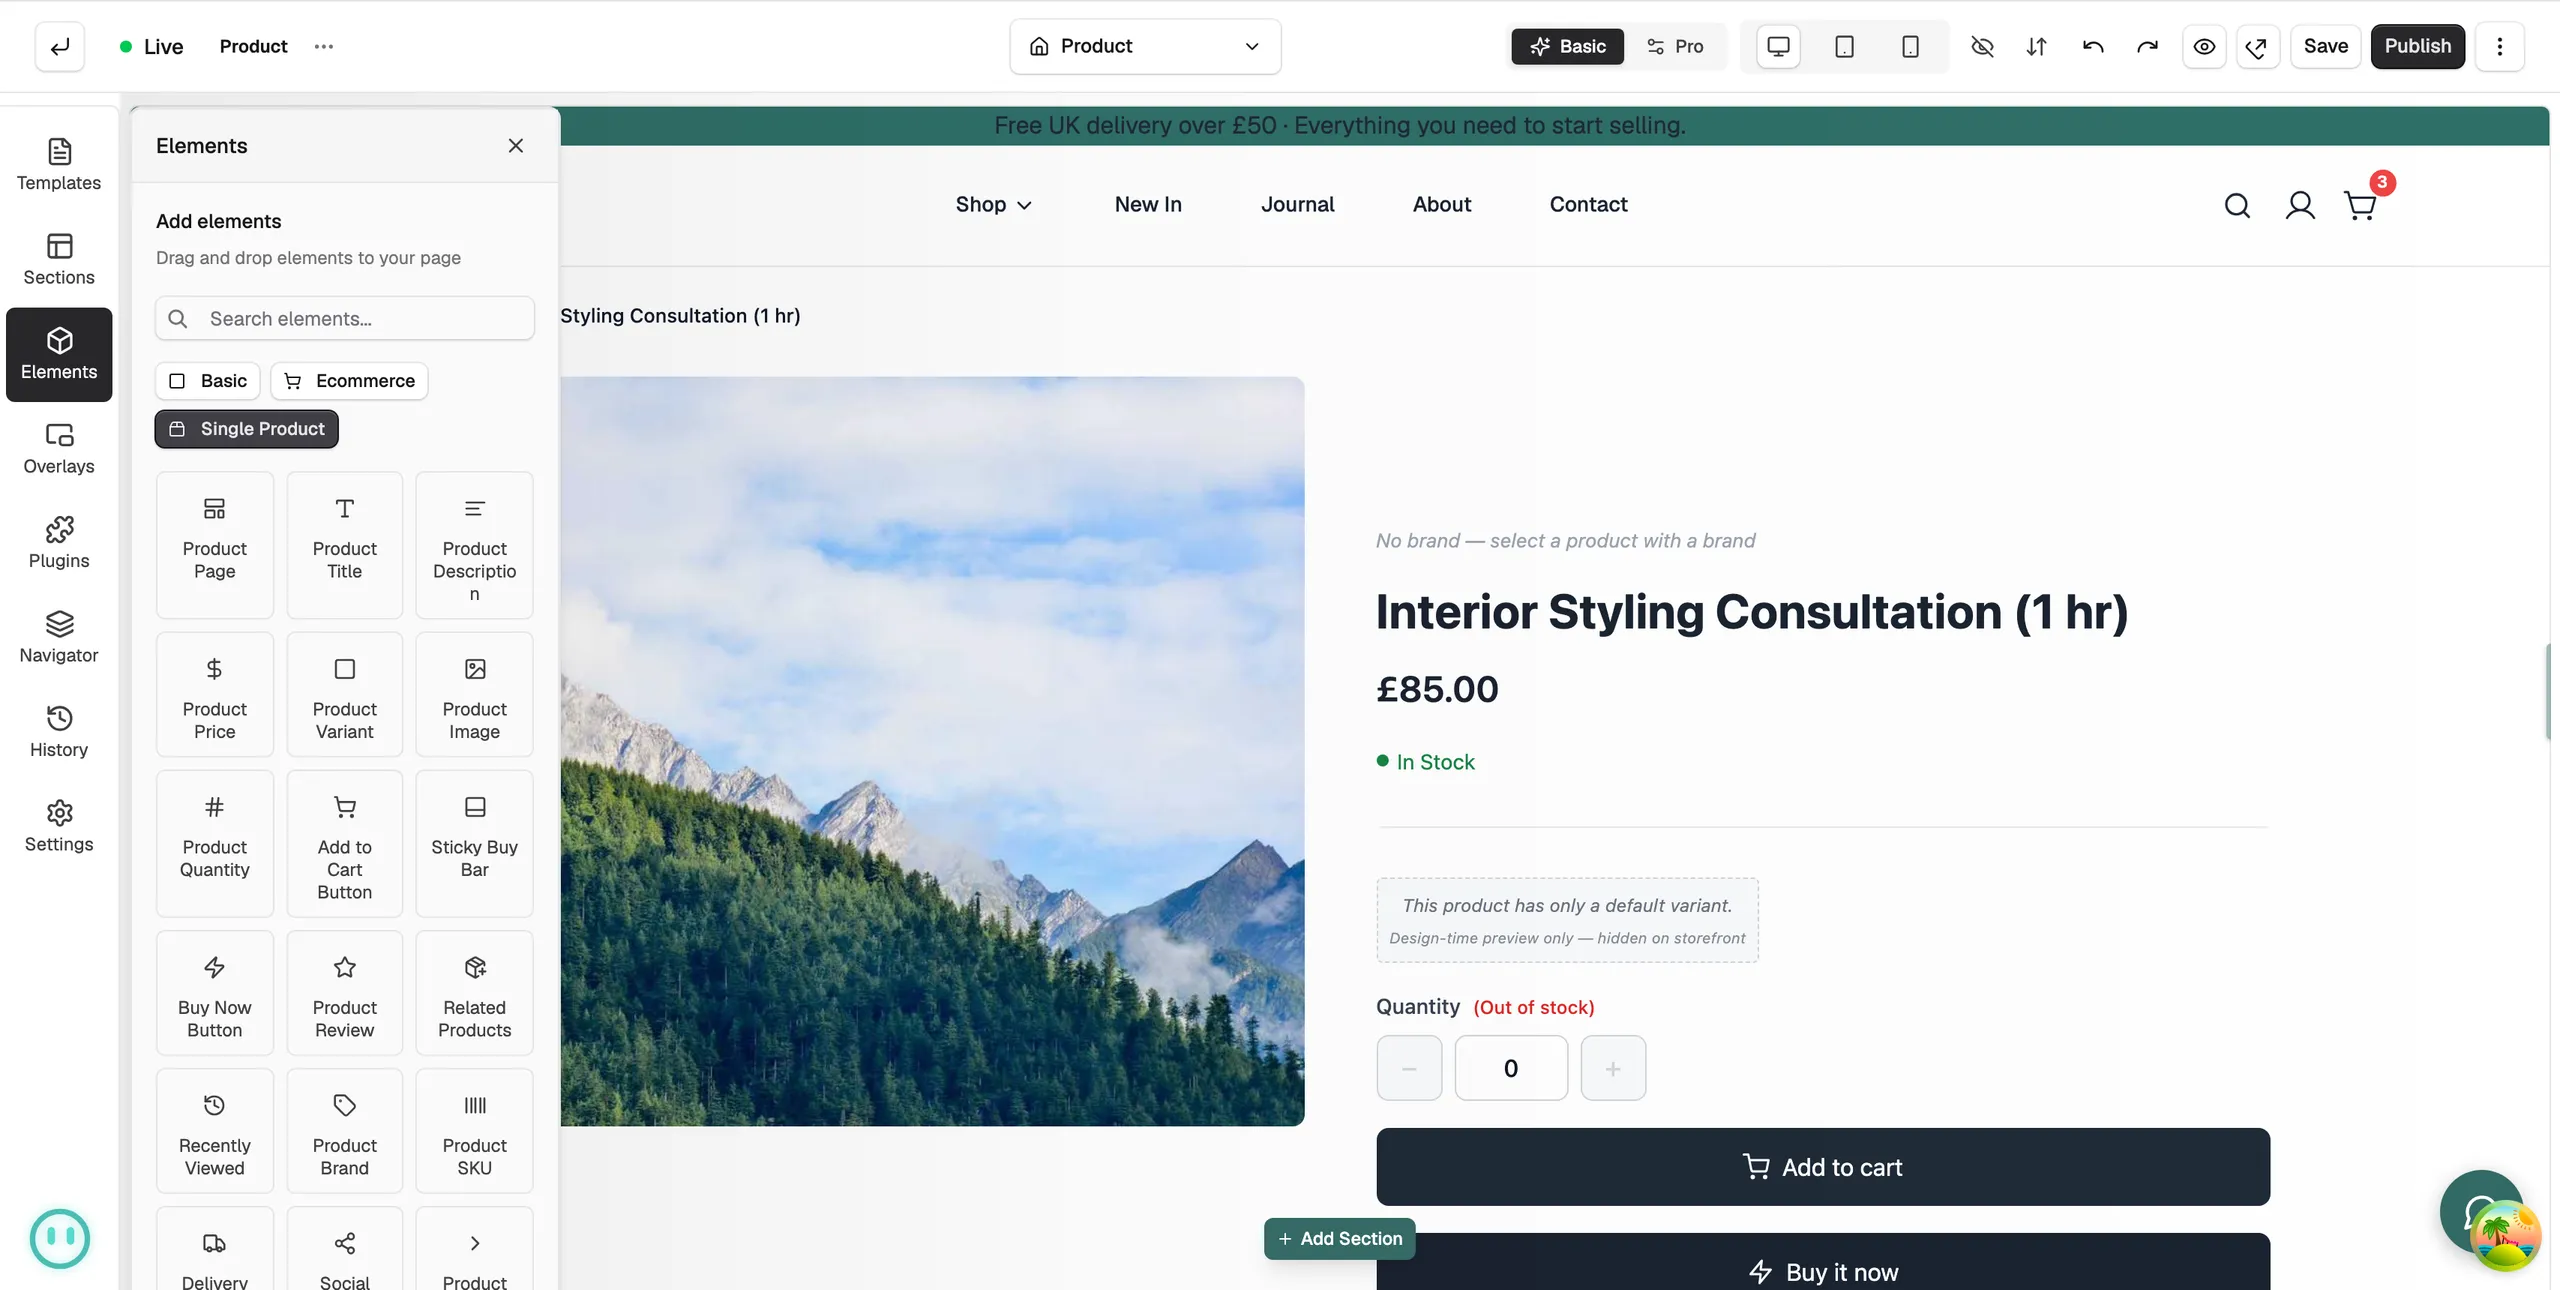
The elements in the Single Product group fill in with each product's own details:
- Product Page: the whole product layout in one block. See below.
- Product Title: the name of the product.
- Product Price: the price, including any compare-at (sale) price.
- Product Image: the product's images.
- Product Description: the full product description.
- Product Variant: lets shoppers choose options such as size or colour.
- Product Quantity: a quantity picker.
- Add to Cart Button and Buy Now Button: add the product to the basket, or go straight to checkout.
- Sticky Buy Bar: a buy bar that stays on screen as the shopper scrolls.
- Product Stock, Product SKU and Product Brand: availability, product code and brand.
- Product Breadcrumb: shows where the product sits in your store.
- Product Review: customer reviews.
- Related Products and Recently Viewed: rows of other products.
Use the all-in-one Product Page element
The Product Page element combines the title, images, price, variants, Add to Cart and description in one ready-made block. It is what the Basic layout gives you. Start with it if you want a complete product page fast. When you want more control, swap in the individual elements.
Lay out the page
Arrange the elements into sections and columns, for example images on the left and details on the right. Style each one in the settings panel. You only design the template once. Every product uses it.
When you are done, click Save, then Publish. See Saving, previewing and publishing a page.
Related guides
Was this helpful?
0 people found this helpful