Setting up email and SMS notifications
Set your sender name and address, verify your domain so emails come from you, choose who gets store alerts, and switch on SMS.
Orbit sends emails and text messages to your customers and to your team. Order confirmations, password resets and payment messages go to customers. New order alerts, return requests and security alerts go to you. You control all of it from Notifications in Settings.
Considerations
- Until your sender domain is verified, your emails still send. They go out from Orbit's own address, with your address as the reply-to. Customers see them coming from Orbit, not from you.
- DNS changes can take up to 72 hours to take effect. Orbit cannot speed this up.
- If you add no notification recipients, the store owner receives every notification.
- Customer text messages only go to customers who opted in and gave a phone number.
Open Notifications
- From your Orbit dashboard, go to Settings.
- Under Insights & Tracking, click Notifications.
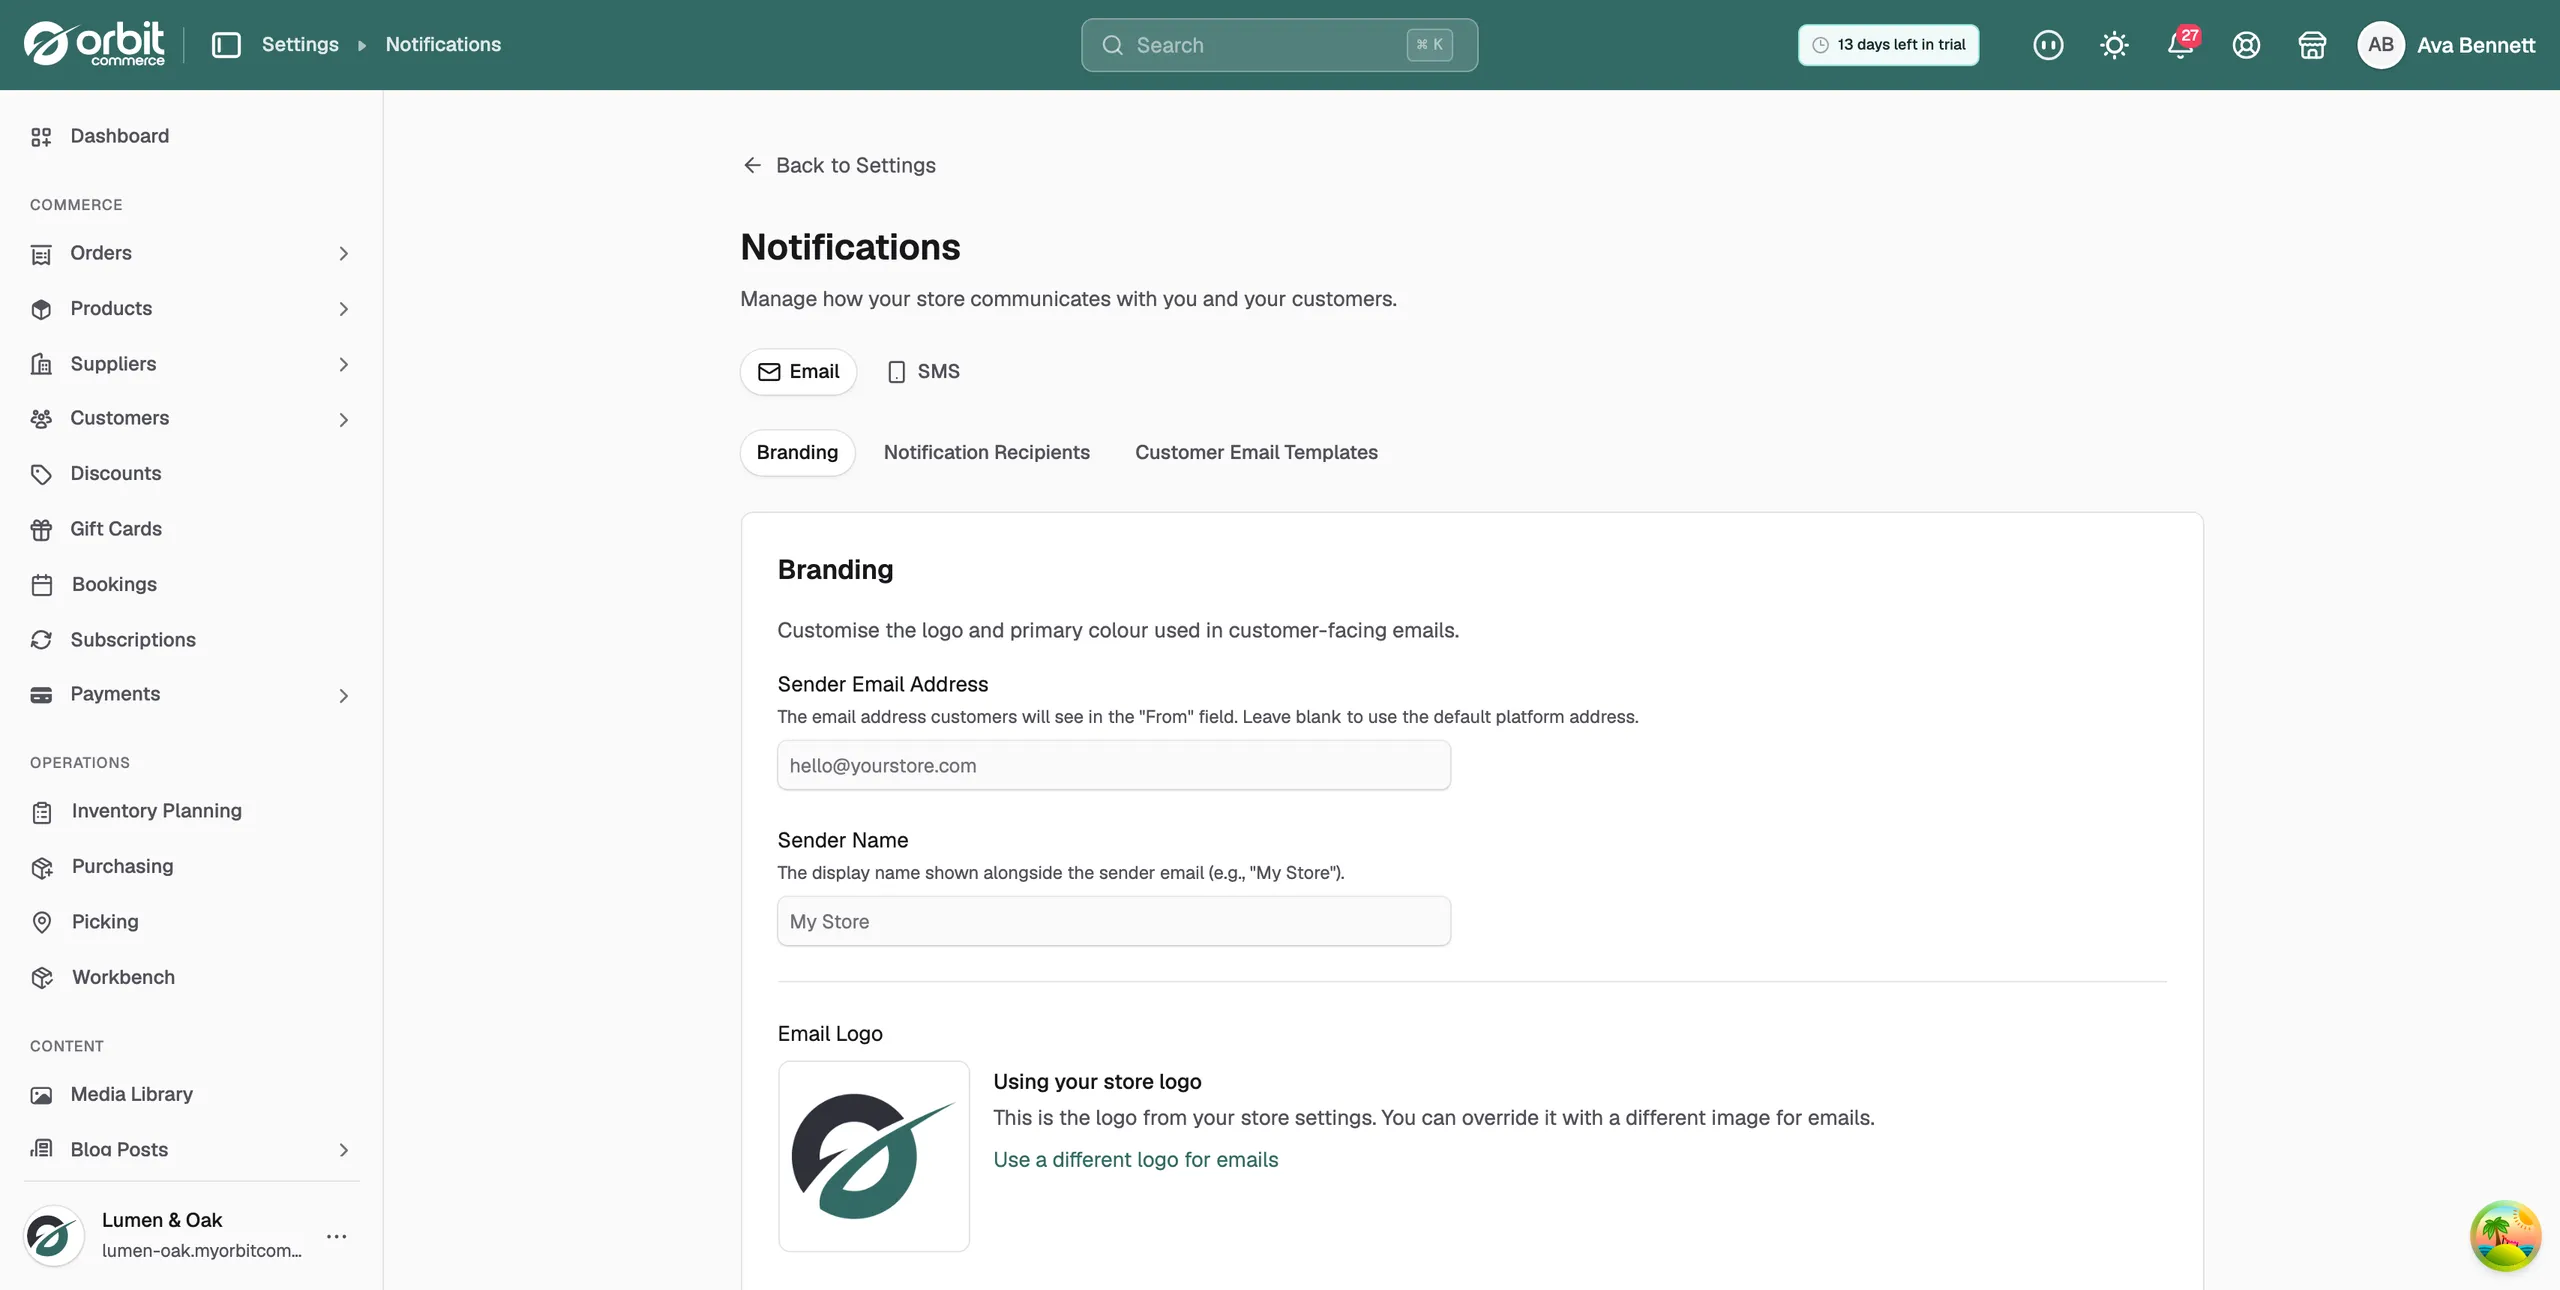
- Choose the Email tab or the SMS tab. The Email tab has three inner tabs: Branding, Notification Recipients and Customer Email Templates.
Set your sender details and branding
- On the Email tab, click Branding.
- In Sender Email Address, type the address customers should see in the From field. Leave it blank to use the default Orbit address.
- In Sender Name, type the name shown next to the address, such as your shop name.
- Under Email Logo, Orbit uses your store logo. To use a different one, click Use a different logo for emails, then Choose logo and pick an image. A width of 300px works best. Click Revert to store logo to go back.
- Under Primary Colour, pick a colour or type a hex code such as #346a65.
- Click Save branding.
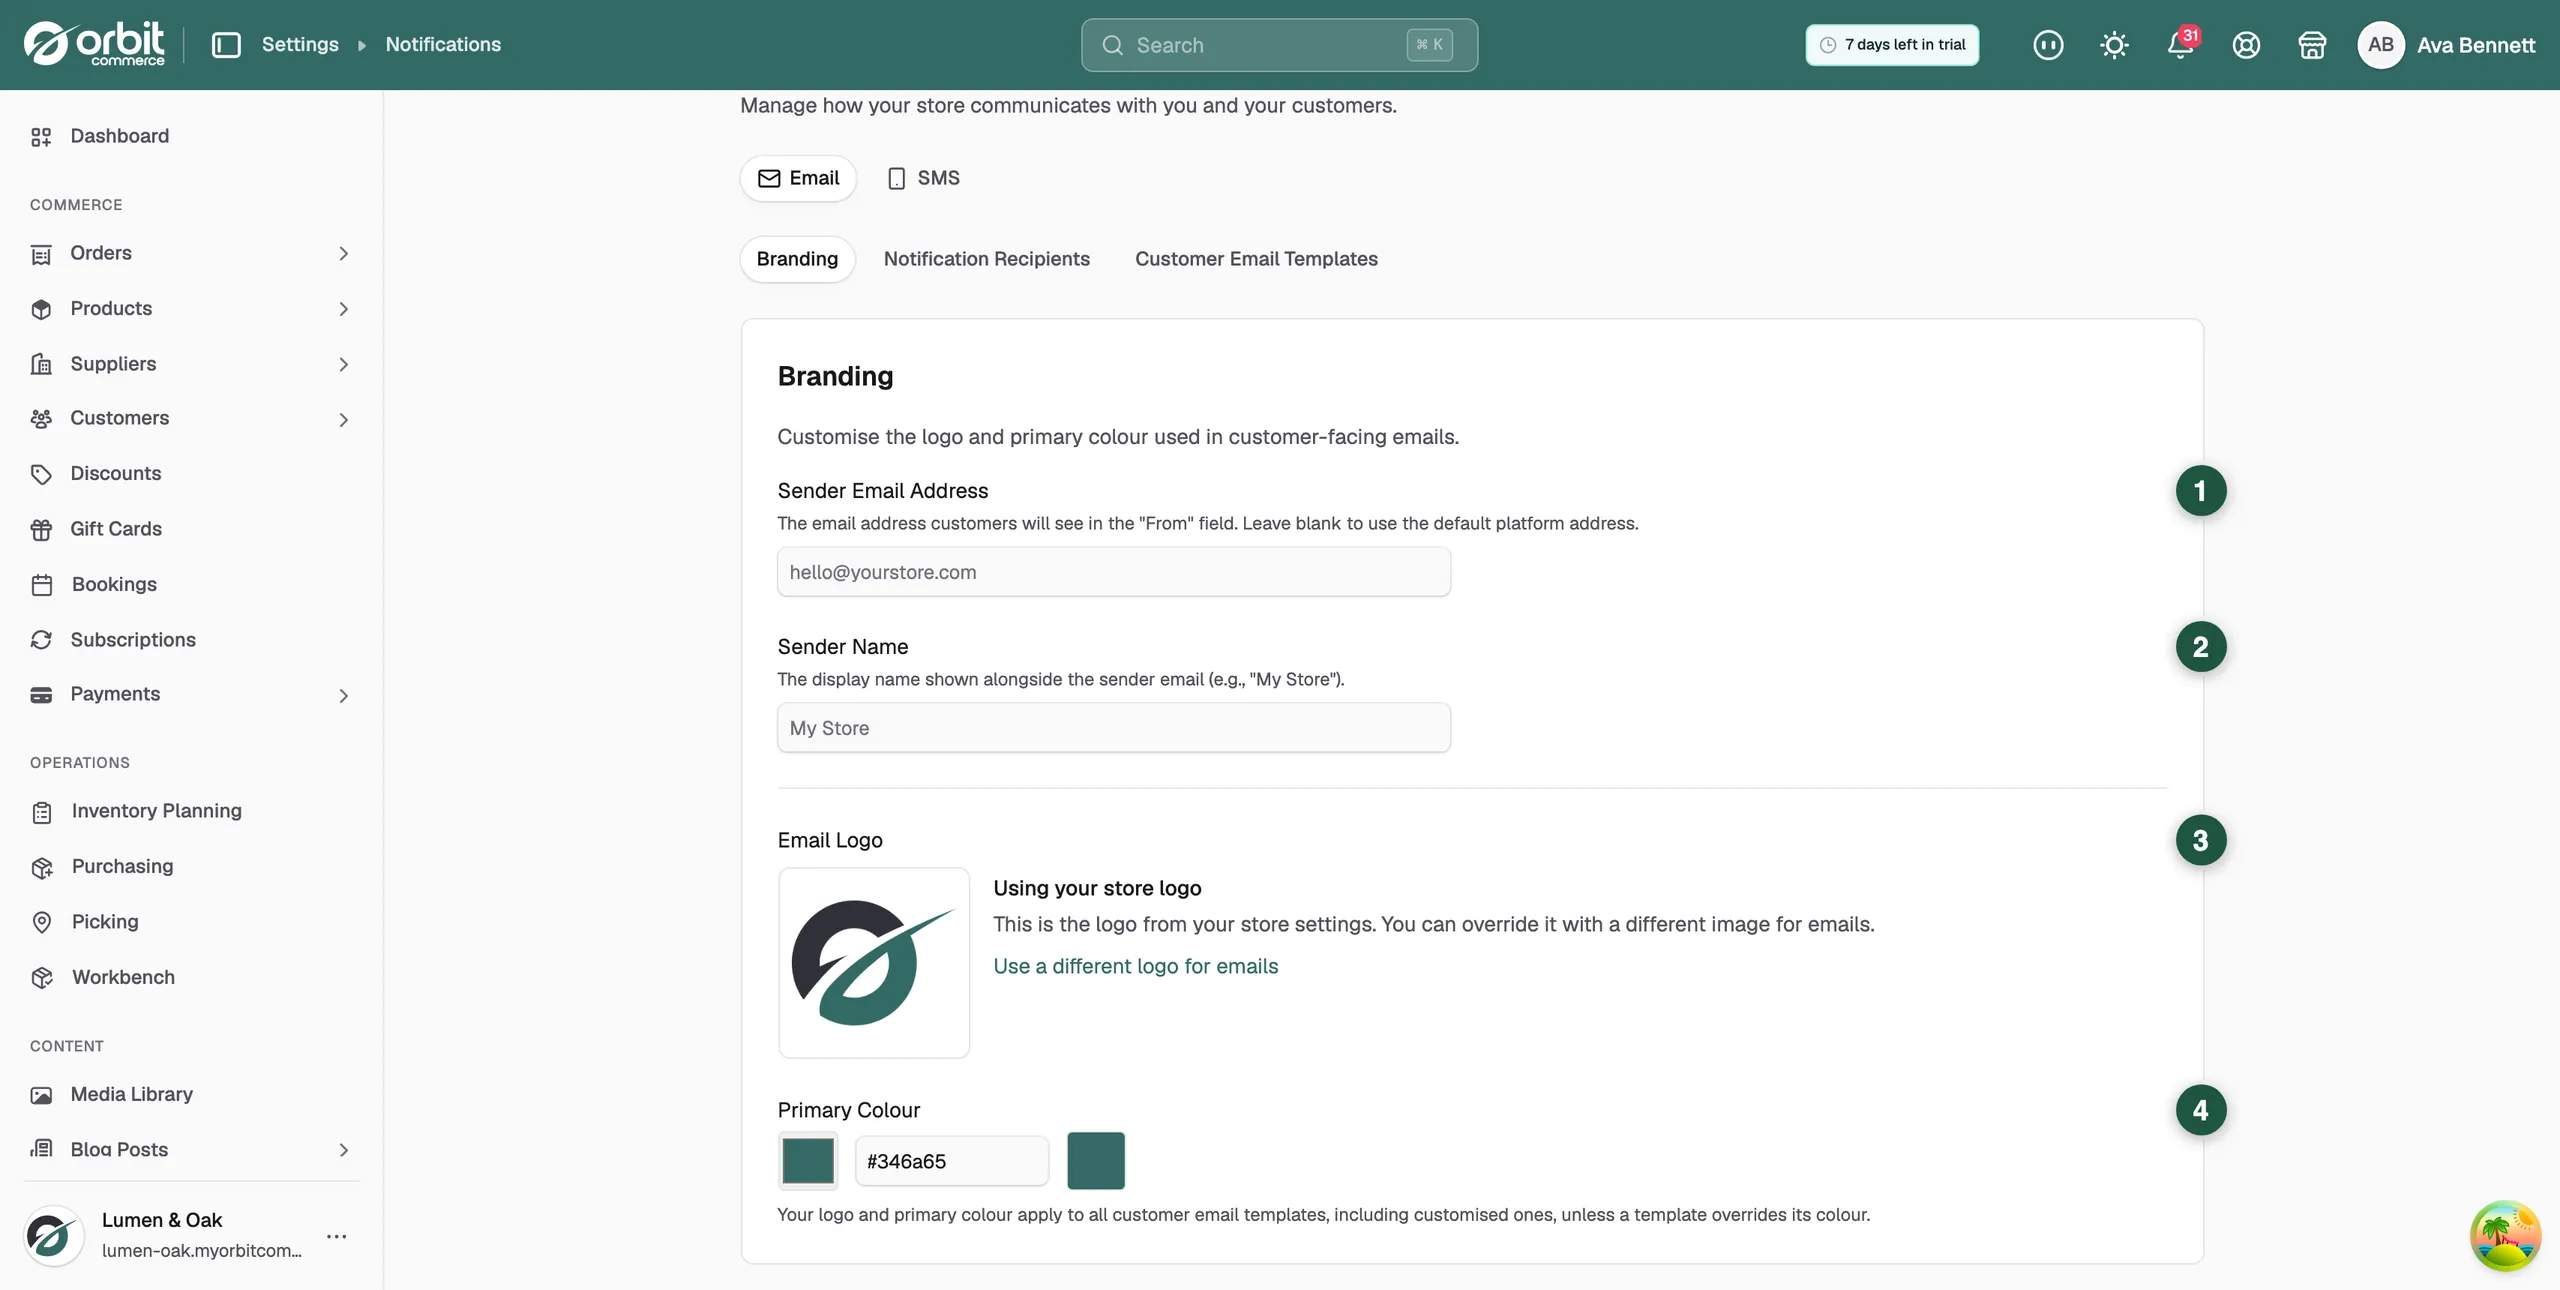
Note: Your logo and primary colour apply to every customer email template, including ones you have customised, unless a template sets its own colour.
Verify your sender domain
When your sender address uses your own domain, an orange bar appears under the sender fields. It reads Domain yourdomain.com requires DNS verification. Until you finish this, emails send from an Orbit address.
- Click anywhere on the orange bar. It expands to show the records your domain needs. If you see Show manual DNS records, click it to open the table.
- The table has three rows, each with a Type, a Name and a Value. All three are CNAME records.
- Sign in to your DNS provider, the company that hosts your domain, and create a new CNAME record.
- Back in Orbit, click the copy button next to the first Name. The message Copied to clipboard appears. Paste it into the name of your new record exactly as copied.
- Click the copy button next to the first Value. Paste it into the target of the same record.
- Repeat for the other two rows, so you have three records.
- In Orbit, click Check verification. DKIM status: reads PENDING at first. That is normal. It can take hours.
- Come back later and open the bar again. It closes each time you leave the page. Click Check verification once more.
When the records are live, the orange bar becomes a green line: Domain yourdomain.com is verified. Emails will be sent from your custom address. Your emails now come from your own address.
Tip: Clicking Check verification as often as you like does no harm. It only looks up the current status. Your DNS provider sets the pace.
Choose who receives store notifications
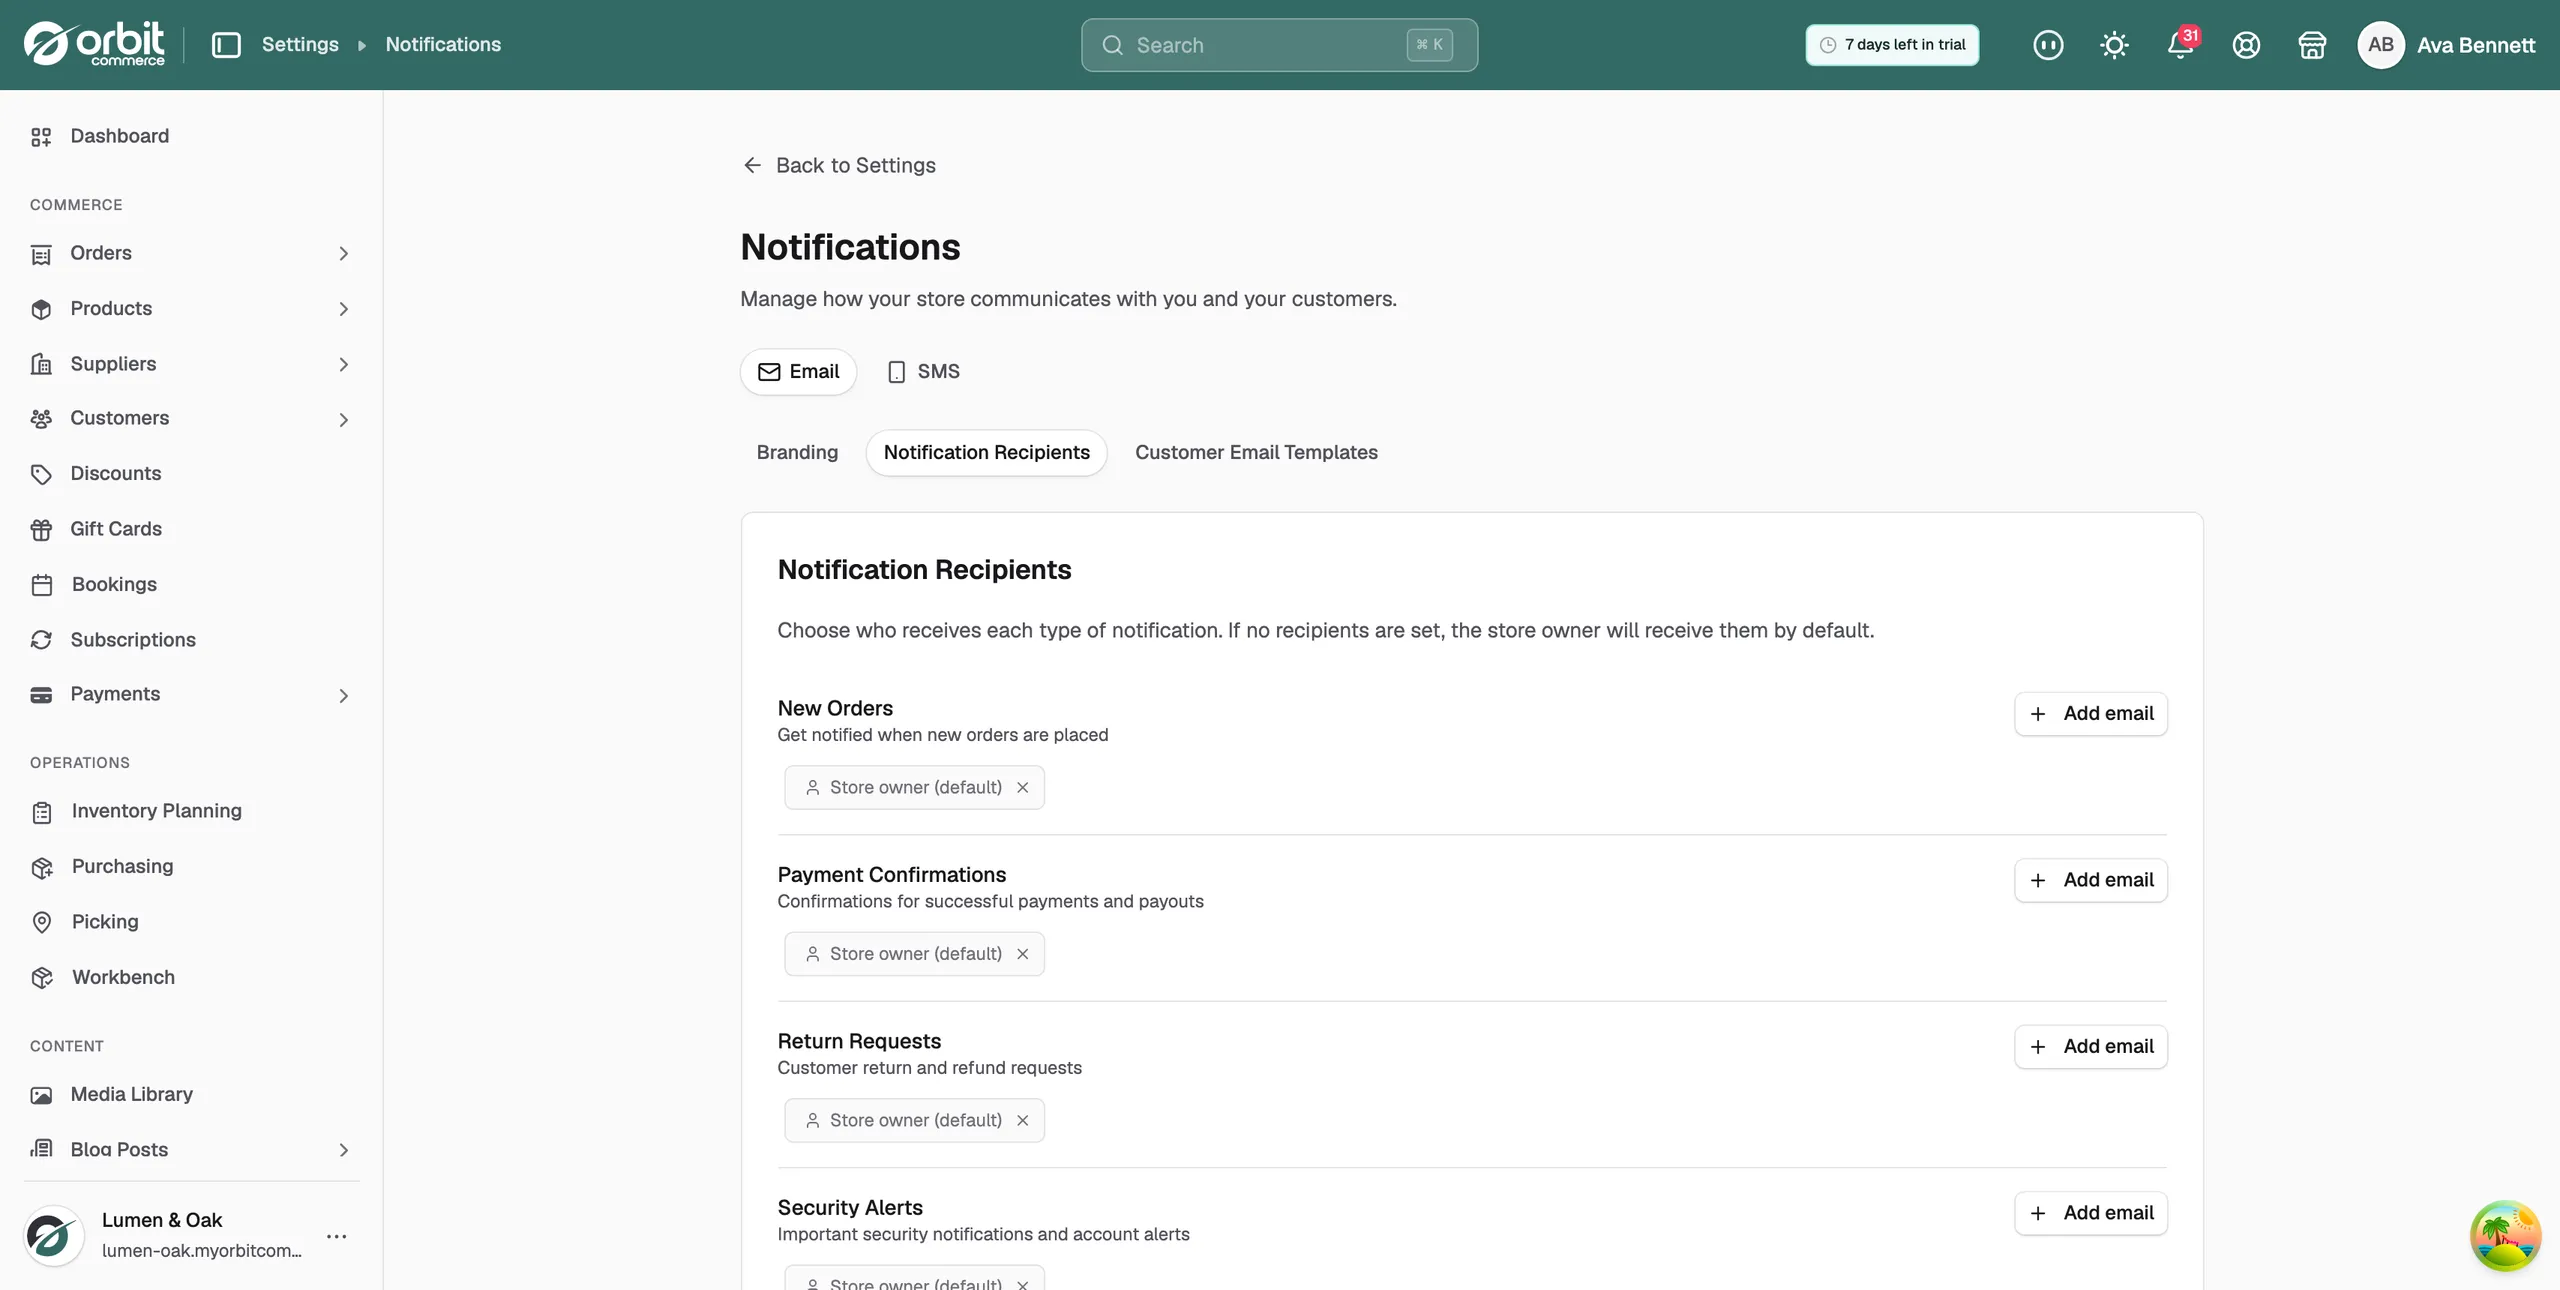
- On the Email tab, click Notification Recipients.
- Find the notification type you want to change:
- New Orders: sent when a new order is placed.
- Payment Confirmations: sent for successful payments and payouts.
- Return Requests: sent for customer return and refund requests.
- Security Alerts: important security and account alerts.
- Click Add email next to it and type the address.
- To stop an address receiving that notification, click the × next to it. The Store owner (default) chip can be removed too. Click Add store owner to put it back.
- Click Save recipients.
Edit customer email templates
- On the Email tab, click Customer Email Templates.
- Click the pencil icon next to the template you want to change. Templates you have changed show a Customised badge.
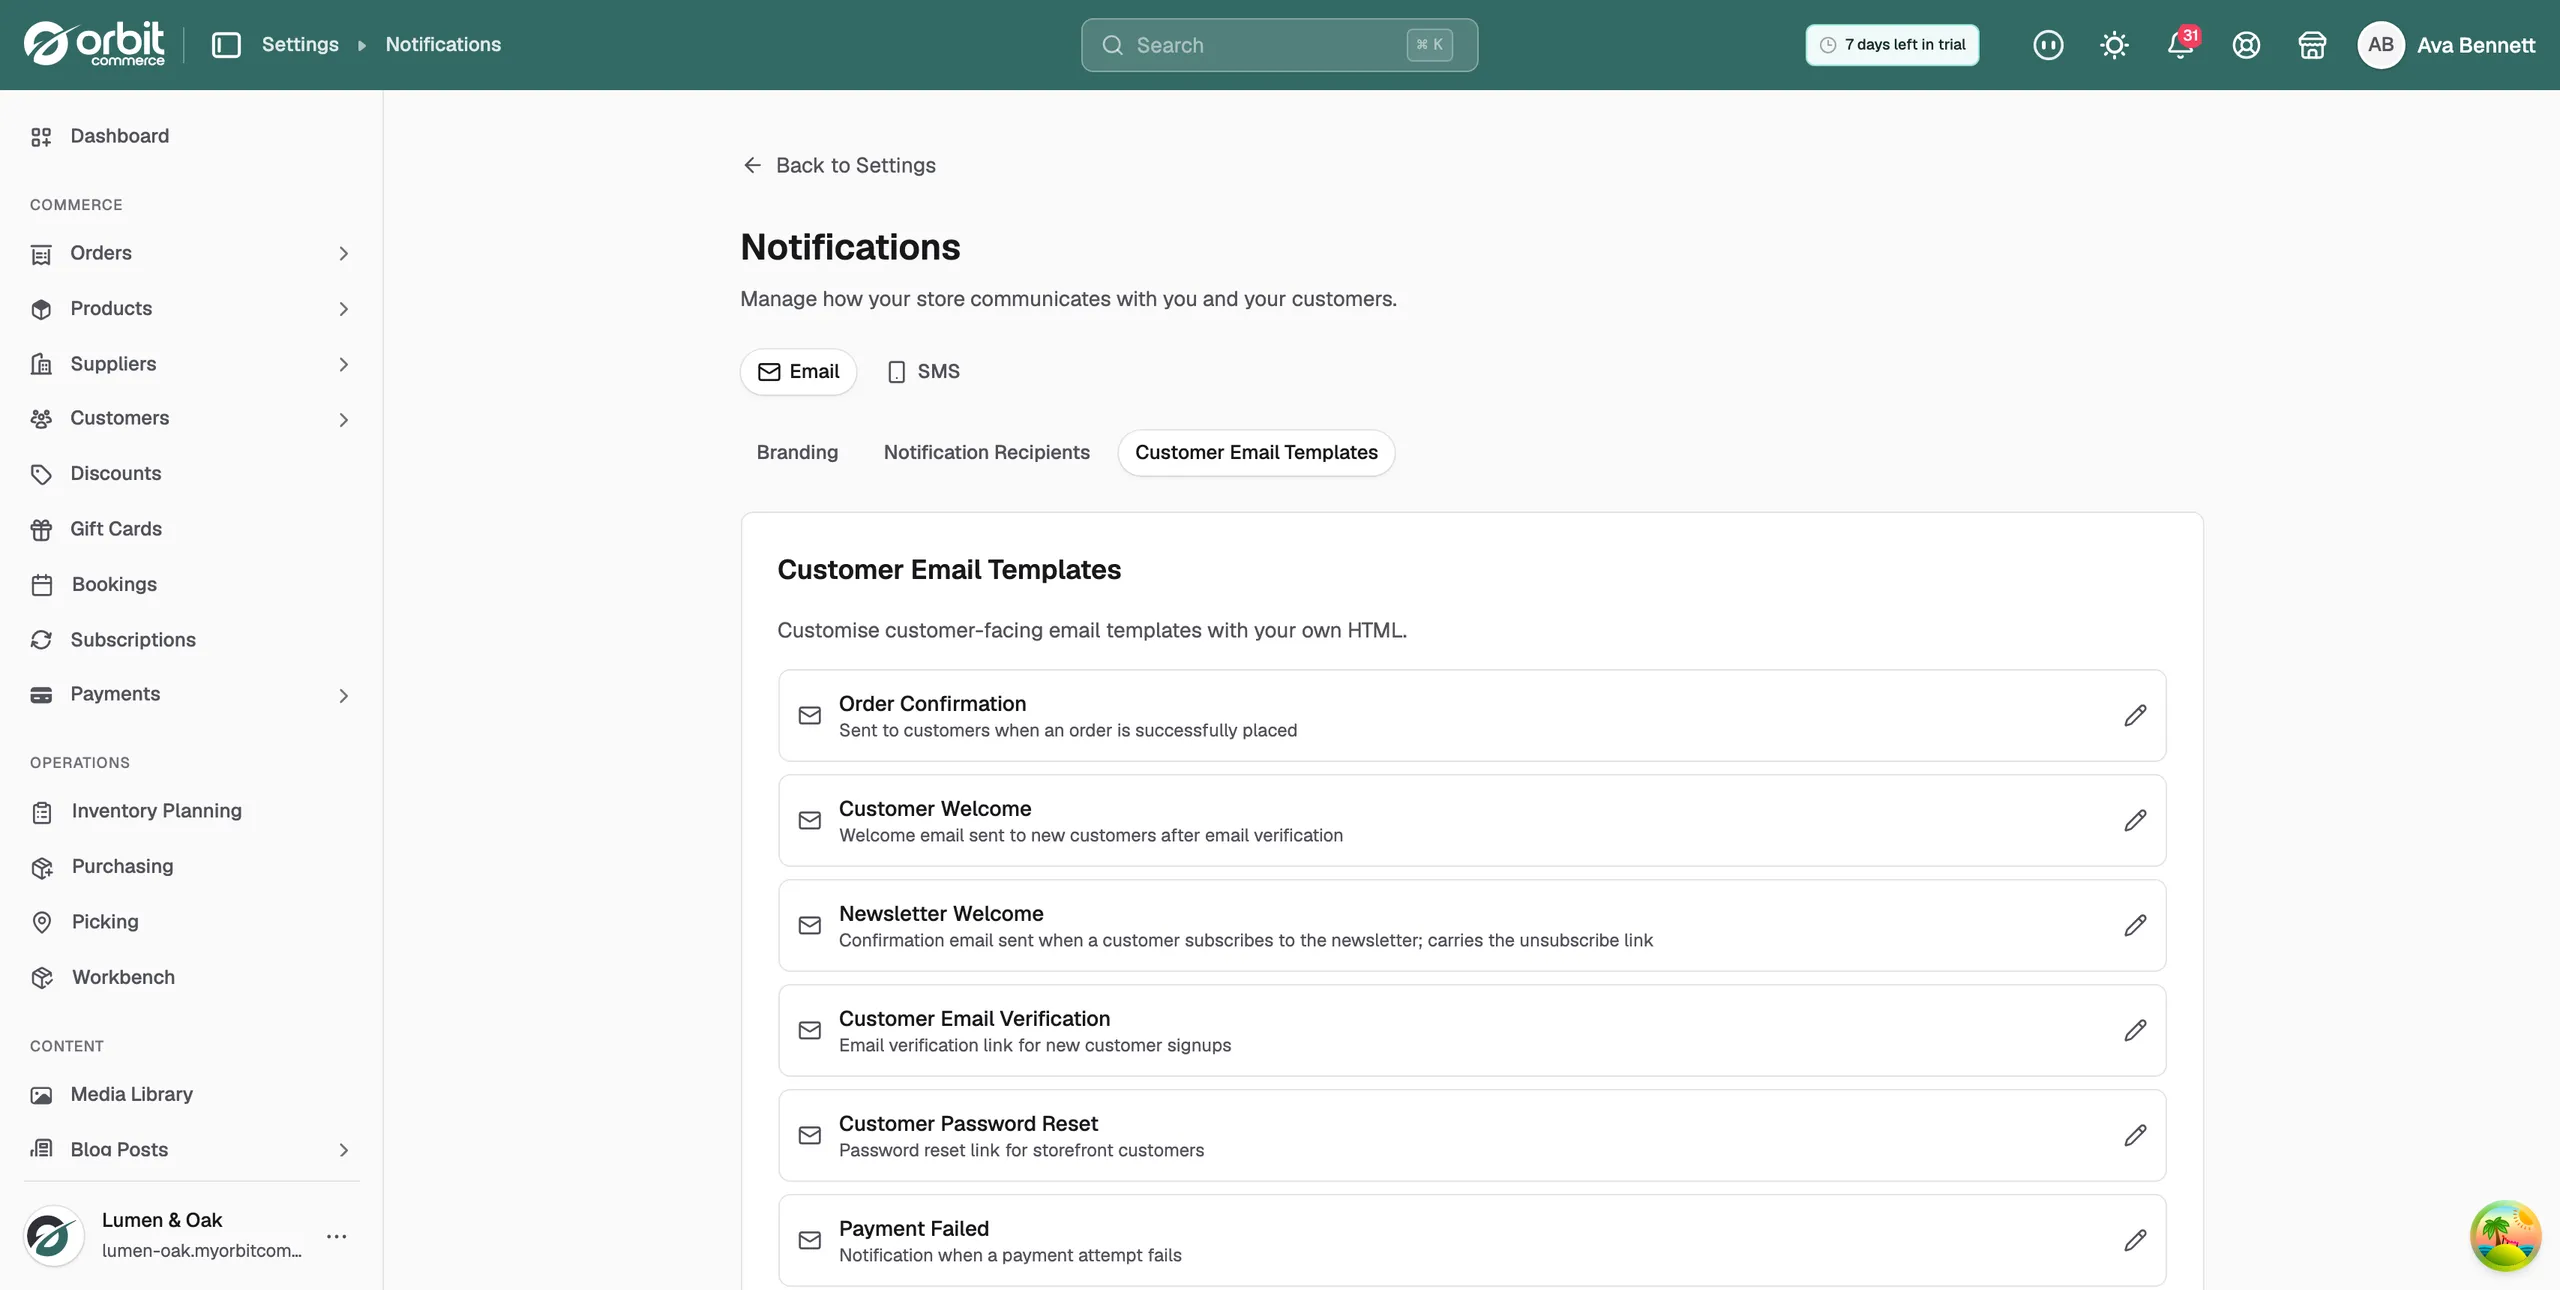
For what each template does and how to edit one, see Editing your customer email templates.
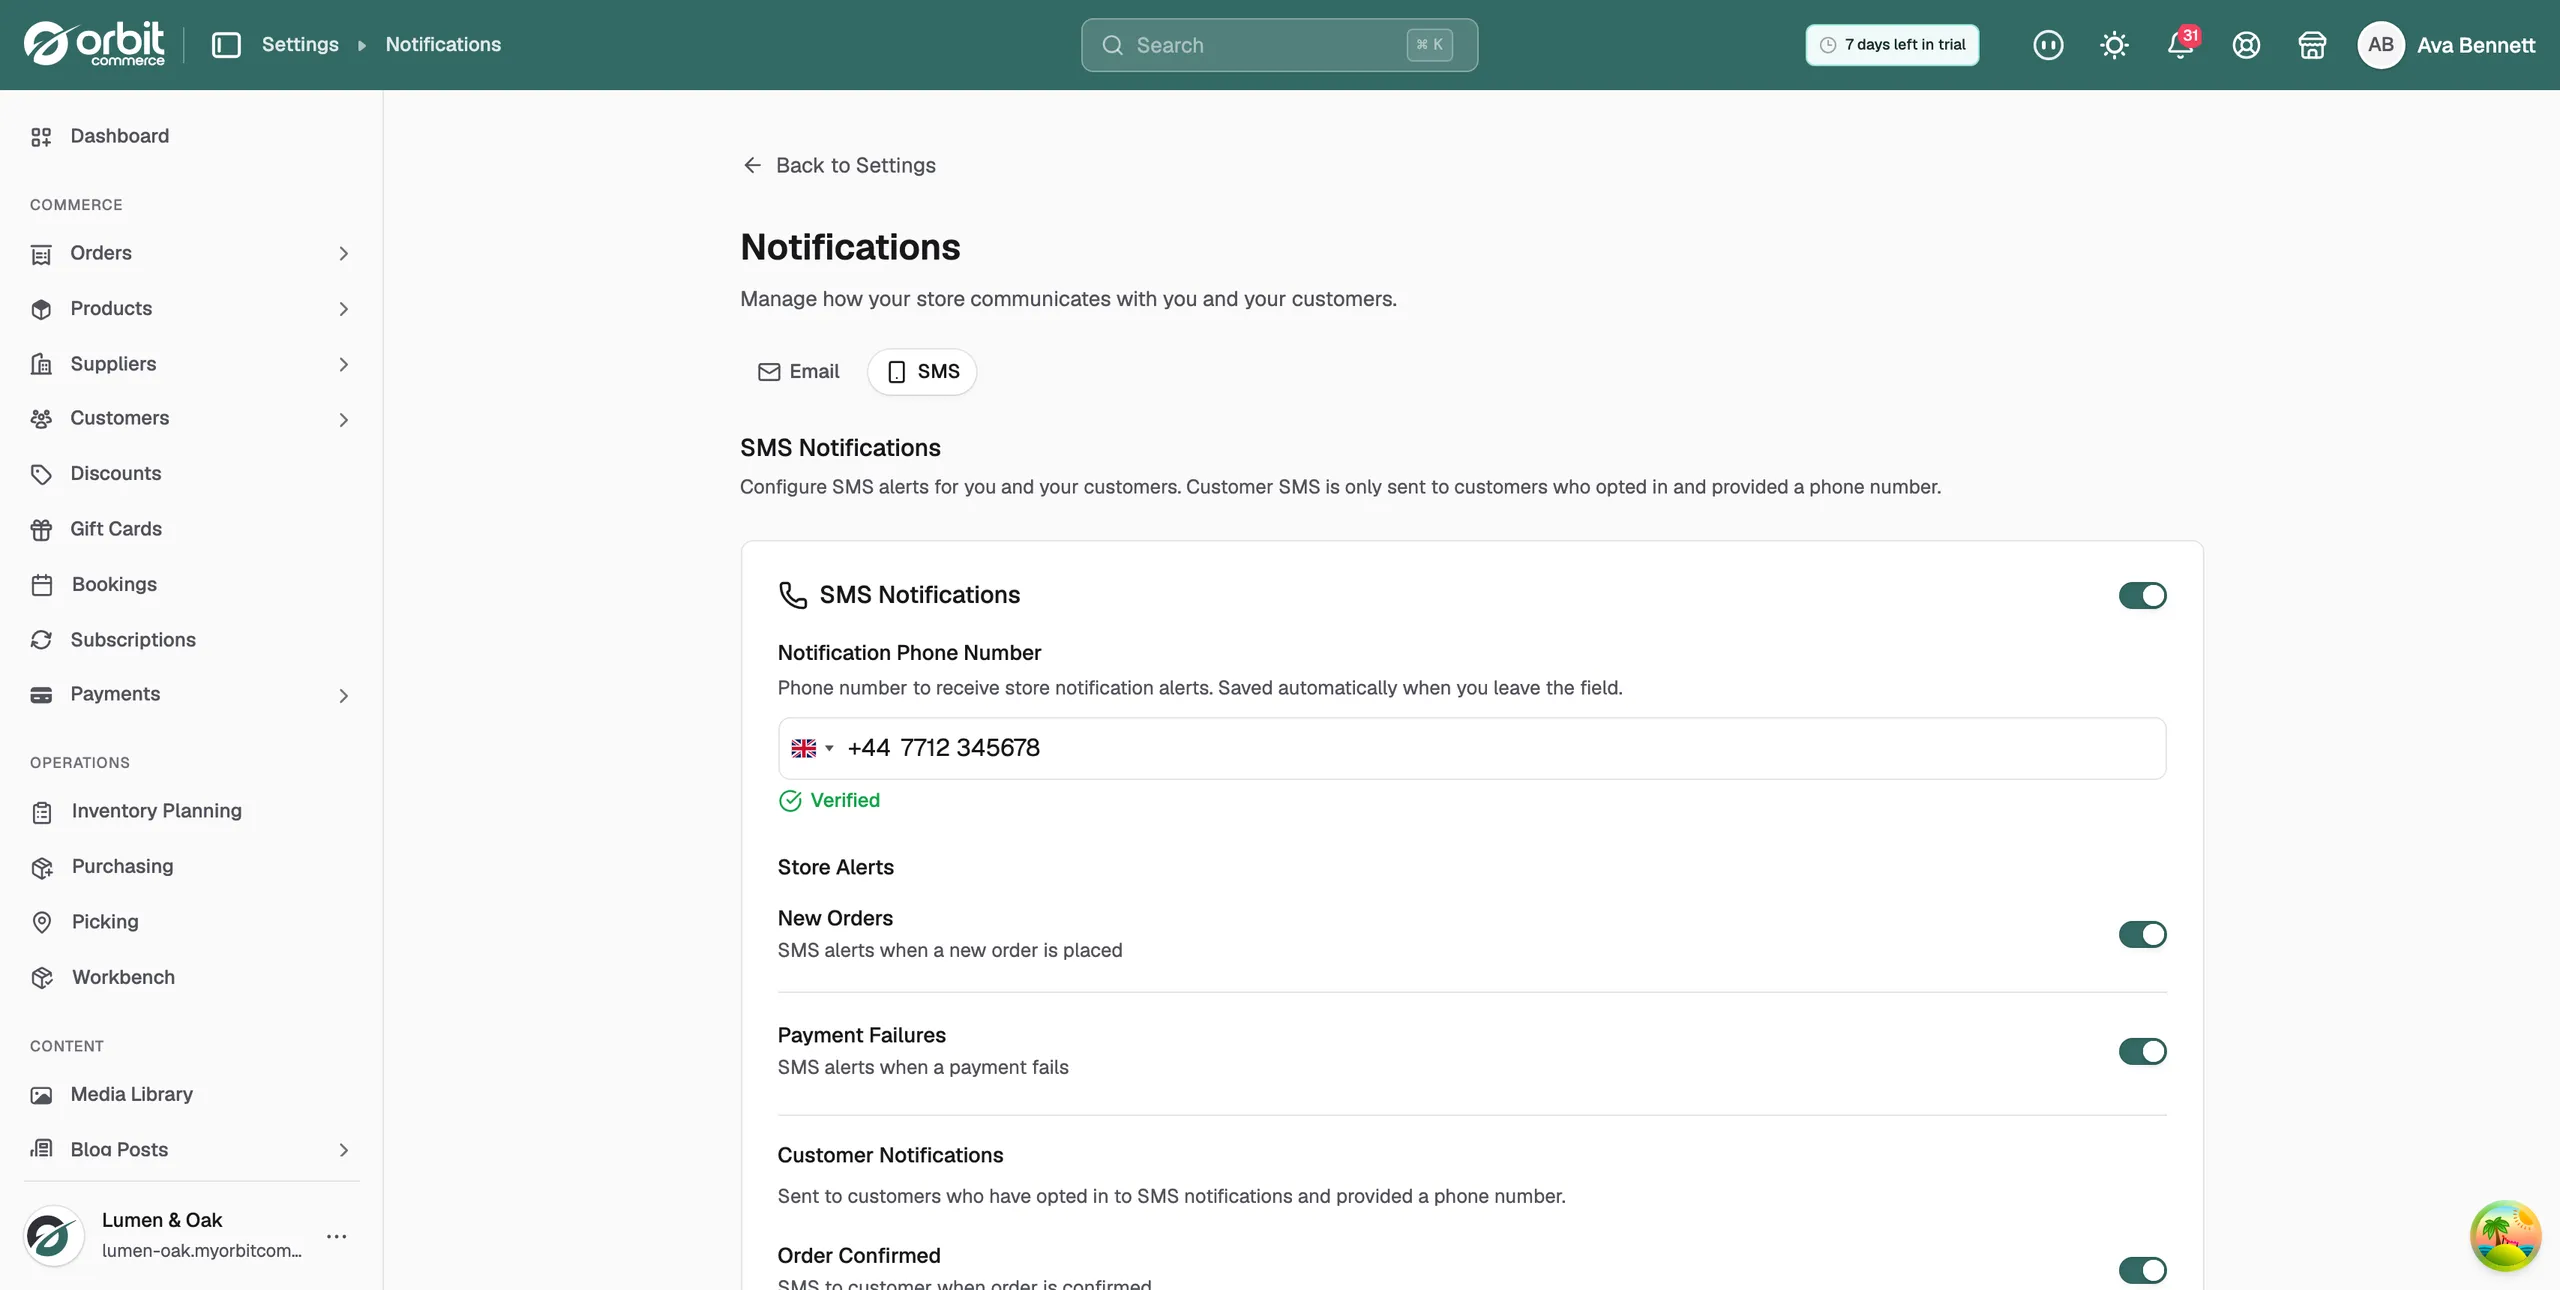
Set up SMS notifications
- Click the SMS tab.
- Switch on SMS Notifications.
- In Notification Phone Number, type the number that should receive store alerts. It saves when you leave the field.
- Under Store Alerts, switch on the alerts you want: New Orders and Payment Failures.
- Under Customer Notifications, switch on the texts customers should get: Order Confirmed, Order Shipped, Order Delivered, Tracking Updates and Order Canceled.
Related guides
Was this helpful?
0 people found this helpful