Using the email template editor
Edit a customer email visually or in HTML, insert merge variables, preview it on desktop and mobile, and send yourself a test before you save.
The template editor is where you change what a customer email looks like and says. You can work visually or edit the HTML, and both views share one live preview. Open it from Settings, then Notifications, then the Customer Email Templates tab.
Considerations
- The logo and primary colour you set on the Branding tab apply to every customer email template, including customised ones, unless a template sets its own colour.
- Resetting a template to the default cannot be undone.
- If you try to leave the editor with unsaved changes, Orbit asks first.
Open a template
- From your Orbit dashboard, go to Settings.
- Click Notifications.
- Open the Customer Email Templates tab.
- Click the pencil next to the template you want.
- The editor opens with the template's name at the top. A template you have already changed carries a Customised badge.
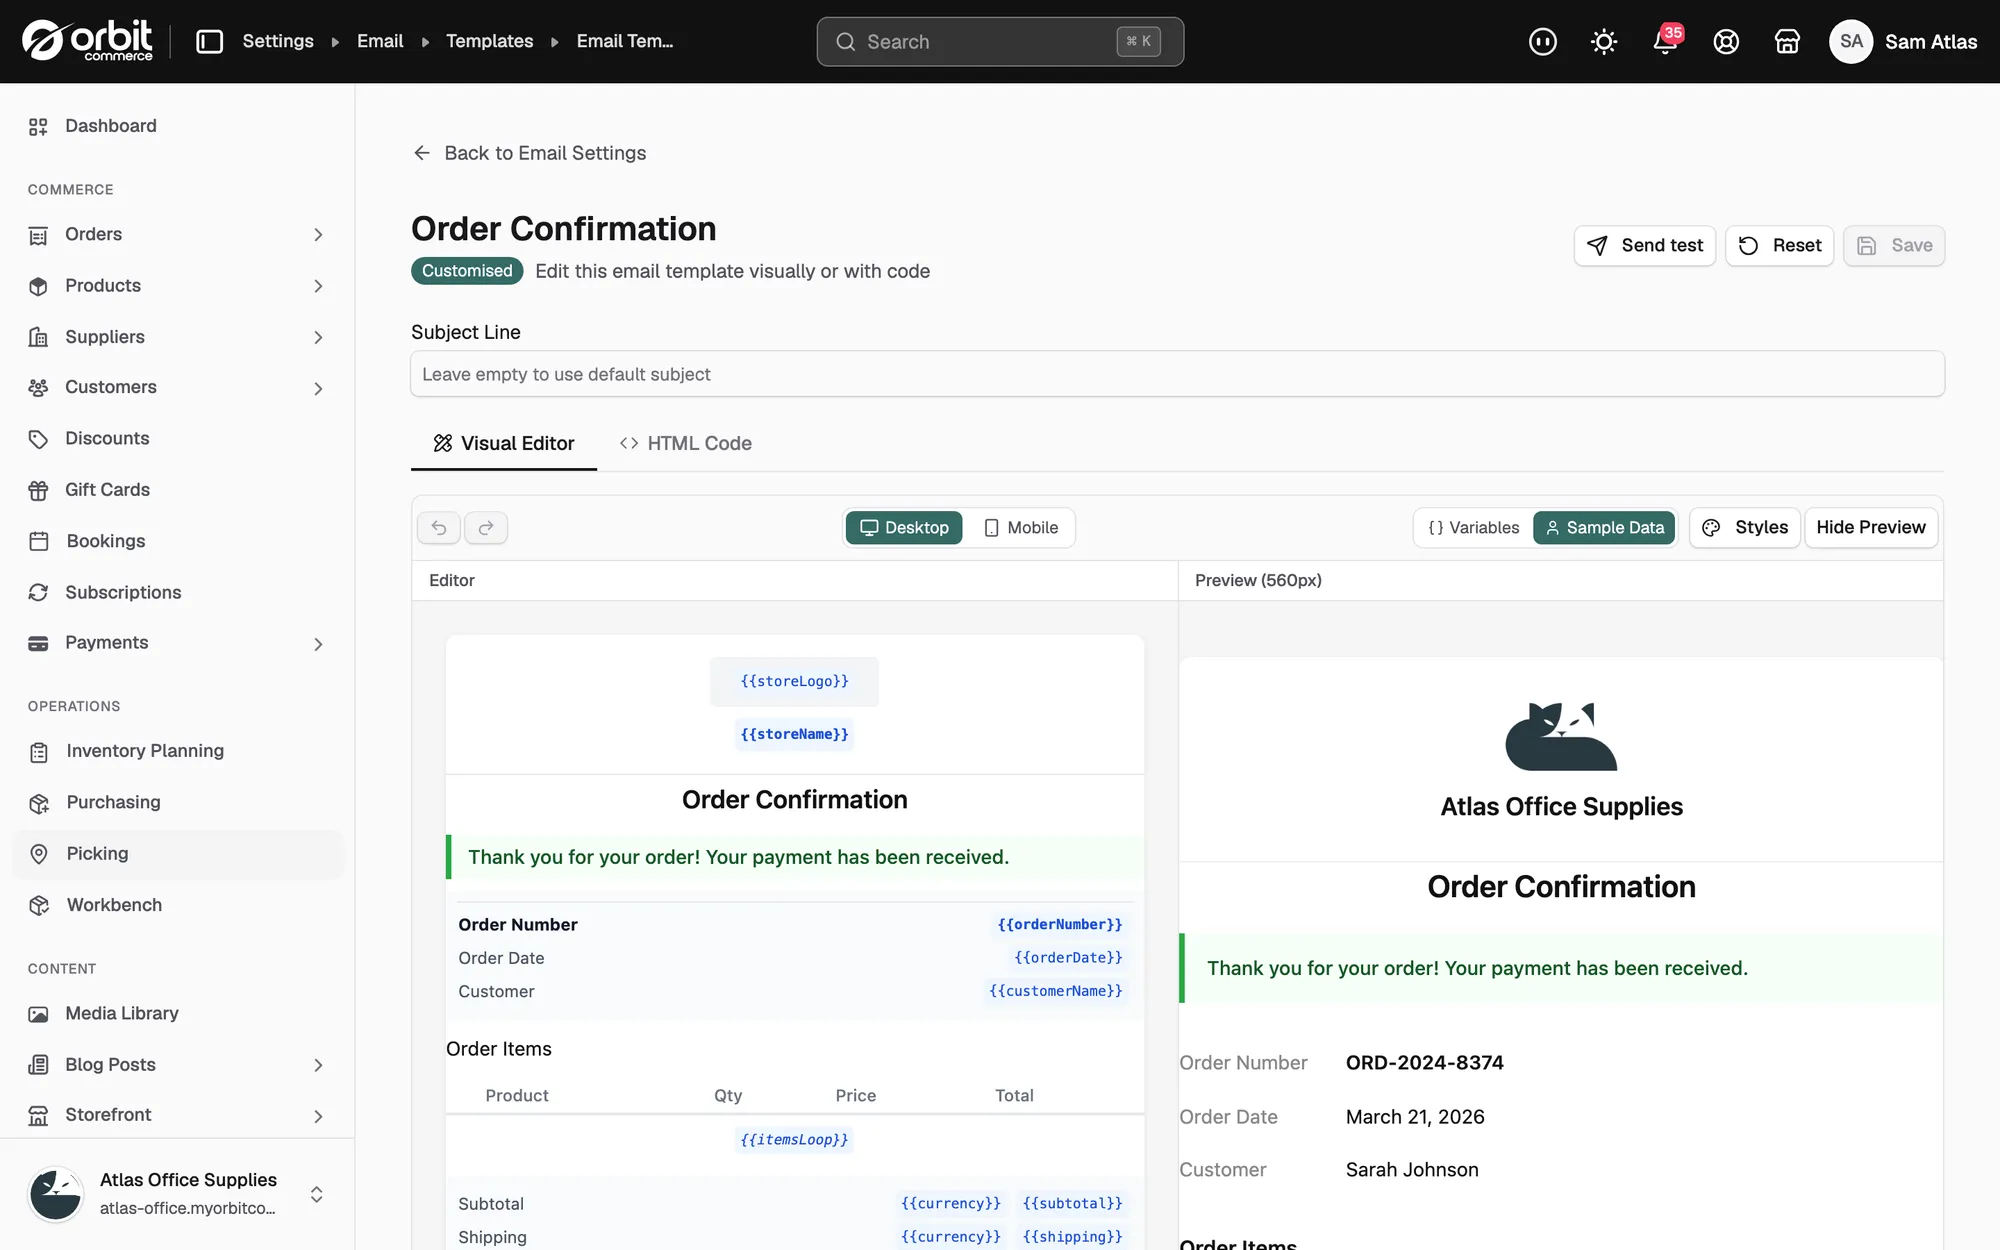
To go back without saving, click Back to Email Settings at the top left.
Change the subject line
- Type the subject in Subject Line.
- Leave the field empty to keep the default subject.
- Click Save.
Merge variables work in the subject as well as the body, so the subject can carry the order number.
Edit the email visually
- Open the Visual Editor tab.
- Click a section in the email to edit it. Sections include Header, Heading, Text, Image, Button, Data Table, Totals, List, Info Box, Divider, Address, Footer and Custom HTML.
- Click Styles to change the Global Styles, such as the fonts and colours used across the whole email.
- Click Save.
The toolbar above the editor controls the preview:
- Desktop and Mobile: change the width the preview is drawn at.
- Variables: show the raw variable tokens in the preview.
- Sample Data: fill the variables with realistic example values instead.
- Hide Preview: give yourself more room to edit. Click Show Preview to bring it back.
Edit the HTML
- Open the HTML Code tab.
- Edit the template under HTML Source.
- The Preview pane beside it updates as you type. Click Code only to hide it, and Show preview to bring it back.
- Click Save.
Insert a merge variable
Merge variables fill an email in with the details of one order or one customer, such as the order number or the customer's name.
- Put the cursor where you want the value to appear.
- Click Insert Variable.
- Find the variable in the list, or type in Search variables.... They are grouped by Order, Customer, Store, Shipping and more.
- Click the variable to insert it.
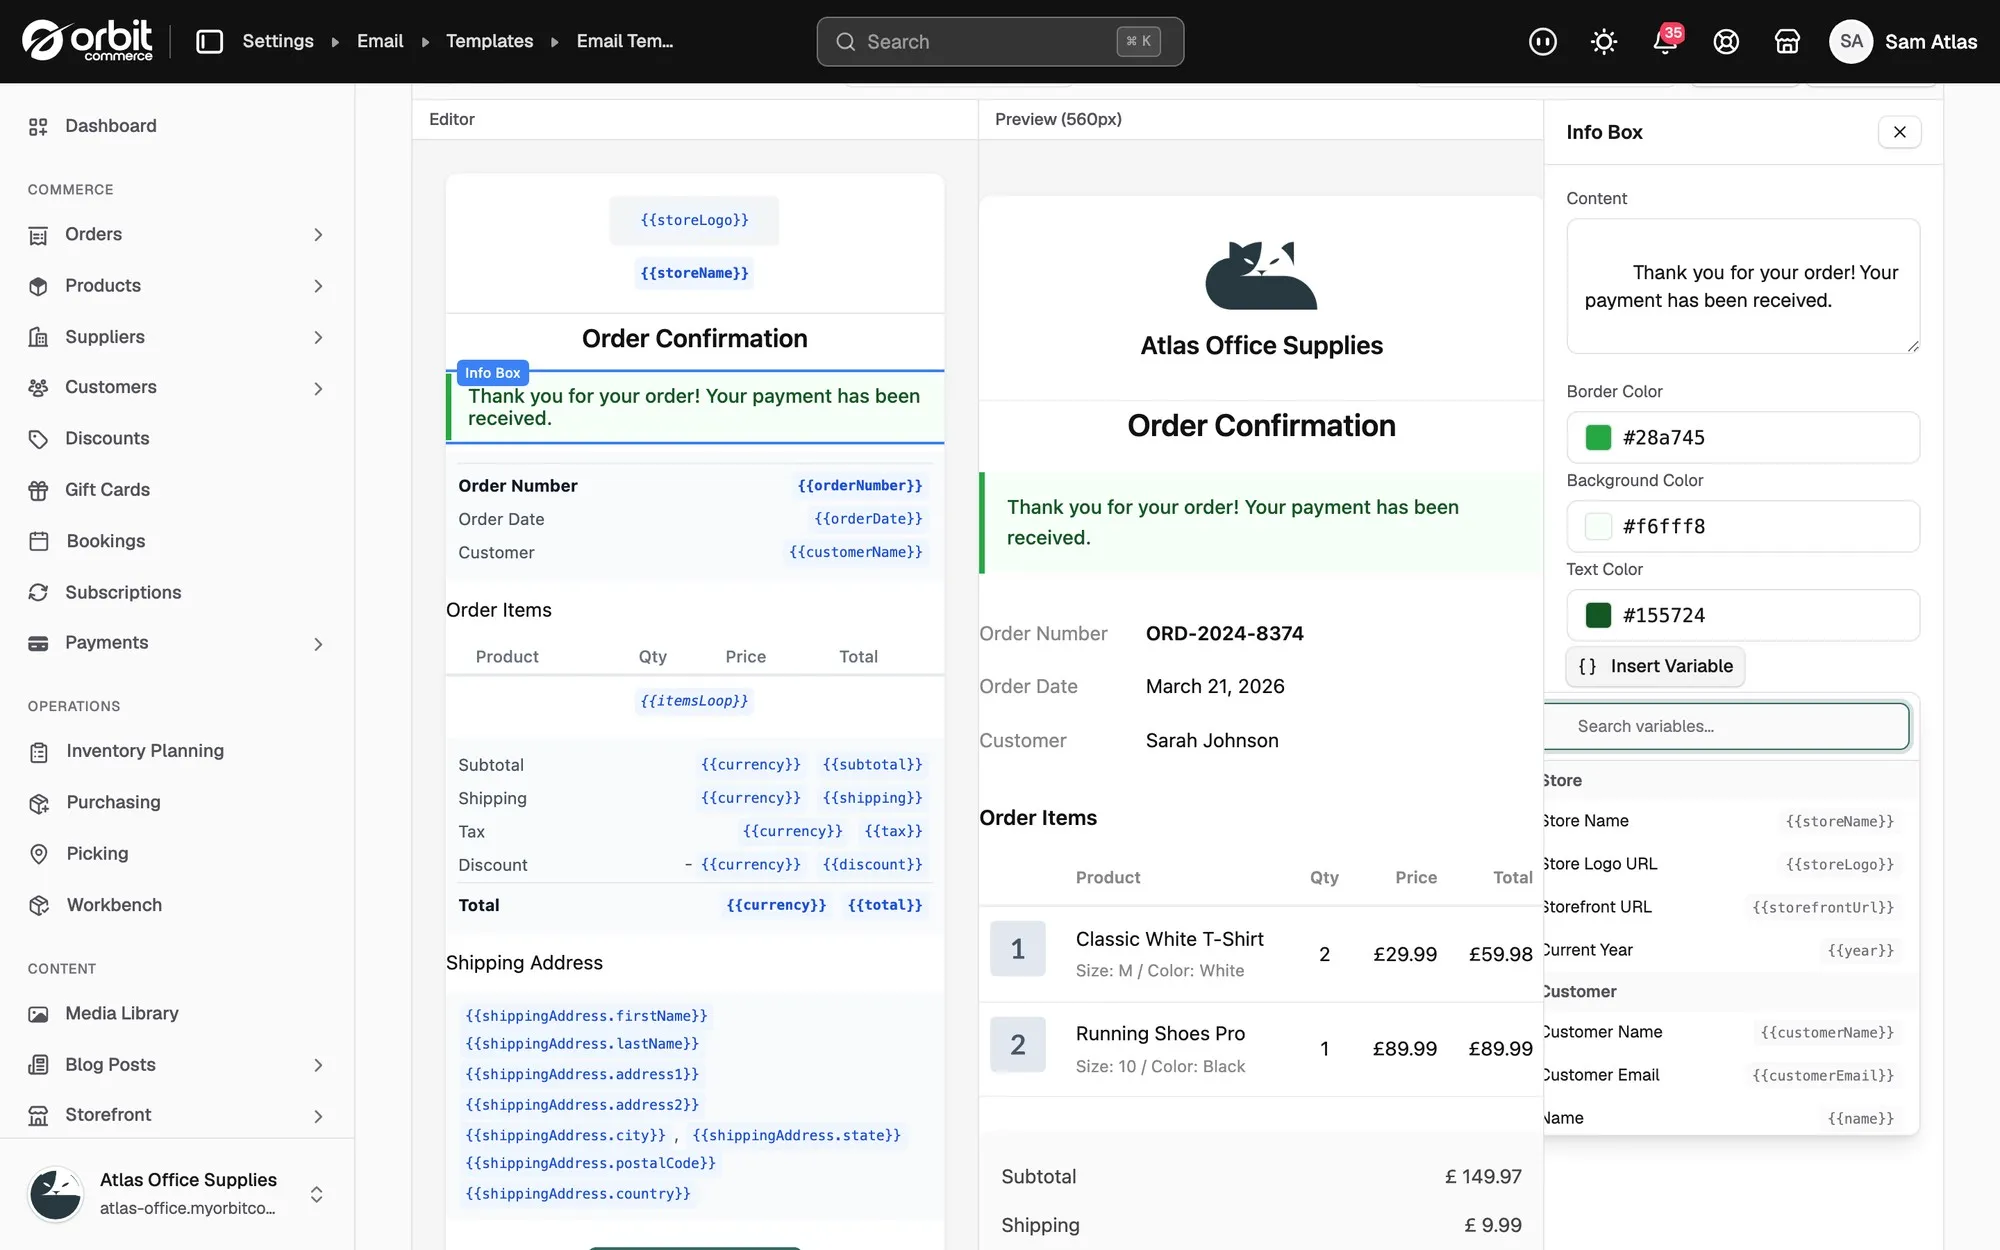
Note: Keep each variable exactly as it was inserted. A variable Orbit does not recognise is not replaced, and the customer sees the raw token in their inbox. Turn on Sample Data to check every variable resolves.
Send yourself a test
- Click Send test.
- Type your address under Send a test email to.
- Click Send.
Read the test on a phone as well as a laptop. Most customers open email on a phone.
Reset a template to the default
- Click Reset.
- Confirm in the message that appears.
Warning: Resetting removes your customisations and puts the template back to its default. This cannot be undone.
Related guides
Was this helpful?
0 people found this helpful