Setting up your store details
Add your store name, logo, contact details and business address, then set order numbering, timezone and units. Save the right country before you connect Orbit Payments.
Your store name, description, logo, contact details and business address live on the Store Information tab of Store Settings. Order numbering, timezone and units live on the General tab of the same page. You find both under Settings, then Store Settings.
Considerations
- Save the correct Country in your business address before you connect Orbit Payments. Your payment account is registered to that country for good and cannot be moved later.
- Stores created by an agency or by cloning start with no address. They cannot begin payment setup until one is saved.
- On a new store, save your address before your contact details. Orbit will not save contact details until an address is on record.
- Store Name is the only required field.
- Each tab saves on its own. Save before you move to another tab.
Open Store Settings
- From your Orbit dashboard, go to Settings, then Store Settings.
- The page opens on the General tab. The other tabs are Store Information, Payment Settings, Shipping Settings, Tax Settings and Danger Zone.
Add your store name, contact details and address
- Click the Store Information tab.
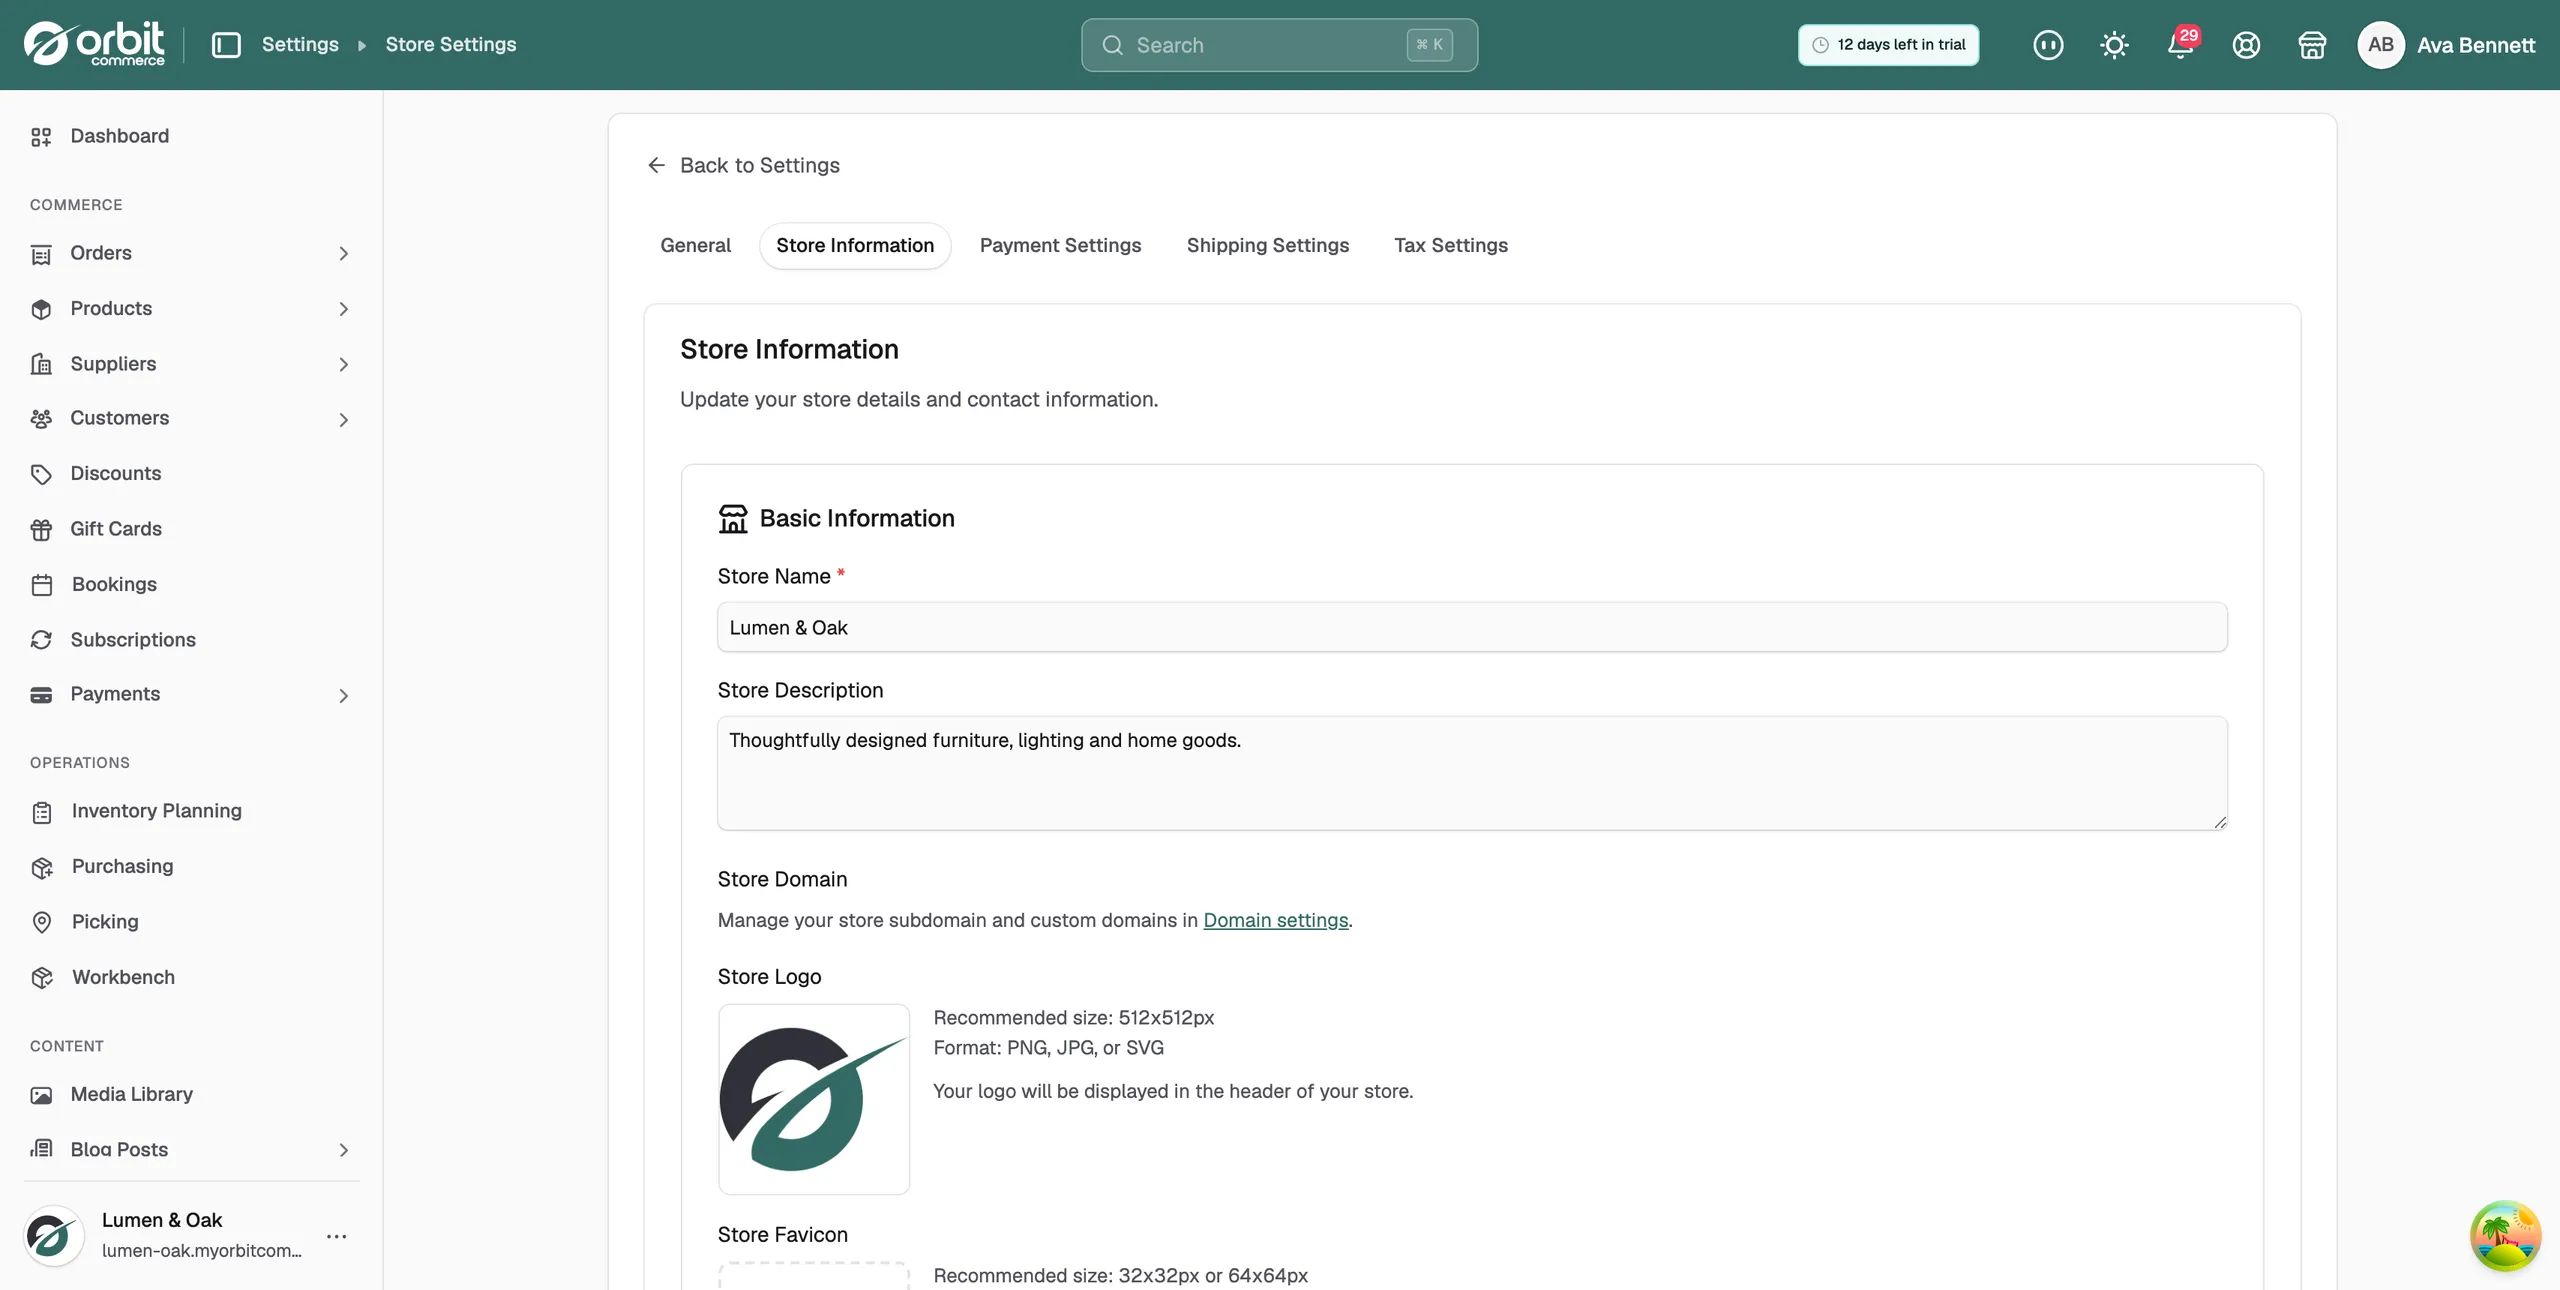
- Under Basic Information, enter your Store Name and a short Store Description.
- Under Contact Information, enter the Contact Email you want customers to use, and a Phone Number.
- Under Store Address, click Country. Type your country in the Search box and click it in the list. The county and town lists unlock once a country is chosen.
- In Street Address, type the first few characters of your street. Matching addresses appear underneath. Click yours, and the postcode, county and town fill in on their own. You can also type them into ZIP/Postal Code, State/Province/County and City/Town.
- Under Social Media, add your Facebook, Instagram, Twitter / X and YouTube links if you have them.
- Click Save Changes. The message Store information updated successfully appears.
Warning: The Country you save here is the country your Orbit Payments account is registered in. It cannot be changed once payments are connected.
Add a logo and favicon
- On the Store Information tab, under Store Logo, click Upload Logo and choose your image. The recommended size is 512x512px in PNG, JPG or SVG. It shows in the header of your store.
- Under Store Favicon, click Upload Favicon. The recommended size is 32x32px or 64x64px in PNG, ICO or SVG. It shows in the browser tab.
- Click Save Changes.
Store Domain on this tab shows your subdomain and any custom domains. You manage those in Setting up your domain.
Set order numbering, timezone and units
- Click the General tab.
- Under Order Numbering, choose a Format, then add a Prefix such as ORD- or a Suffix such as -UK. The Preview box shows your next order number as you type.
- Under Store Timezone, type your city to shorten the list, then click your timezone. The line below reads Currently set to: followed by your choice.
- Under Units of Measurement, choose Metric system or Imperial system. Weight Unit and Dimension Unit change to match.
- A bar reading Unsaved changes appears at your first edit. Click Save. The message Settings saved appears and the bar closes.
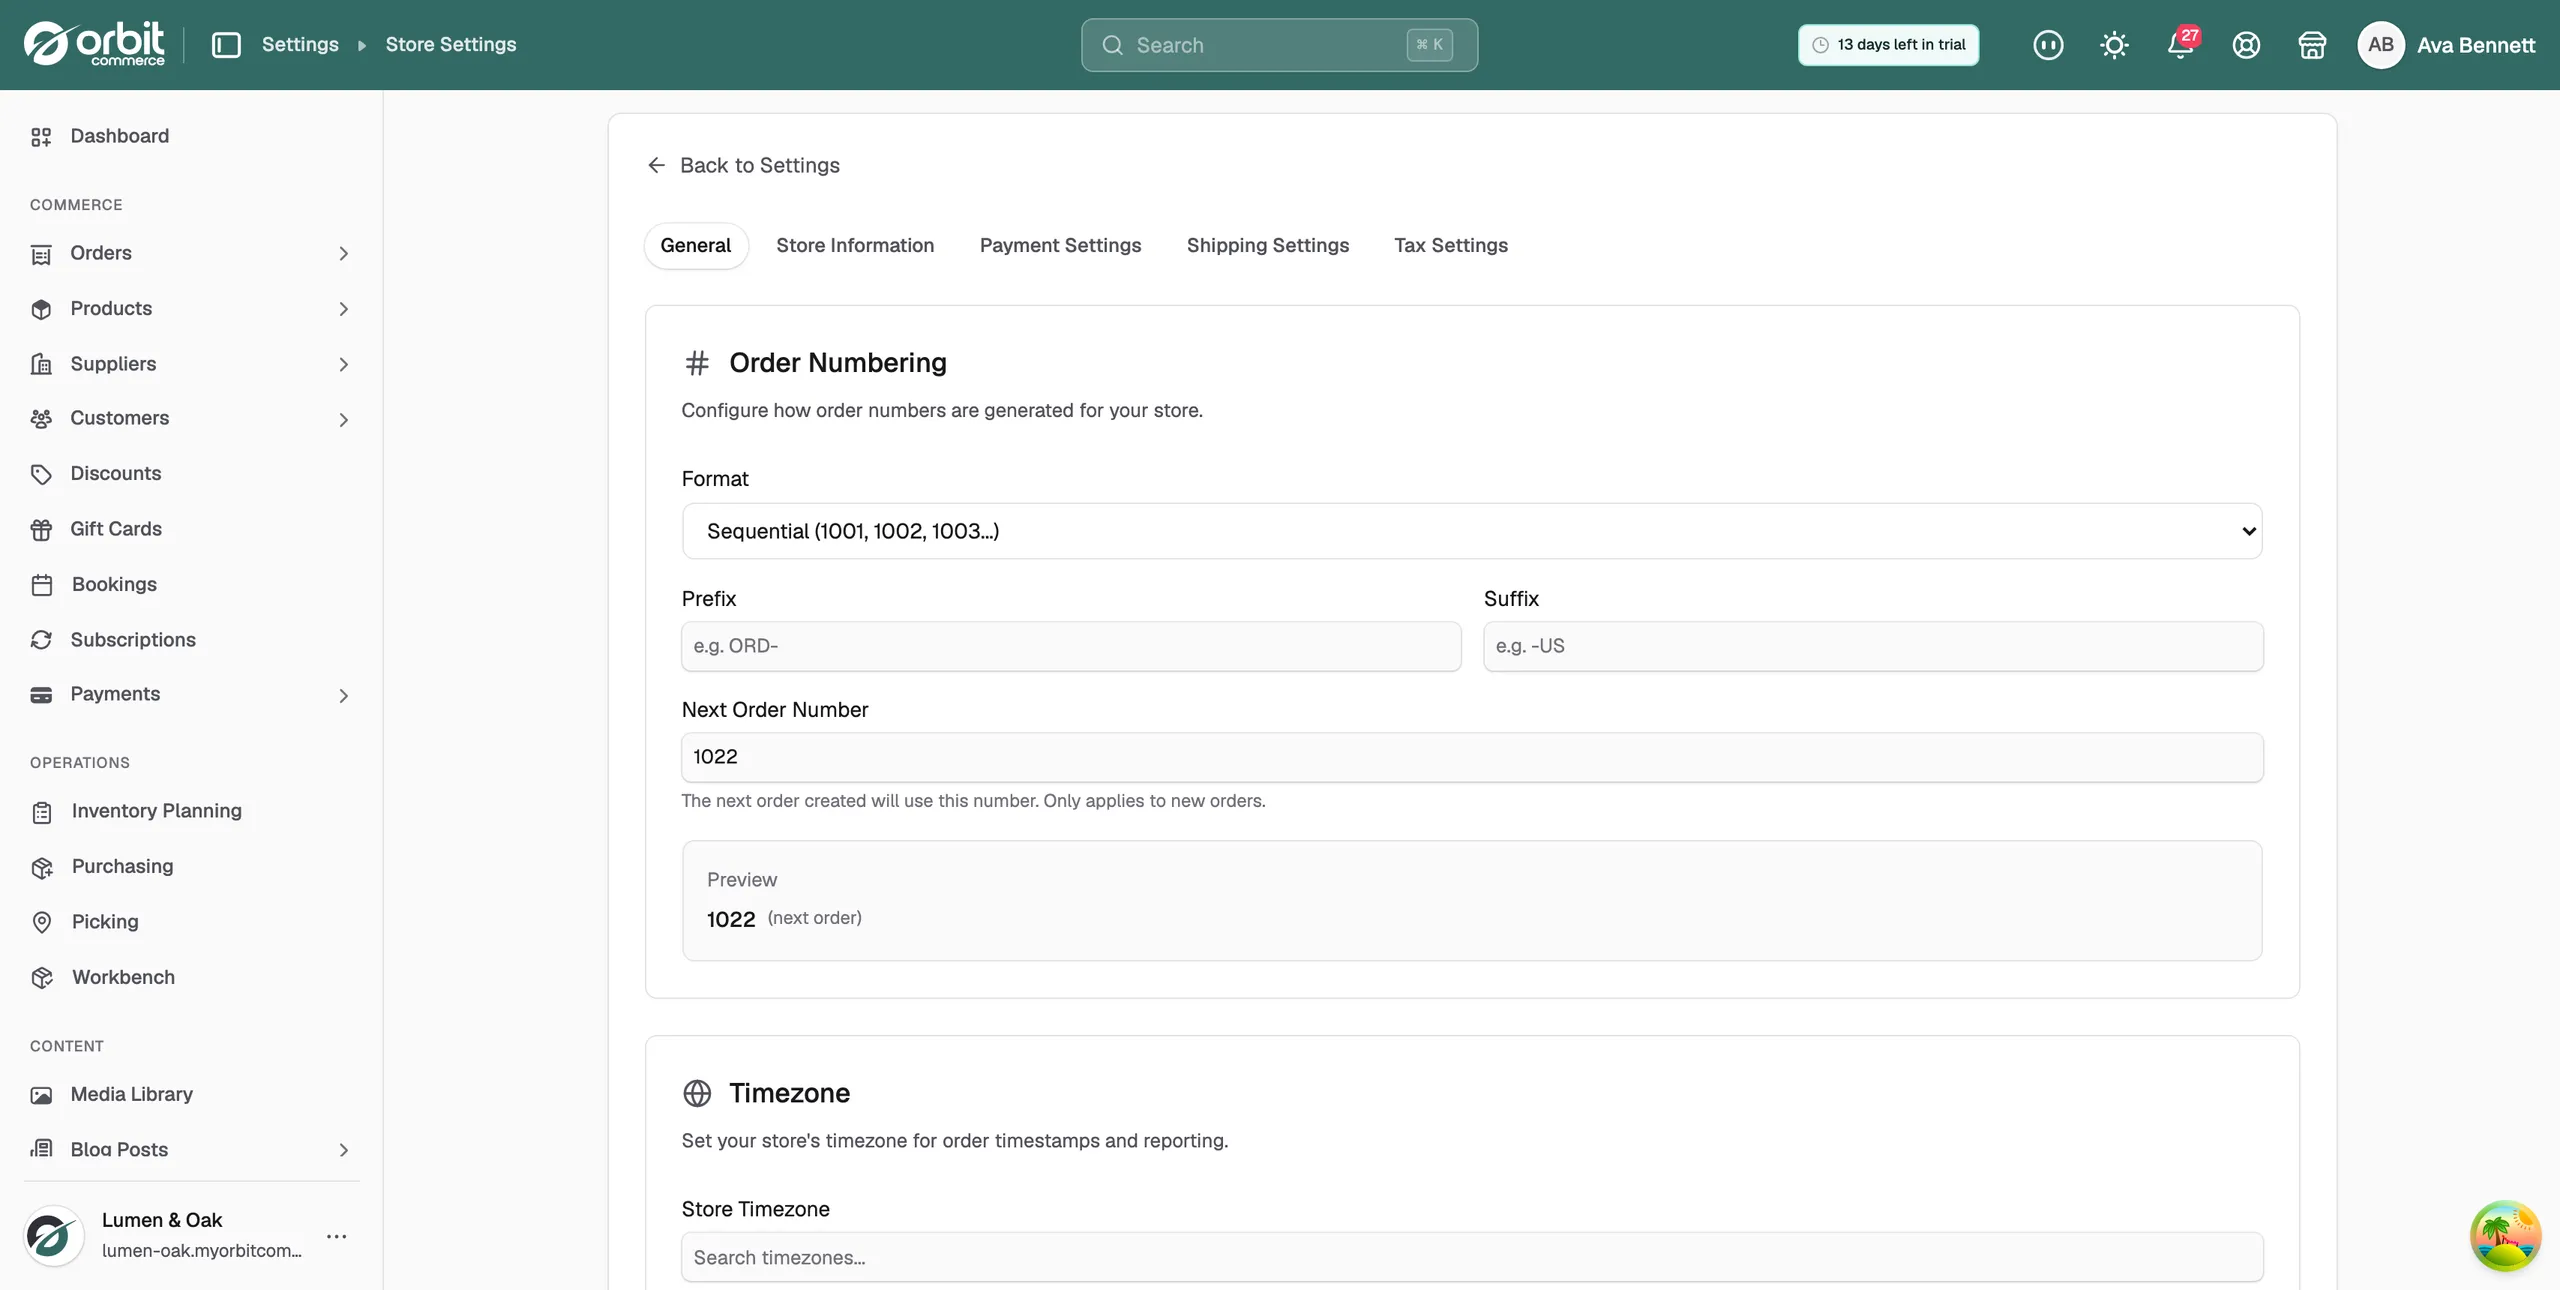
The order numbering fields:
- Format: how order numbers are built, for example Sequential (1001, 1002, 1003...).
- Prefix: text added to the start of every order number.
- Suffix: text added to the end of every order number.
- Next Order Number: the number the next order will use. It only applies to new orders.
- Preview: a live example of your next order number.
Tip: The timezone sets the time on every order and report. Pick the one you trade in, so your records line up with your day.
Related guides
Was this helpful?
0 people found this helpful