Running a sale on a product
Put one product on sale with a sale price and a crossed-out compare-at price, and set the dates and times the sale runs.
You can put a product on sale from the Pricing section of the product editor. Set a sale price, show the old price crossed out, and choose when the sale starts and ends. The sale then runs on its own.
Considerations
- The Pricing section only shows for a product with no variants. A product with variants has its price and compare-at price on each variant instead. See Adding variants.
- The sale price must be lower than the price. If it is the same or higher, the product still saves but the sale does not run.
- The sale end must be after the sale start.
- Dates and times are in your local time.
- Sale pricing is for one product at a time. For a discount code or an offer across many products, use Discounts instead.
Set a compare-at price
The compare-at price is the old price. Customers see it crossed out next to the price they pay, so the saving is clear.
- From your Orbit dashboard, go to Products.
- Click the product you want to put on sale.
- Click Pricing in the menu on the left. The page scrolls to the Pricing section.
- Under Compare-at price, enter the old price. Set it higher than the price and the sale price.
- Click Save on the Unsaved changes bar at the bottom right.
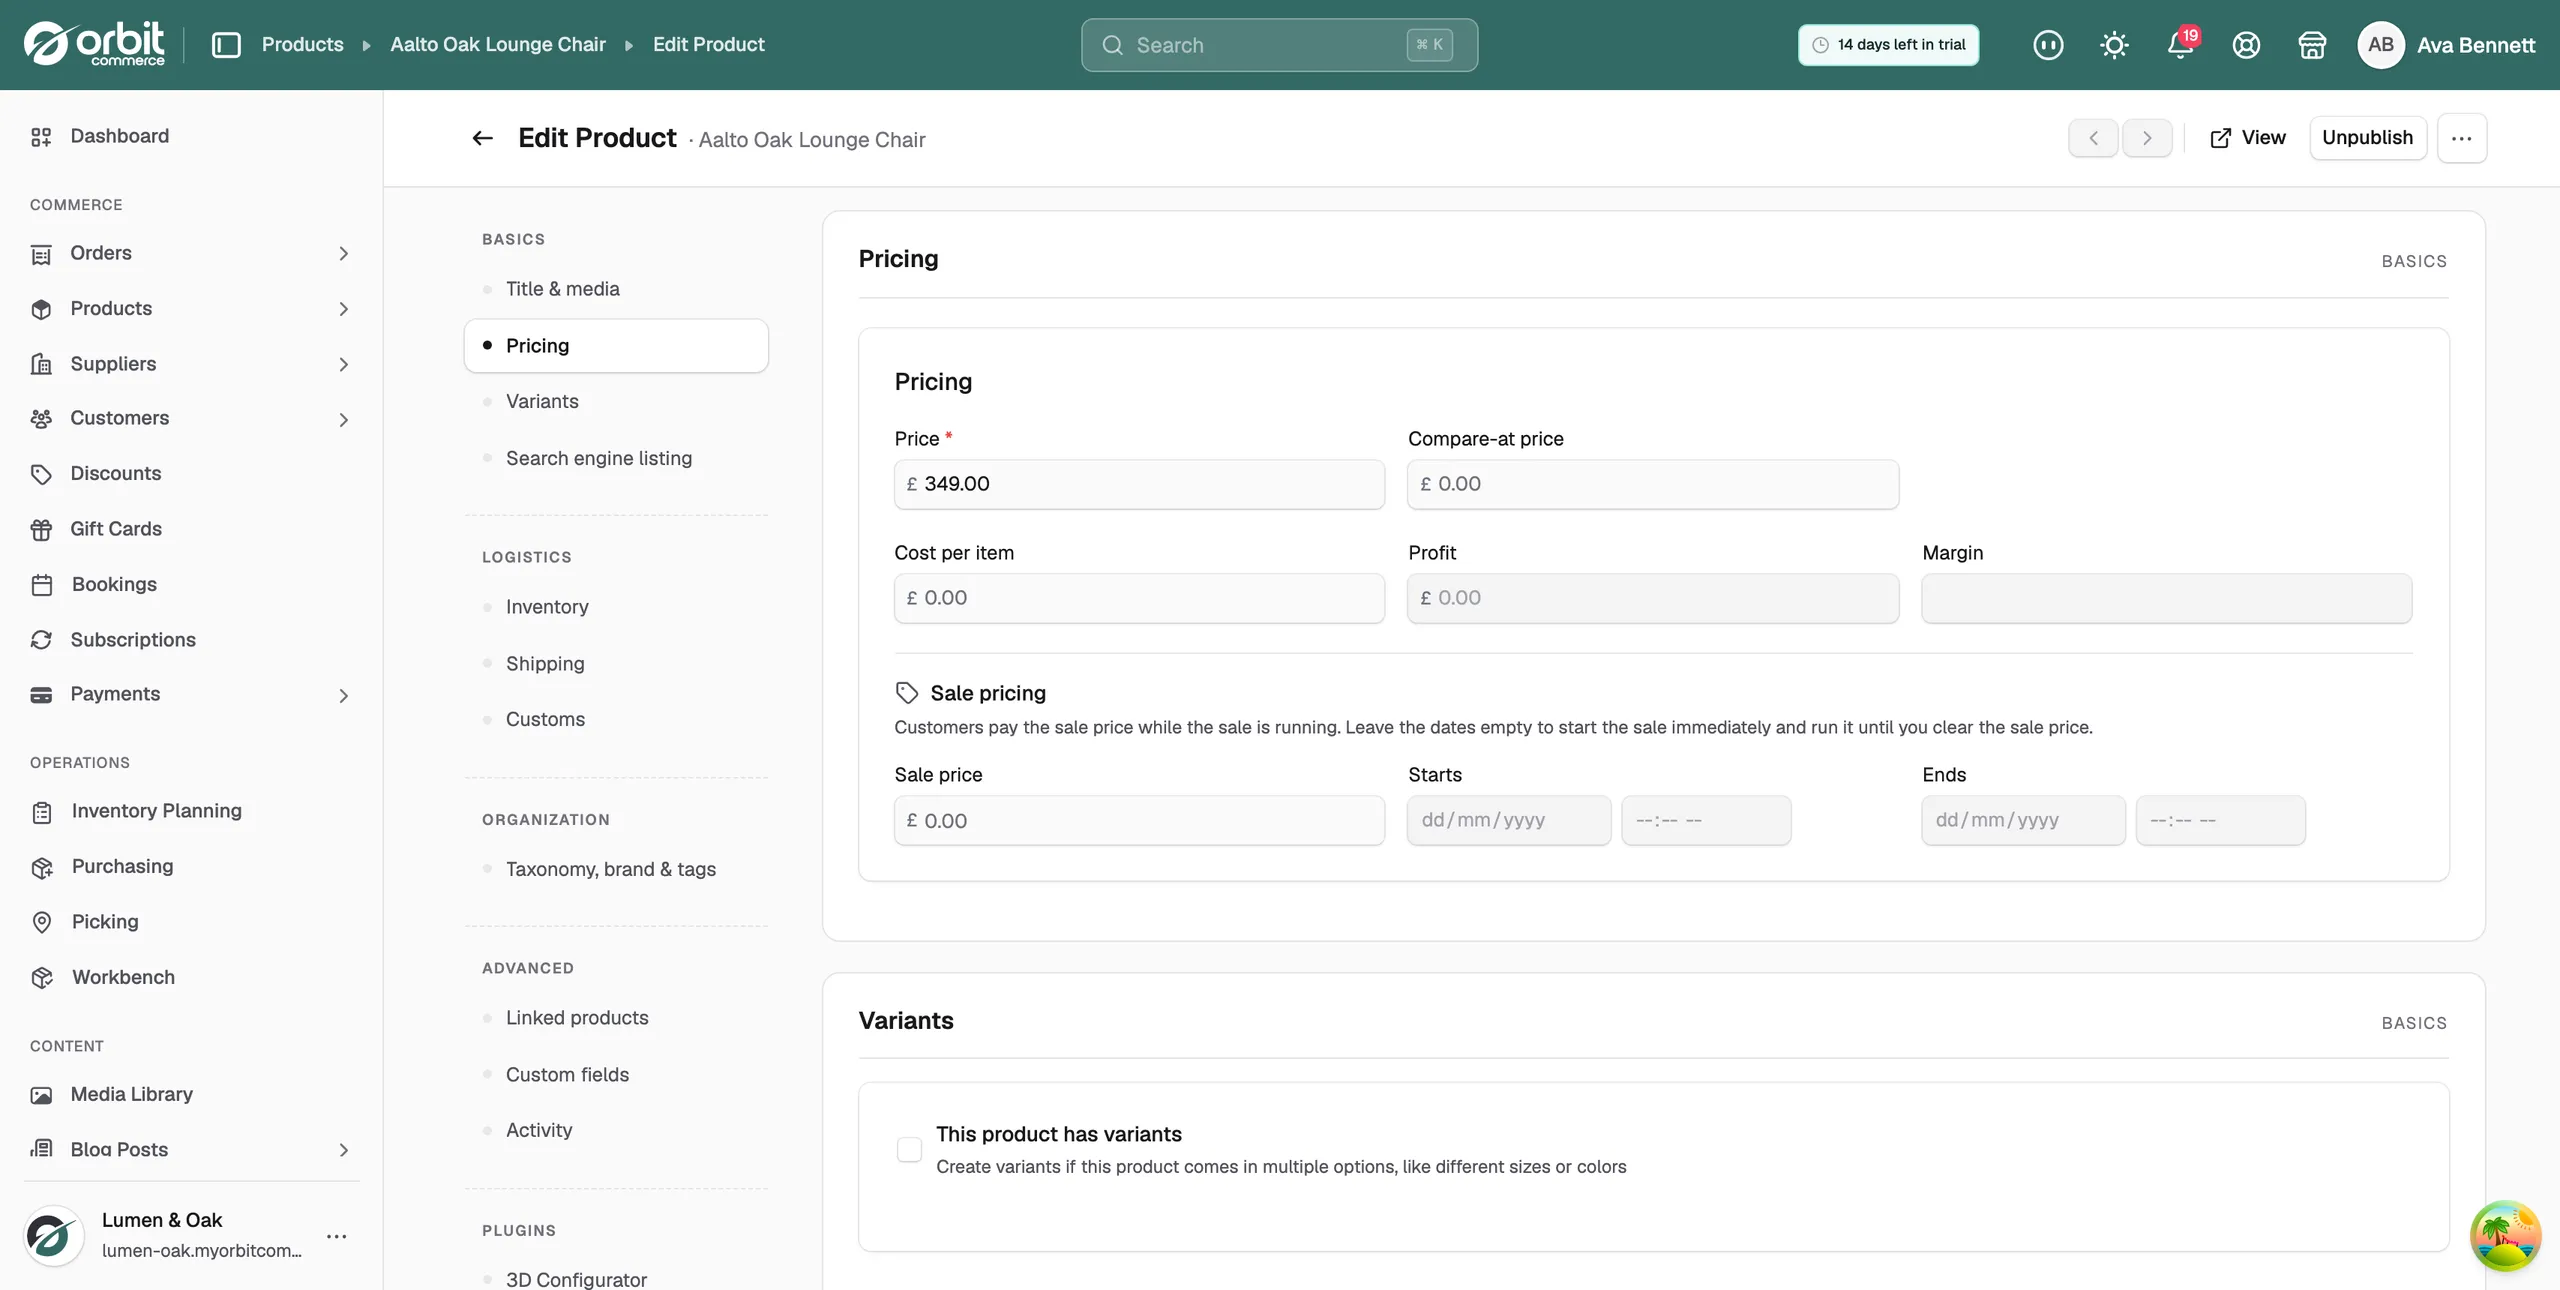
The compare-at price is never charged. It does not change your profit or margin.
Set a sale price
- In the Pricing section, scroll to Sale pricing.
- Under Sale price, enter what customers pay during the sale. Keep it lower than the price.
- Leave Starts and Ends empty to start the sale now.
- Click Save on the Unsaved changes bar at the bottom right. The message Product updated shows.
The sale runs until you clear the sale price. To end it, delete the value in Sale price and click Save.
Schedule a sale start and end
The Starts and Ends boxes are greyed out until you enter a sale price. Each date has a time box next to it. The time box opens once you pick its date.
- Under Sale price, enter the sale price. The two date boxes open.
- Under Starts, pick the date the sale begins. The time box next to it opens.
- Enter the start time, for example 09:00.
- Under Ends, pick the date the sale finishes, then enter the end time.
- Click Save on the Unsaved changes bar at the bottom right.
The sale switches itself on at the start time and off at the end time. You do not need to come back and change anything.
Tip: Set the end a little after your last email or post goes out. A sale that ends at 09:00 on Monday catches weekend shoppers who open the email late.
What the customer sees
- Before the sale starts: the normal price.
- While the sale runs: the sale price. If you set a compare-at price, it shows crossed out beside the sale price.
- After the sale ends: the normal price again, with no action from you.
- The cost per item, profit and margin are never shown to customers.
Related guides
Was this helpful?
0 people found this helpful