Setting up the 3D Product Configurator
Install the 3D Product Configurator, upload a GLB model to a product, switch on the viewer, add the element to your product page and set the AR and lighting defaults.
The 3D Product Configurator lets customers spin, zoom and set up a product in 3D on your storefront. On supported phones and tablets they can also view it in their own room with augmented reality (AR). It suits furniture, lighting and anything customers want to see from every angle before they buy.
Considerations
- The plugin is a paid subscription. The plugin page shows whether you are on a trial or an active subscription.
- You set up 3D on each product. There is nothing to manage on the plugin page beyond your subscription and the viewer defaults.
- Each product uses one GLB model. Your variant options (colour, finish, size) map onto that one model.
- Keep GLB files small. Compressed models load faster and work better on mobile connections.
Install the plugin
- From your Orbit dashboard, go to Plugins.
- Find 3D Product Configurator and click Install.
- Click Install Plugin to confirm.
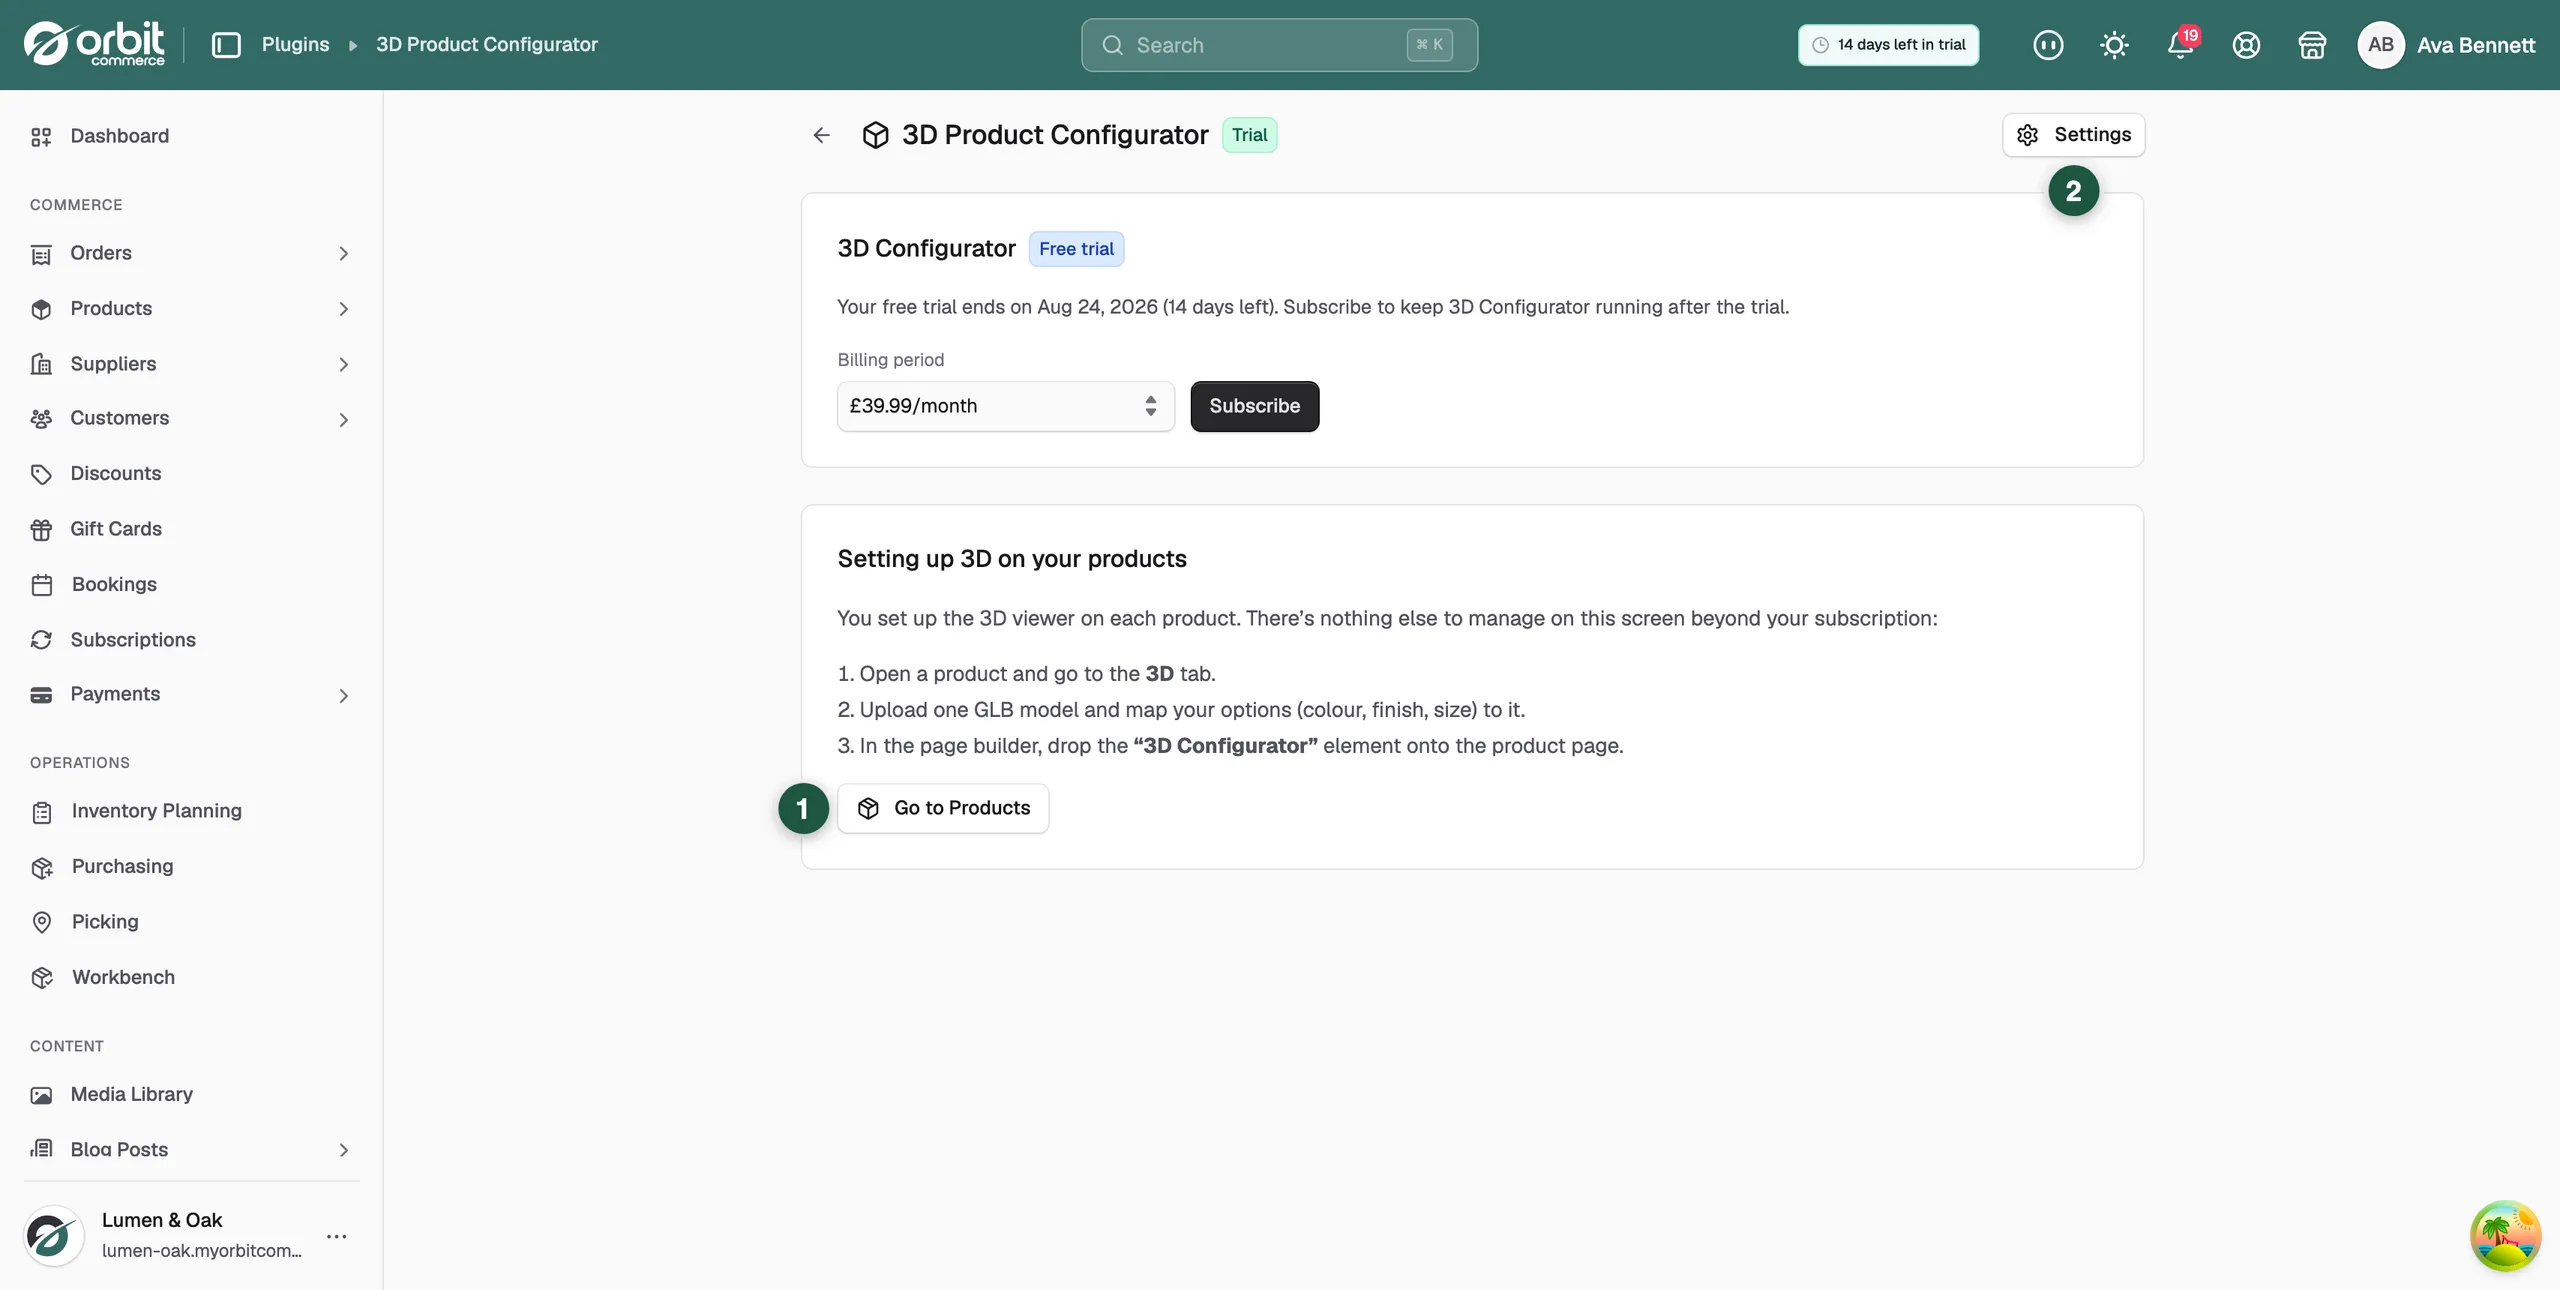
- Under My Plugins, open 3D Product Configurator. The plugin page shows your subscription and the three setup steps. Click Go to Products to jump to your catalogue.
For more on installing, trials and billing, see Installing and managing plugins.
Upload the 3D model
- From your Orbit dashboard, go to Products and open the product.
- In the Media section, add your .glb file. The drop area accepts images, videos and 3D models.
- Click Save.
Note: The AR button on iPhone and iPad needs a USDZ copy of the model. You can add a USDZ File and a Poster Image when you upload the model. The poster shows while the model loads. Without a USDZ file, the AR button does not appear on iOS.
Switch on the configurator for the product
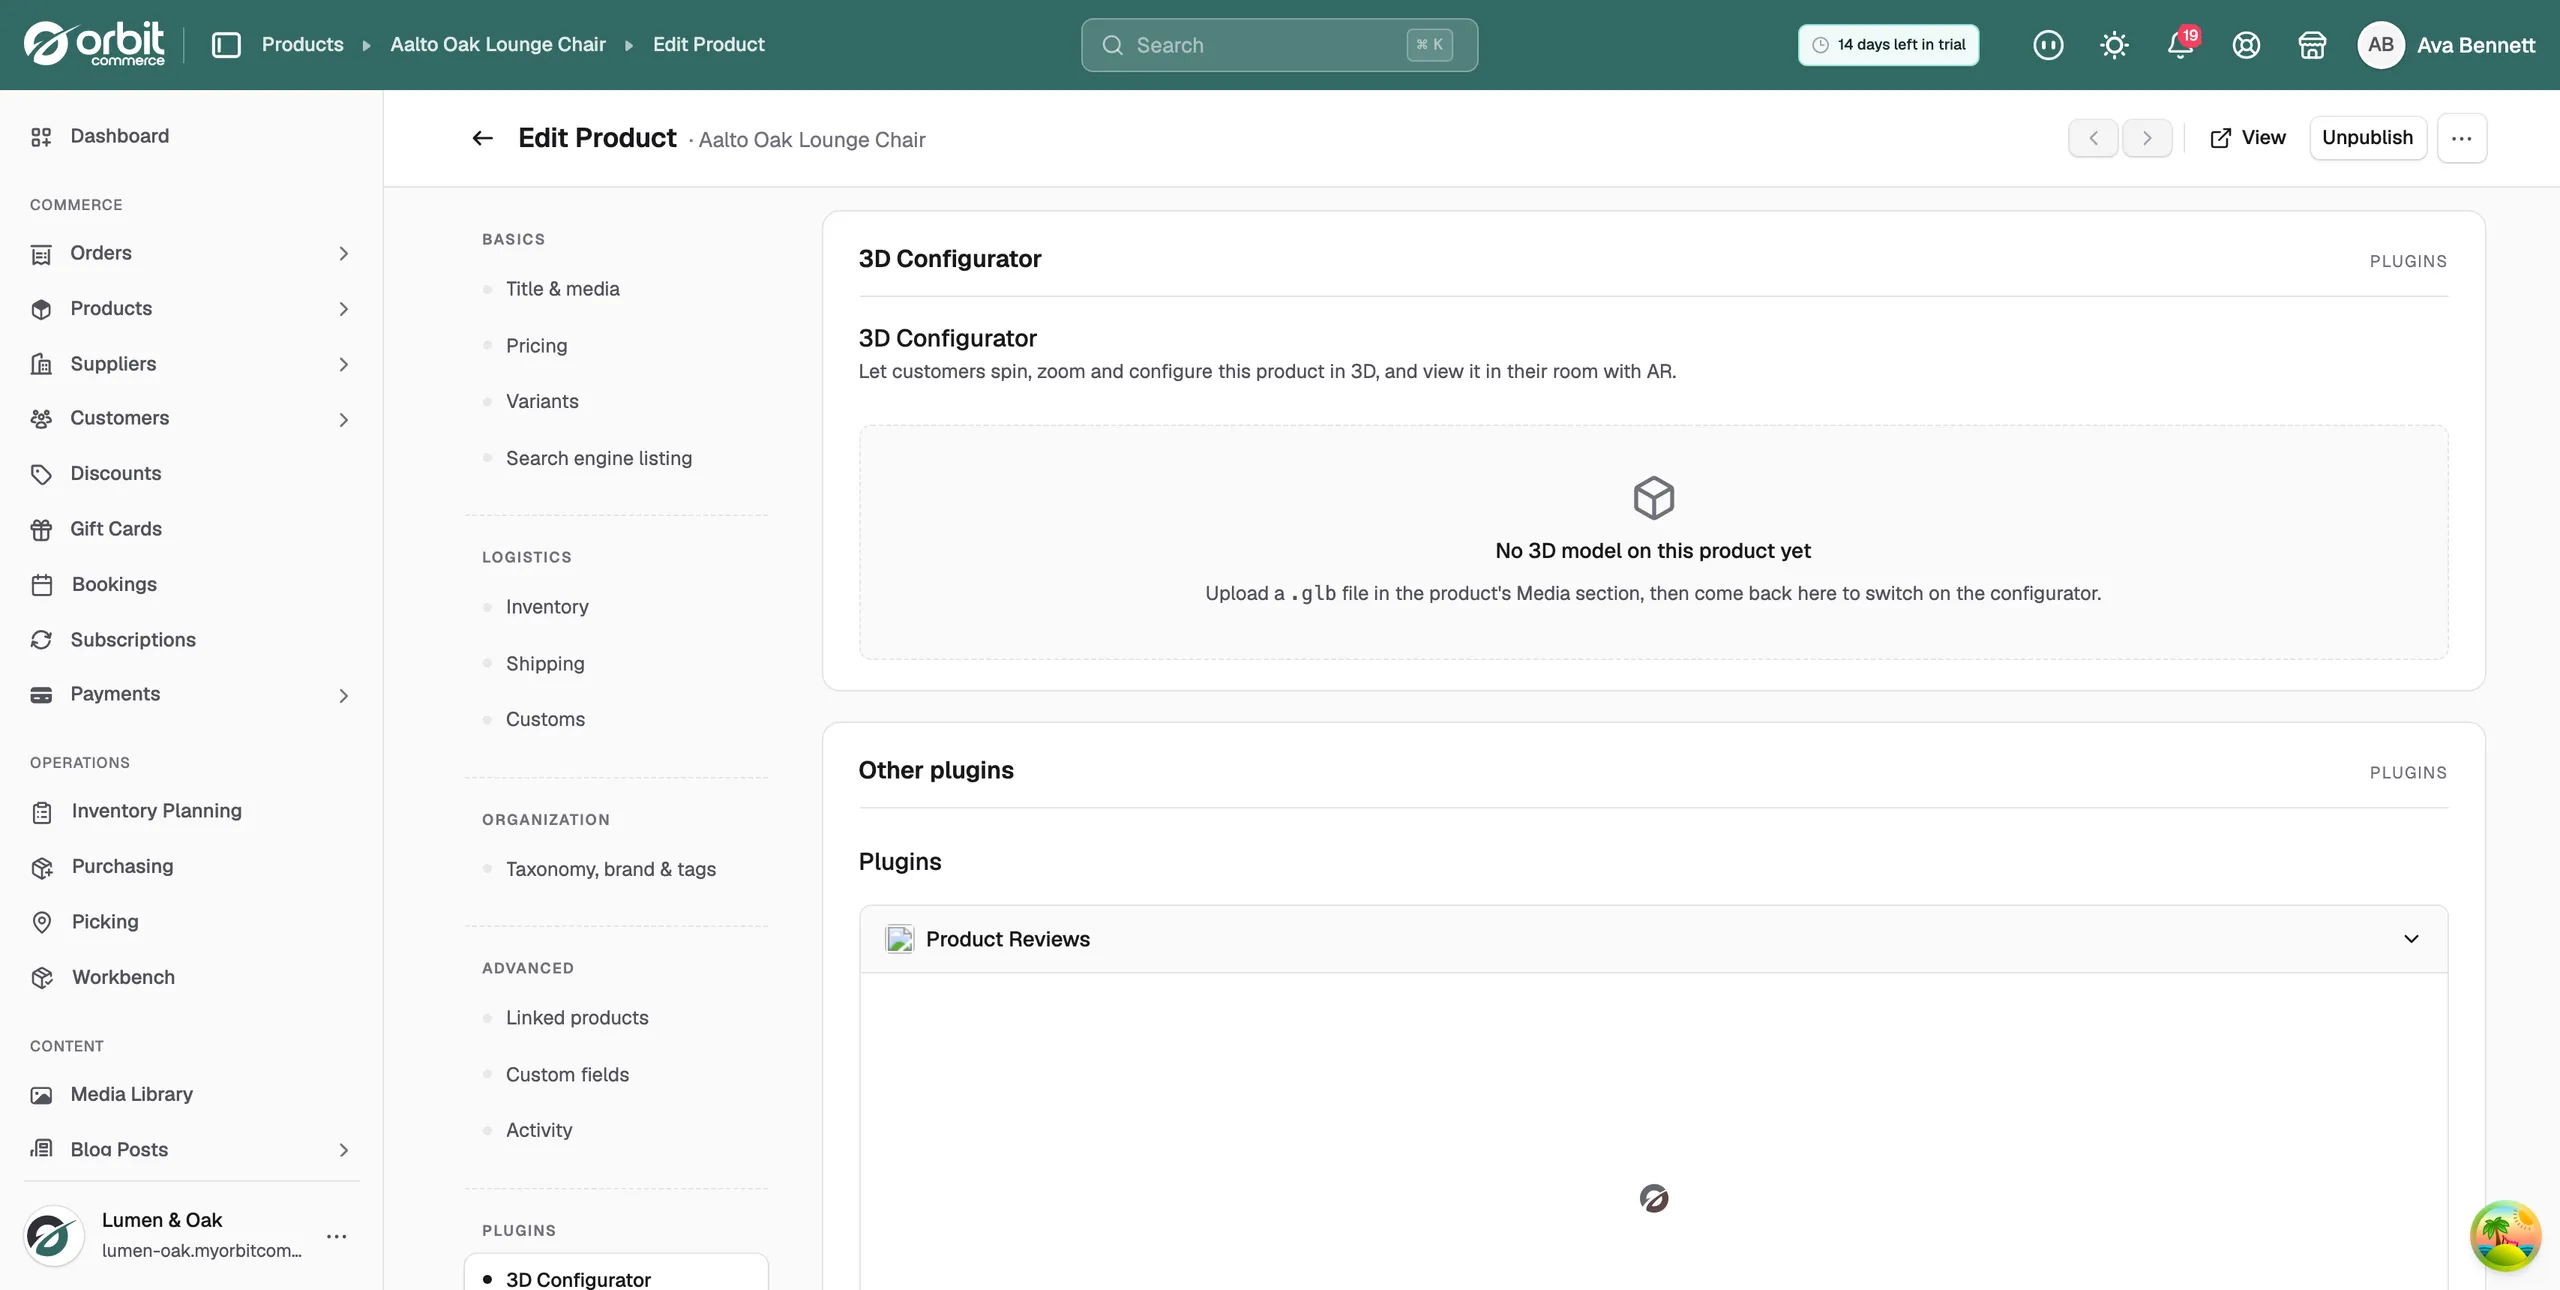
- In the product editor, under Plugins, click 3D Configurator. If the product has no model yet, the section says No 3D model on this product yet. Go back to Media and add one first.
- Turn on Enable 3D configurator. When it is on, the 3D Configurator element shows this model on your storefront.
- Under Master model, pick the GLB the configurator should display.
- Under Viewer, set Auto-rotate when idle, the Augmented reality button, Lighting and Background colour for this product.
- Under Option overrides, check how your options map to the model. Finishes map on their own when an option value name matches a finish in your GLB. The section lists the finishes it found. Use Show finish… or Recolour… only when a value does not match.
- Click Save.
Add the element to the product page
- Open your product page template in the page builder.
- Drag the 3D Configurator element onto the page.
- Save the template. Products with the configurator switched on now show the 3D viewer in that spot.
Set the viewer defaults
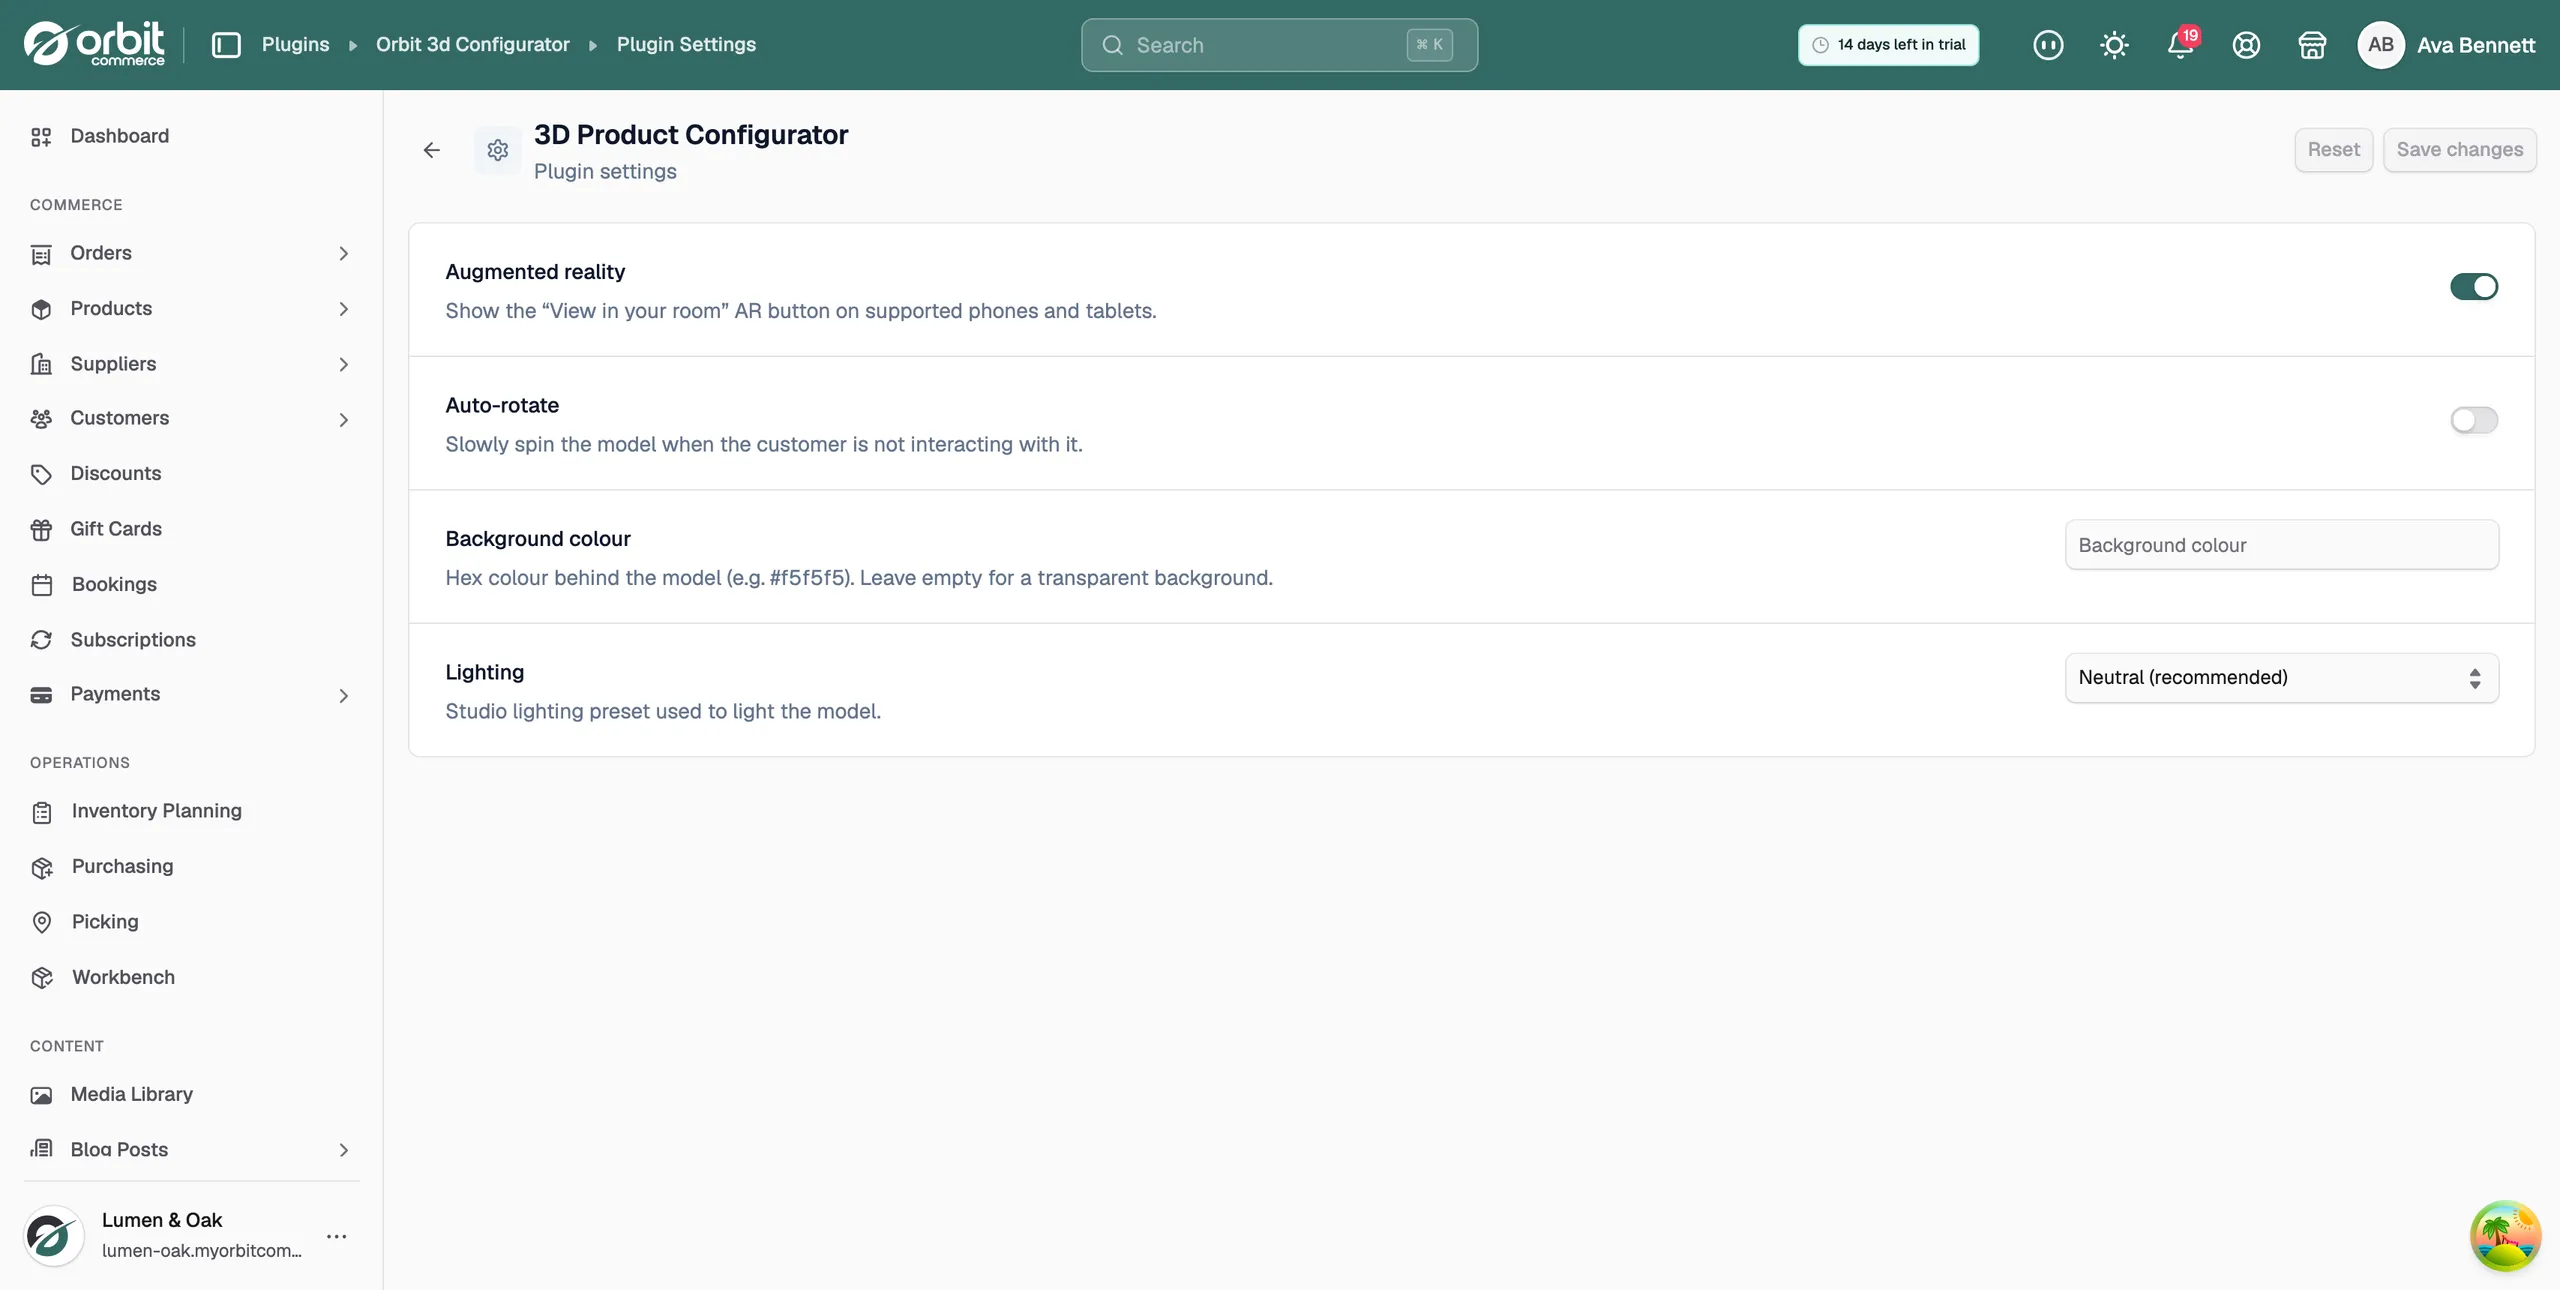
The plugin settings control how the viewer looks and behaves across your store.
- From your Orbit dashboard, go to Plugins and open 3D Product Configurator.
- Click Settings.
- Change the settings you need:
- Augmented reality: show the "View in your room" AR button on supported phones and tablets.
- Auto-rotate: slowly spin the model when the customer is not touching it.
- Lighting: the studio lighting preset. Neutral is recommended for true colours. Legacy is the older look.
- Background colour: a hex colour behind the model, such as #f5f5f5. Leave it empty for a transparent background.
- Click Save changes. Reset puts every setting back to its default.
Tip: AR is the feature customers remember. Leave it on unless your models are not true to scale.
Related guides
Was this helpful?
0 people found this helpful