Setting up Orbit Payments
Connect Orbit Payments to take cards, Apple Pay, Google Pay and Klarna, choose which methods customers see, and set up offline methods such as bank transfer.
Orbit Payments is the built-in way to take card payments in your shop. It is provided by Stripe. Once your account is connected, customers can pay by card, Apple Pay, Google Pay and Klarna, and the money is paid into your bank account. You can also set up offline methods such as bank transfer and cash on delivery.
Considerations
- Save your business address, including the country, under Settings › Store Settings › Store Information first. Until you do, an Add your business address first message appears and Connect Payment Account is blocked.
- Your payment account is registered in that country when it is created. It cannot be moved to another country later, so check the address before you connect.
- Only team members with the payment setup permission can connect or change payment processing. If you do not see the option, ask the store owner to set it up, or to give you access from the Team page in Settings.
- Have photo ID and your bank details to hand. Most checks finish in a few minutes, but they may be asked for.
Open Payment Settings
- From your Orbit dashboard, go to Settings.
- Open Store Settings.
- Click the Payment Settings tab. Your online and offline payment options are on this one tab.
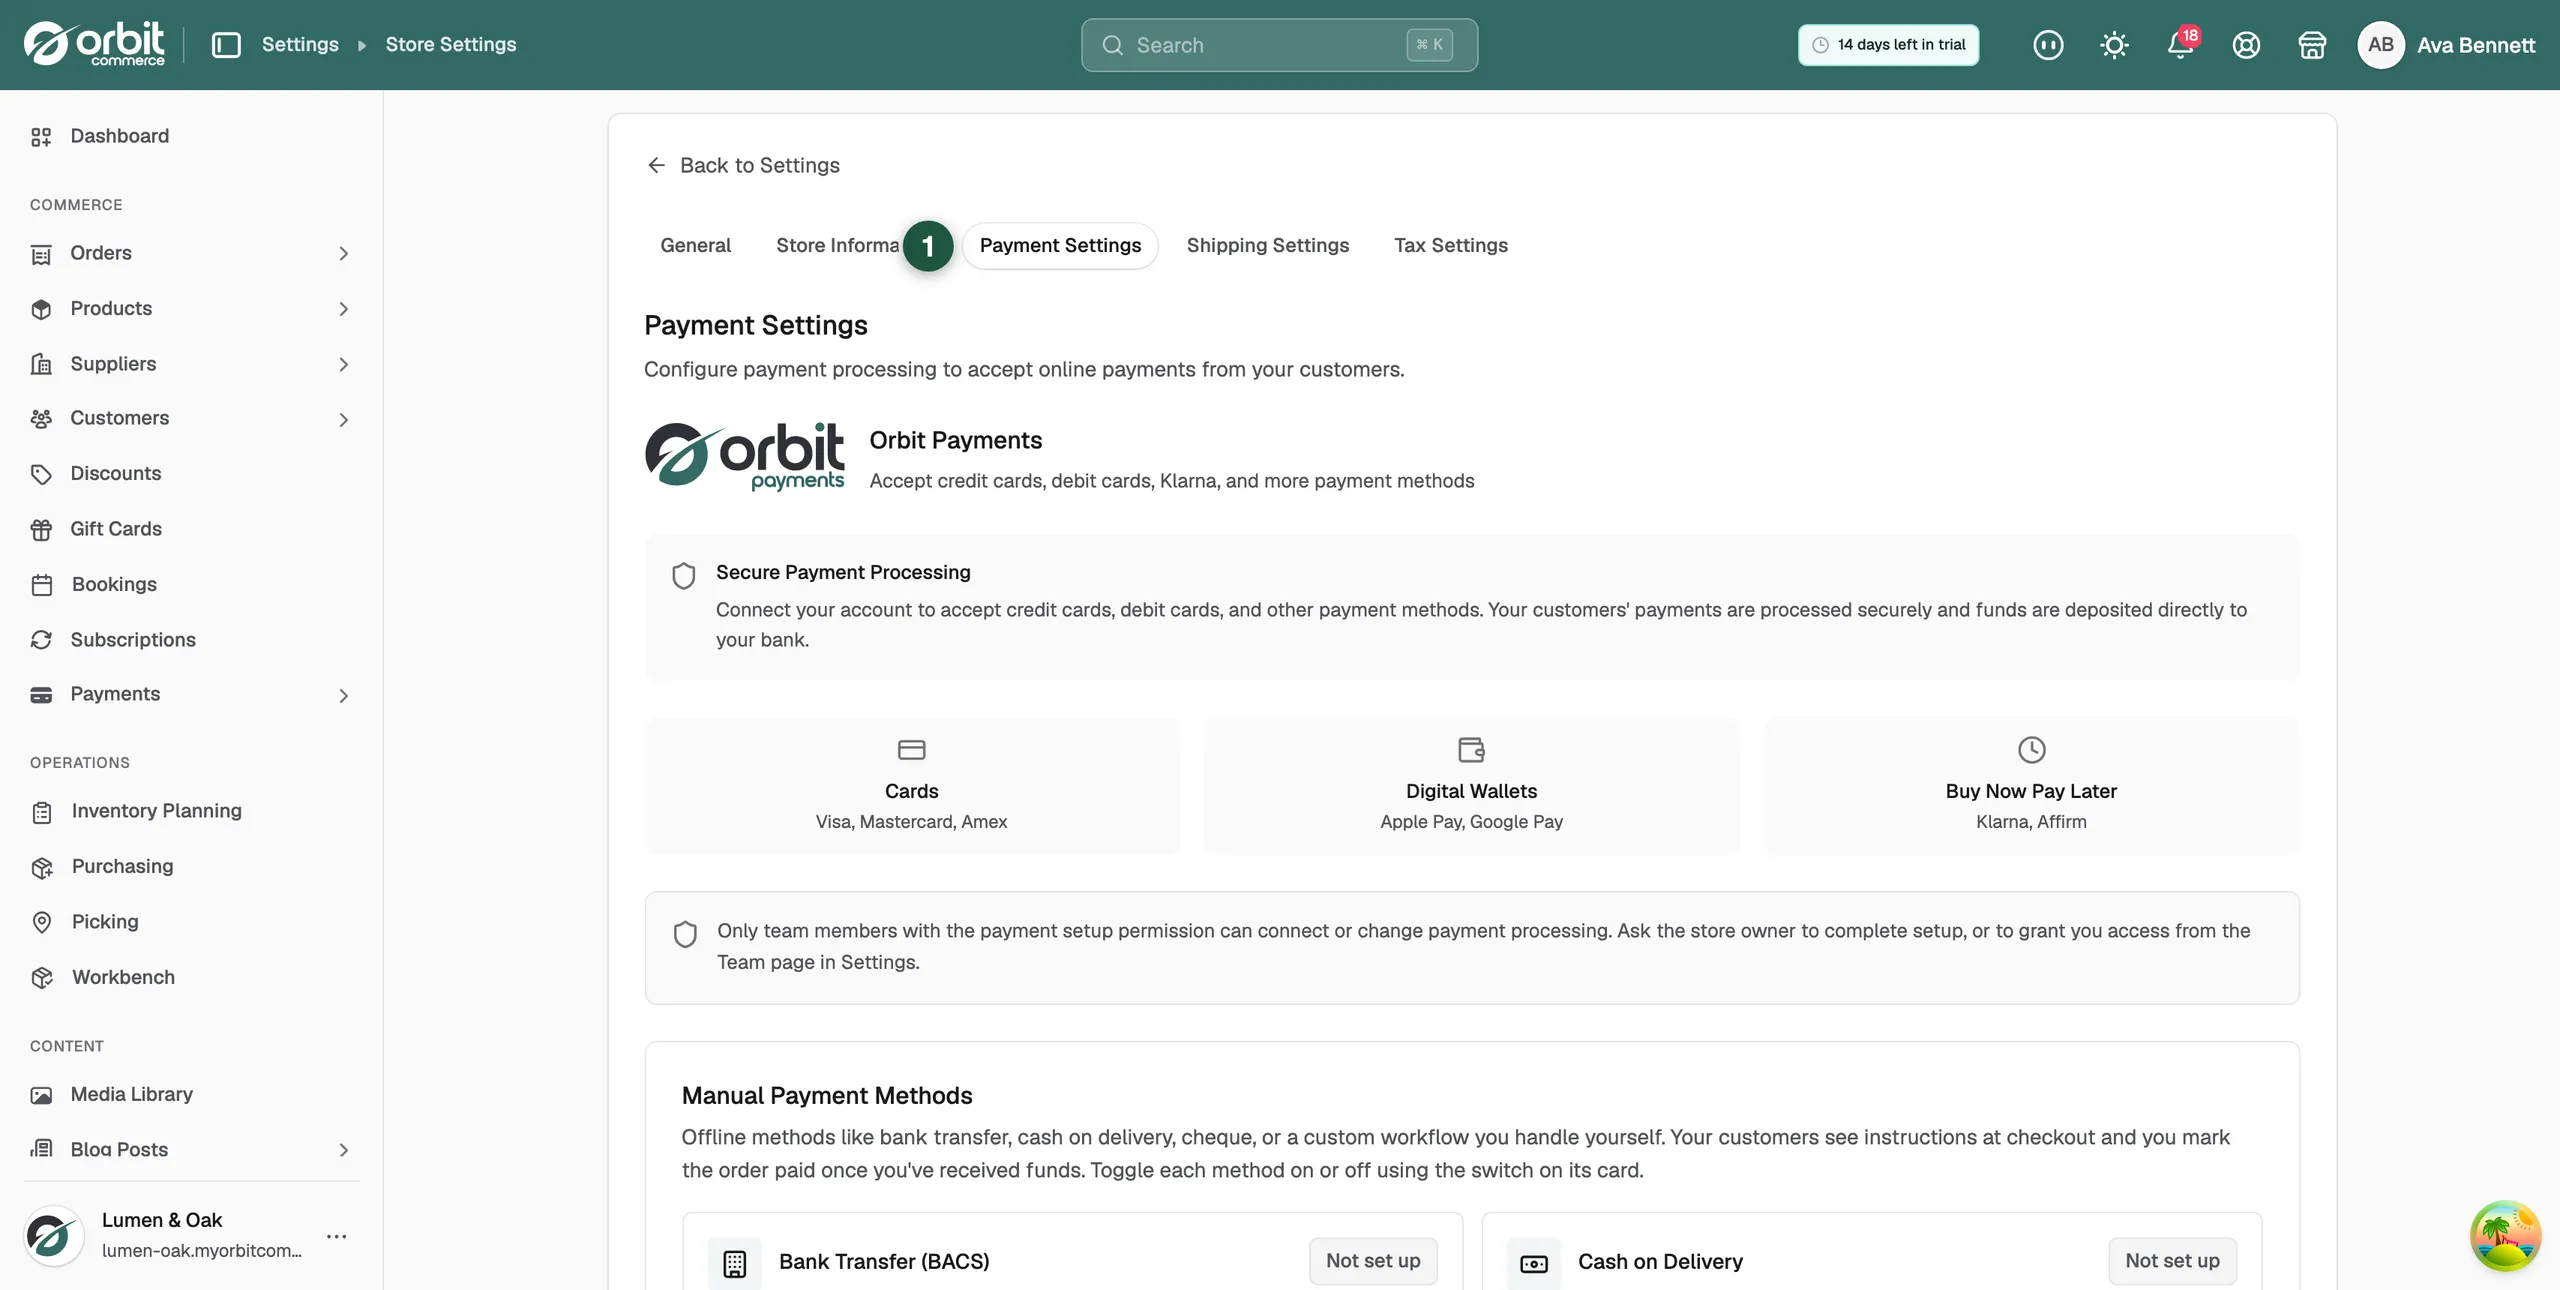
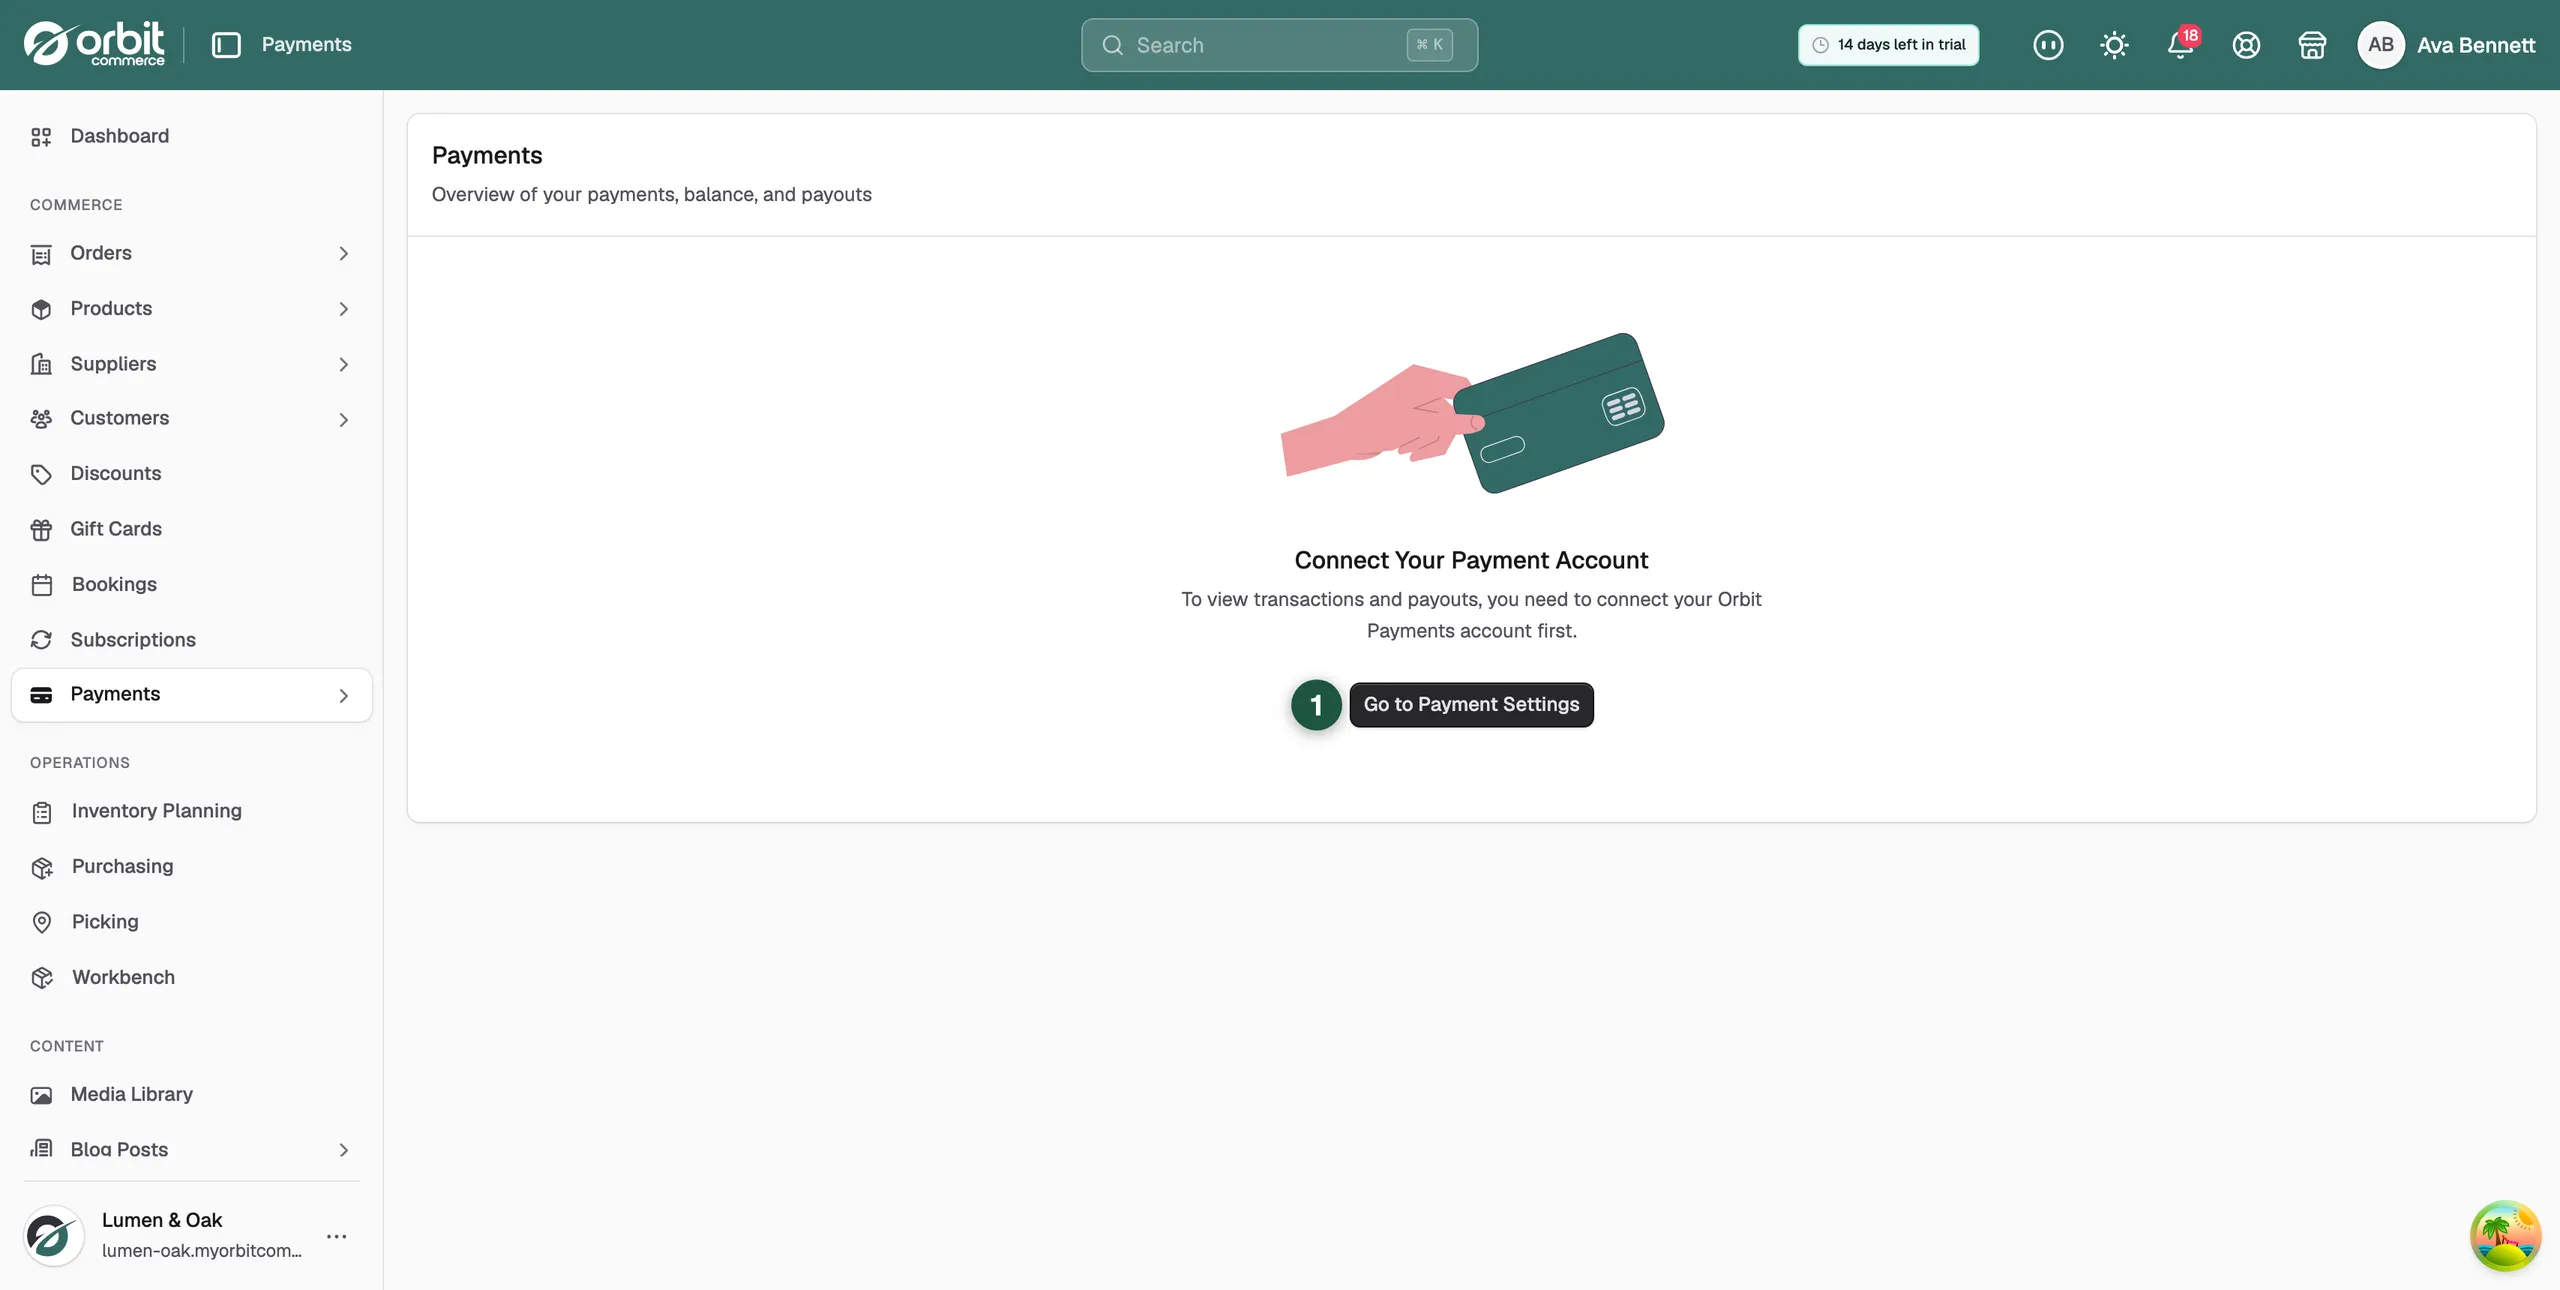
Tip: You can also get there from Payments. Before an account is connected, that page shows Connect Your Payment Account and a Go to Payment Settings button.
Connect Orbit Payments
- On the Payment Settings tab, find the Orbit Payments card. Before you connect it reads Secure Payment Processing.
- Click Connect Payment Account. The card is replaced by a secure form from Stripe.
- Enter your business details, the person responsible for the account, and the bank account you want your payouts sent to. Your details are held by Stripe, not by Orbit.
- When the checks pass, the card shows a green Connected badge and Ready to Accept Payments.
Note: There are no fields to fill in and no Save button on this card before you connect. The connection is the setting.
Finish a setup you started
Click Cancel in the Stripe form to stop partway through. Your progress is kept.
- Continue Setup: reopens the form where you left off. The card shows Complete Your Setup until you finish.
- Check Status: asks Stripe for the latest state of your account. The message Status synced successfully appears when it is up to date.
Warning: Setup Required is a green badge, the same colour as Connected. Read the words, not the colour. You cannot take card payments until the badge says Connected.
Choose which payment methods you accept
Once you are connected, a Payment methods list appears on the card. Each row has a switch and saves as soon as you change it. There is no Save button.
- Card payments: Visa, Mastercard, American Express. This row is Always on.
- Apple Pay: one-tap checkout on Apple devices.
- Google Pay: one-tap checkout on Android and Chrome.
- Klarna: buy now, pay later in 3 instalments.
Click Show all payment methods to see the rest, such as PayPal, Clearpay, Amazon Pay, Revolut Pay and Link. Methods come through your Stripe account, so there are no separate sign-ups, and new ones appear in the list on their own.
Change your business or bank details
- Scroll to the bottom of the Orbit Payments card.
- Click Manage Account. The Manage Payment Account panel opens.
- Update your business information or your bank account details.
- Click Done. The panel closes and you stay connected.
Set up a manual payment method
Manual methods are offline. Your customers see your instructions at checkout, and you mark the order paid once the money arrives. They sit under Manual Payment Methods, below Orbit Payments.
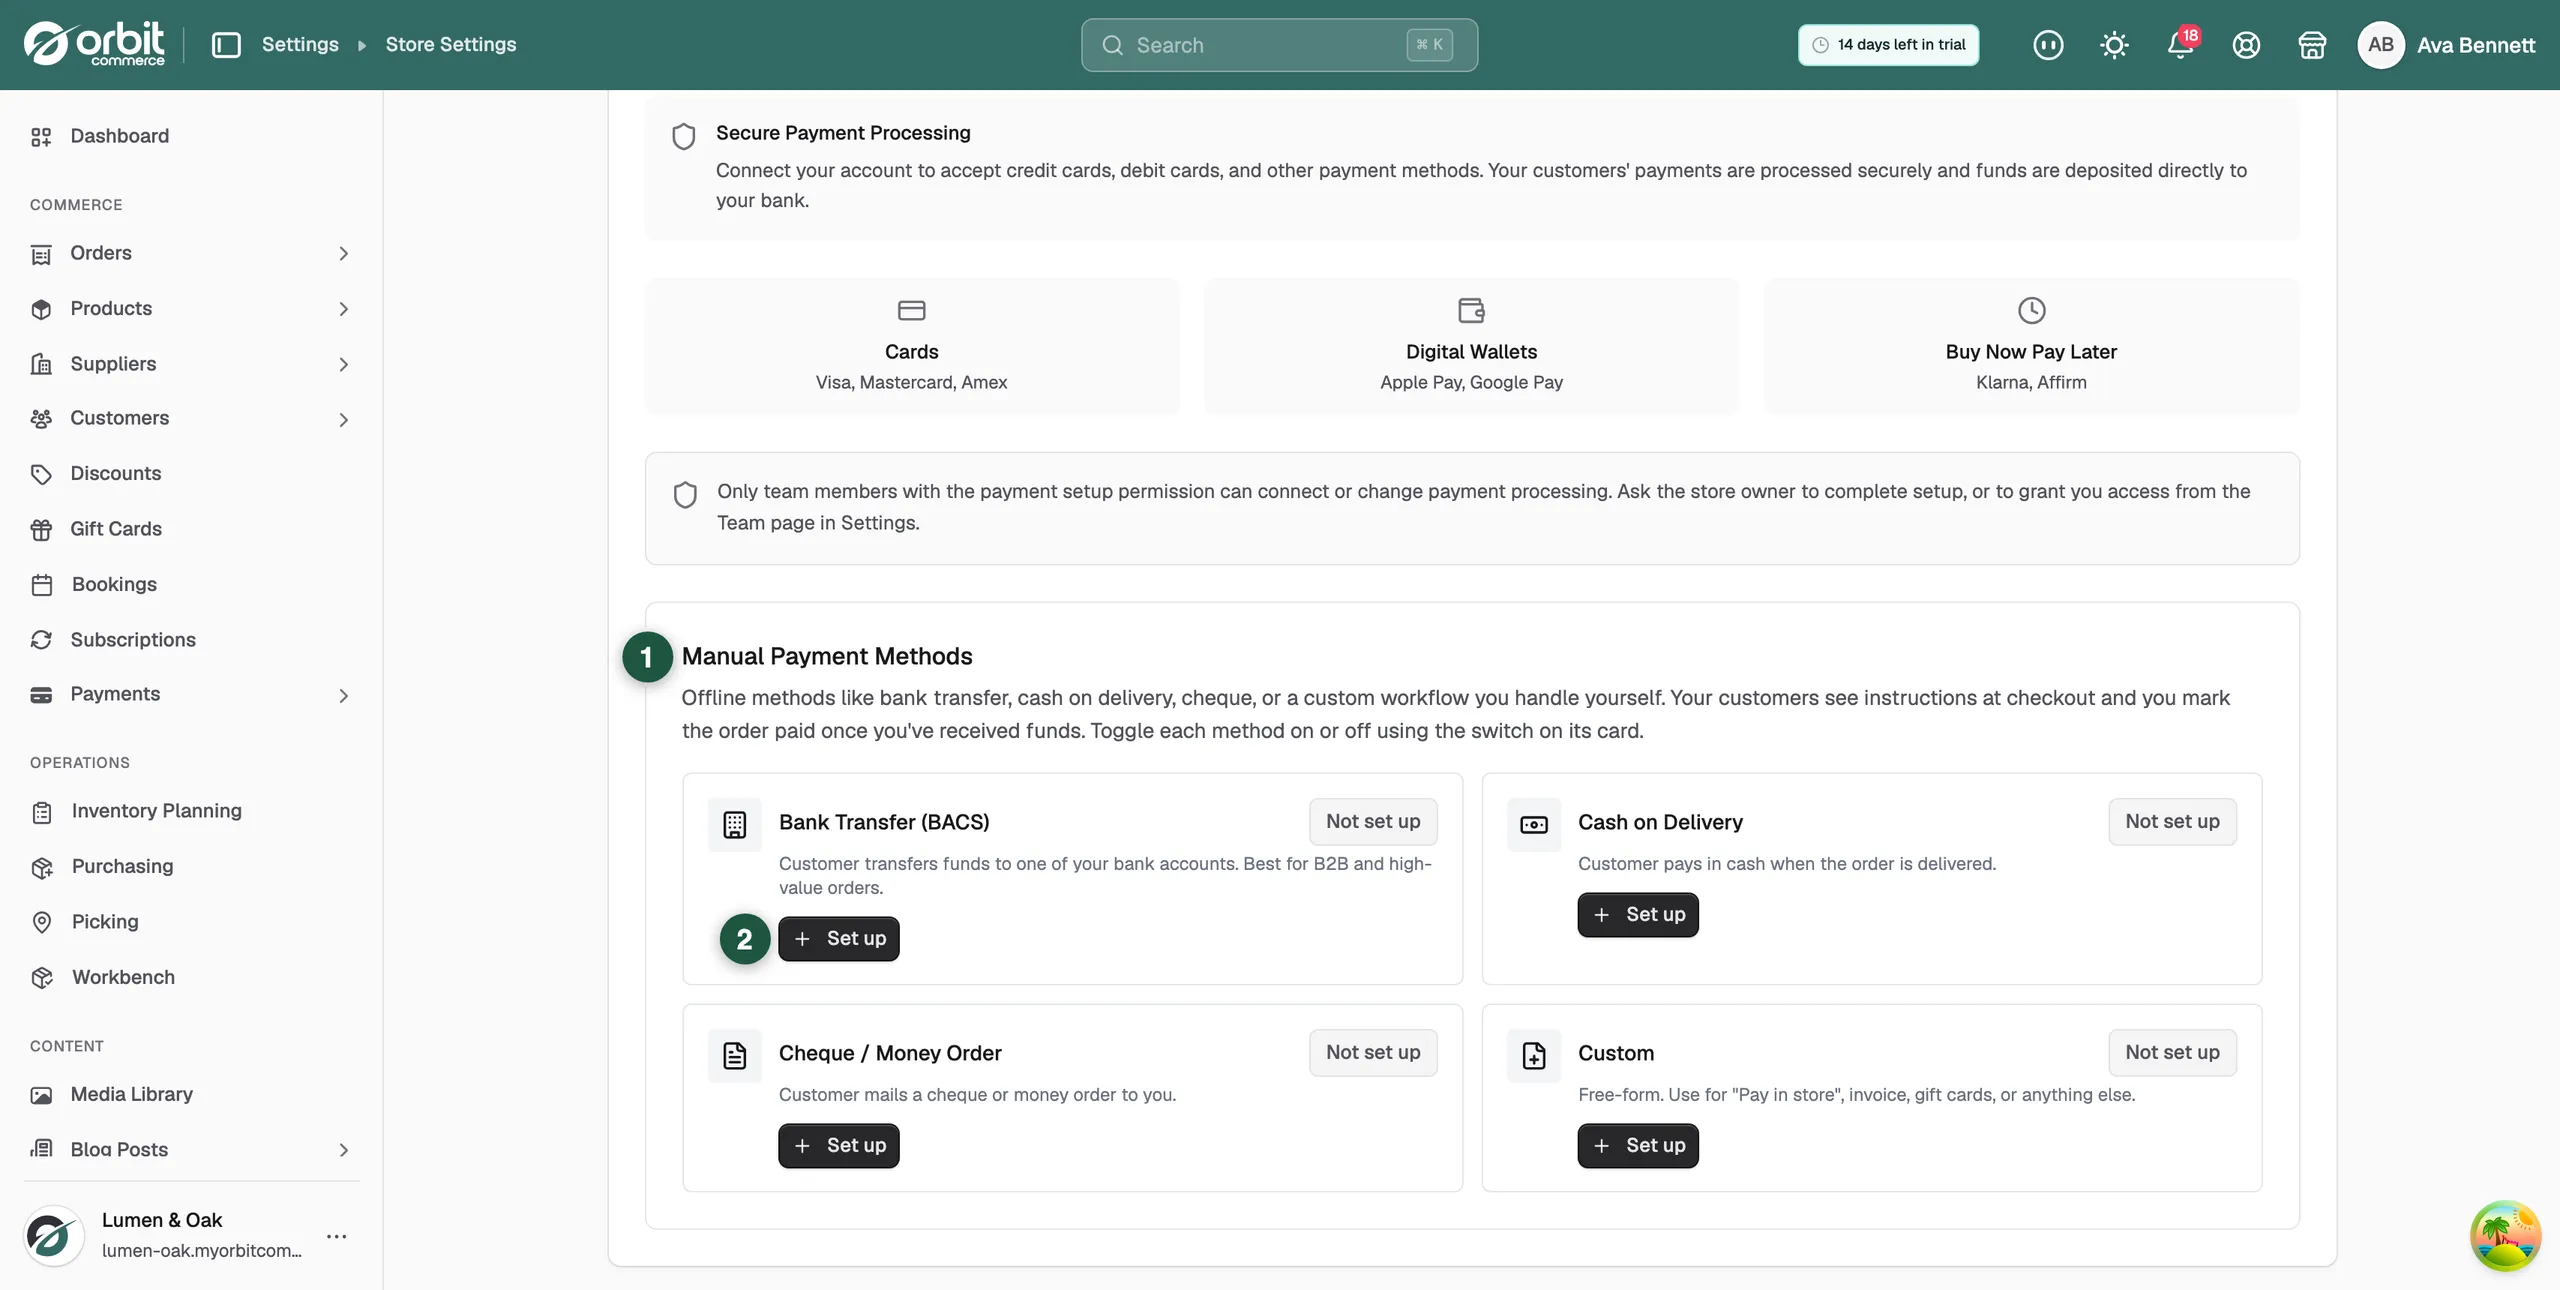
- Click Set up on the method you want. A new method shows a Not set up badge.
- Fill in the required fields for that method.
- Add a Display name or Instructions for customers if you want to, then click Save.
- The method is switched on and appears at checkout. Use the switch on its card to turn it off again at any time.
Four methods are available:
- Bank Transfer (BACS): the customer transfers funds to one of your bank accounts. Best for B2B and high-value orders. Needs at least one bank account.
- Cash on Delivery: the customer pays in cash when the order is delivered. Needs no details.
- Cheque / Money Order: the customer posts a cheque or money order to you. Needs Make payable to.
- Custom: free-form. Use it for pay in store, invoices, gift cards or anything else. Needs Instructions.
Bank transfer fields
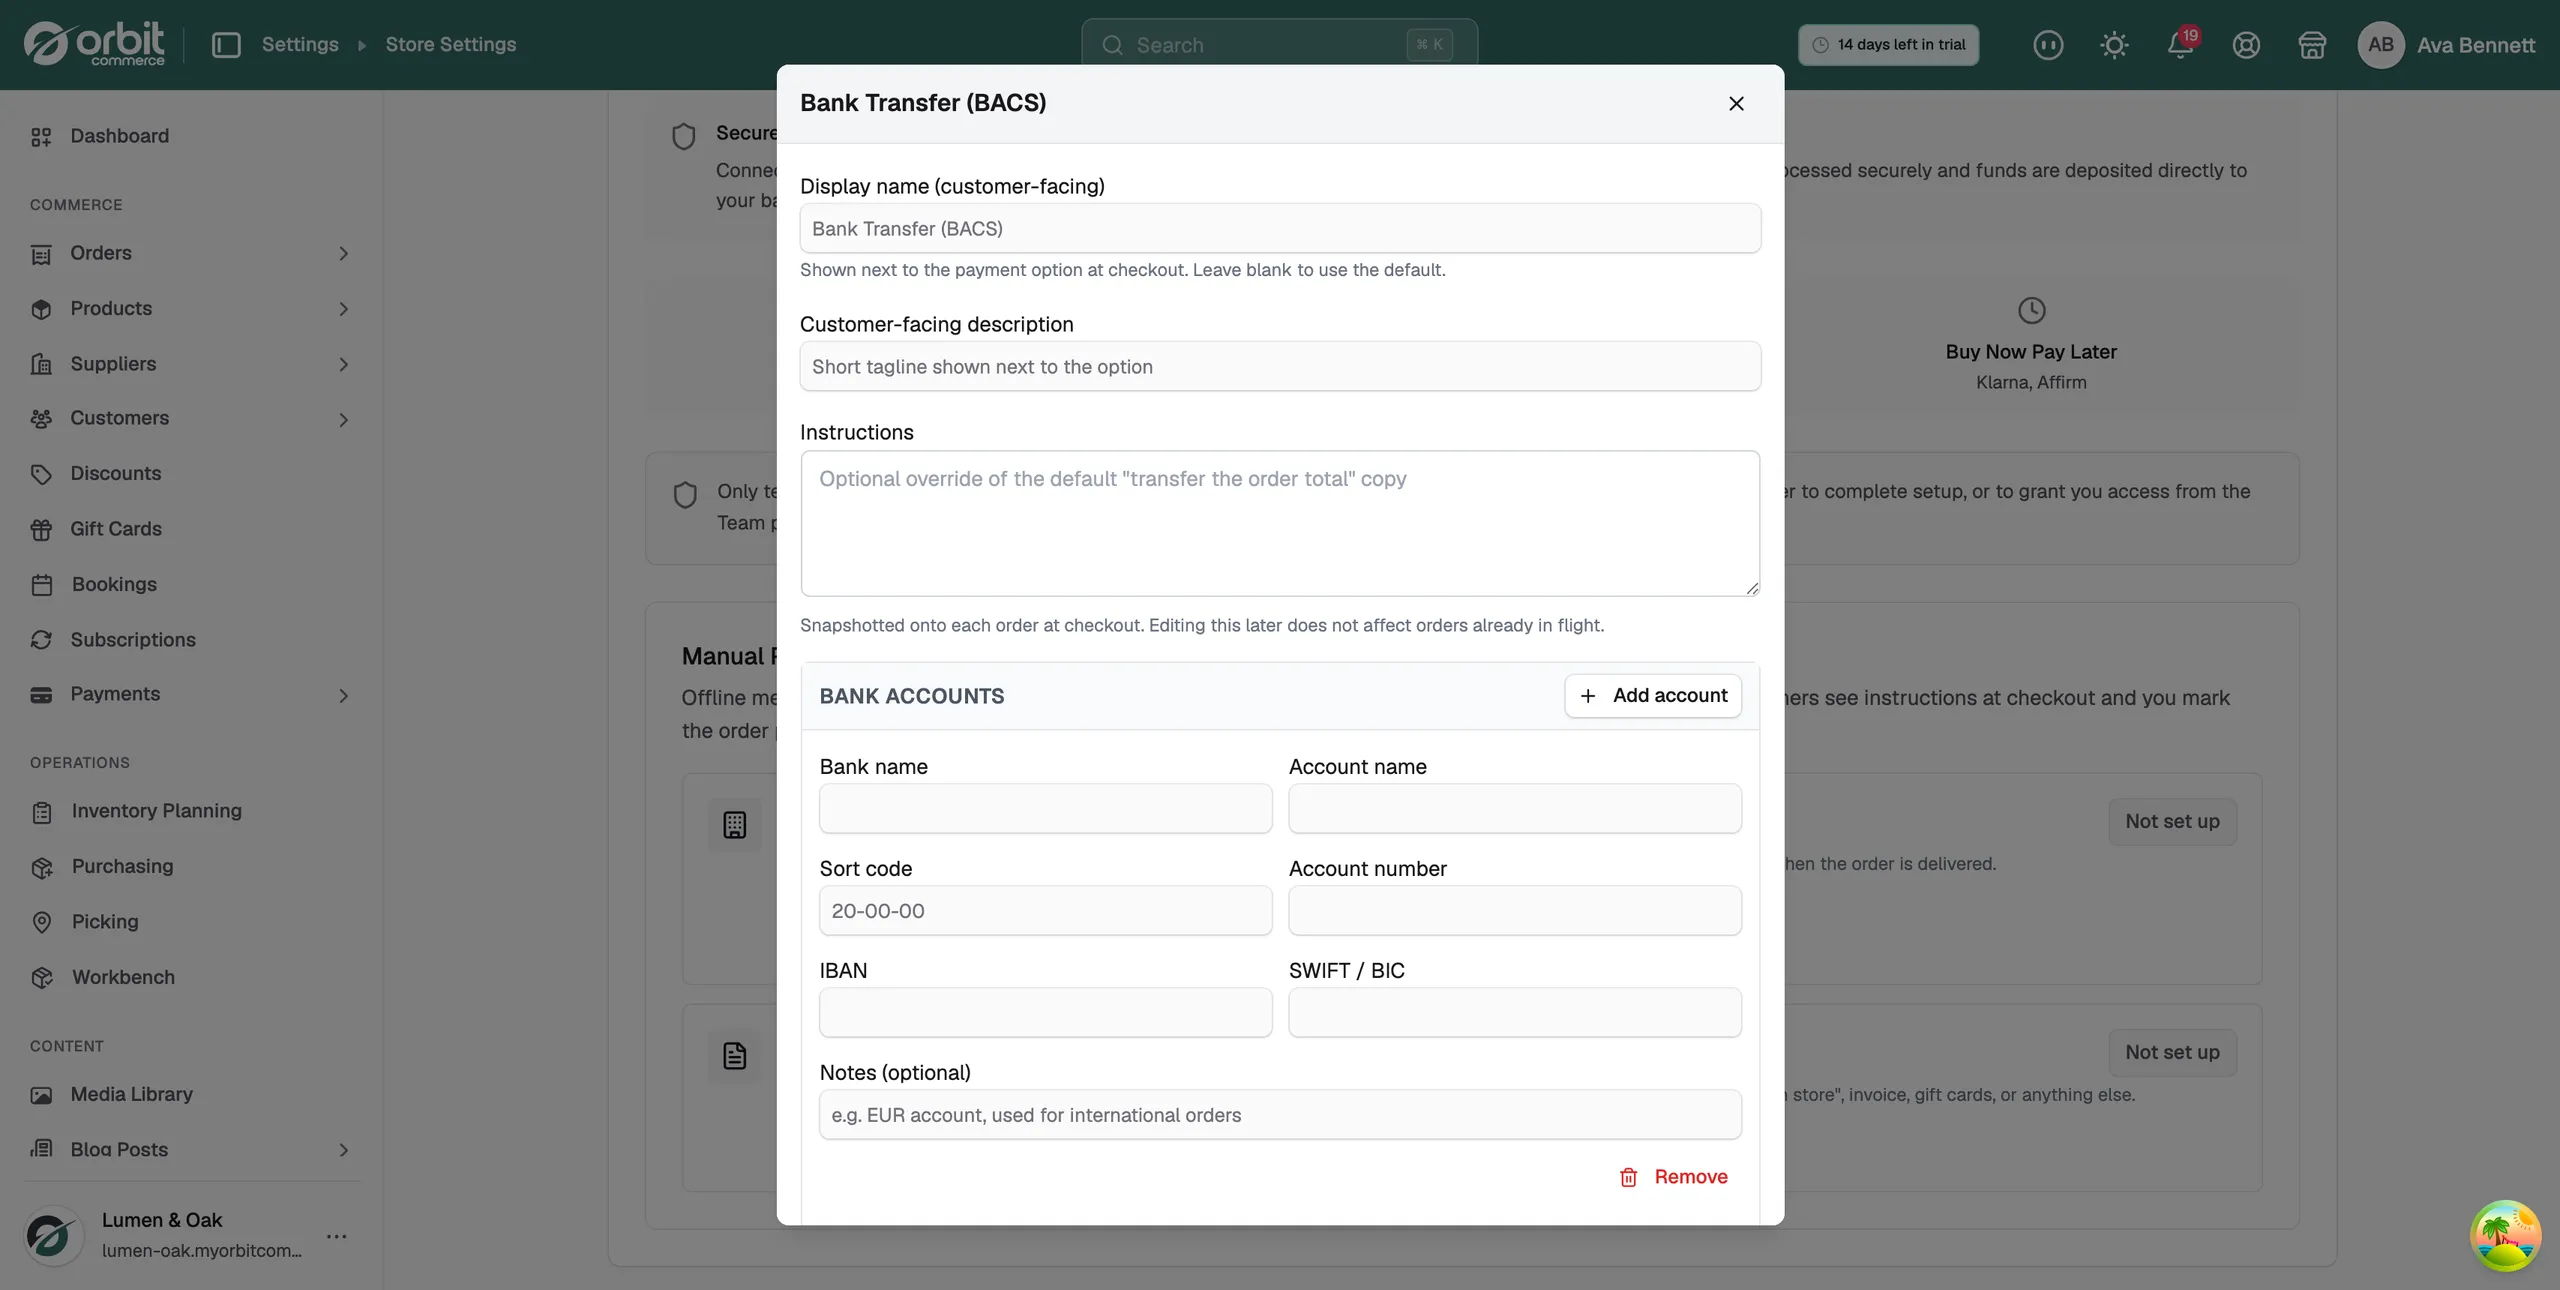
- Display name (customer-facing): what the option is called at checkout. Leave it blank to use the default.
- Customer-facing description: a short line shown next to the option.
- Instructions: replaces the default "transfer the order total" wording.
- Bank accounts: each account needs a Bank name, an Account name, and either a UK Sort code and Account number or an IBAN. Add a SWIFT / BIC for international orders.
- Add account: adds a second account, for example a euro account.
Note: Instructions are copied onto each order at checkout. Editing them later does not change orders that are already in flight.
Related guides
Was this helpful?
0 people found this helpful