Printing packing slips and pick lists
Select the orders you are working on, then print a packing slip for each box and one consolidated pick list for the shelf run.
Two documents keep a packing day moving. A packing slip goes in the box so the customer knows what is inside. A pick list tells whoever is on the shelves what to collect. You print both from the Orders page.
Considerations
- Filter the list before you tick anything. Changing a filter, searching or moving to another page clears your selection.
- The tick box in the header row selects the orders on the page you are looking at, up to 50.
- Both documents open in a new tab. Your order list and your selection stay where they are.
- Pick lists need the Enterprise plan and permission to see picking. Without both, the button is not shown.
Select the orders to print
- From your Orbit dashboard, go to Orders.
- Click the Unfulfilled tab. That leaves the orders that still have something to send.
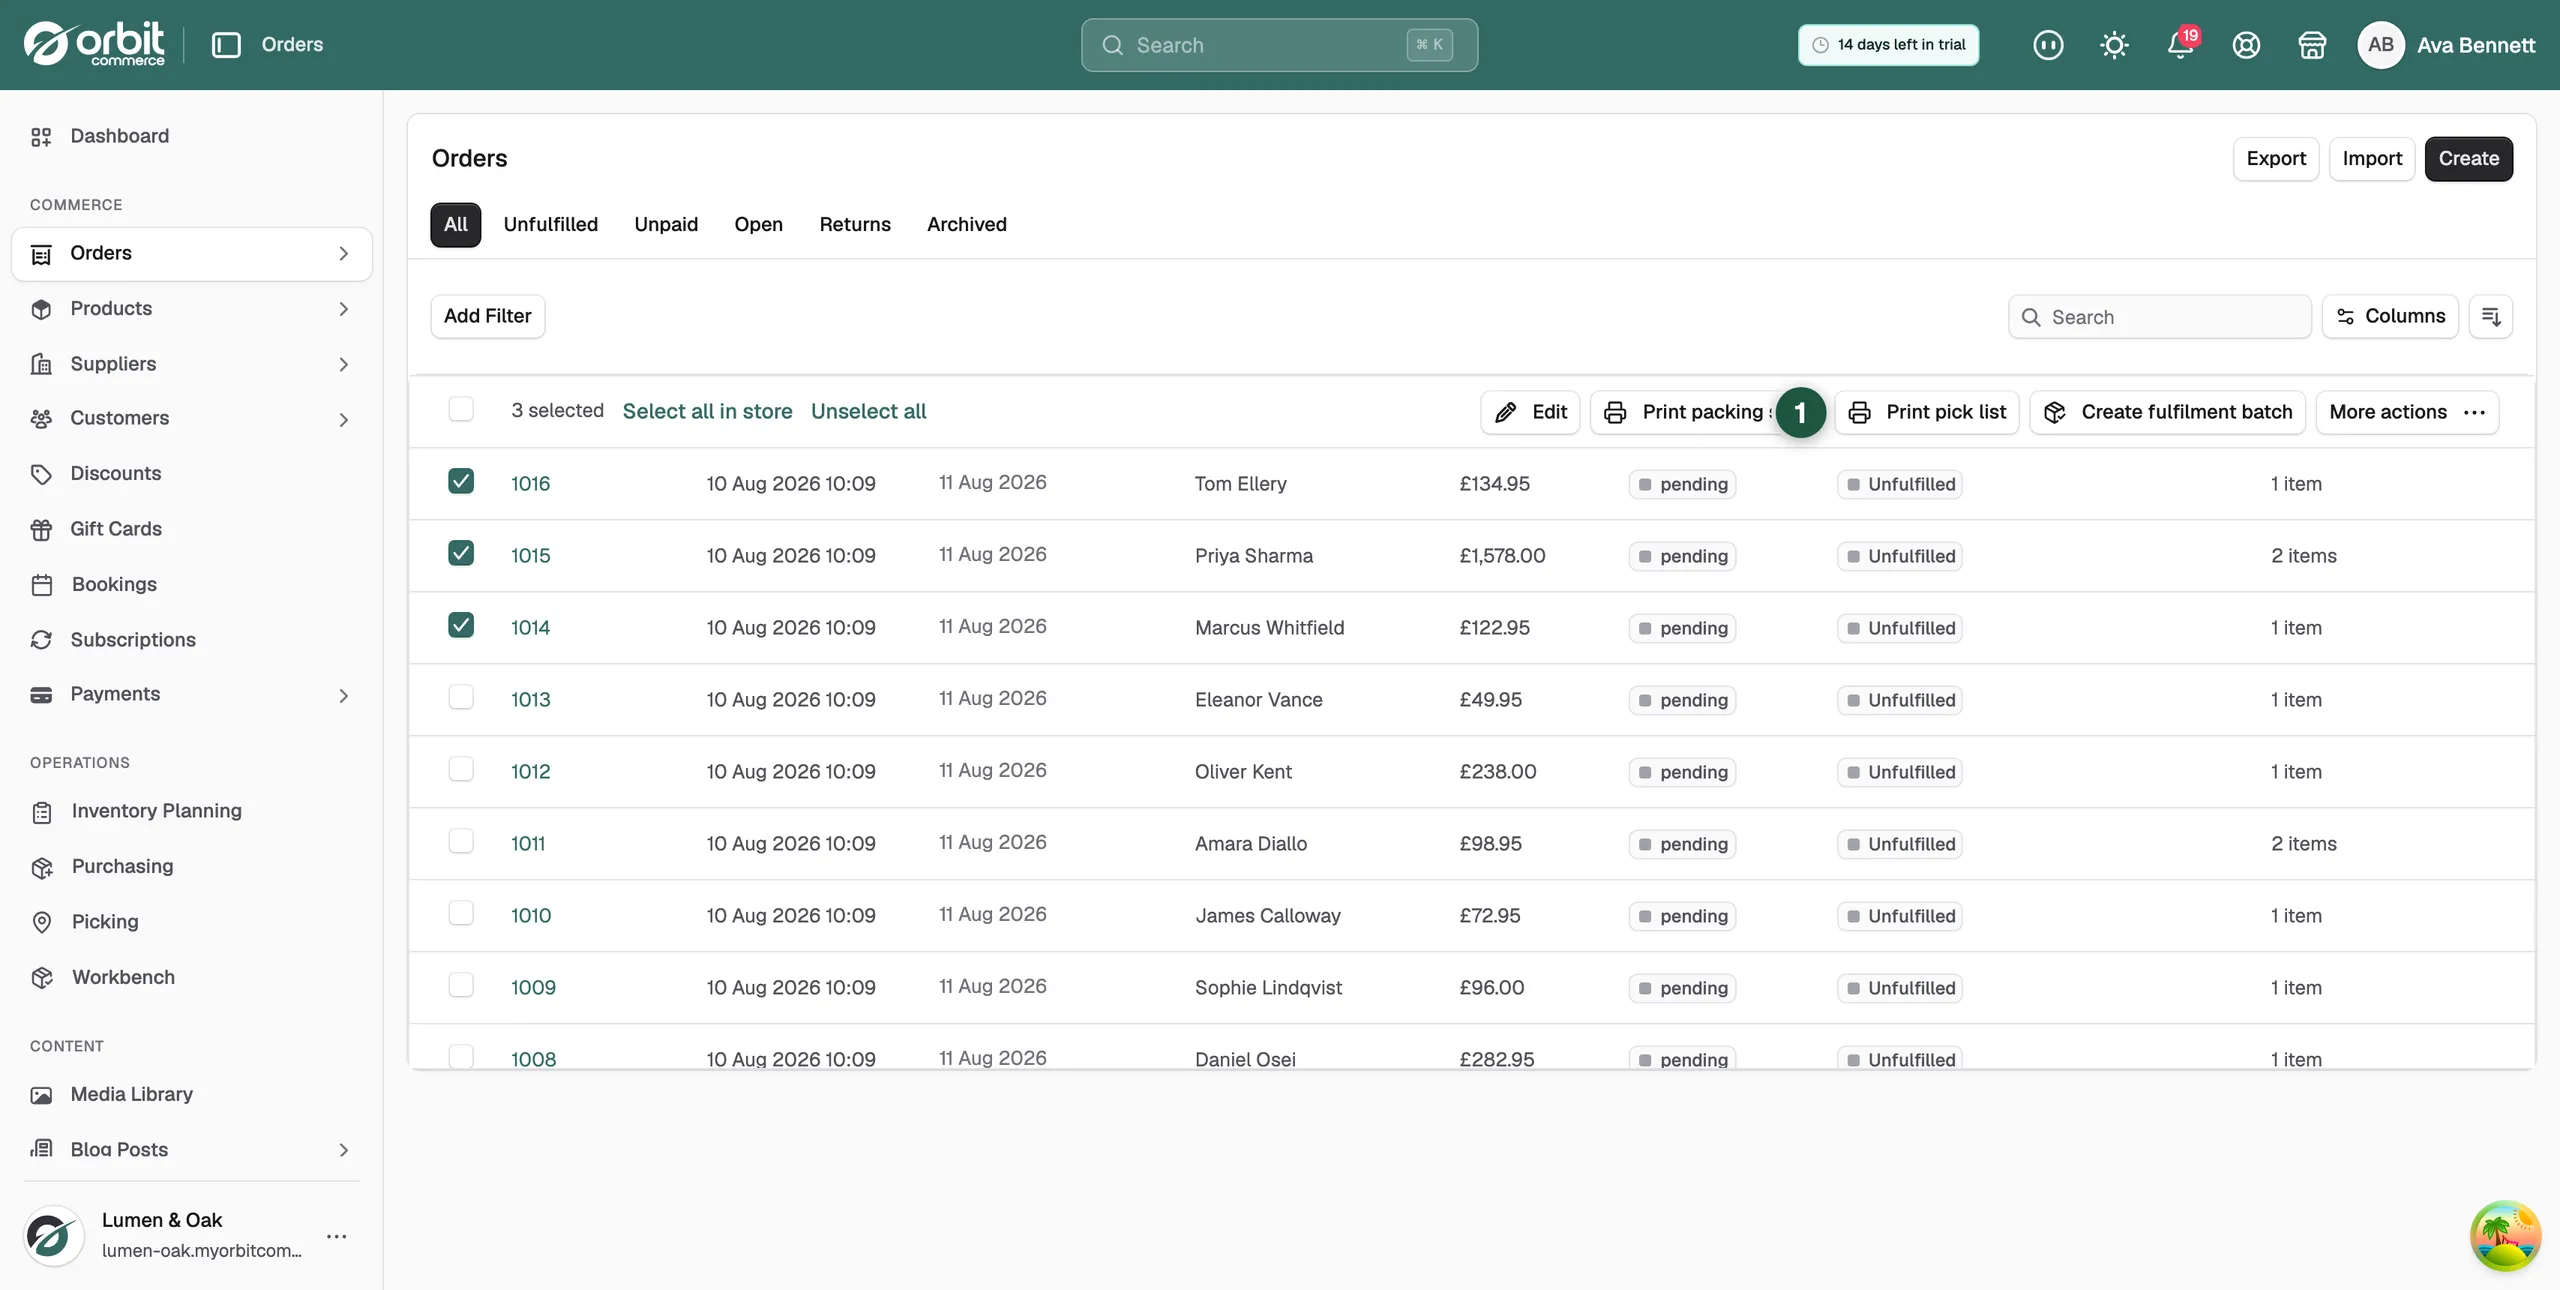
- Tick the box at the top of the first column to select every order on the page, or tick the orders you want one by one.
- The header row is replaced by a bar showing 6 selected and the actions you can run on them.
Tip: Print the pick list first and the packing slips second. The list empties the shelves, the slips fill the boxes.
Print packing slips
- With your orders ticked, click Print packing slips in the bar.
- A new tab opens and reads Generating packing slips while it builds the documents.
- Your browser's print window opens on its own once the slips appear. Print them as normal.
What is on a packing slip
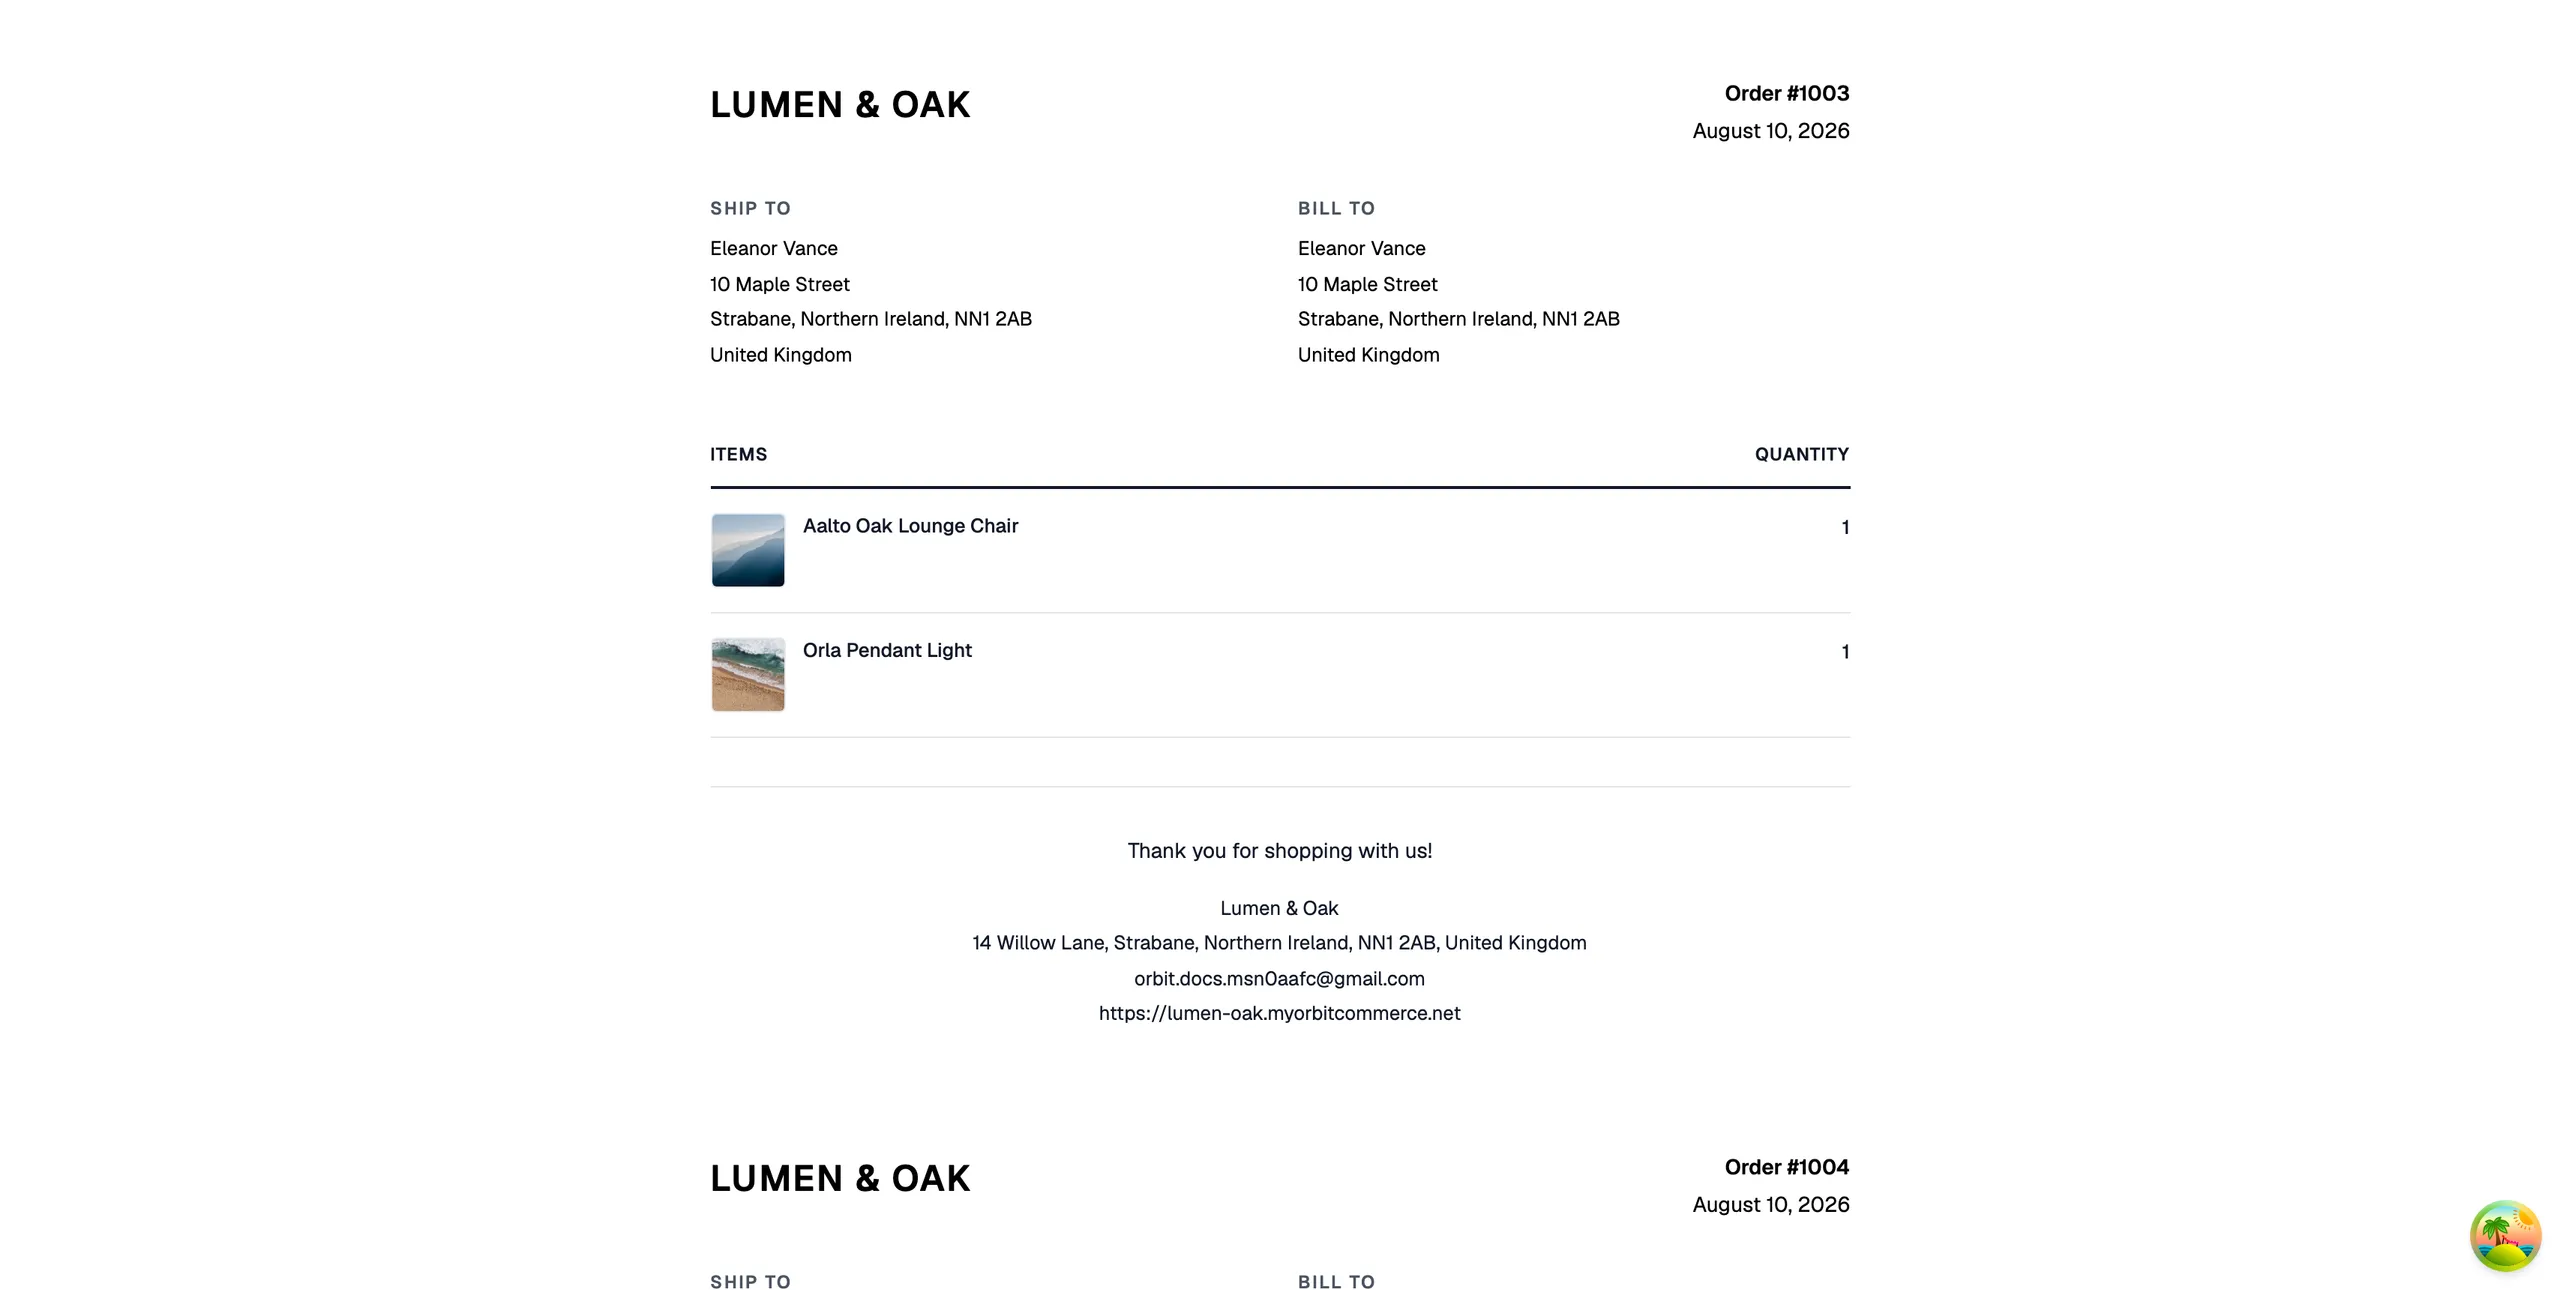
One page per order, in the order the rows were listed. Each slip carries:
- Your store name and logo at the top.
- Order # and the date the order was placed.
- Ship to and Bill to addresses, taken from the order itself.
- An Items table with a photo of each product and the Quantity ordered.
- A thank you line and your store's contact details in the footer.
There are no prices, totals, delivery charges or VAT on a packing slip. Those are on the order and on the invoice.
Note: The photo on each line is the product's first image, so two sizes of the same product print the same picture. Read the item name before you pack, not the photo.
Print a pick list
- Tick the orders you are picking. You can pick up to 100 orders at a time.
- Click Print pick list in the bar.
- A new tab opens with one consolidated document for the whole run. Print it as normal.
What is on a pick list
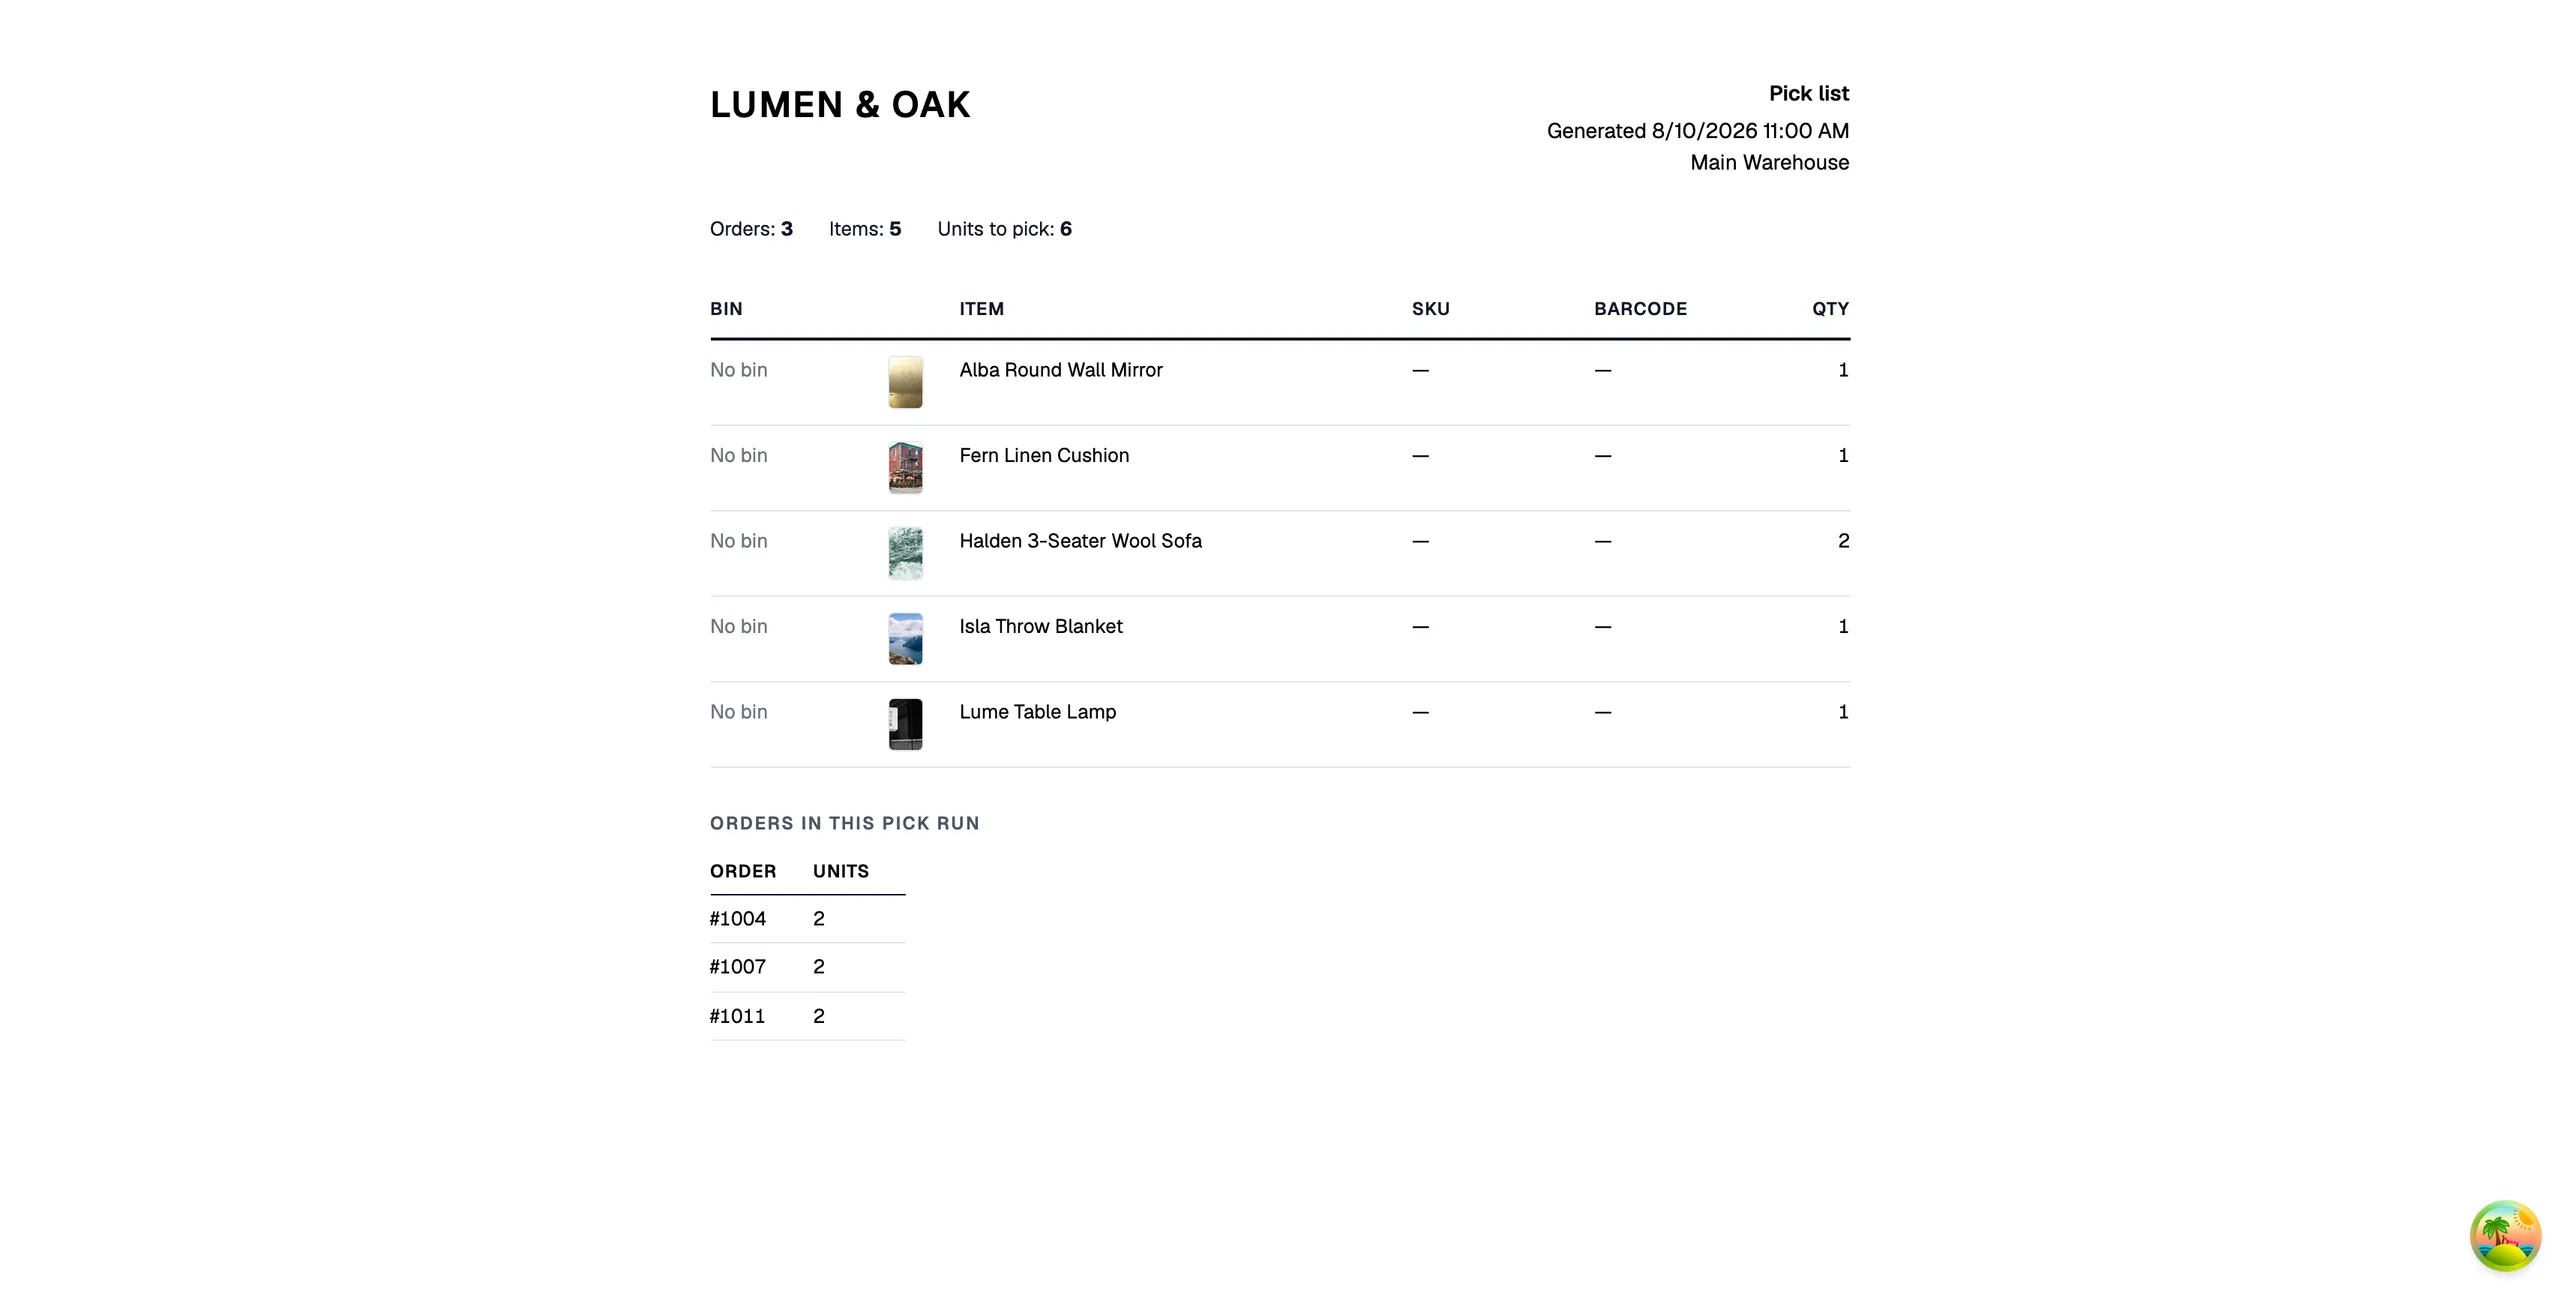
- A summary line with Orders, Items and Units to pick.
- A table with Bin, a photo, Item, SKU, Barcode and Qty. The same product across several orders is added up into one row.
- Orders in this pick run, listing each Order and the number of Units it contributes.
- Not included, listing any order that was left out and why. The reasons are order not found, order canceled, order refunded, already fully fulfilled, and no physical items to pick.
Bin locations come from your inventory. An item with no bin set prints as No bin, so assign bins as your store grows.
Print one order's paperwork
- Open the order from the Orders list.
- Click Print in the row of buttons at the top. That order's packing slip opens in a new tab.
Related guides
Was this helpful?
0 people found this helpful