Picking orders and running cycle counts
Give every item a bin, print bin-sorted pick lists for your orders, and check the shelf against your stock figures with a cycle count.
Picking gives your shelves an address. You put a bin on each item, print pick lists that are sorted by bin, and check the shelf against your stock figures with a cycle count. You will find it under Operations > Picking.
Considerations
- Picking is part of the Enterprise plan. On other plans the Operations section does not appear.
- Bins are for finding things. Putting an item in a bin never changes its stock figure.
- A cycle count changes nothing until you apply its variances. Until then it is a snapshot and a set of numbers someone typed.
- A count takes a snapshot of the matching items as soon as it starts, up to 1,000 items per count.
- Staff can run and enter a count. Only owners and admins can apply one.
Set up your bins
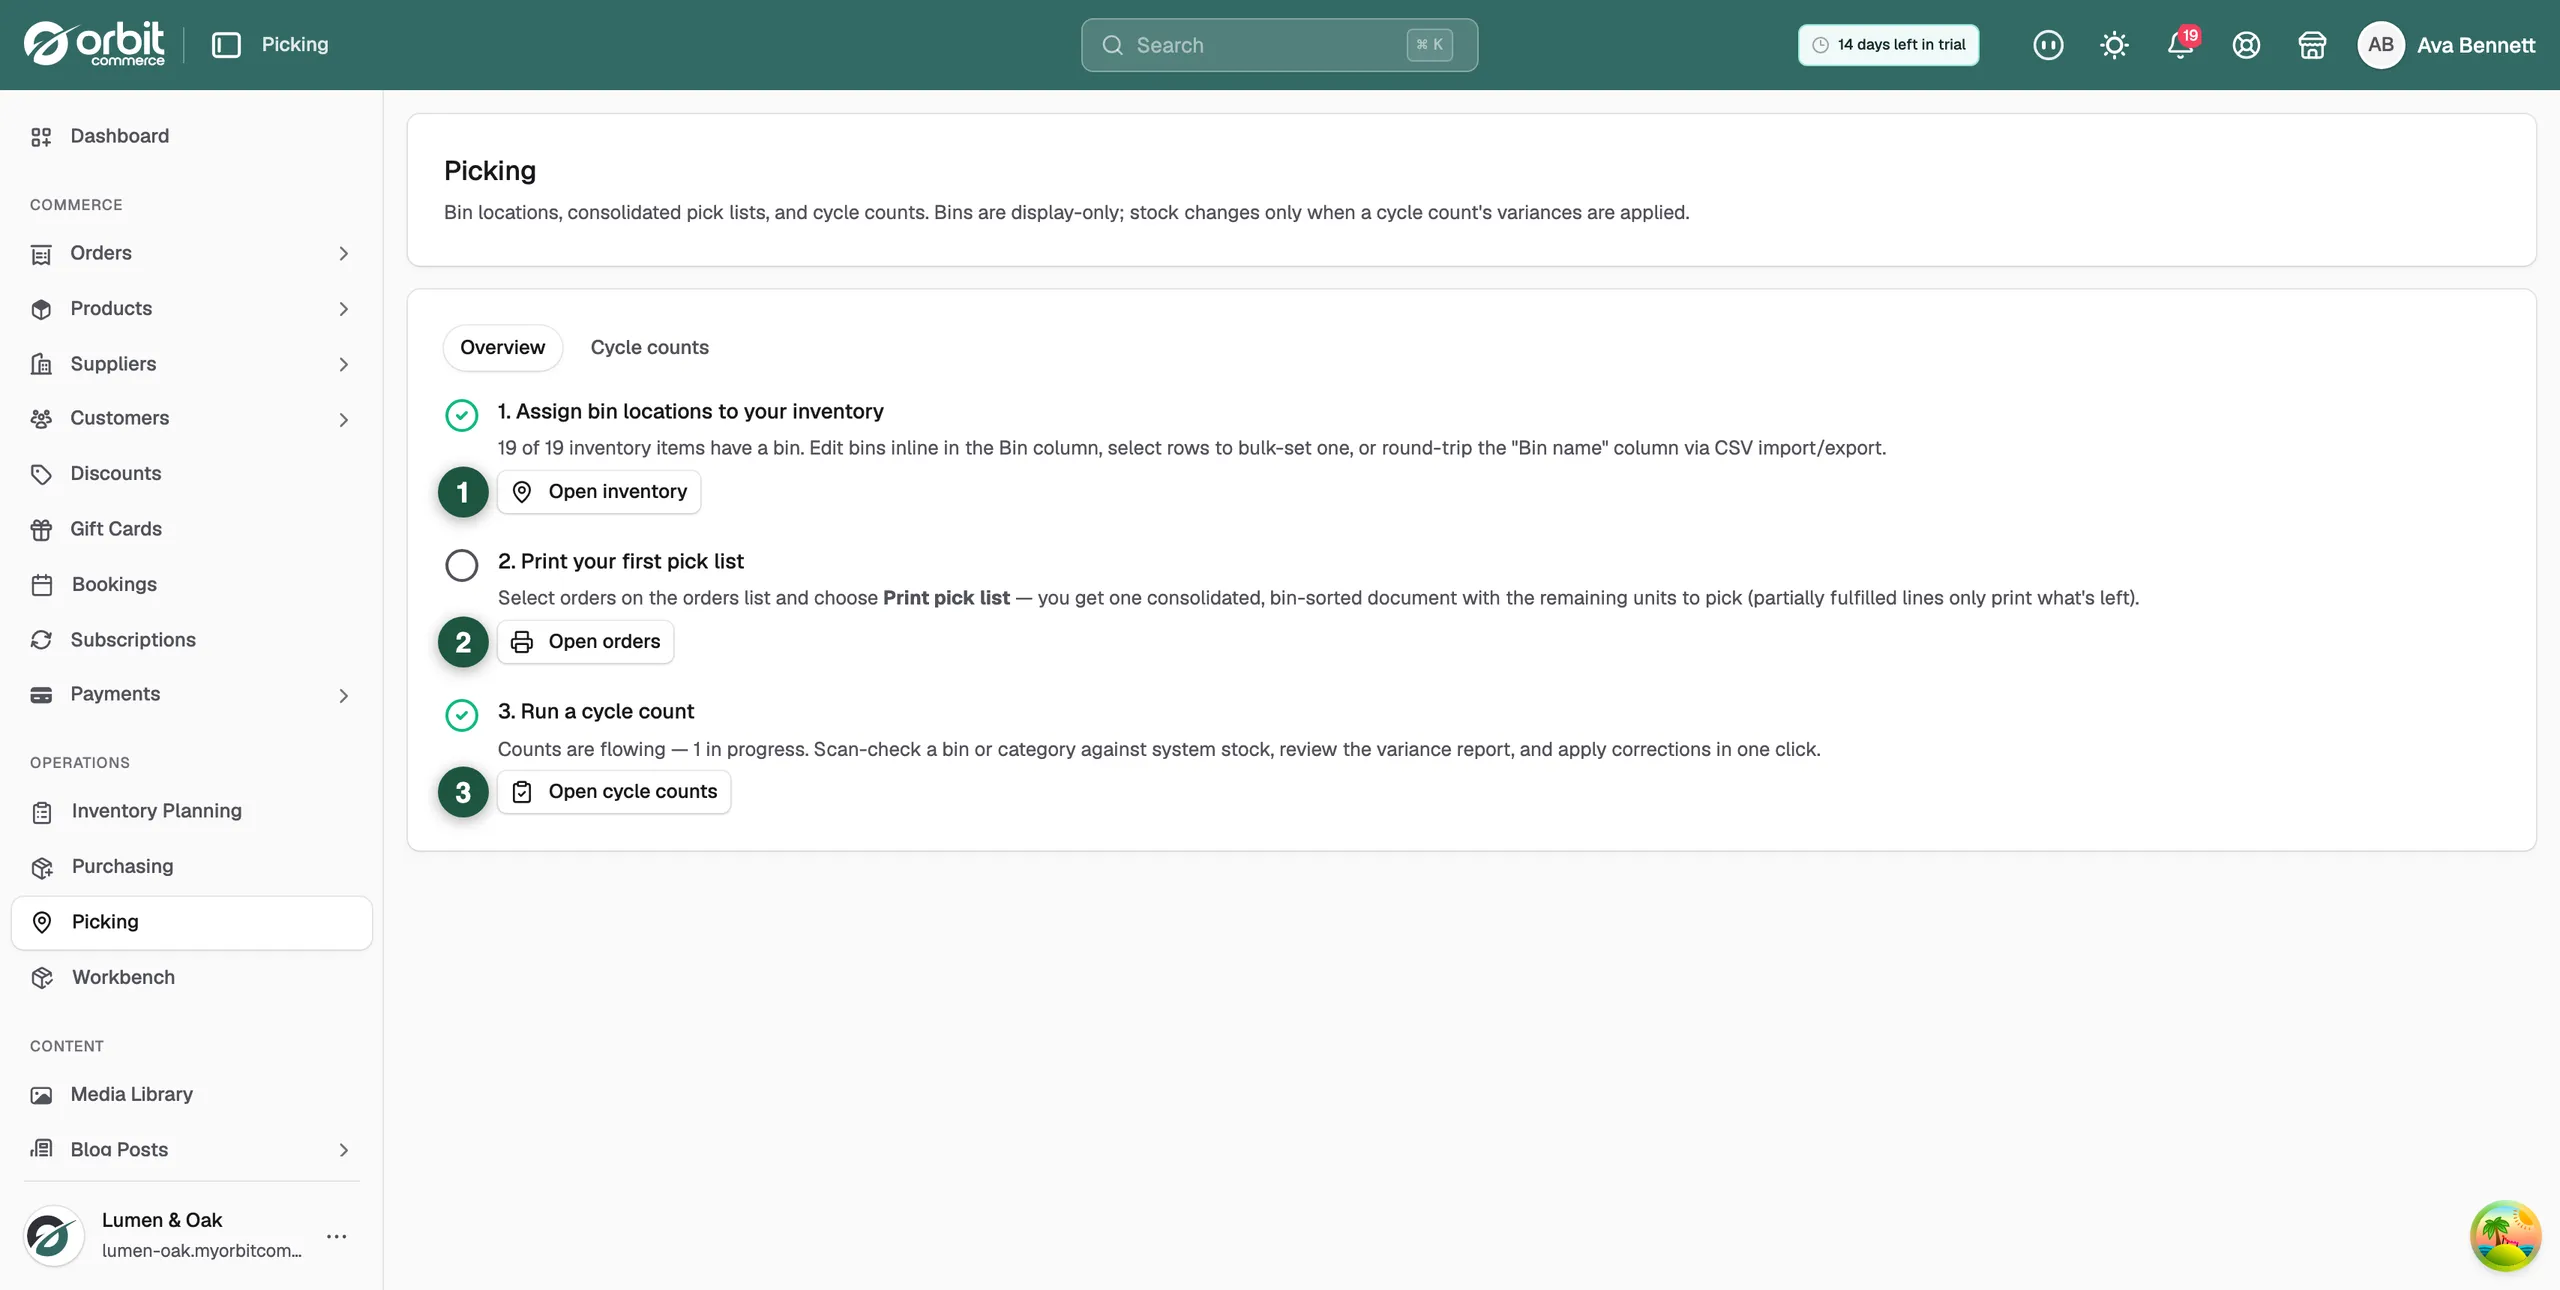
The Overview tab is the first thing you see. It lists the three jobs and tells you how many of your items have a bin.
- Go to Operations > Picking.
- On the Overview tab, click Open inventory.
- Type a bin straight into the Bin column, or tick several rows and set one bin for all of them.
Tip: For a warehouse full of items, export your inventory, fill in the Bin name column in the spreadsheet and import it back.
Print a pick list
- From your Orbit dashboard, go to Orders.
- Tick the orders you are ready to pick.
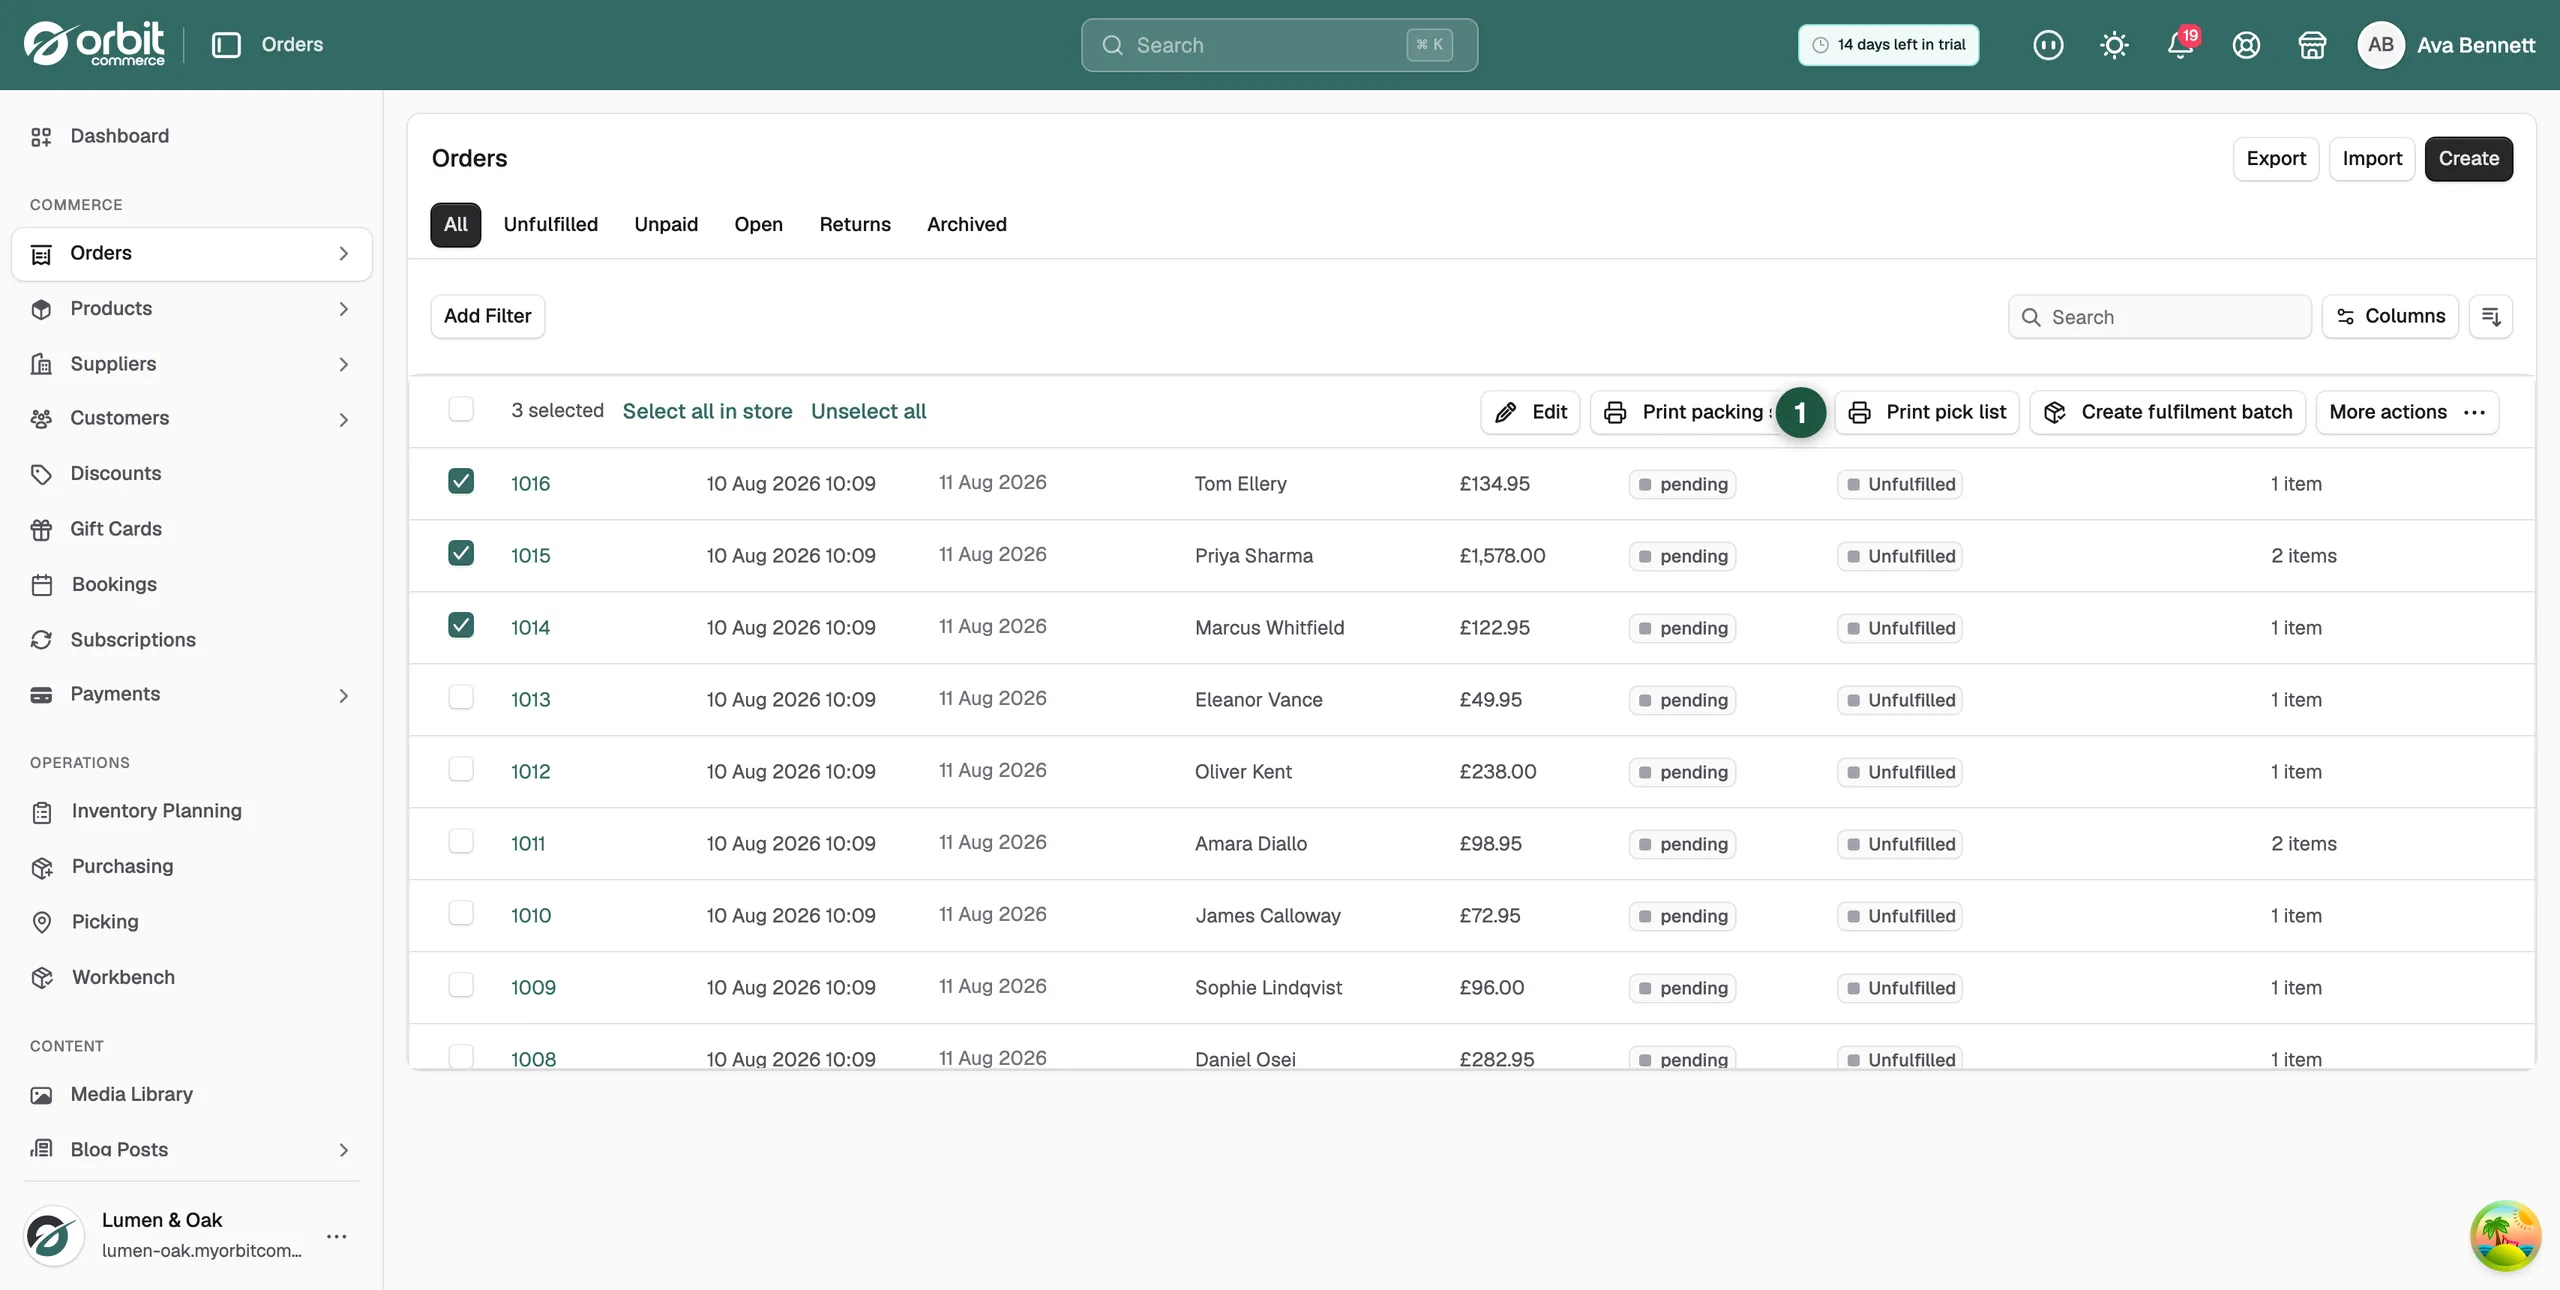
- In the bulk action bar, click Print pick list.
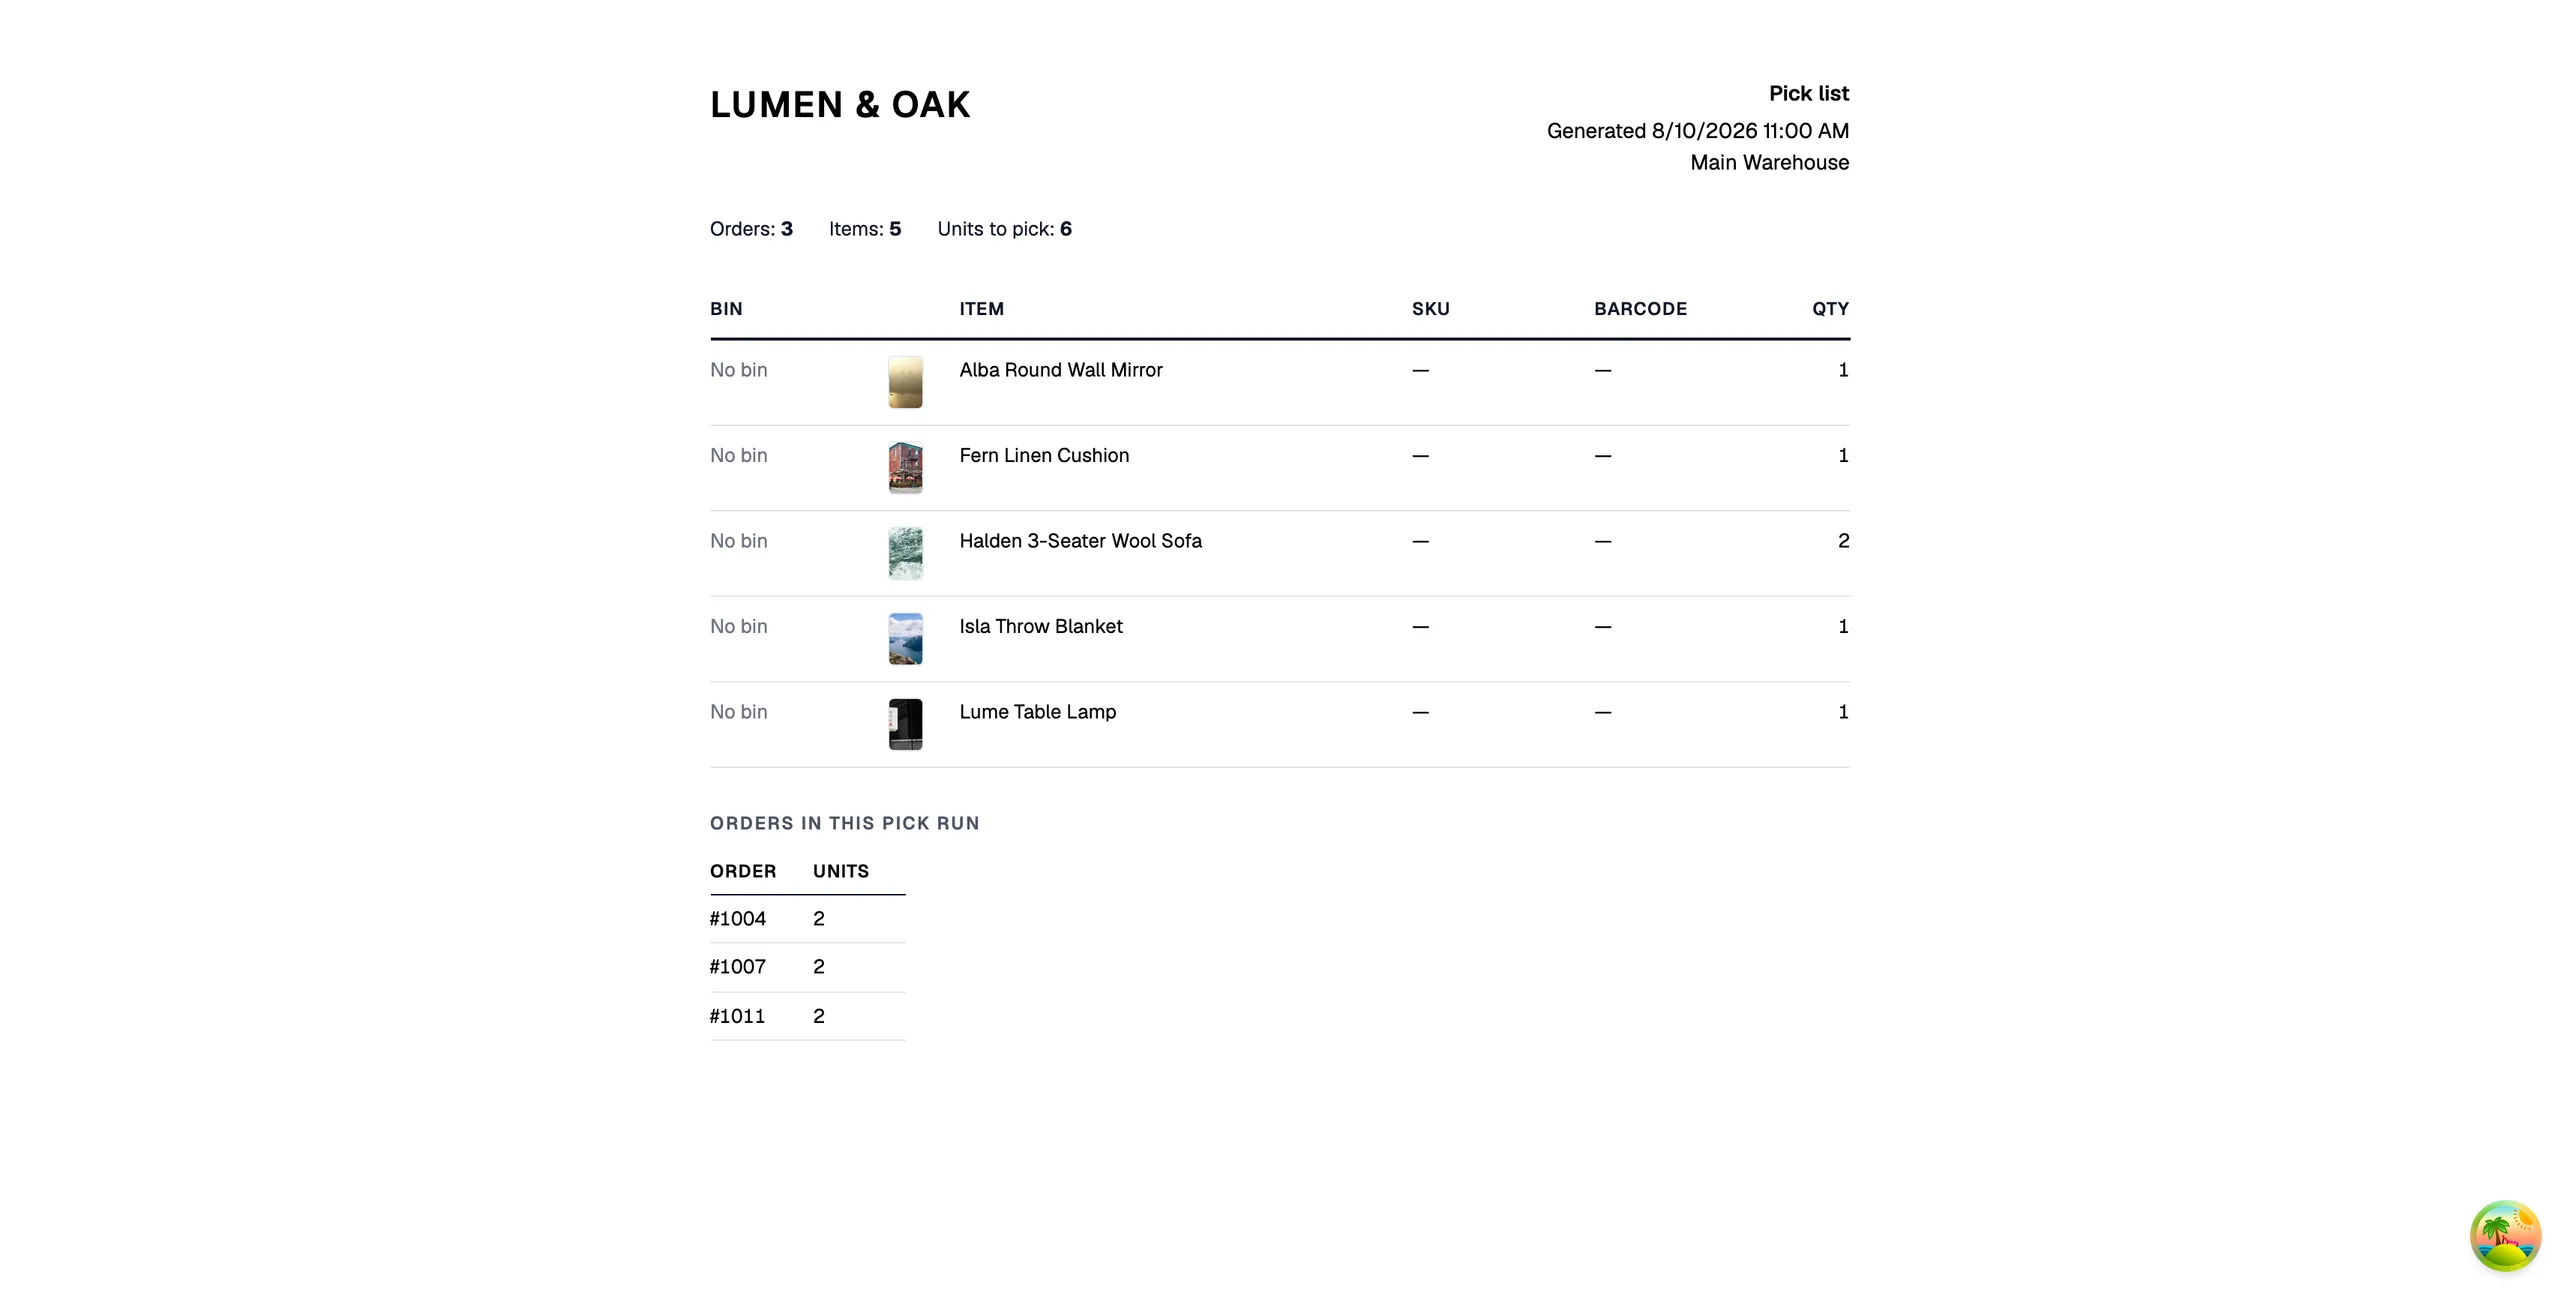
You get one document for the whole selection, sorted by bin. Each item is totalled across the orders, so you collect it once. Lines that are part fulfilled print only what is left, so it is safe to reprint. The header sums the orders, items and units, and the footer lists the orders in the run.
Start a cycle count
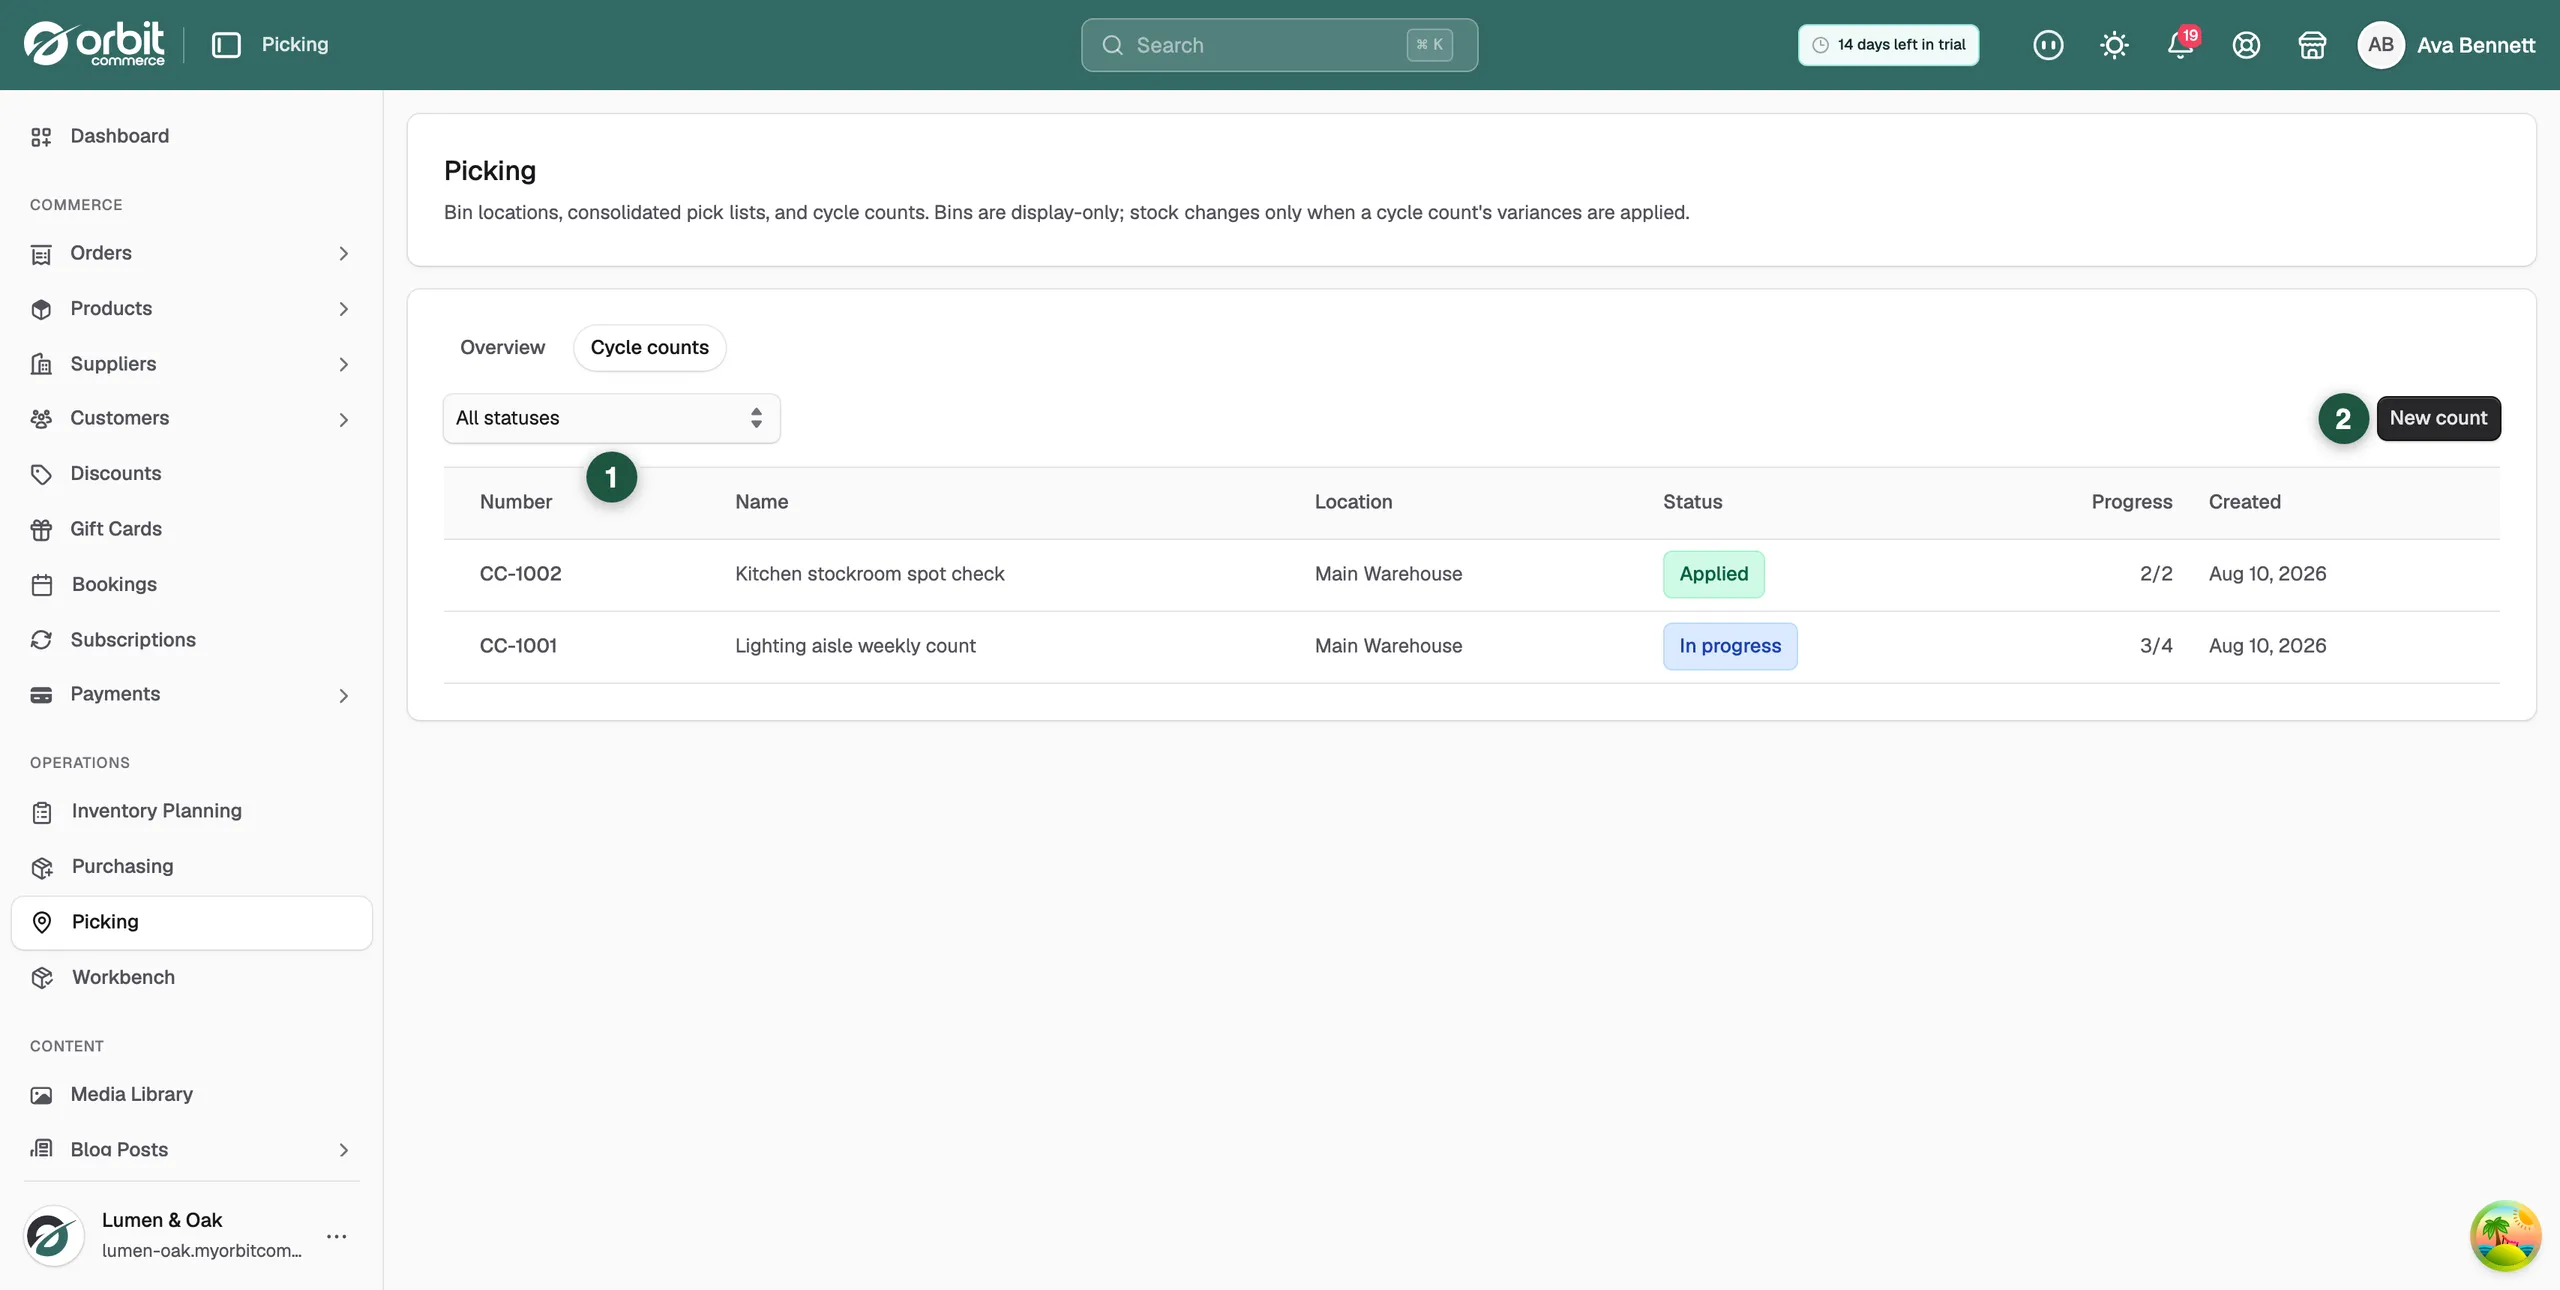
- Go to Operations > Picking, then open the Cycle counts tab.
- Click New count. A panel opens on the right.
- Give the count a Name so you can find it later, for example Aisle A weekly count. The name is optional.
- Leave Location on Default location, or pick another one if you hold stock in more than one place.
- Under Bins, tick the bins you are counting today. Leave them all unticked to count every bin.
- Under Categories, tick a category to narrow it further. Leave them all unticked to count every product.
- Click Start count. The count opens with every line reading Not counted.
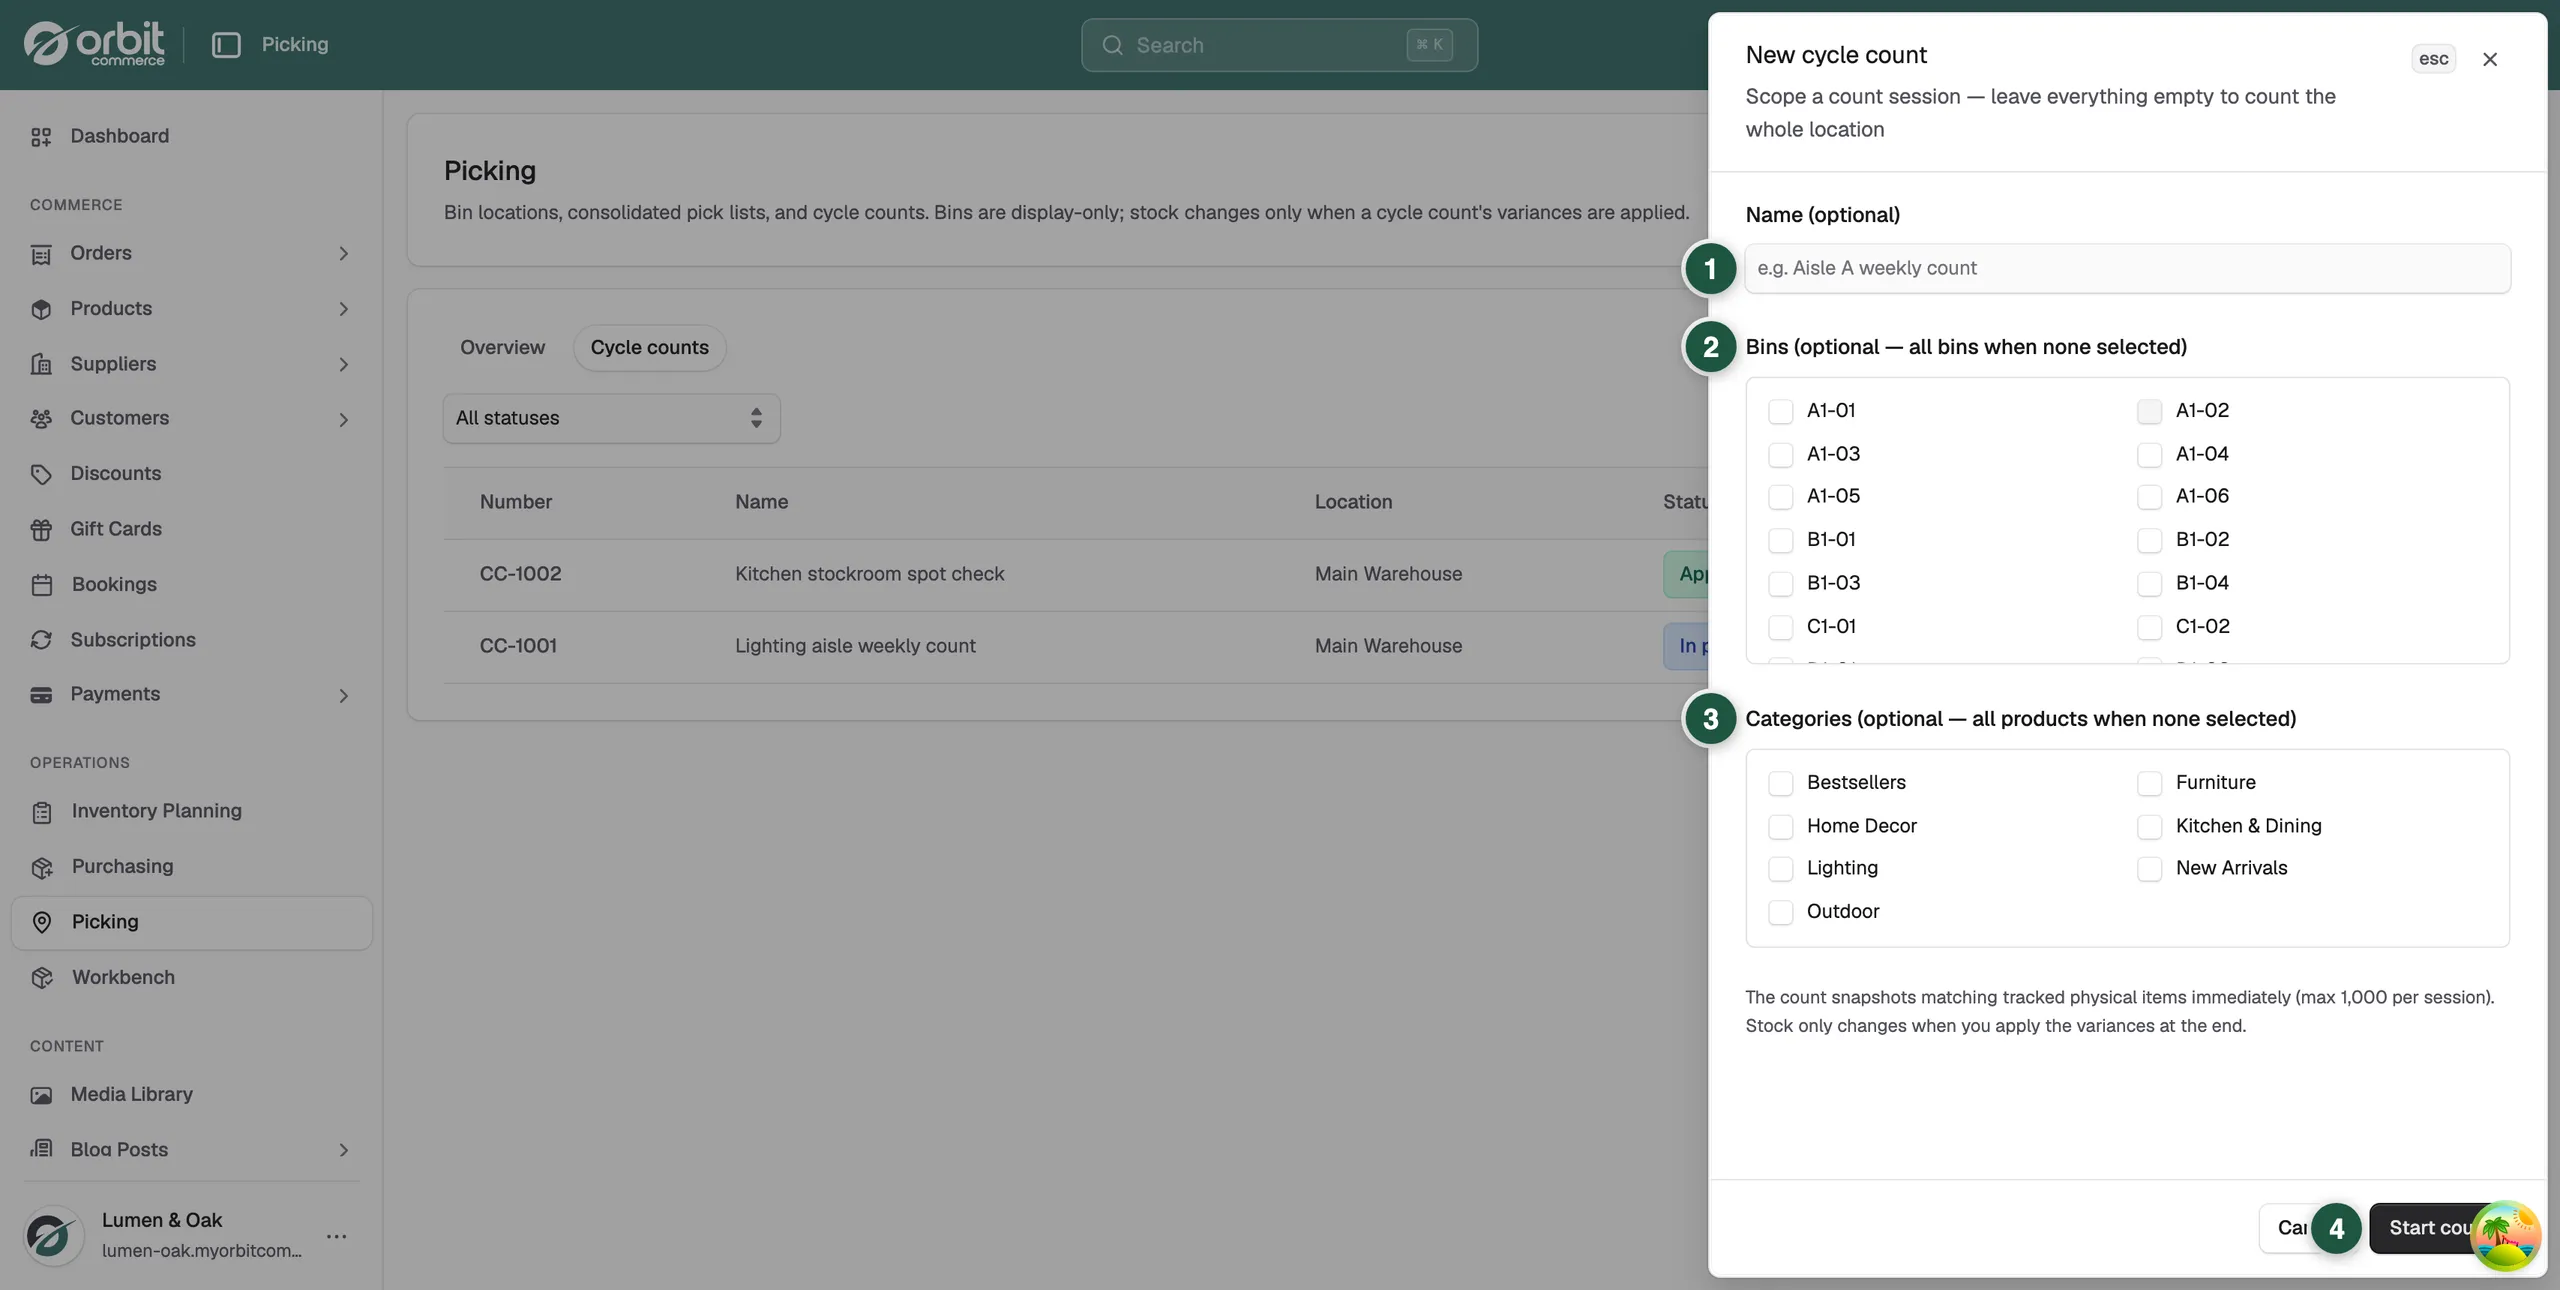
Note: Bins and categories narrow the count together. Tick bin A-1 and the category Storage and you count the storage items in bin A-1, not both sets.
Count the shelf
- Scan a barcode into the Scan barcode or SKU box, or type a code and press Enter. Each scan adds 1 to that line.
- If you have counted a whole shelf already, type the total into the line's Counted box instead. What you type replaces what you scanned, it does not add to it.
- Count as many lines as you have time for. Lines you leave reading Not counted keep their stock exactly as it is.
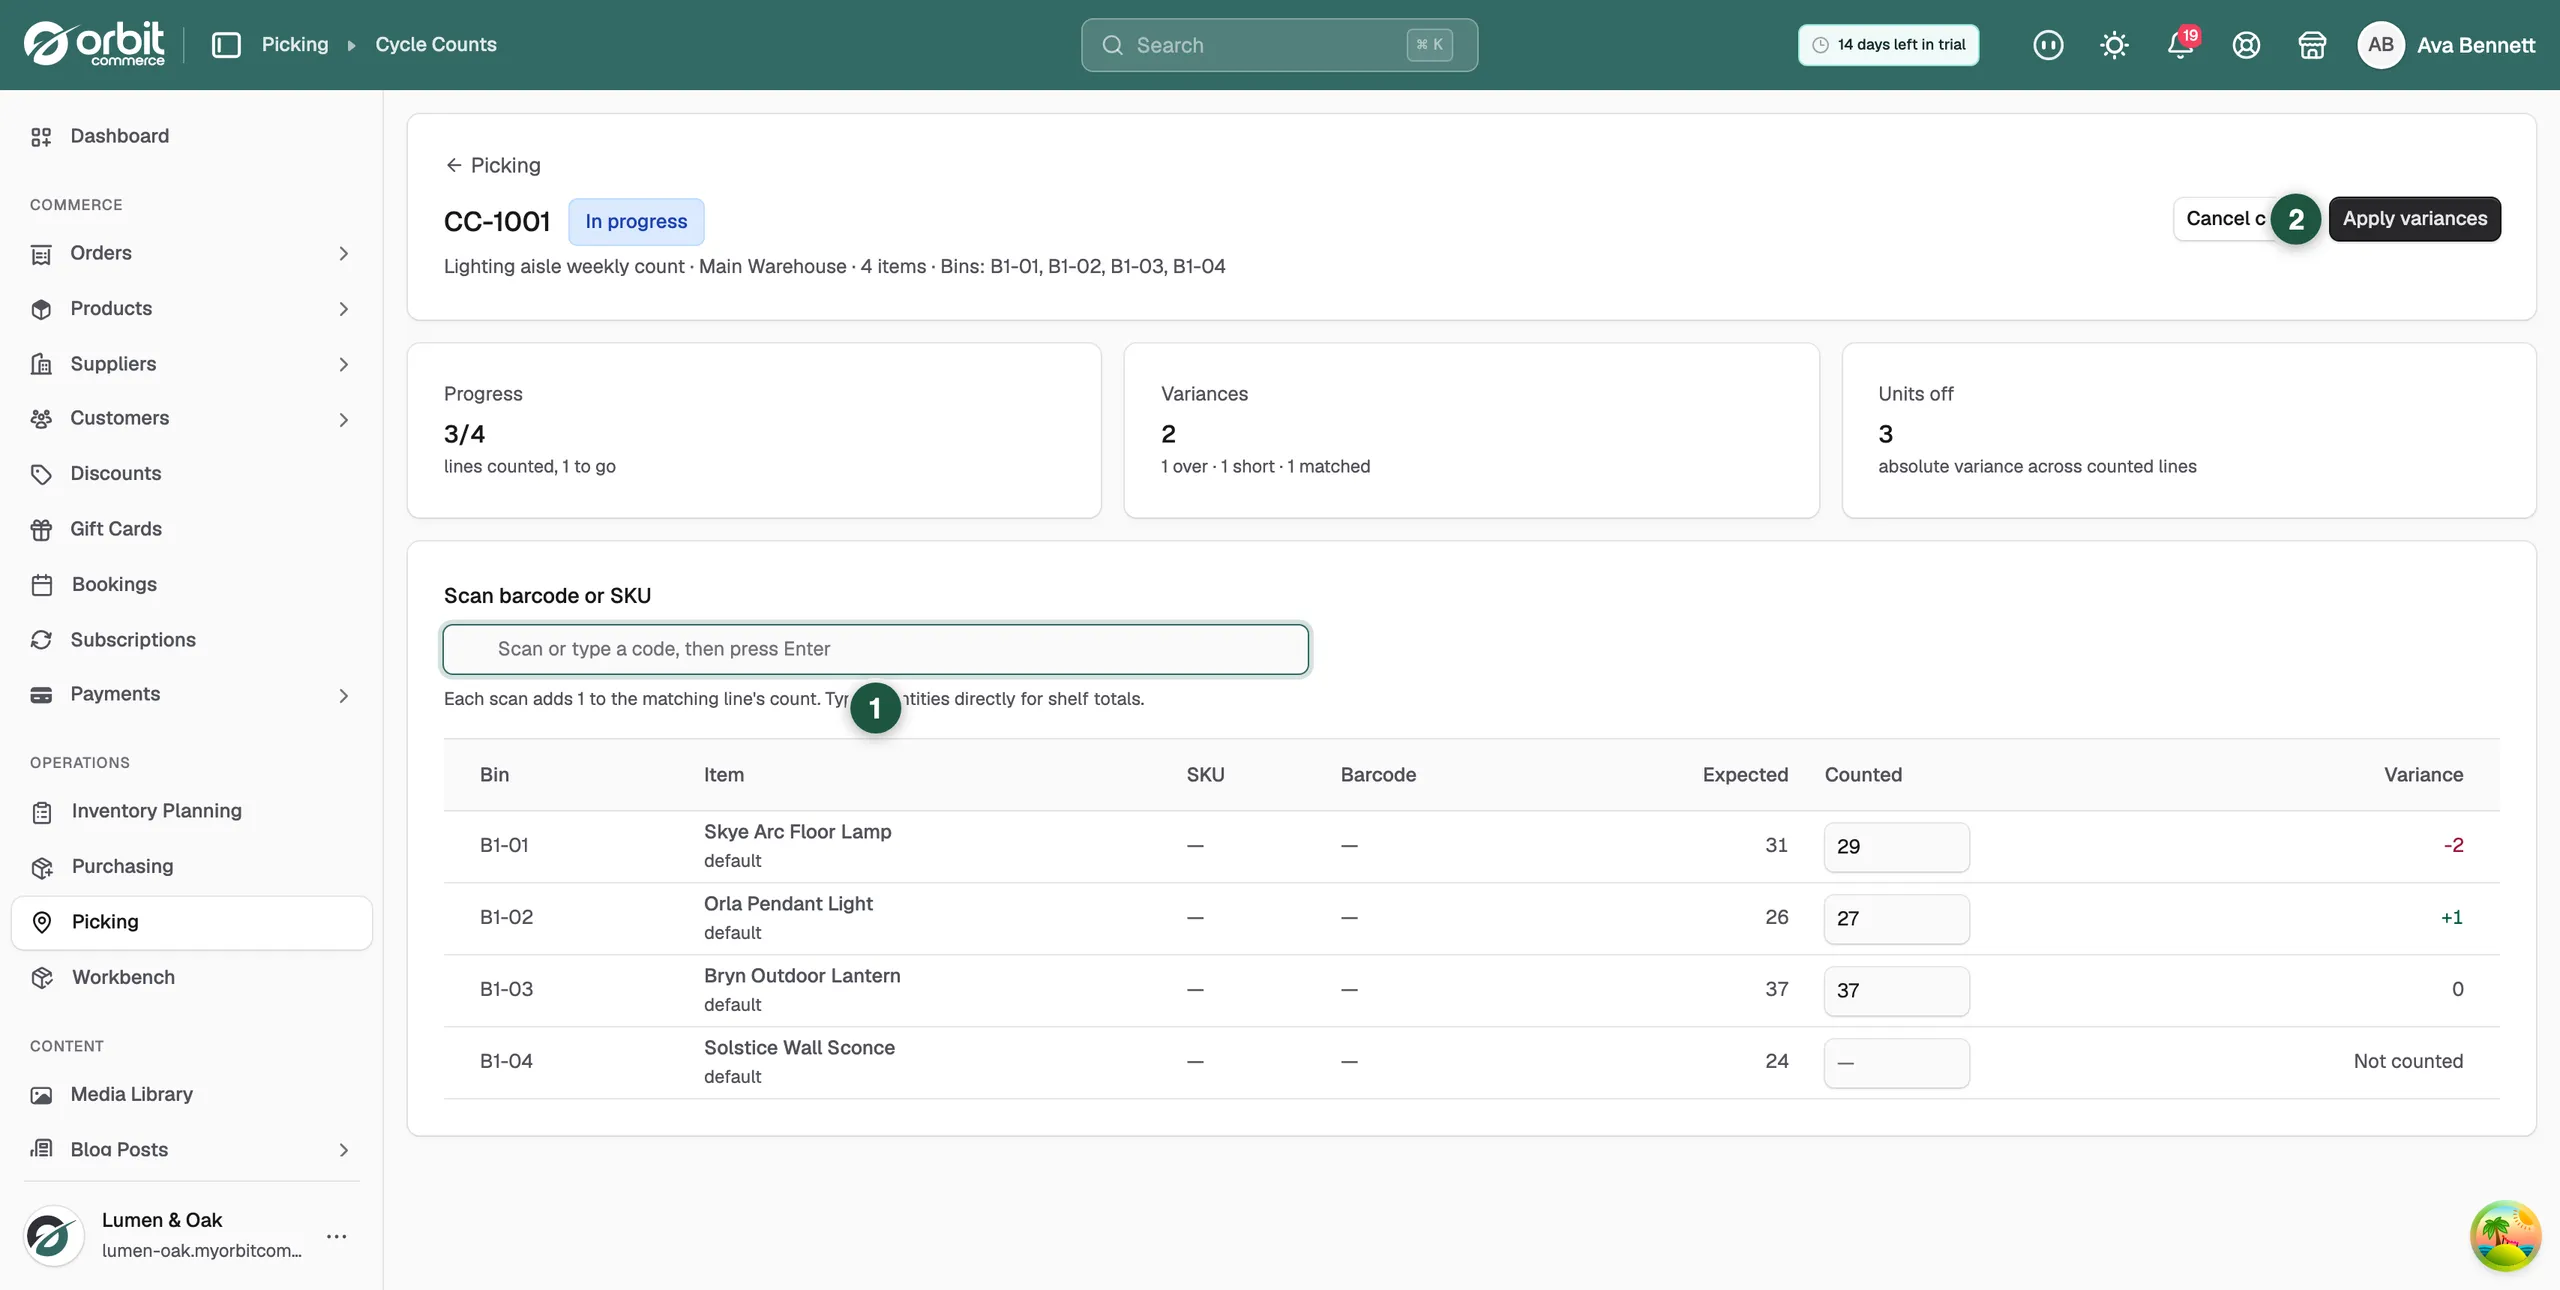
Three figures sit above the table:
- Progress: how many lines you have counted, out of the lines in the count.
- Variances: how many lines disagree with your stock figures, split into over, short and matched.
- Units off: every unit out of place added up, whichever way it is out. One line over by 1 and one line short by 2 reads 3.
Apply the variances
- Click Apply variances at the top of the count.
- A box asks Apply variances to stock?. Click Apply.
- The count's badge changes from In progress to Applied, and an Applied column appears on the table.
The Applied column shows what moved on each line. A line that already matched reads No change. Every correction is written to your stock movement record.
Warning: Applying a count changes your stock figures. Check the variances first. To finish without changing anything, click Cancel count instead: your counts are kept for reference and your stock stays exactly as it is.
What the count statuses mean
- In progress: the count is open and can be added to. Come back to it later.
- Applied: the variances have been written to your stock.
- Cancelled: the count was closed without changing any stock.
The Cycle counts tab lists every count with its number, name, location, status, progress and the date it was created. Use the status filter above the list to narrow it.
Related guides
Was this helpful?
0 people found this helpful