Importing and exporting stock with a CSV
Export your stock to a spreadsheet, edit the On hand (new) column, and import it back to update many items at once.
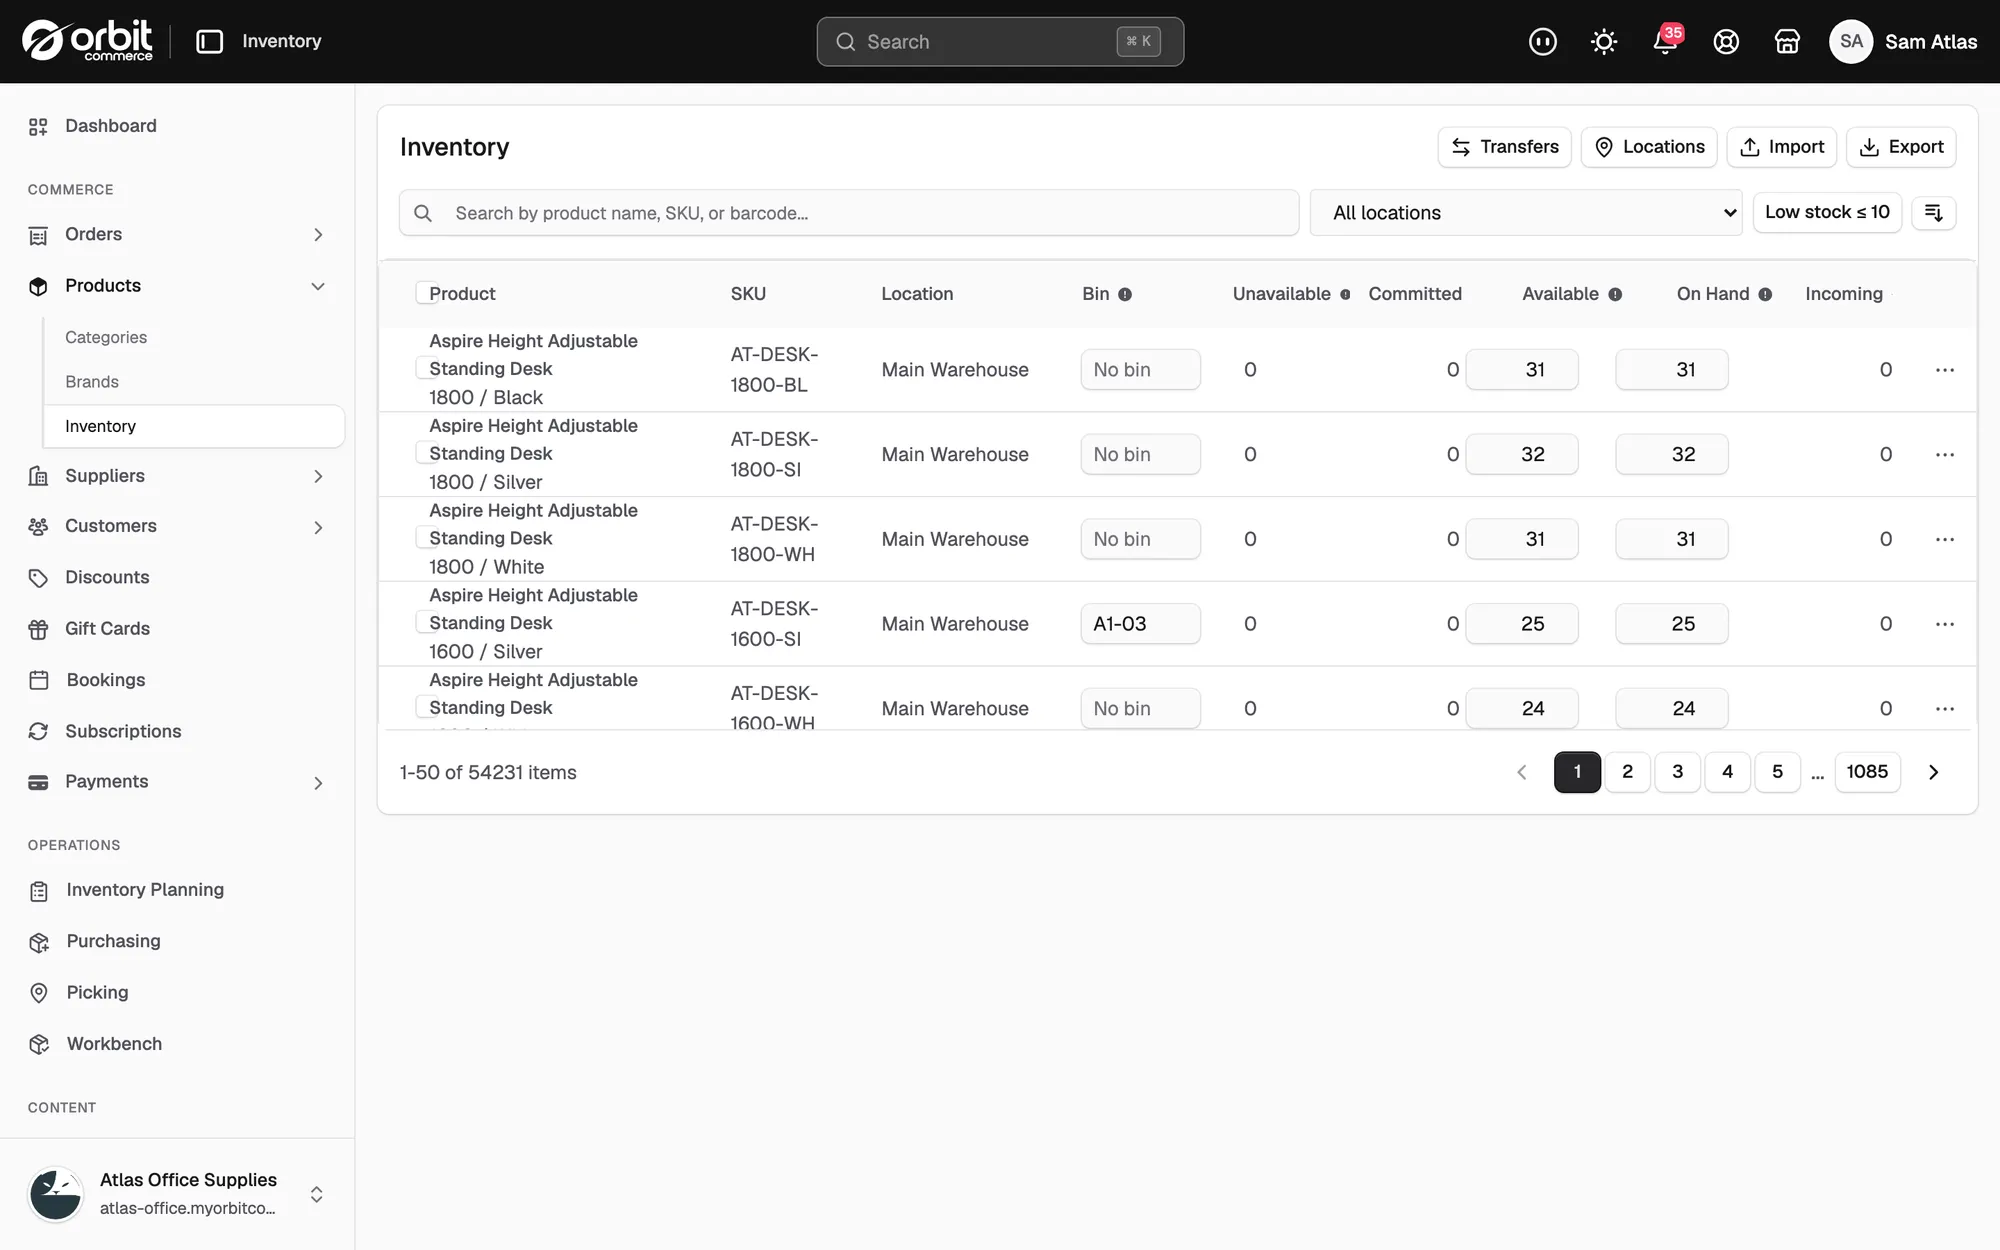
Stock changes faster than you can type. Export your stock to a CSV file, edit it in a spreadsheet, then import it back. This is the quickest way to true up a warehouse after a stocktake or to set up stock for the first time. Both buttons are on the Inventory page, under Products > Inventory.
Considerations
- Rows are matched on SKU and Location. Both columns are required, and both must match an item you already hold.
- The import writes the On hand (new) column. A row with no value there is skipped.
- Available, Unavailable, Committed, Incoming and On hand (current) are there to read. Changing them in the file does nothing.
- An import cannot create products or locations. It updates stock for items that already exist.
- Items that are not in the file are left alone.
- The Bin name column needs the Enterprise picking feature. Without it the column is ignored and the rest of the import still runs.
Export your stock
- From your Orbit dashboard, go to Products > Inventory.
- Filter or search the list if you only want part of it.
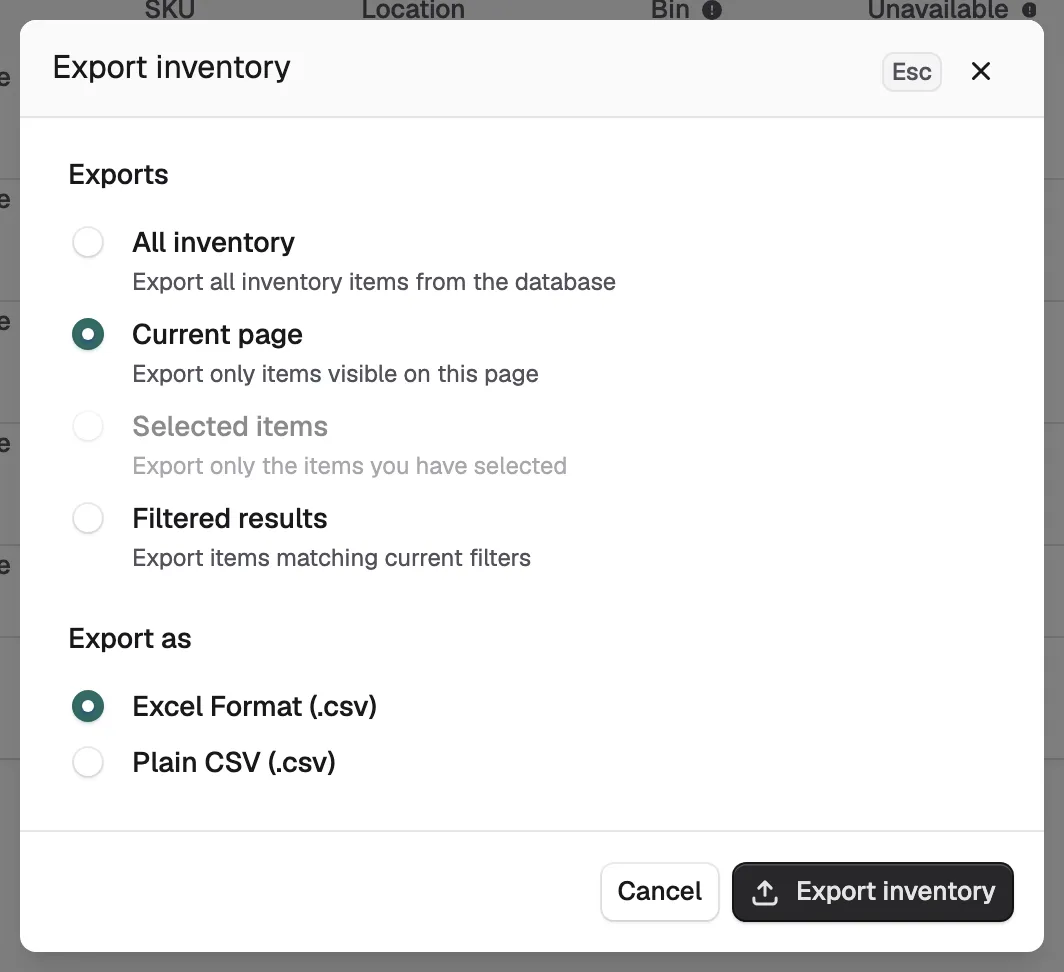
- Click Export. The Export inventory window opens.
- Under Exports, choose how much to include: All inventory, Current page, Filtered results or Selected items.
- Under Export as, choose Plain CSV (.csv), or Excel Format (.csv) if you will open it in Excel.
- Click Export inventory. The file downloads and Orbit confirms with Export completed successfully!
Columns in the file
The file has one row per item, per location.
- Handle and Title: which product the row belongs to.
- SKU: required. Half of the key that matches the row to your stock.
- Location: required. The other half of the key.
- Bin name: the shelf or bin position within the location.
- Unavailable, Committed, Available, Incoming, On hand (current): your figures as they stand. Read only.
- On hand (new): the one quantity column the import writes. Put your counted number here.
- HS Code and COO: the customs code and country of origin.
Warning: Do not retype the SKU or Location columns. If either stops matching, the row is skipped. Edit the quantity and bin columns only.
Import your stock
- Put your counted figures in the On hand (new) column and save the file as a CSV.
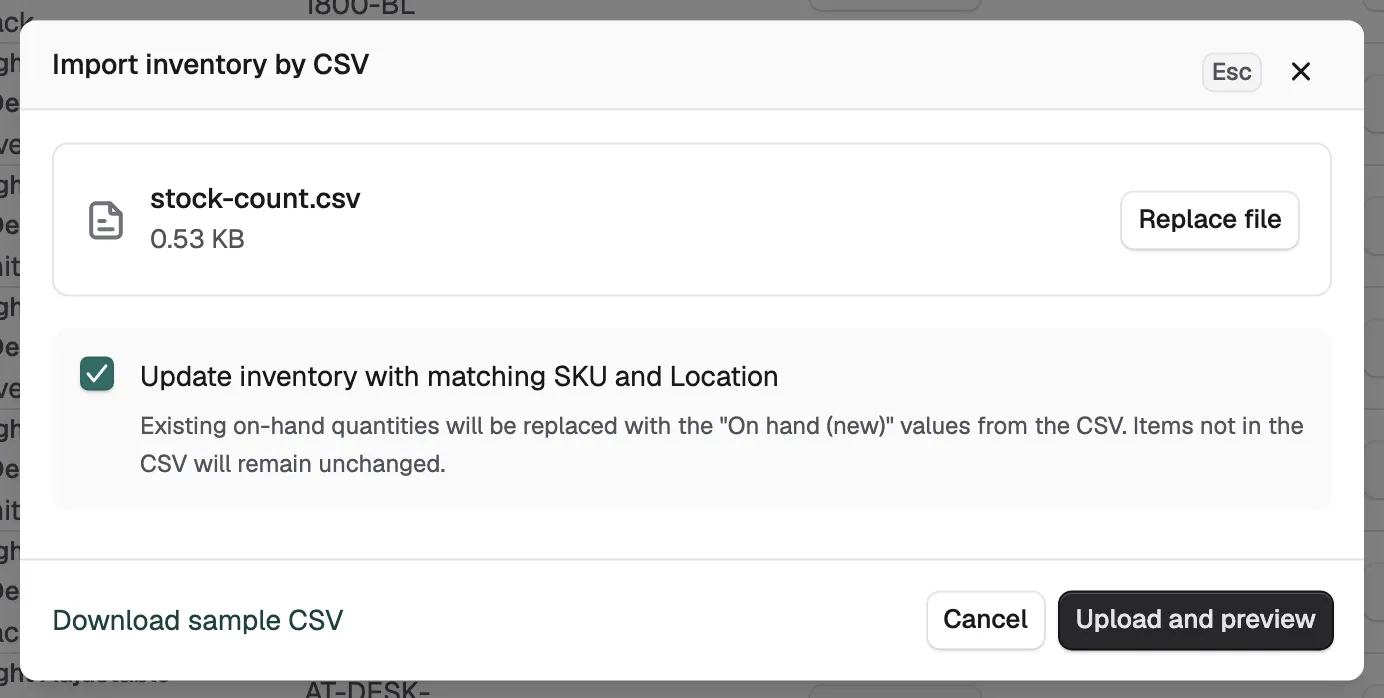
- Go to Products > Inventory and click Import.
- Click + Add file, or drop the file on the window. If you need a template, click Download sample CSV.
- Leave Update inventory with matching SKU and Location ticked. This replaces the on-hand figures with your On hand (new) values.
- Click Upload and preview.
- Read the summary. It tells you how many items will be updated and from how many rows.
- Check the Column mappings row. If it says a required field is unmapped, click it, then set Maps to for each heading Orbit did not recognise. Click Back to preview when you are done.
- Click Import inventory.
You can click Close and continue working while it runs. Orbit shows the progress and tells you when it is finished.
Tip: Import a file of ten rows first. Check the result, then run the whole file.
If rows are skipped
A finished import lists how many items were updated, and how many were skipped or failed. The usual reason is Inventory items not found, which means no item matched that SKU and location pair. Check that:
- The SKU in the file matches the SKU on the product exactly.
- The location name in the file matches a location you have set up.
- The row has a value in On hand (new).
Click Download CSV on the results panel to open the skipped rows in a spreadsheet.
Update stock with the product importer
You can also set stock from a product file, which is useful when the same spreadsheet carries new prices.
- Go to Products and click Import.
- Click + Add file and choose your spreadsheet.
- Leave Update existing products ticked and Create new products off, so nothing new is made.
- Check that Match existing products by reads SKU.
- Click Upload and preview.
- Click Column mappings. Open the list next to your stock column and choose Quantity, under Inventory.
- Click Back to preview, then Import products.
Everything else on those products is left as it is. See Importing and exporting products for the full product file.
Related guides
Was this helpful?
0 people found this helpful