Setting up SEO for your store
Set your homepage meta title, description and sharing image, choose an alt text template for product images, edit robots.txt, and submit your sitemap to search engines.
SEO settings control how your store looks in Google and when someone shares it on social media. You set your homepage title and description, choose how alt text is written for product images, edit your robots.txt file and find your sitemap. All of this is under Settings, then SEO.
Considerations
- Each section on the page has its own save button. There is no page-level save, so save a section before you move on.
- The homepage title, description and sharing image also appear in Storefront Preferences. Whichever you save last wins.
- On a new store, alt text is set to Don't set alt text automatically. Nothing is written until you pick a template and save it.
- The sitemap link only works once your store has a domain.
Open SEO settings
- From your Orbit dashboard, go to Settings.
- Under Store, click SEO. The SEO Settings page opens.
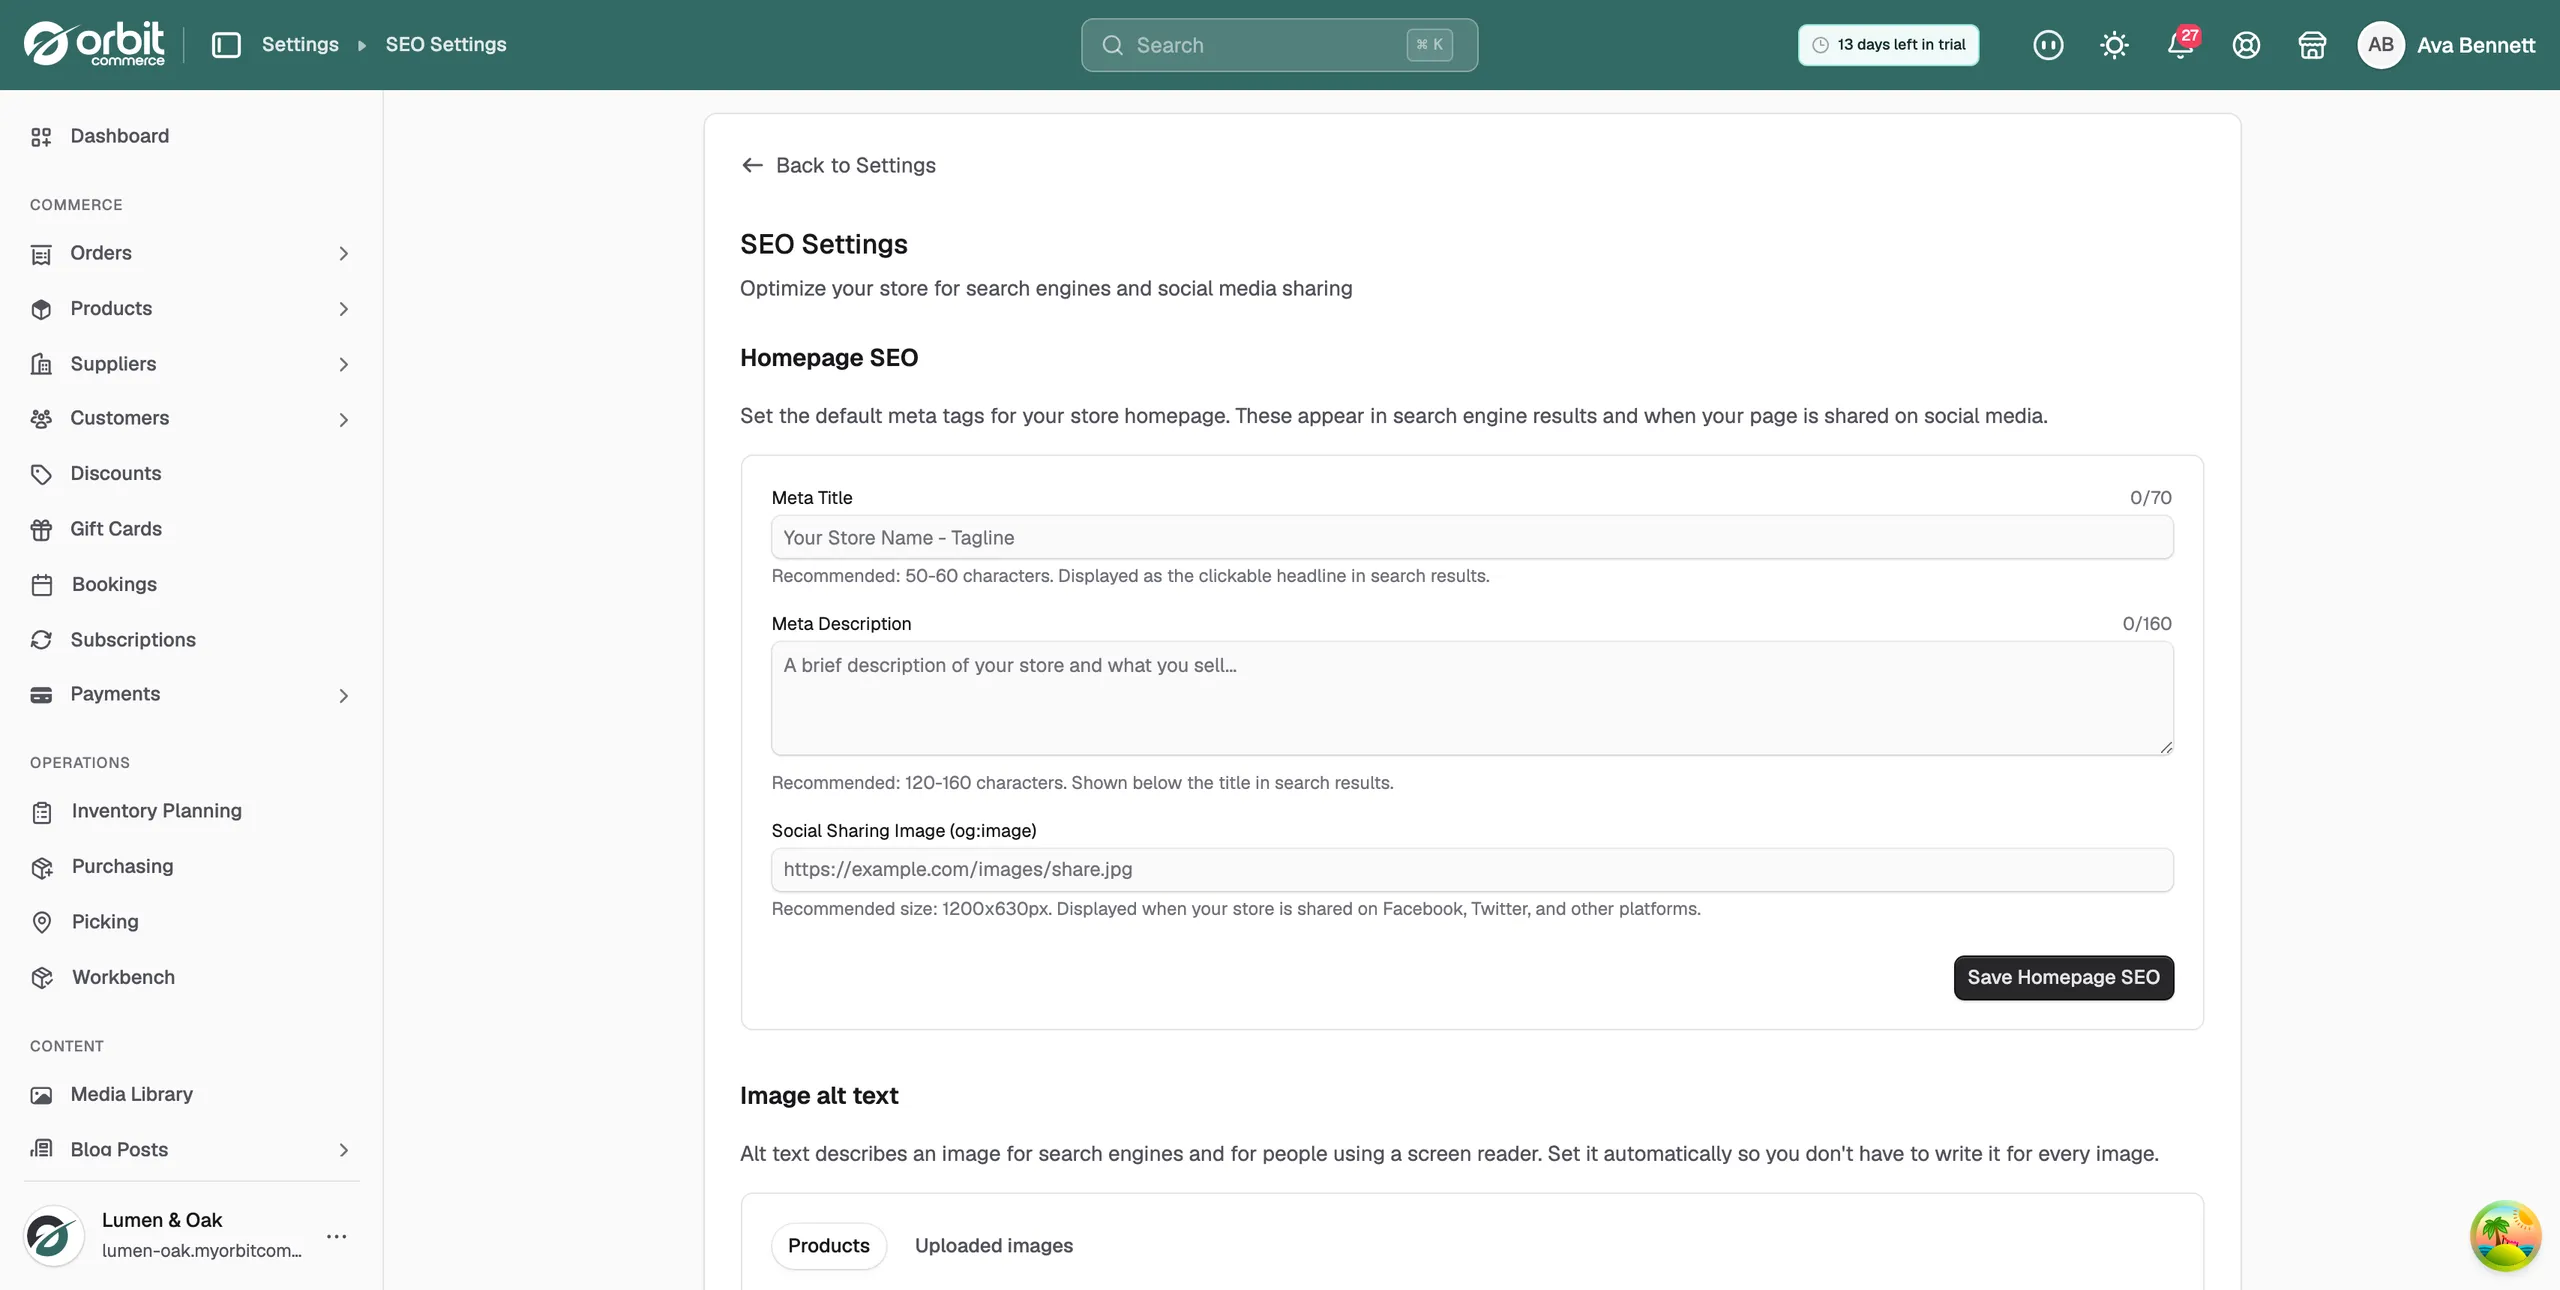
Set your homepage title and description
- Under Homepage SEO, type a Meta Title. This is the clickable headline Google shows. The counter next to the label runs to 70. Aim for 50 to 60 characters.
- Type a Meta Description. This is the summary shown under the headline. The counter runs to 160. Aim for 120 to 160 characters.
- In Social Sharing Image (og:image), paste the web address of an image. It shows when your store is shared on Facebook, X and other platforms. Use an image 1200 by 630 pixels.
- Click Save Homepage SEO. The message SEO settings saved successfully appears.
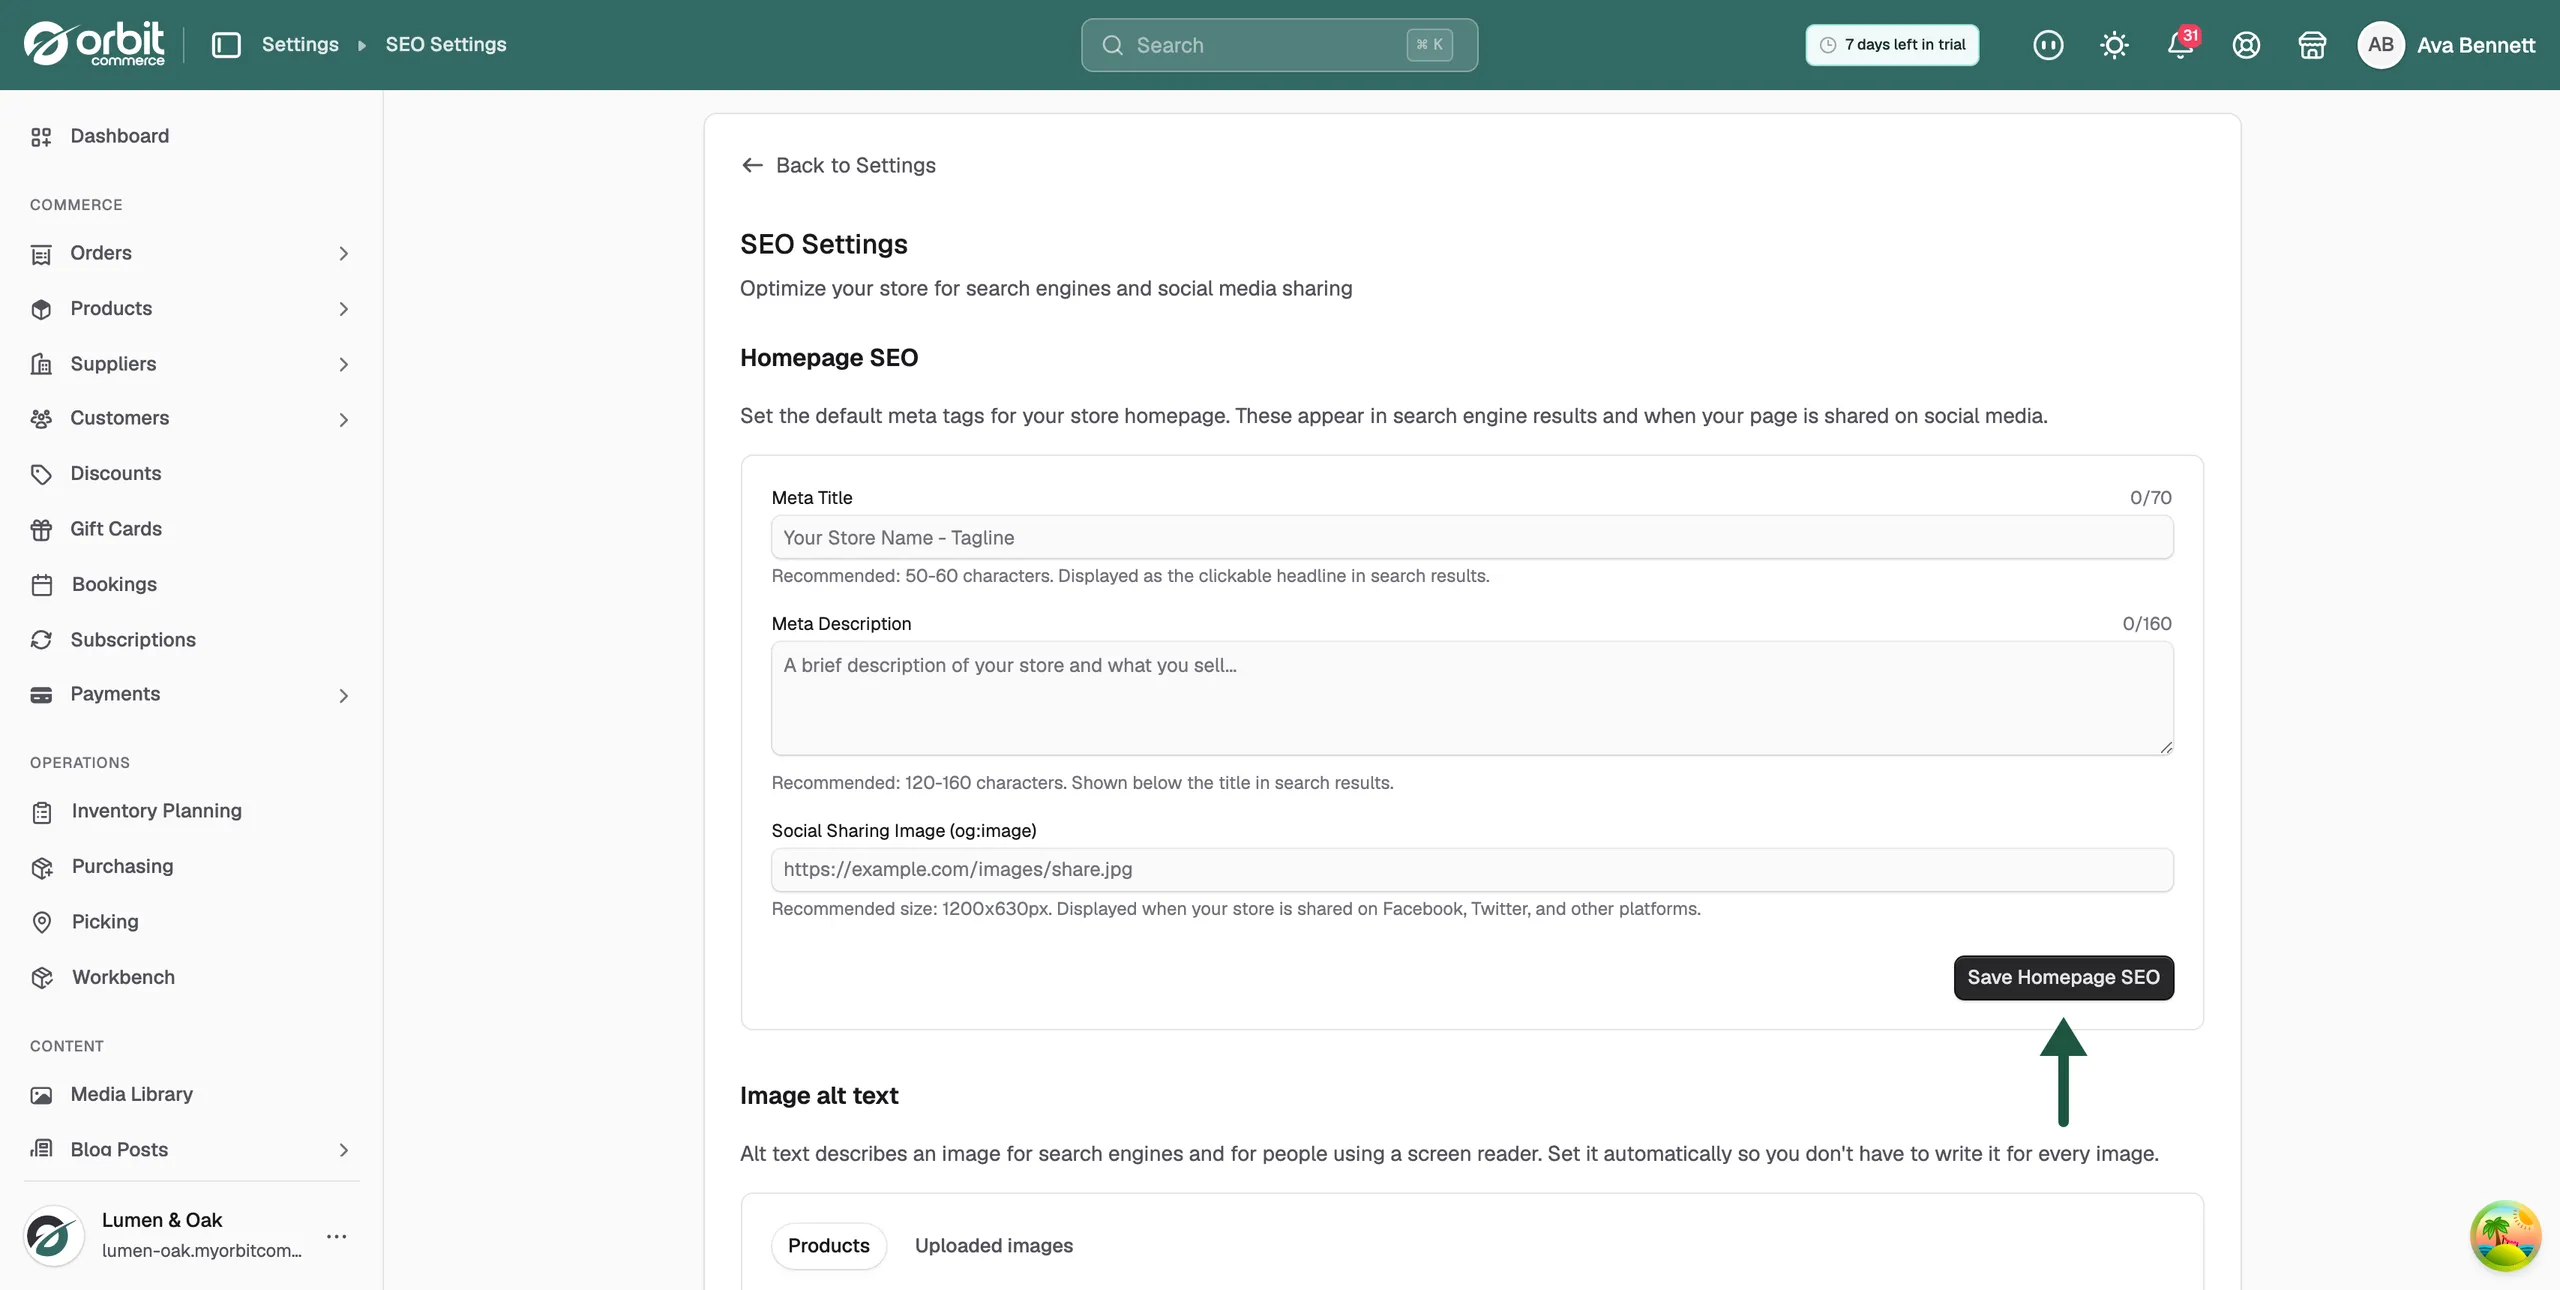
Note: The title field does not cut long text short. If you paste more than 70 characters, nothing is pasted. Shorten the text and try again.
Set alt text for product images
Alt text describes an image for search engines and for people who use a screen reader. The Image alt text card writes it for you from a template. The Products tab is ready to use. The Uploaded images tab is coming soon.
- Under Image alt text, pick a template:
- [product_name] [product_type] [brand] [variant_option1] [variant_option2] [variant_option3]: marked Recommended. Uses the product's own details.
- [product_name] [product_type] [brand]
- [product_name]
- Customise my own template: write your own. See below.
- Don't set alt text automatically: leaves alt text alone so you can write it yourself. Existing alt text is kept.
- Check the Preview box. It shows the alt text one of your products would get. Empty details, such as a missing brand, leave no gap.
- Click Save template. The message SEO settings saved successfully appears.
Write your own template
- Pick Customise my own template. An empty box appears with a row of buttons under it.
- Click a button, such as [product_name], to add that detail at the cursor. Type a space before you click the next one. The buttons add no spaces on their own.
- You can use [product_name], [product_type], [brand], [sku], [variant_option1], [variant_option2], [variant_option3], [store_name] and [position]. Any other word is written as plain text.
- Click Save template.
Apply the template to images you already have
Saving a template sets alt text on images from now on. To go back over existing product images:
- Click Resync alt text. The button only works once a template is saved.
- Pick Fill in the blanks only to write alt text on images that have none and leave the rest alone. Pick Overwrite everything to replace all product image alt text.
- Click Start resync. The message Resync queued appears. The update runs in the background. Check a product image in a few minutes.
Warning: Overwrite everything replaces alt text you wrote by hand and cannot be undone. Use Fill in the blanks only unless you are sure.
Edit your robots.txt
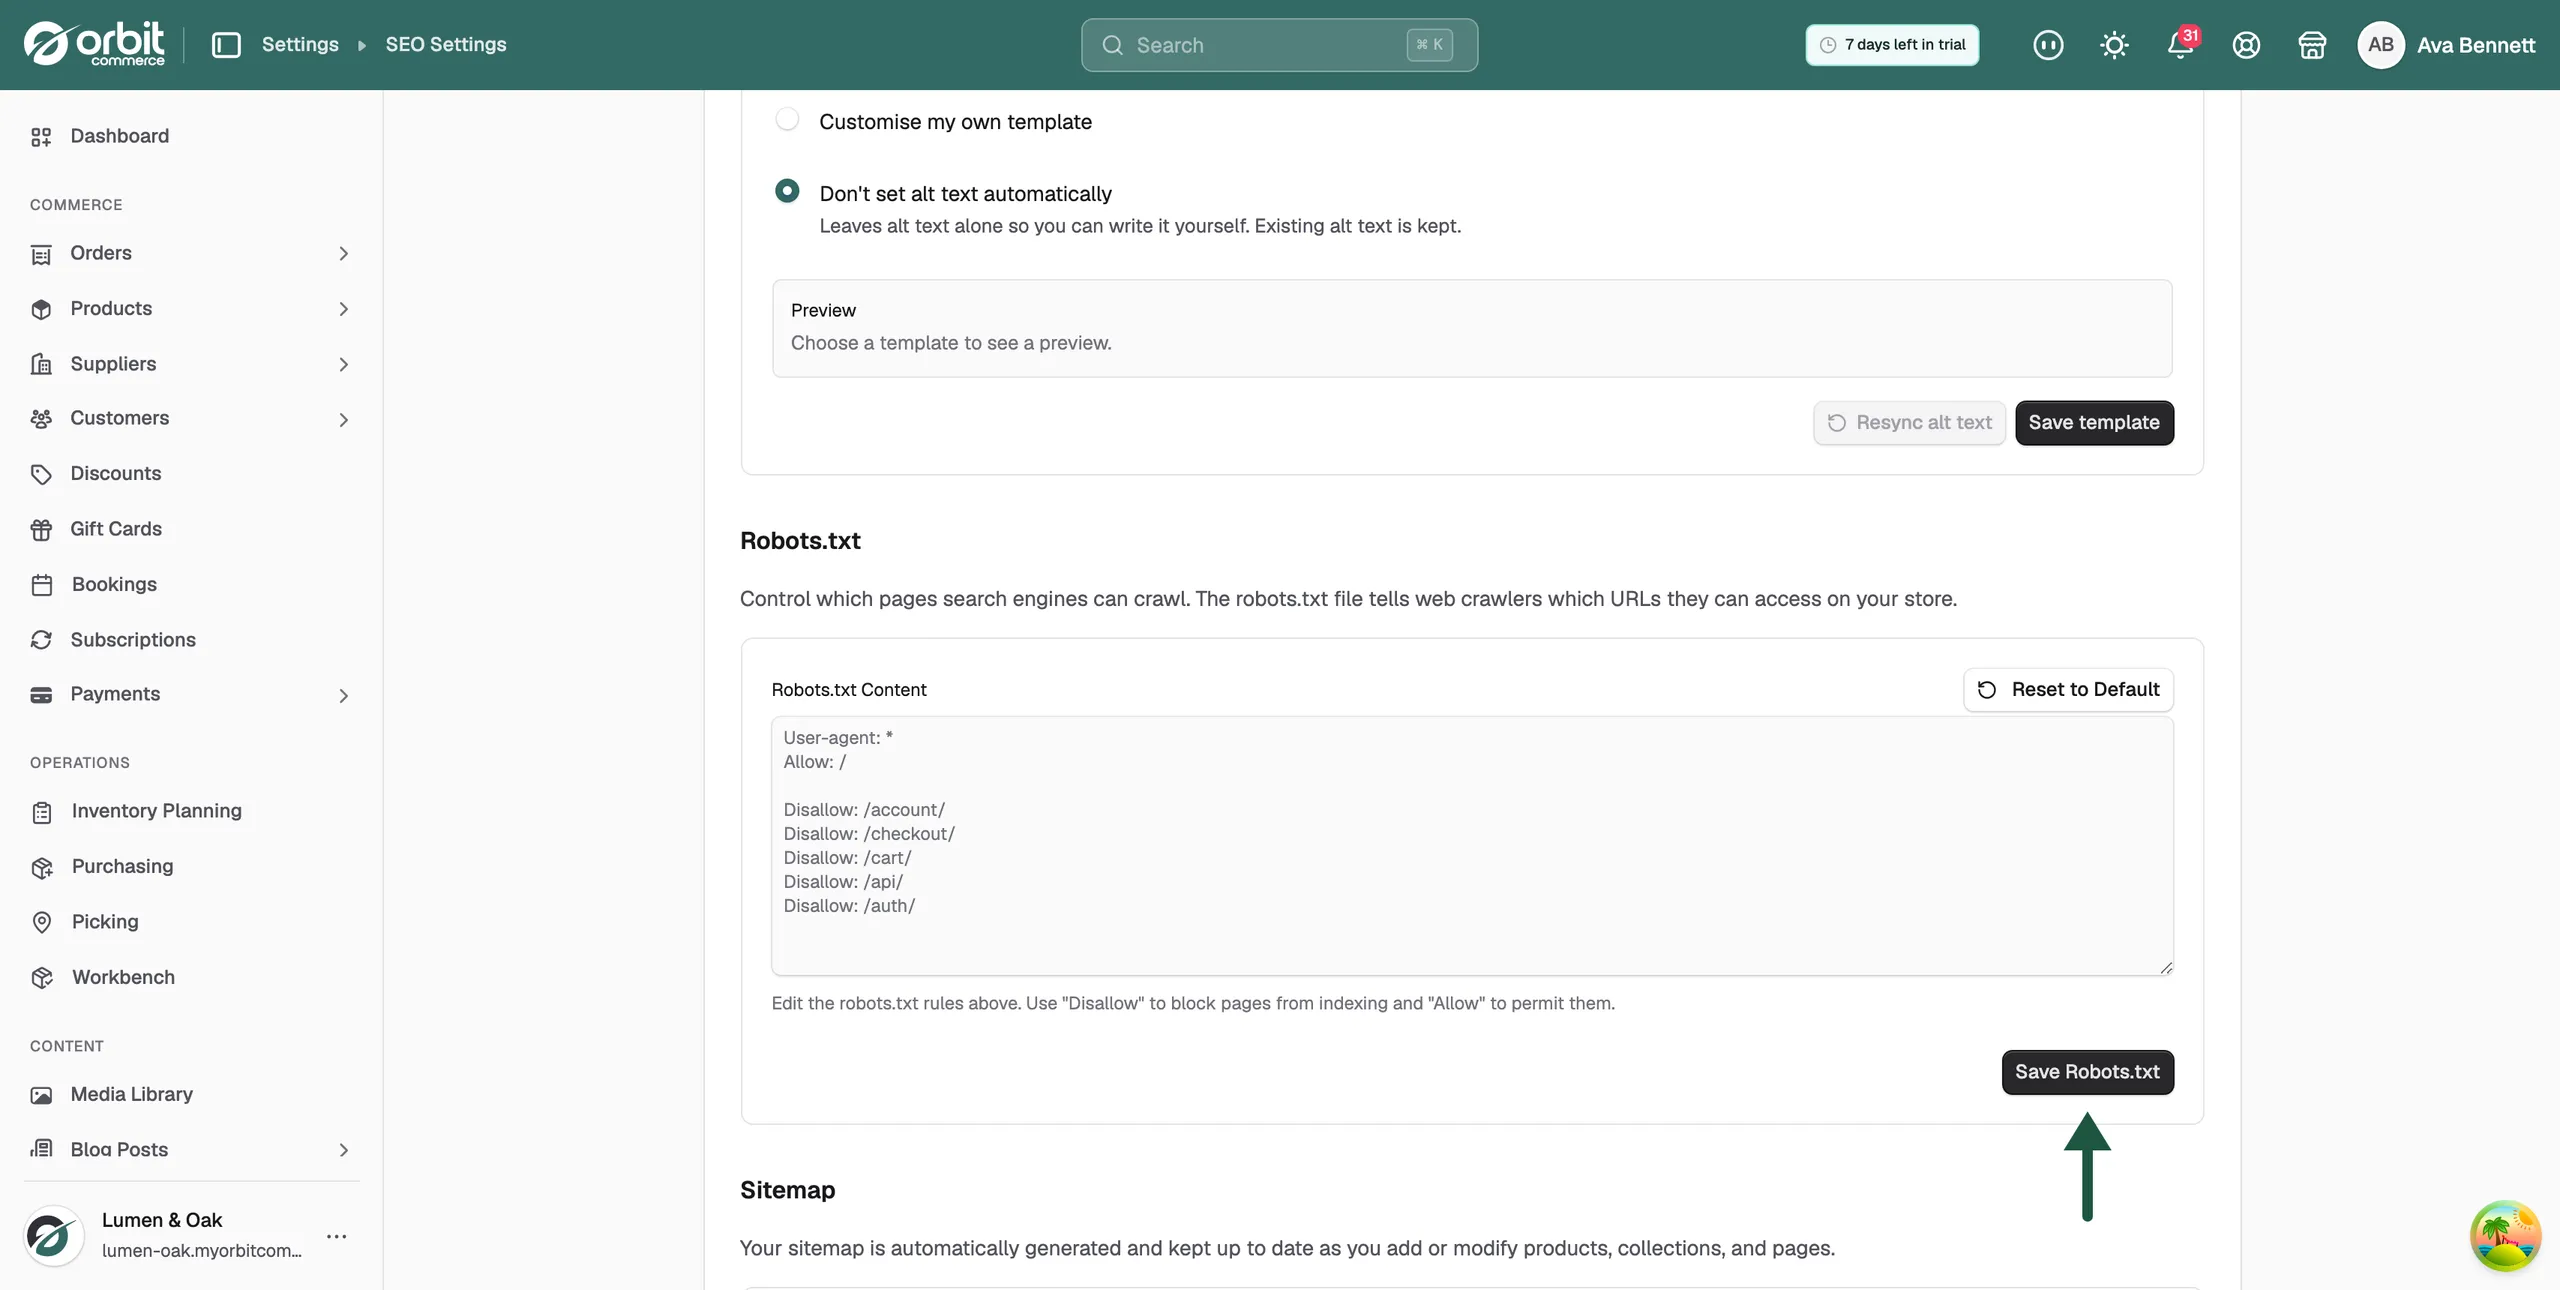
The robots.txt file tells search engines which pages they may crawl. The default rules let crawlers read your store but keep them out of the account, checkout, cart, API and login pages.
- Scroll to Robots.txt. On a new store the Robots.txt Content box shows the default rules in grey. Grey text is an example, not saved rules.
- Click Reset to Default to put the default rules in the box. The message Default robots.txt template restored. Click Save to apply. appears.
- Edit the rules if you need to. Use Disallow to block a path and Allow to permit one.
- Click Save Robots.txt.
Find your sitemap
Orbit builds a sitemap.xml for your storefront and keeps it up to date as you add or change products, collections and pages.
- Scroll to Sitemap. Your sitemap address is shown under Auto-Generated Sitemap.
- Click View Sitemap to open it in a new tab.
- Copy the address and submit it in Google Search Console so Google finds your pages sooner.
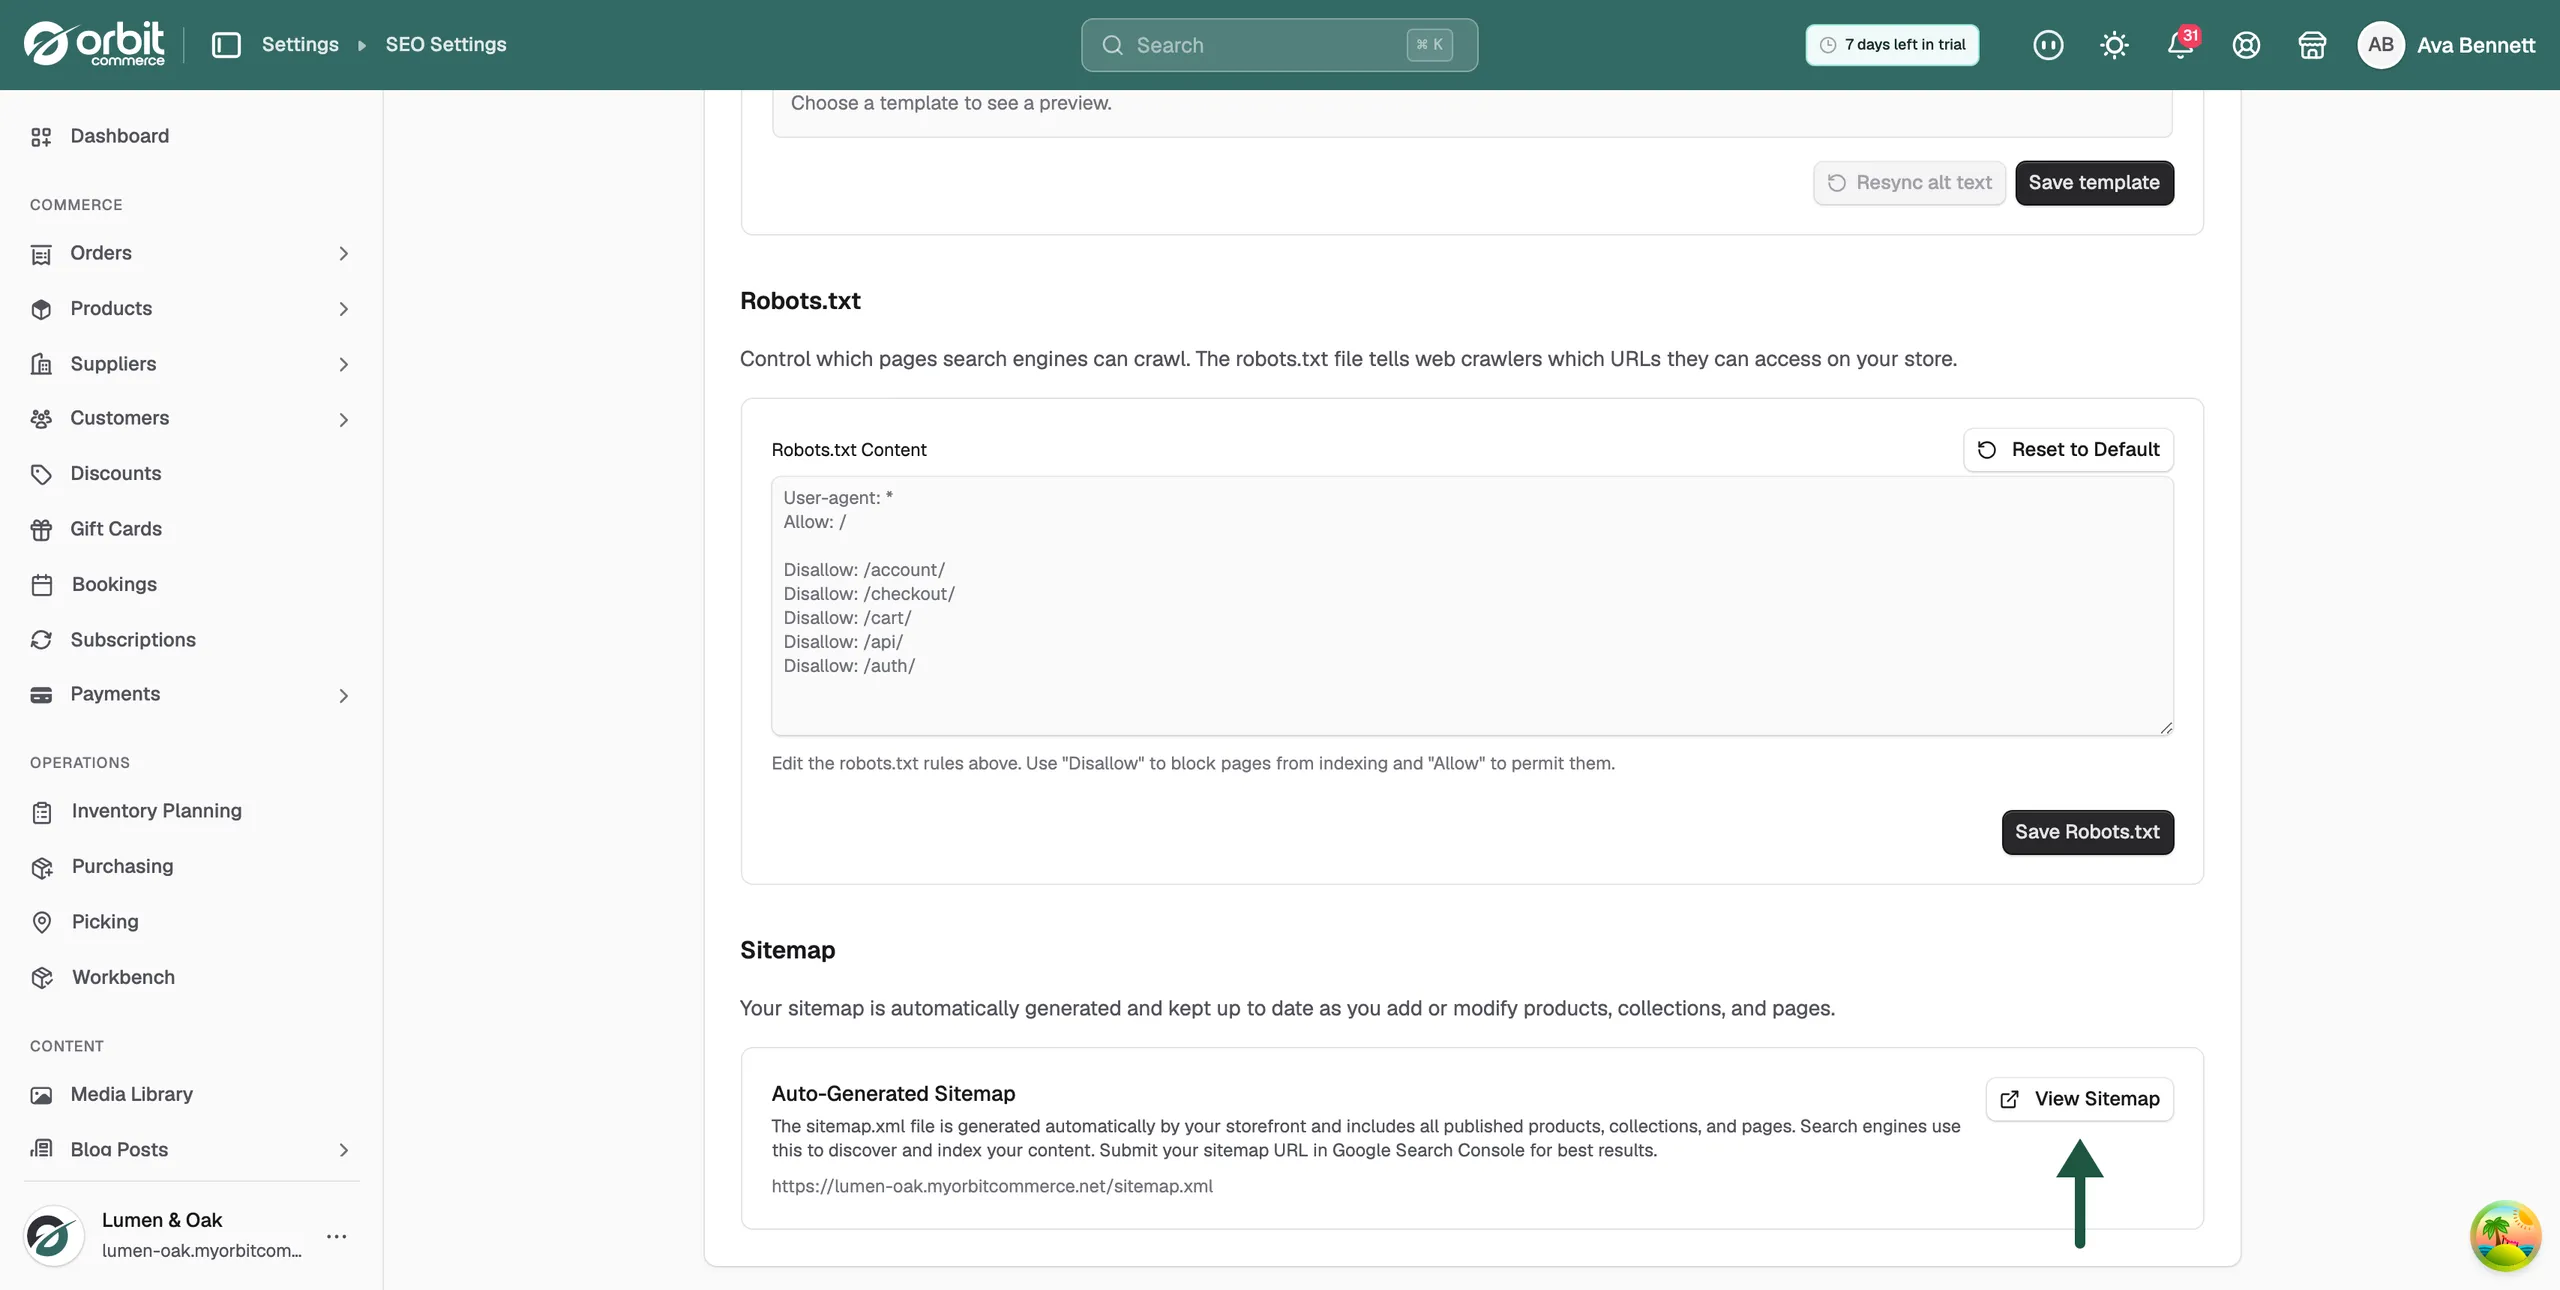
If the button is greyed out and the card reads Sitemap URL will be available once your store domain is configured, set up a domain first. See Setting up your domain.
Submit your sitemap to search engines
A sitemap is a list of the pages on your store. Search engines read it to find your pages sooner. Your sitemap address is your store domain followed by /sitemap.xml, such as your-store-domain.com/sitemap.xml. It is built for you and updates as your store changes.
Your sitemap lists:
- Products that are active
- Categories that are active
- Pages you have created and published. Page templates, such as the home or product template, are not listed on their own.
- Blog posts that are published
- Brands that are active
Drafts and deleted items are left out. So are pages, categories and brands you have limited to certain customers, because search engines are not signed in.
- Copy your sitemap address from the Sitemap card.
- Sign in to Google Search Console, prove that you own the domain, then submit the address.
- Sign in to Bing Webmaster Tools, prove that you own the domain, then submit the same address.
- Give both a few days. A new sitemap is not read straight away.
Search engines read your robots.txt rules before they read your sitemap. If those rules block your store, submitting the sitemap makes no difference.
Warning: In the Robots.txt Content box, a Disallow line that ends in a single slash tells search engines to stay away from your whole store. Your pages then fade out of search results over the following weeks. Keep your homepage, products and categories allowed. If you are not fixing a set problem, click Reset to Default and save.
Related guides
Was this helpful?
0 people found this helpful