Securing your account and checking the activity log
Change your password, find the passkey and two-factor cards, and use the Activity Log to see who changed what in your store over the last 180 days.
Security Settings is where you change your password, add passkeys, turn on two-factor authentication and check the browsers you have trusted. The Activity Log lists every change made to your store in the last 180 days. Both live under Settings in your Orbit dashboard.
Considerations
- Security Settings protects your own login, not the store. Each team member sets up their own password and second factor.
- Changing your password signs you out of every browser and removes all trusted devices. Have your new password ready to log in again.
- The Activity Log is open to the Store Owner and Store Administrator roles.
- The Activity Log records changes to the store: orders, products, settings and so on. It does not record sign-ins or password changes.
Open Security Settings
- From your Orbit dashboard, go to Settings.
- Under Team & Access, click Security. The Security Settings page opens.
The page has four cards:
- Change Password: set a new password for your login.
- Passkeys: sign in with your fingerprint, face or device PIN instead of a password.
- Two-Factor Authentication: ask for a code from an authenticator app or by SMS at each sign-in.
- Trusted devices: browsers where you chose to skip the second factor for a while.
Passkeys, two-factor authentication and trusted devices are covered in Setting up two-factor authentication and passkeys.
Change your password
- On the Security Settings page, find the Change Password card.
- In Current Password, type the password you use now.
- In New Password, type your new password. A strength meter appears as you type. It scores length, capitals, numbers and symbols. Aim for Strong.
- In Confirm New Password, type the new password again.
- Click Update Password. The message Password changed successfully. Please log in again with your new password. appears and Orbit signs you out.
- Log in again with your new password.
Tip: Click the eye icon at the end of each field to show or hide what you have typed. Use a long password that you do not use anywhere else.
Open the Activity Log
- From your Orbit dashboard, go to Settings.
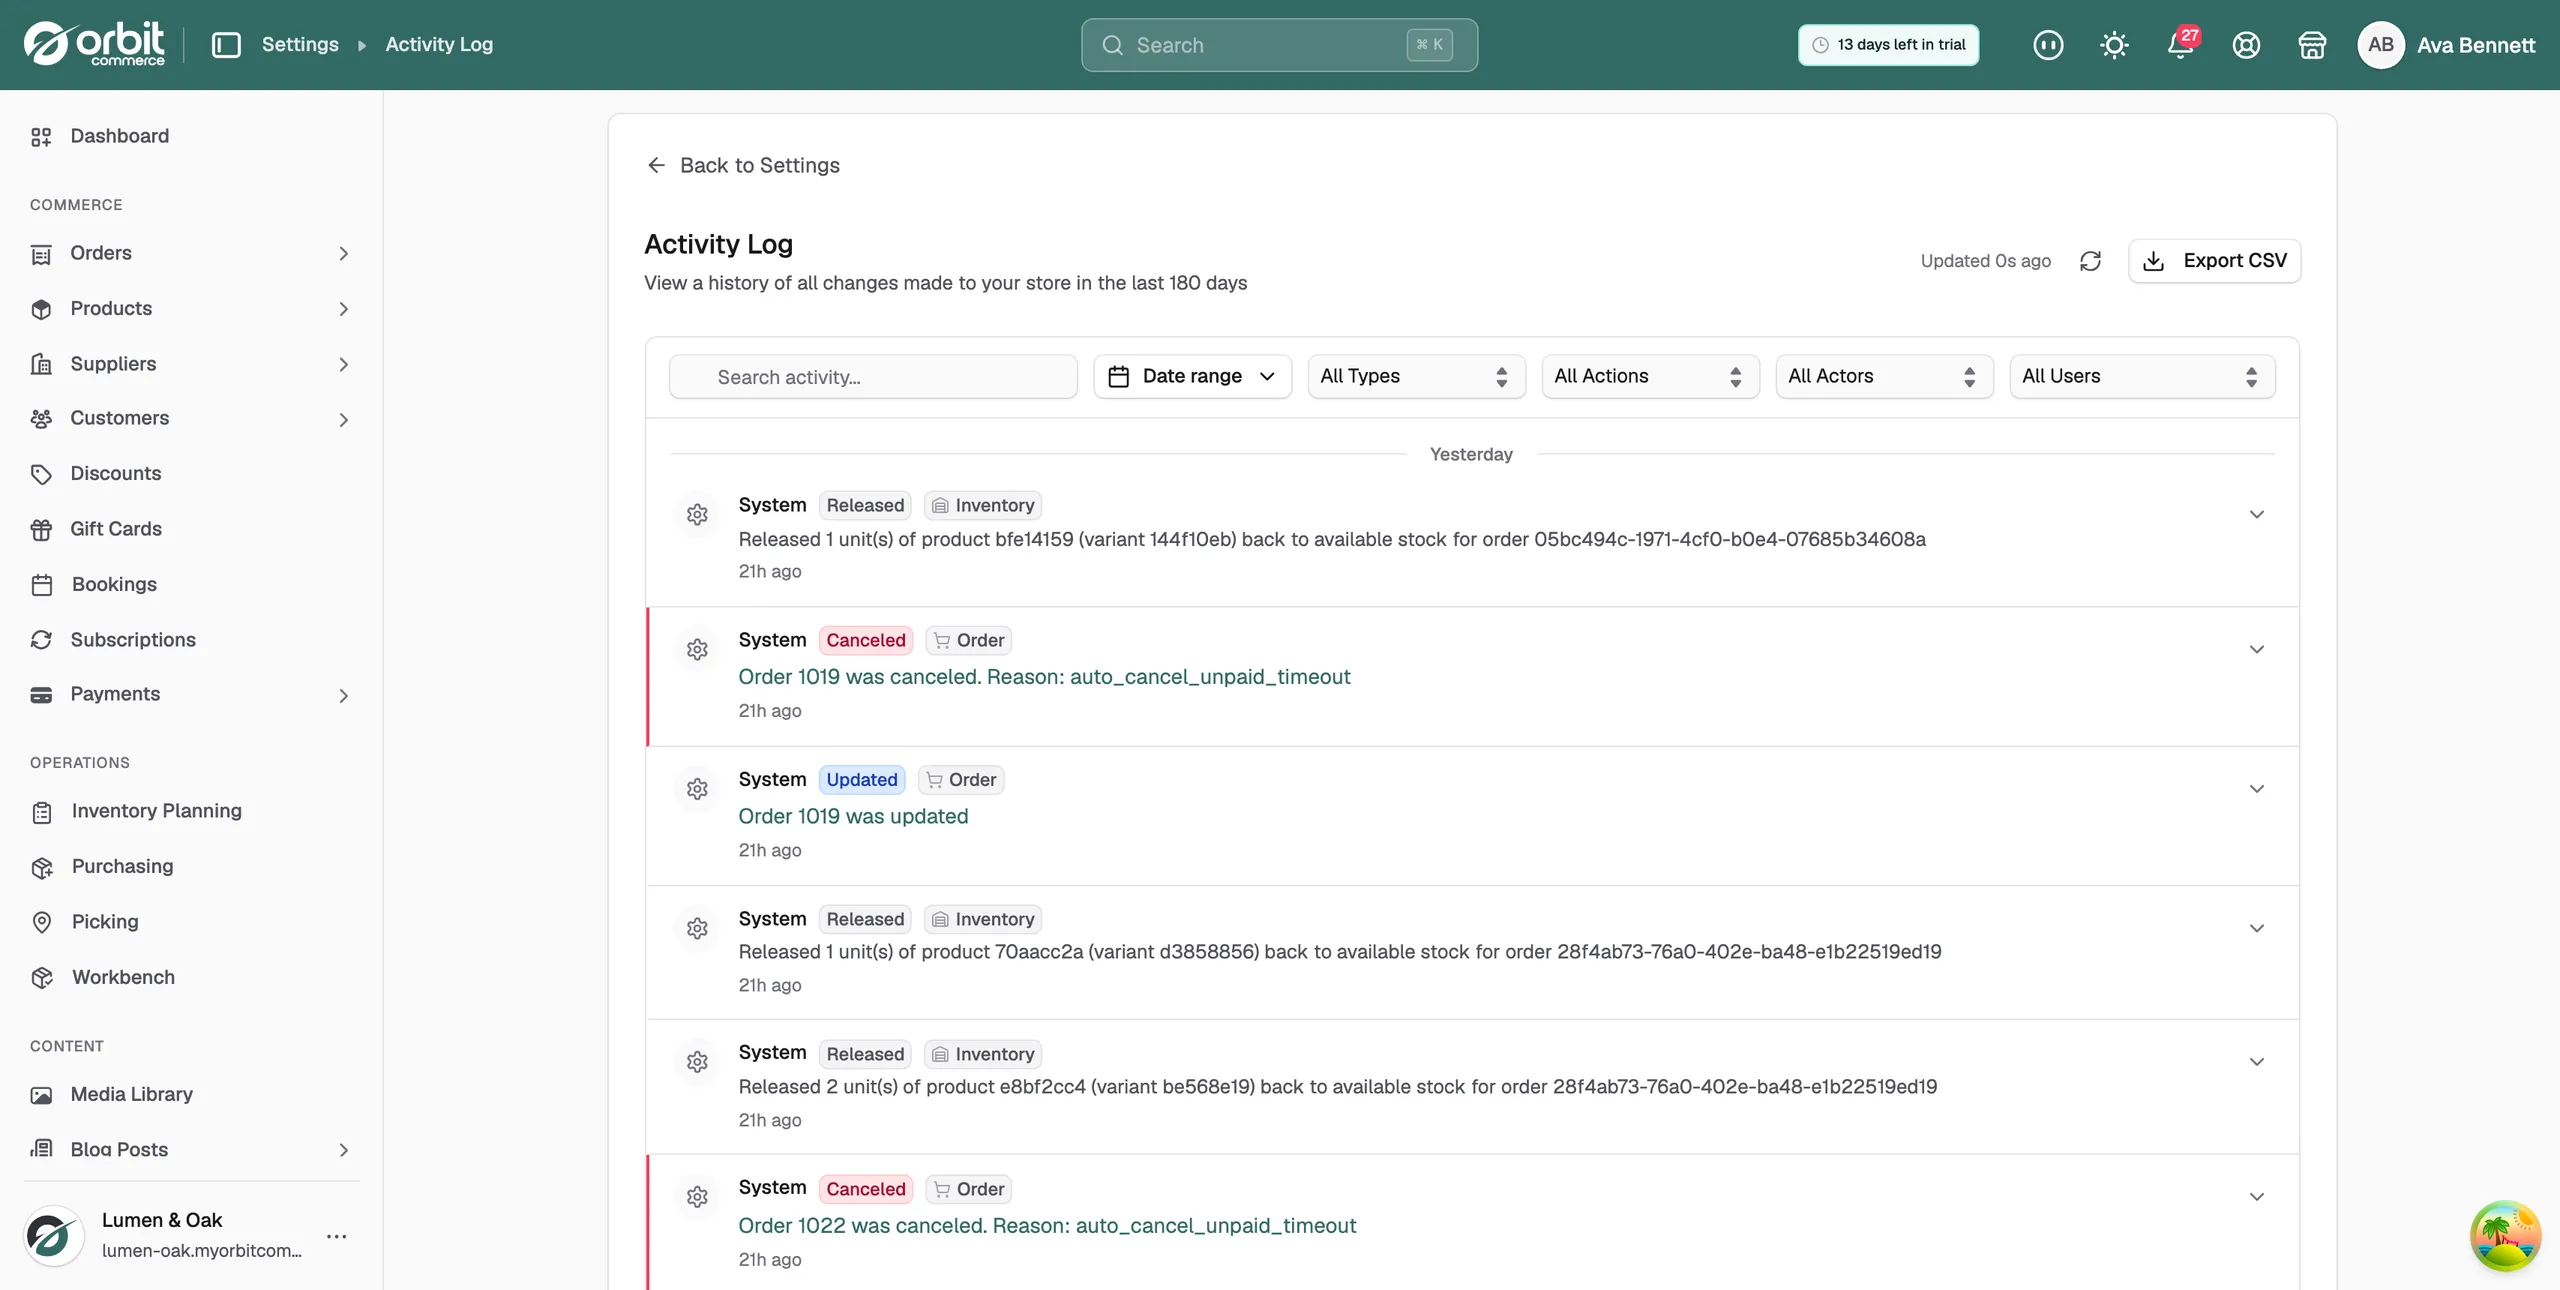
- Under Insights & Tracking, click Activity Log. The log opens with the newest entries first, grouped by day.
Read an entry
Each row is one change. A row shows:
- Who: the name of the team member, or System for changes Orbit made on its own. Apps, customers and support staff get a badge next to the name.
- Action: what happened, such as Created, Updated or Canceled.
- Type: the kind of record, such as Order, Inventory or Settings.
- Description: a plain sentence about the change. When it is a link, click it to open the record.
- Time: how long ago it happened, with the IP address it came from.
Click the arrow at the right of a row to expand it. The detail shows the exact date and time, the IP address and the browser. For some changes it also lists each field with its old and new value. Rows with nothing more to show have no arrow.
Filter the log
Use the controls at the top of the log to narrow the list:
- Search activity...: find entries by keyword.
- Date range: Today, Last 7 days, Last 30 days, Last 90 days or Custom.
- All Types: show one kind of record, such as Order.
- All Actions: show one kind of change, such as Updated.
- All Actors: Staff, Apps, System, Customers or Support access.
- All Users: changes made by one team member.
Each filter you set appears as a chip under the controls. Click the × on a chip to remove it, or click Clear all.
Note: The type and action lists only show what your store has logged. A new store with orders only lists Order, not every type Orbit can record.
Export the log
- Set any filters you want.
- Click Export CSV at the top right. The file downloads to your computer.
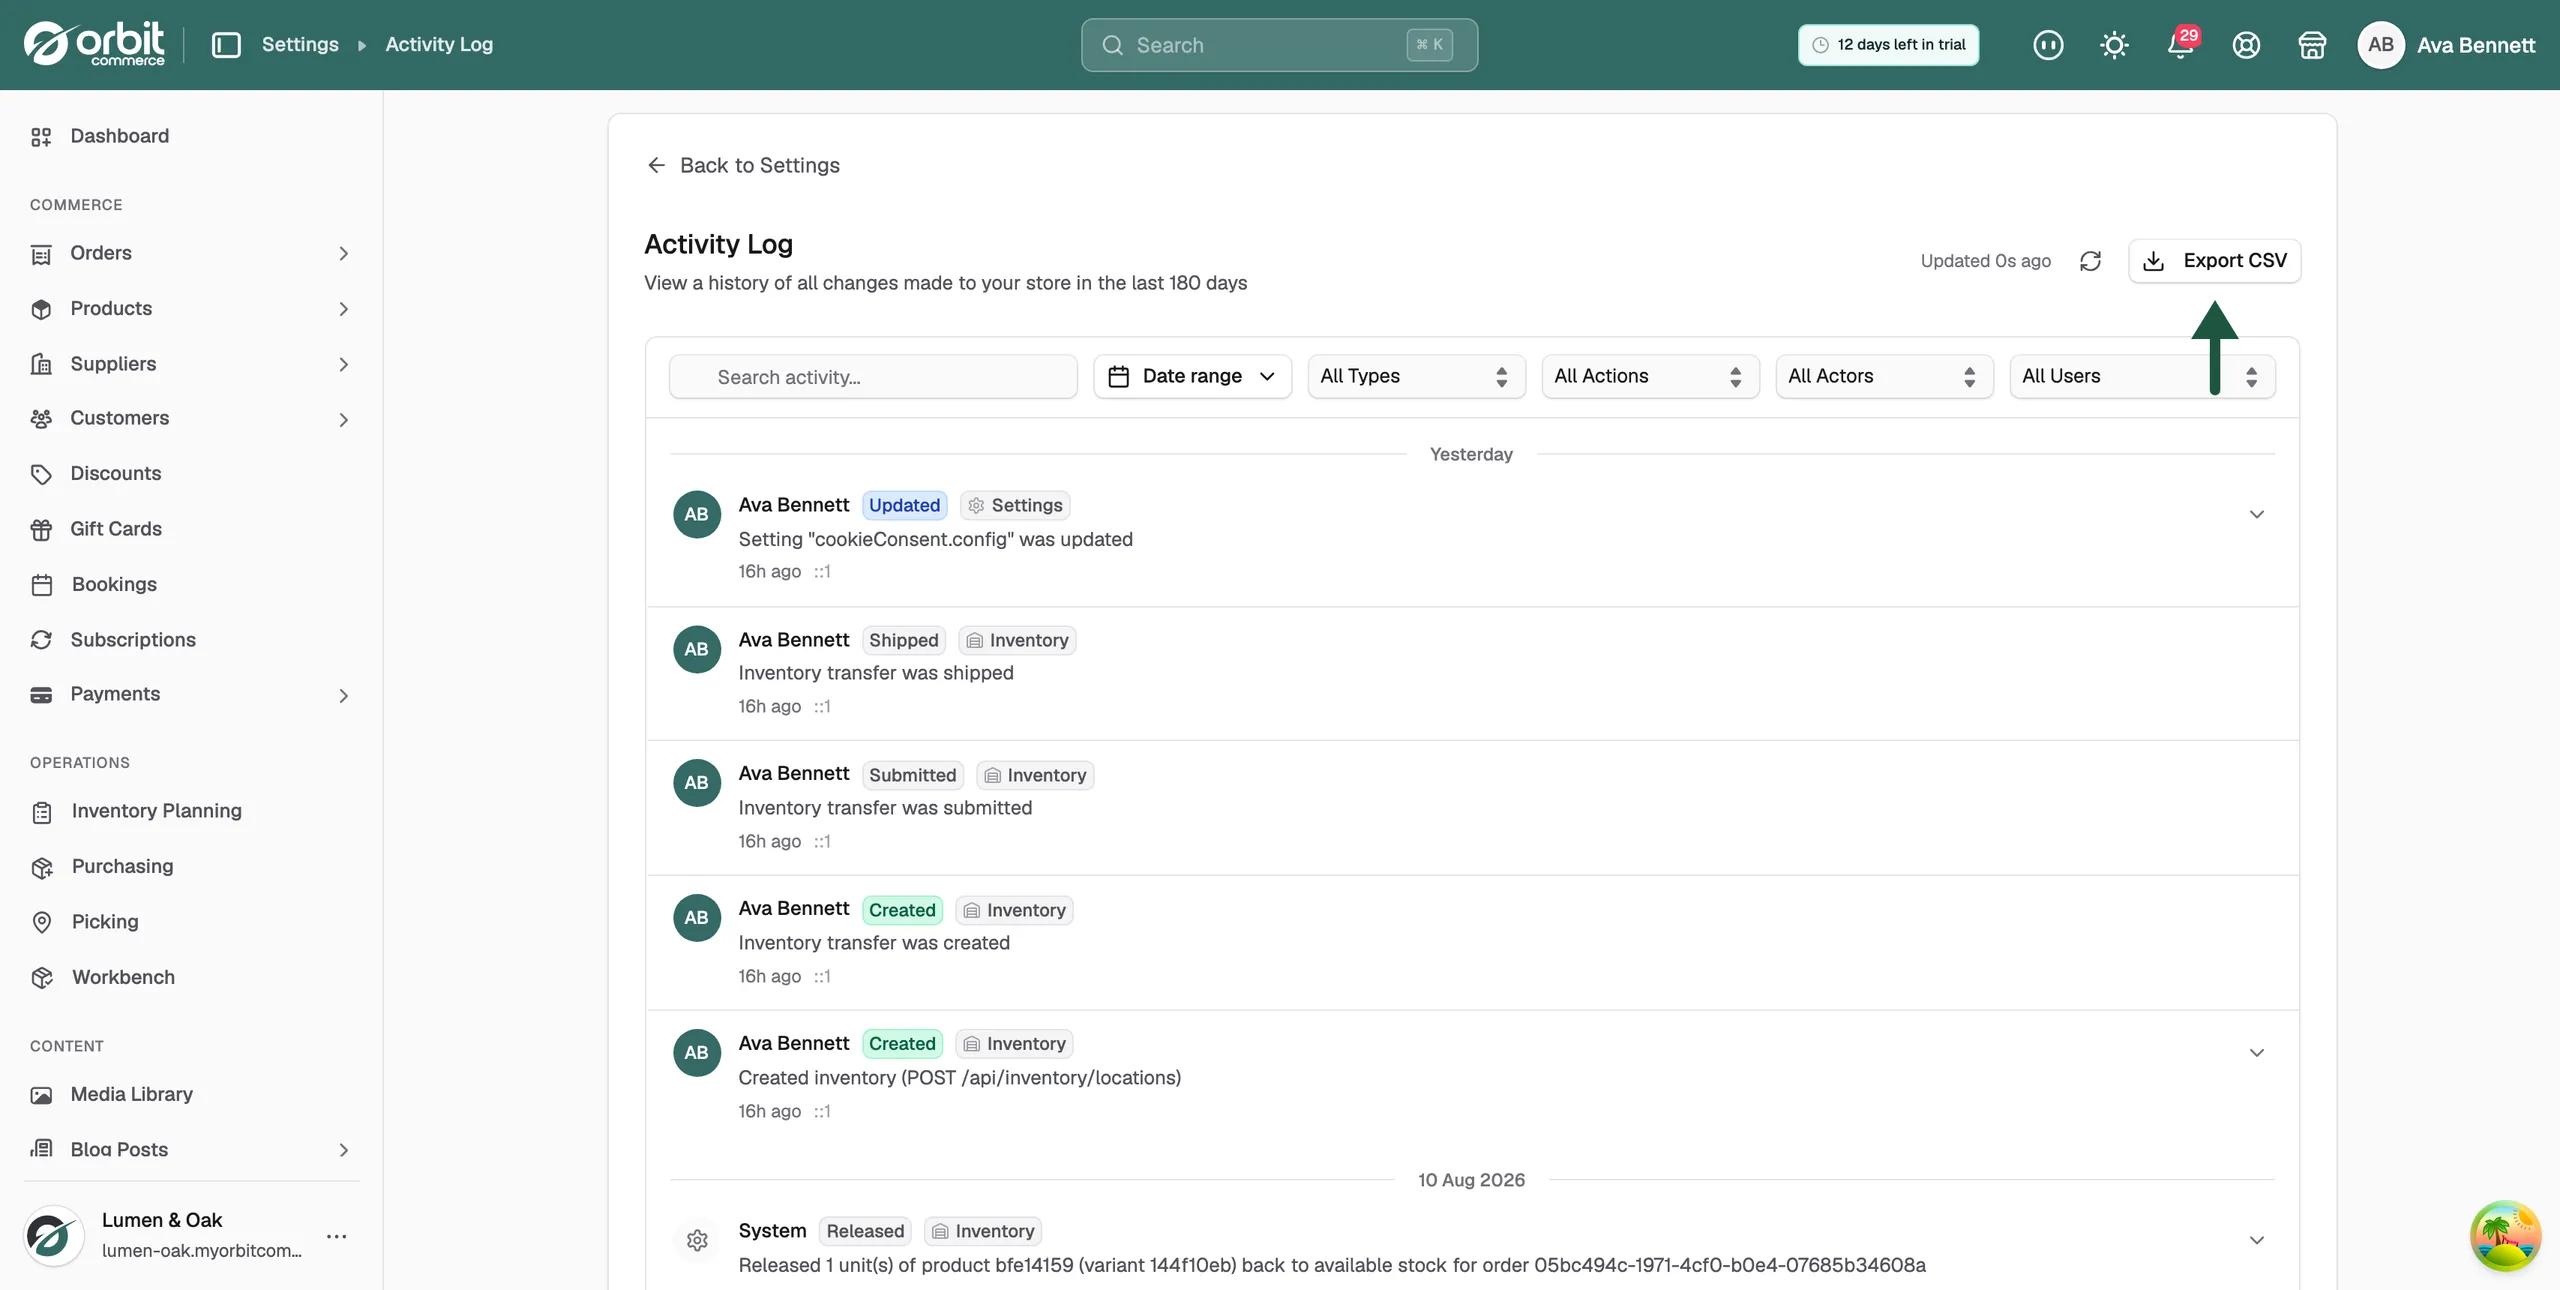
The button is greyed out when the log is empty.
Related guides
Was this helpful?
0 people found this helpful