Settings | Team
The Team section in Orbit allows you to manage who can access your store, invite new team members, assign roles, and control permissions.
The Team section in Orbit allows you to manage who can access your store, invite new team members, assign roles, and control permissions.
This is useful when multiple people are helping manage your store, such as warehouse staff, customer service users, admins, marketers, or external partners.
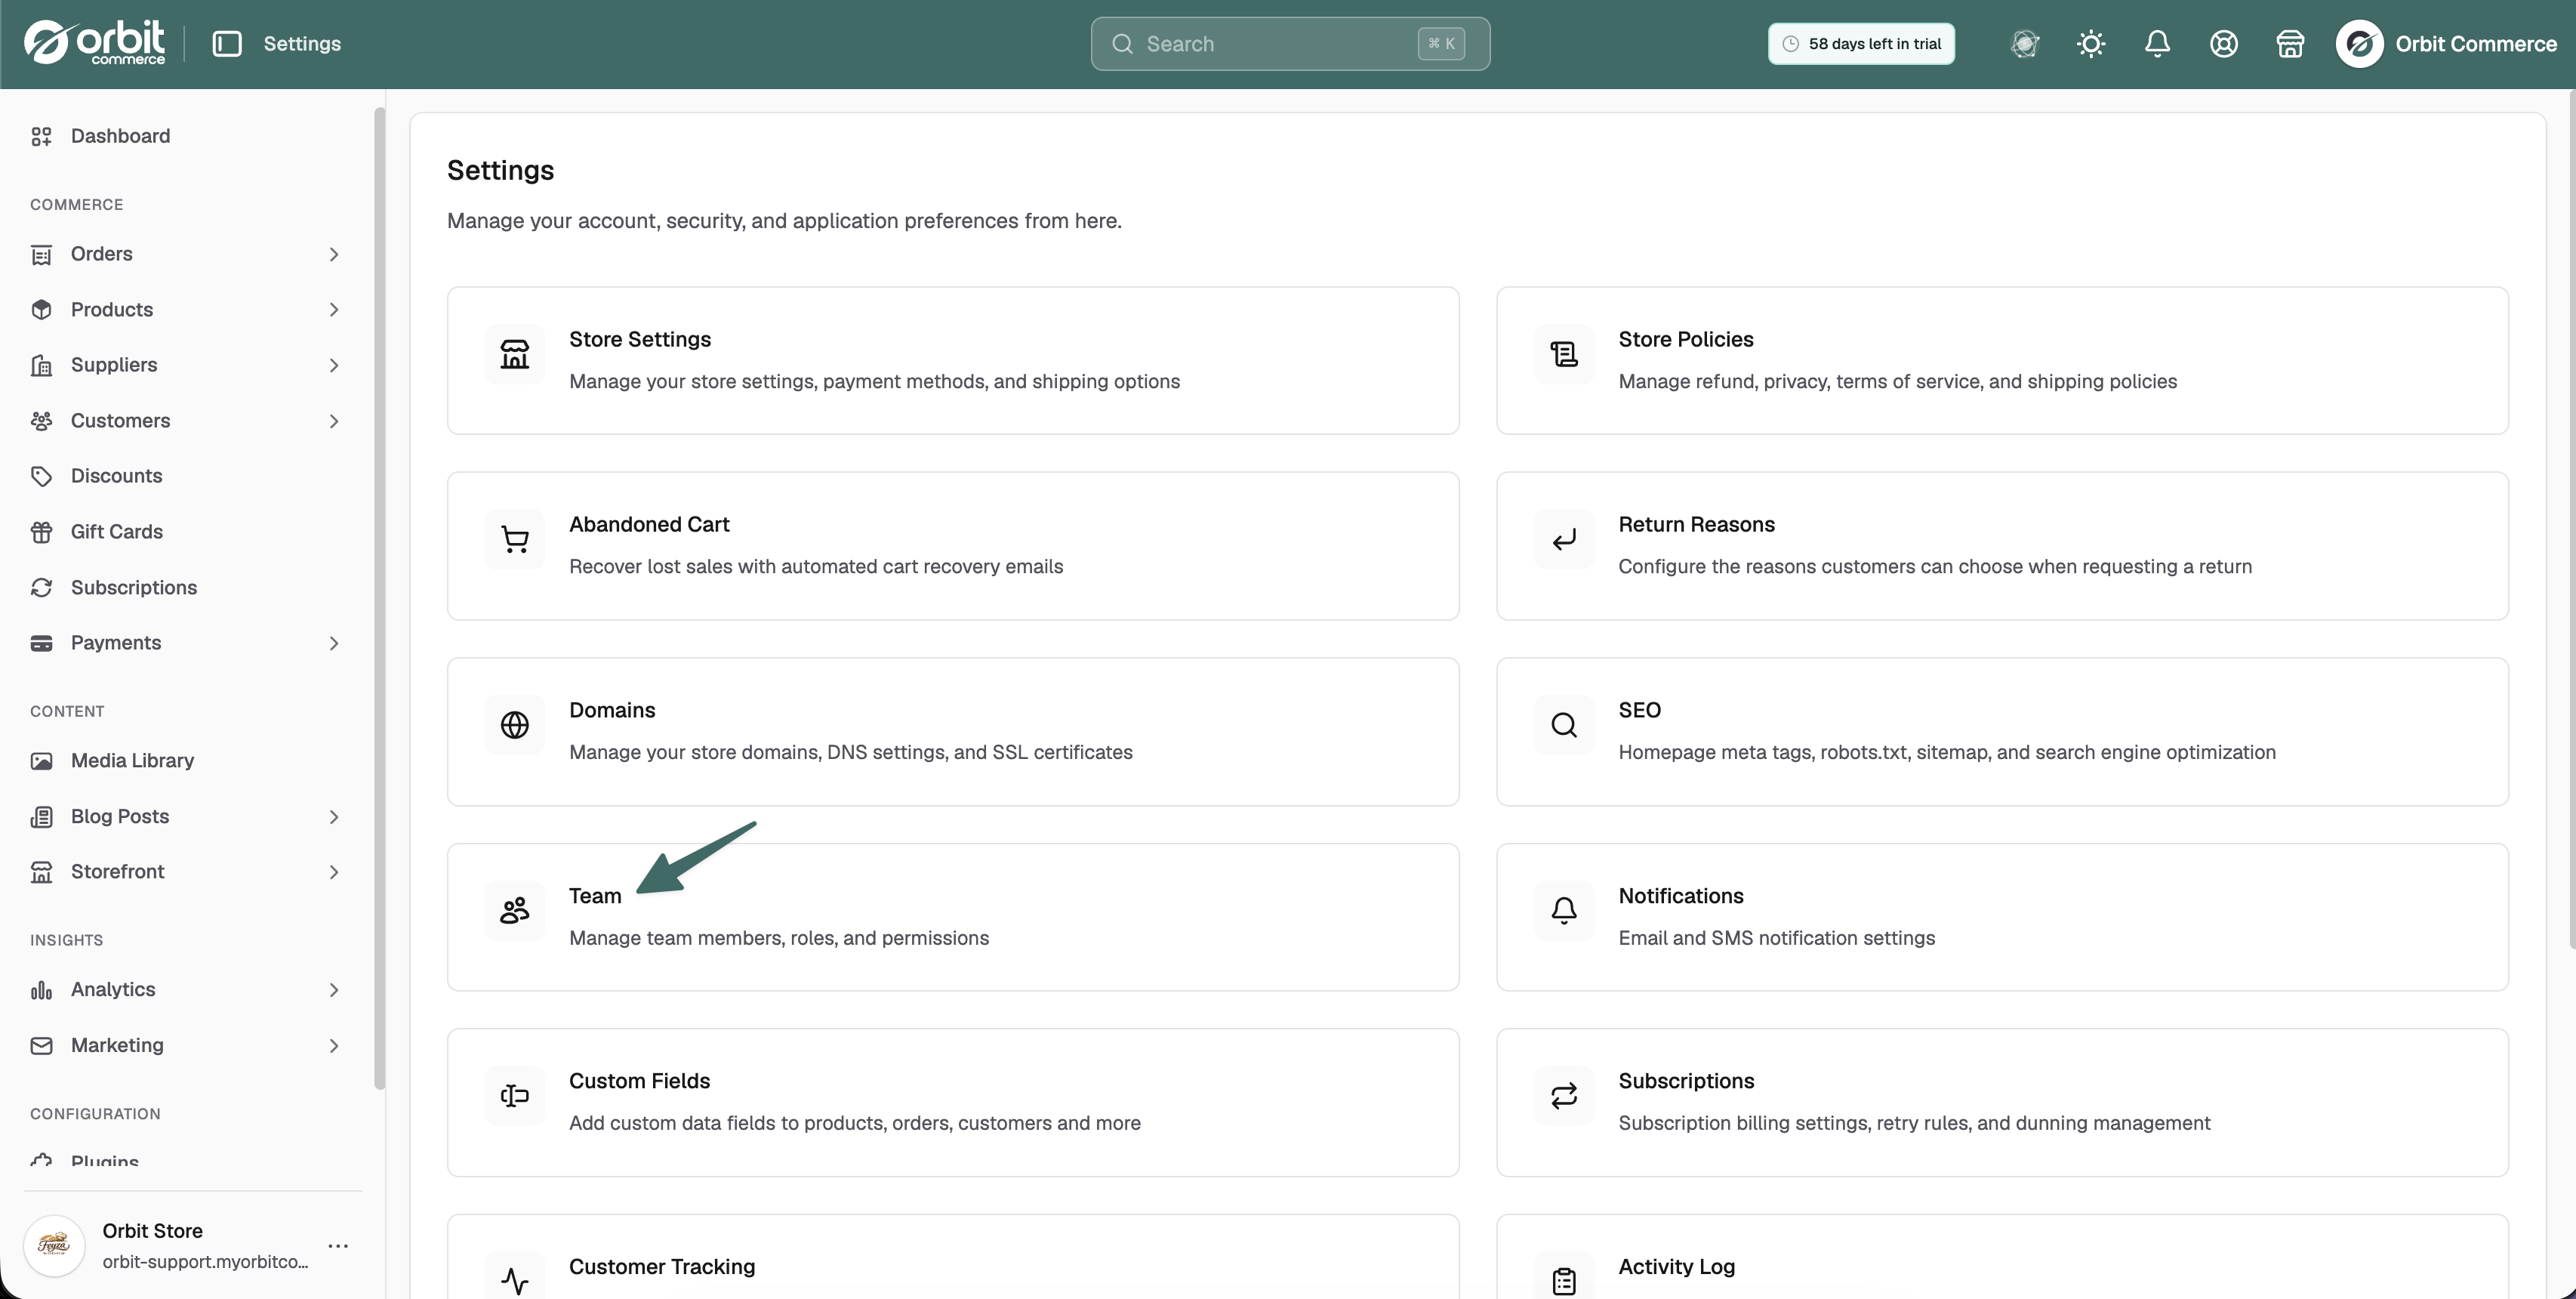
Accessing Team Settings
To access the Team area:
From the left-hand menu, go to Settings.
Select Team.
The Team page allows you to manage your team members, roles, and permissions from one place.
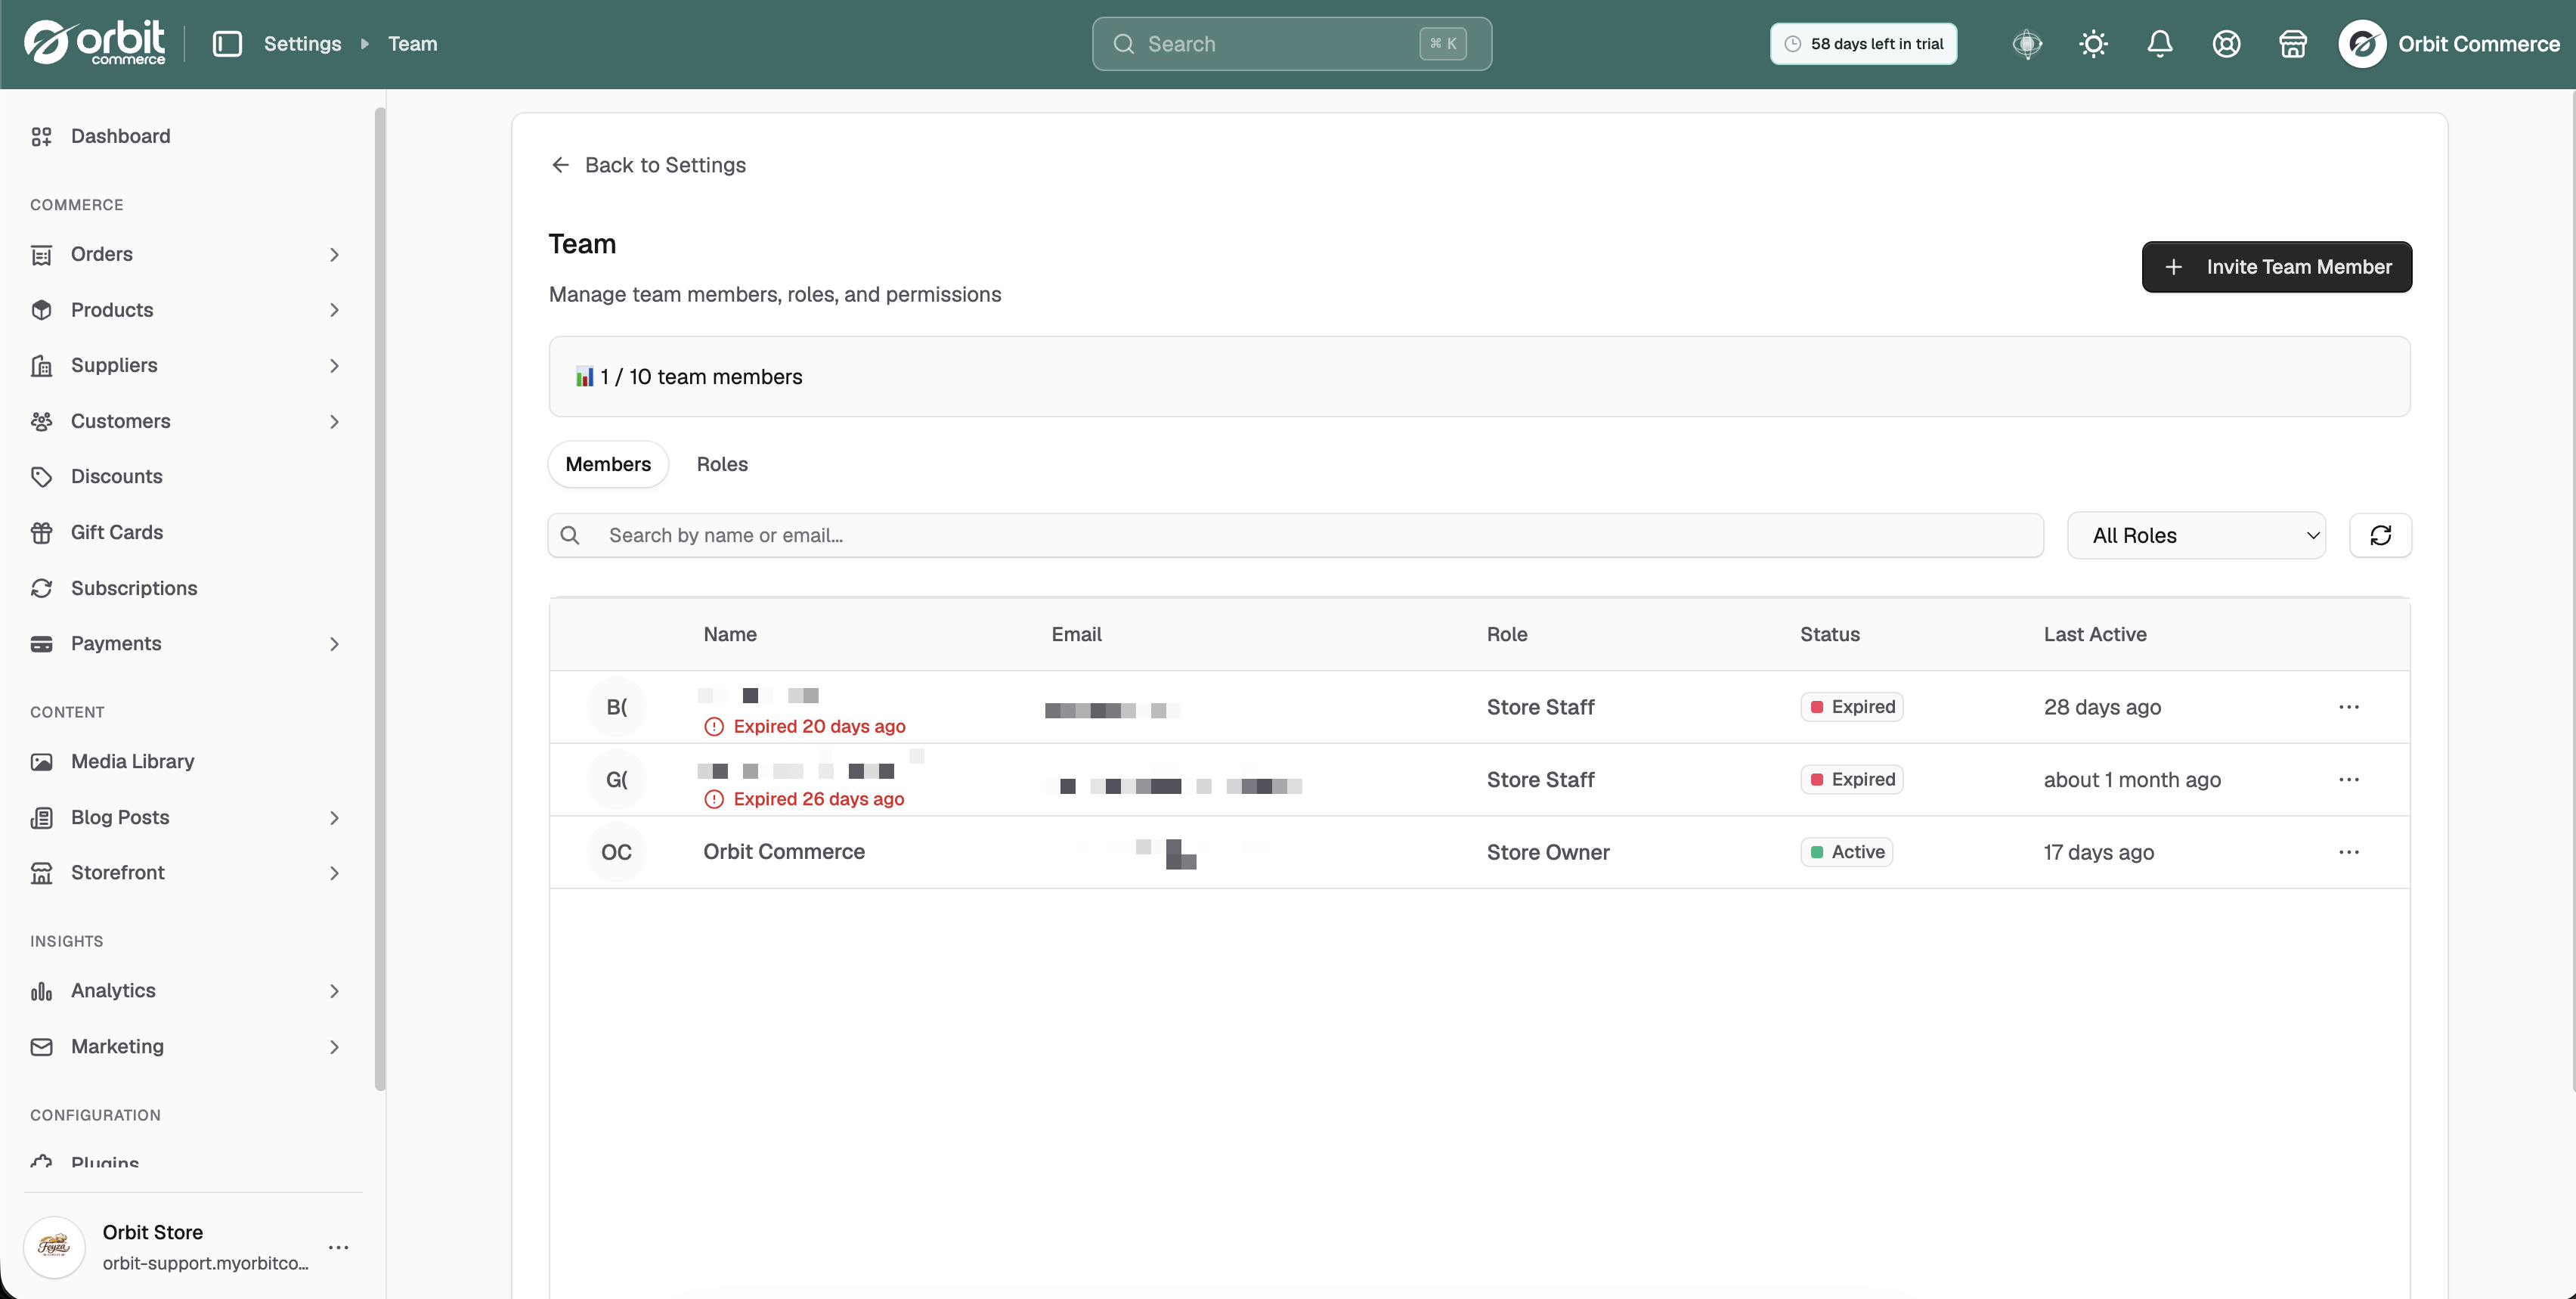
Team Overview
At the top of the Team page, you will see your current team member usage.
This shows how many team members are currently using your available team member allowance.
The page is split into two main tabs:
Members
Roles
Members
The Members tab displays all users who have access to your Orbit store or who have been invited.
The member table includes:
Name
The team member’s name or invitation name.
Email
The email address used for the invitation or account.
Role
The role assigned to the user, such as Store Owner or Store Staff.
Status
The current status of the user, such as Active or Expired.
Last Active
Shows when the user was last active or when the invitation was last updated.
You can use the search bar to quickly find a member by name or email address.
You can also use the role filter to view users assigned to a specific role.
Inviting a Team Member
To invite a new team member:
Click Invite Team Member.
Enter the team member’s email address.
Enter their first name and last name.
Select a role.
Choose whether to send a welcome email with account setup instructions.
Click Send Invitation.
If the welcome email option is enabled, the invited user will receive instructions to set up their account and access the store.

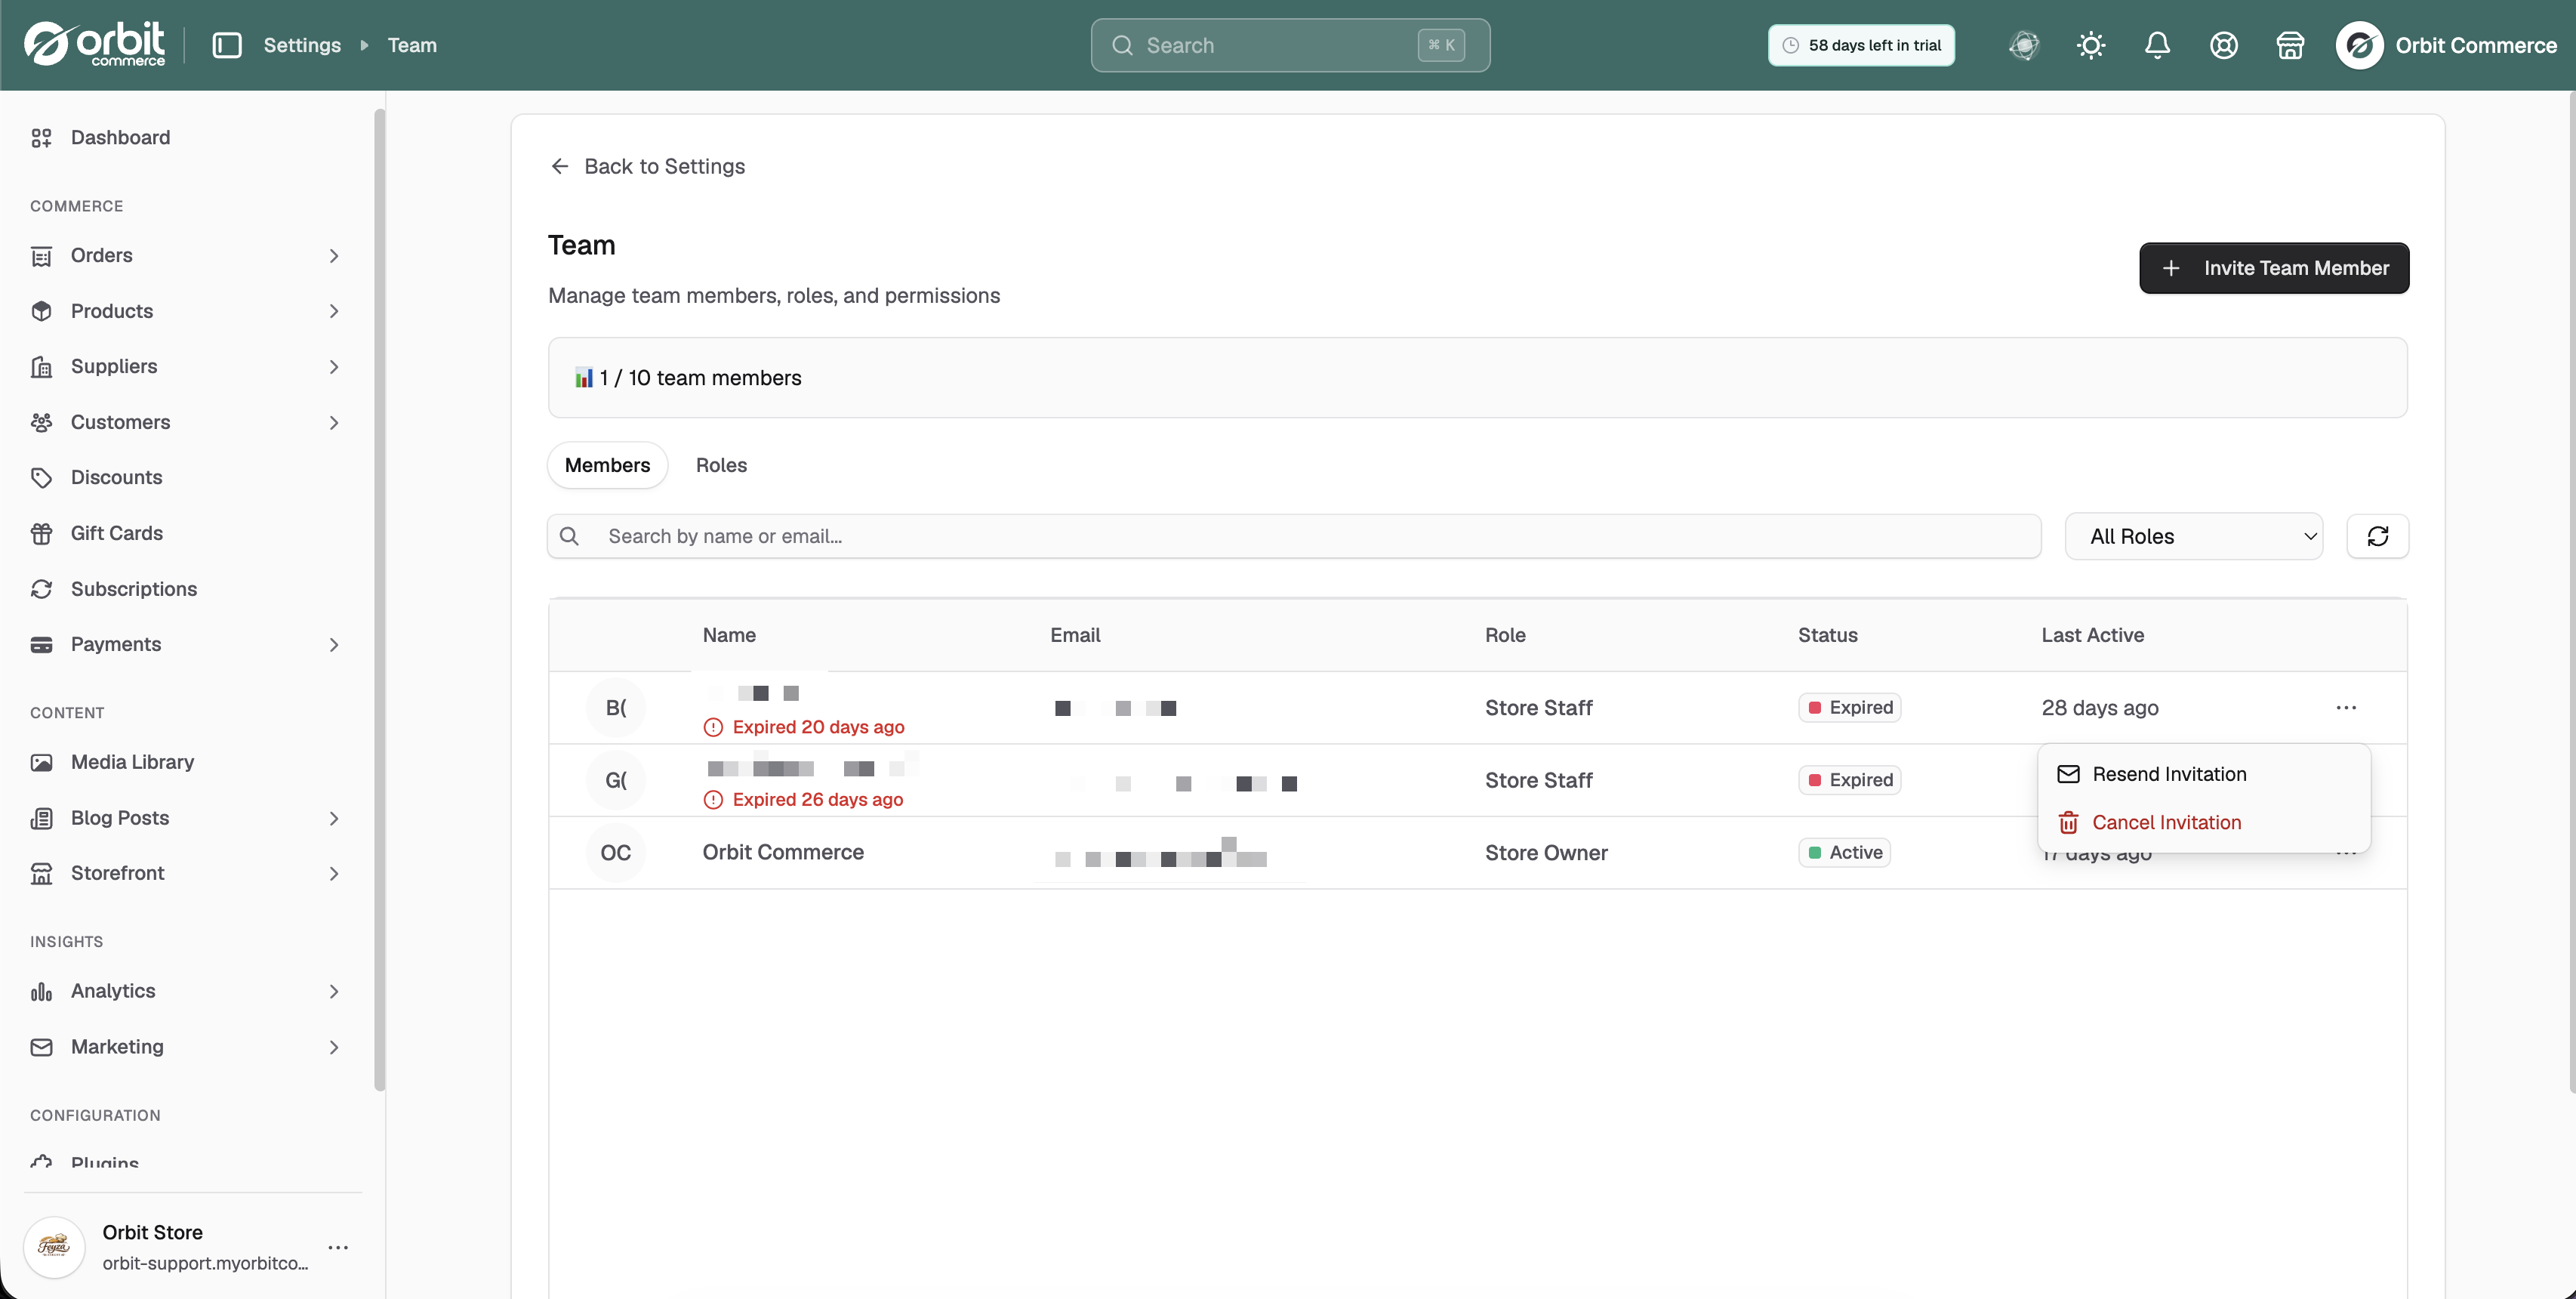
Managing Invitations
If a team member has not accepted their invitation, they may appear as Invited.
If the invitation has expired, the status will show as Expired.
From the member options menu, you can:
Resend Invitation
Cancel Invitation
Use Resend Invitation if the user did not receive the email or their previous invitation has expired.
Use Cancel Invitation if the invite is no longer needed.
Roles
The Roles tab allows you to manage custom roles and permissions.
Roles define what team members can see and do inside Orbit.
System roles cannot be modified, but you can create custom roles to match your store’s internal workflows.
Creating a Custom Role
To create a new role:
Open the Roles tab.
Click Create role.
Enter a Name for the role.
Add a Description explaining what the role is for.
Select the permissions the role should have.
Click Create.
You can use the permission checkboxes to decide exactly what actions users with this role can perform.
Permissions are grouped by area, making it easier to select access for specific parts of the platform.
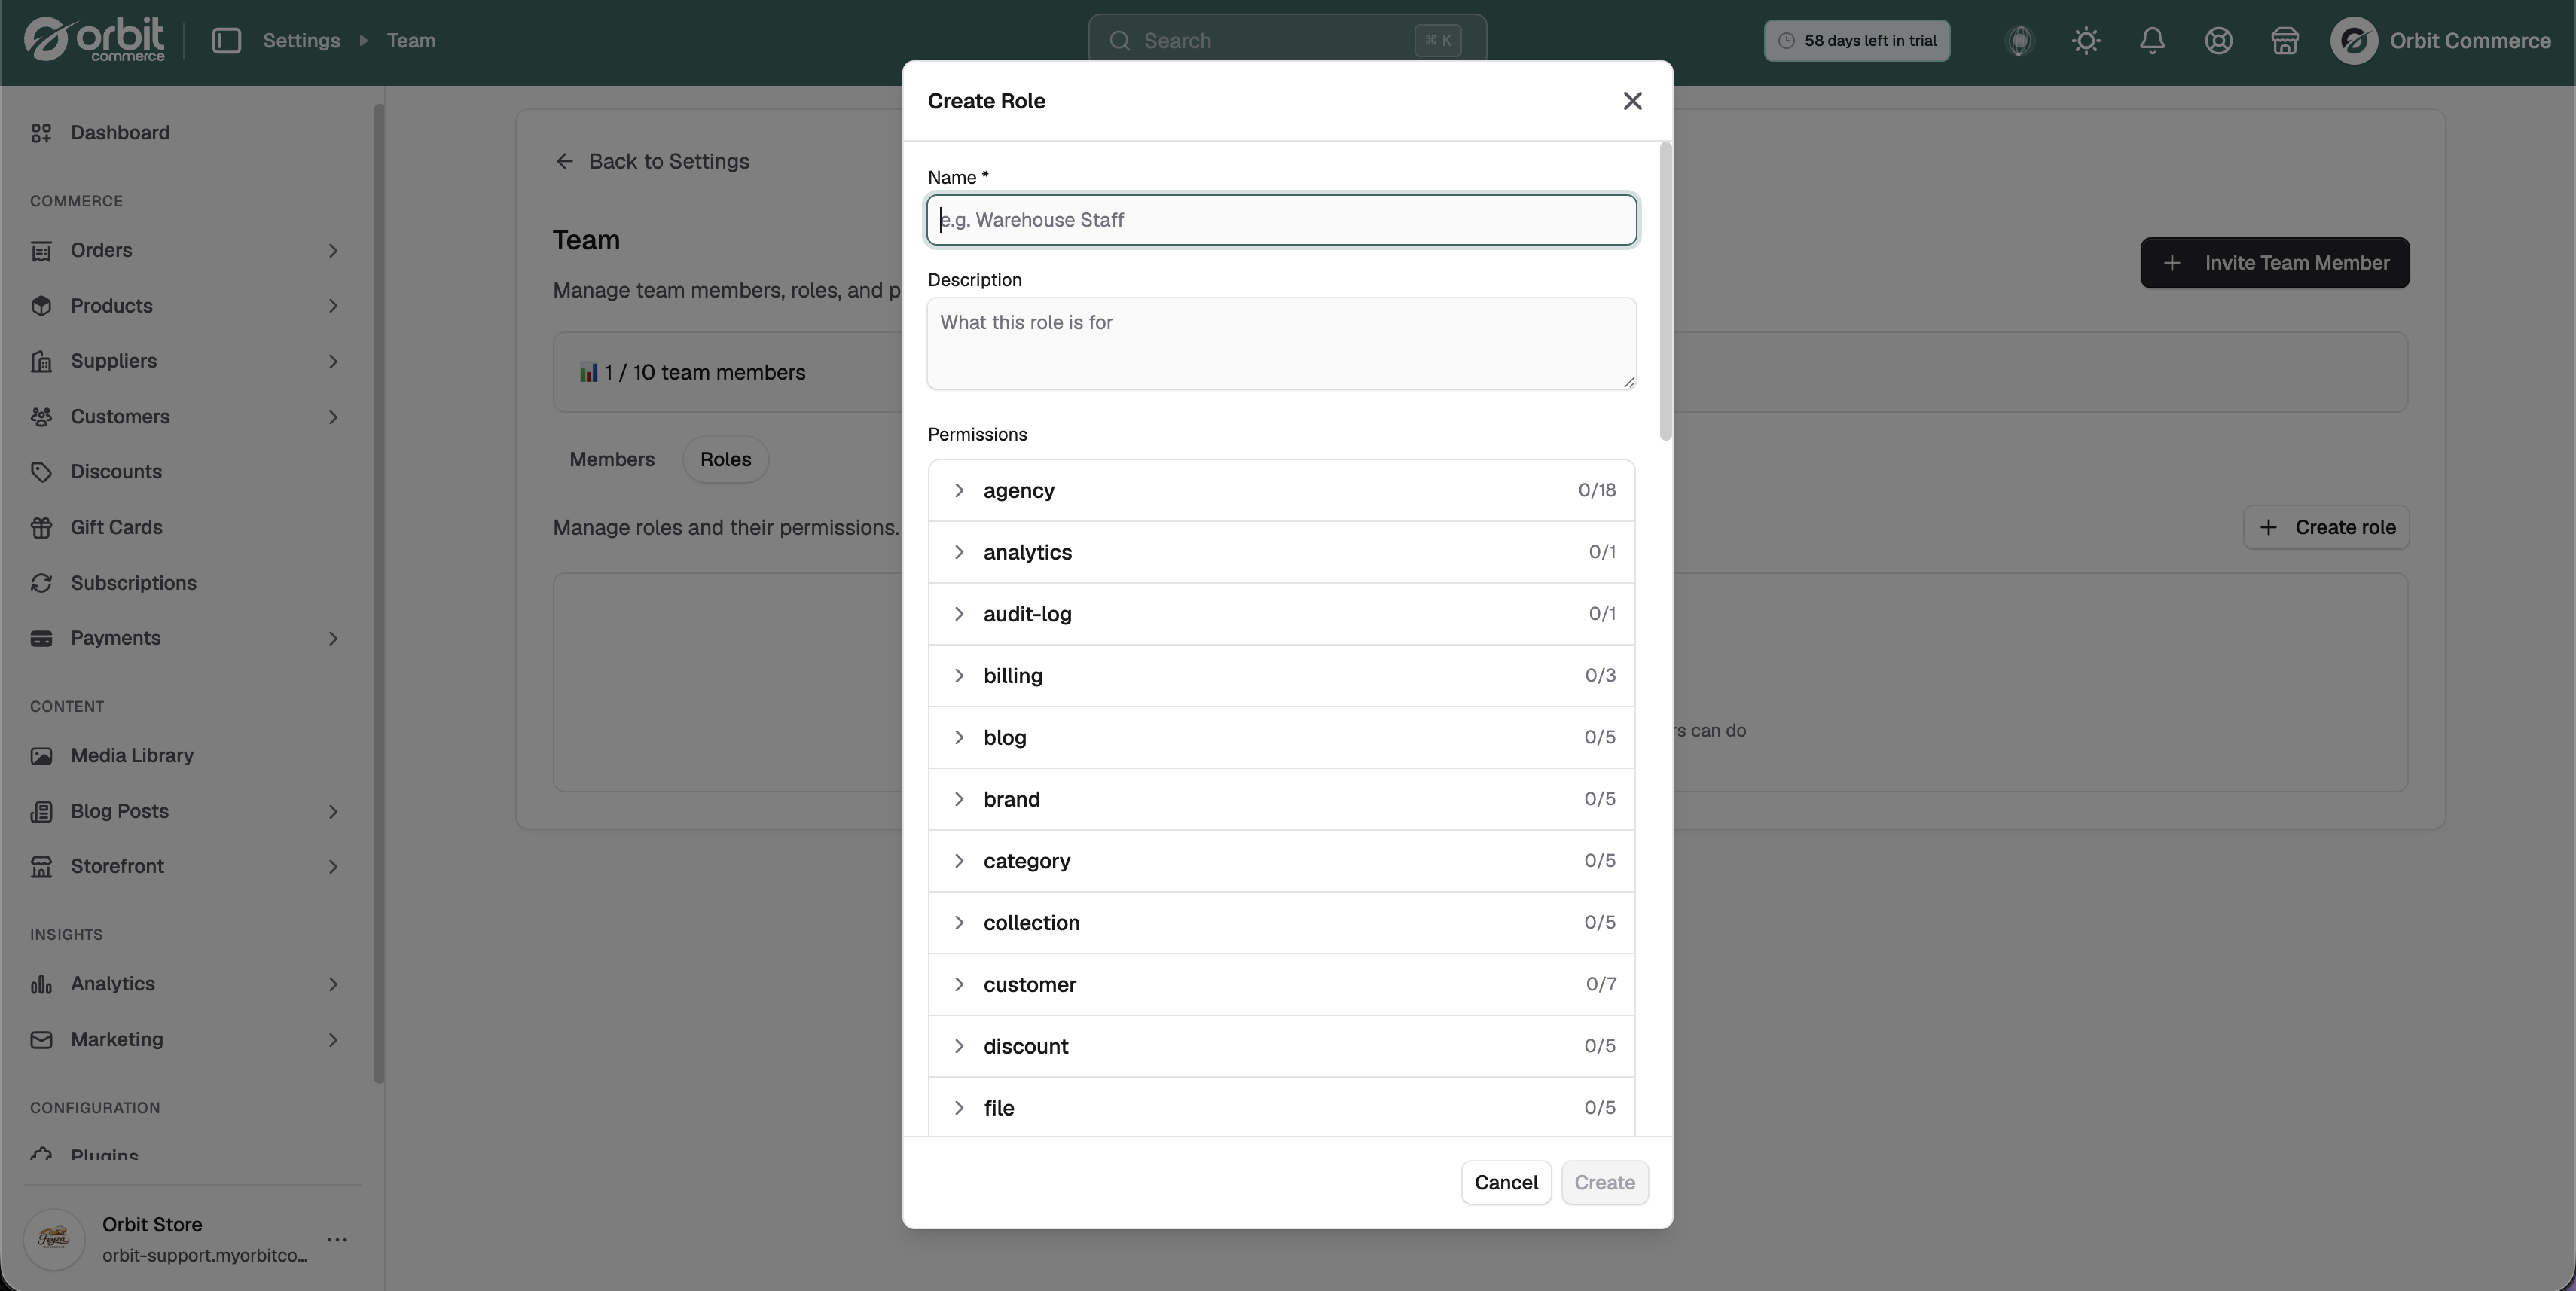
Permissions
Permissions control what a team member can access and manage.
You can select permissions individually or use Select all within a permission group.
Only assign permissions that are necessary for the user’s role. This helps keep your store secure and prevents users from accessing areas they do not need.
Why Team is Important
The Team section helps you safely manage store access as your business grows.
Instead of sharing one login across multiple users, each person can have their own account with the right level of access. This improves security, accountability, and day-to-day control.
Team roles also help reduce mistakes by limiting access to sensitive areas. For example, a warehouse user may only need operational access, while an administrator may need permission to manage settings, team members, and store configuration.
Using roles and permissions correctly makes it easier to delegate work while keeping important store settings protected.
If you have any questions, please contact us at support@orbitcommerce.net
Was this helpful?
0 people found this helpful