Automating your store with Workflows
Build trigger, condition, delay and action workflows on a visual canvas to tag orders and customers, change statuses and send emails without code.
Workflows is a plugin that does routine jobs for you. When something happens in your store, such as an order being paid, a workflow checks a few conditions and then acts: it can tag the order, tag the customer, change a status or send an email. You build each workflow on a visual canvas, step by step, with no code.
Considerations
- Workflows is a paid plugin. It comes with a free trial, and you are not charged until the trial ends.
- A workflow only runs while it is switched On. New workflows start Off, so you can build and test first.
- Build one workflow, watch it run correctly for a week, then build the next. Ten untested workflows are hard to untangle.
- Conditions keep the noise down. "Every order" sends a lot of email. "Every order over £500" is worth a message.
- If you run Orbit CRM, its own automations cover deals and tasks. Use Workflows for orders, customers and products. See Automating deals and tasks in Orbit CRM.
How a workflow is put together
- Trigger: the event that starts the workflow. Every workflow has exactly one.
- Delay: an optional wait of minutes, hours or days before the next step.
- Condition: an optional check. Steps on the Then branch run when it passes, steps on the Otherwise branch when it does not.
- A/B split: sends a percentage of runs down branch A and the rest down branch B.
- Action: the work, such as adding a tag or sending an email. A workflow can have several.
Install Workflows
- From your Orbit dashboard, go to Plugins.
- Under Explore Plugins, find Workflows and click Install. If it is not in the list, click View all to open the Plugin Store.
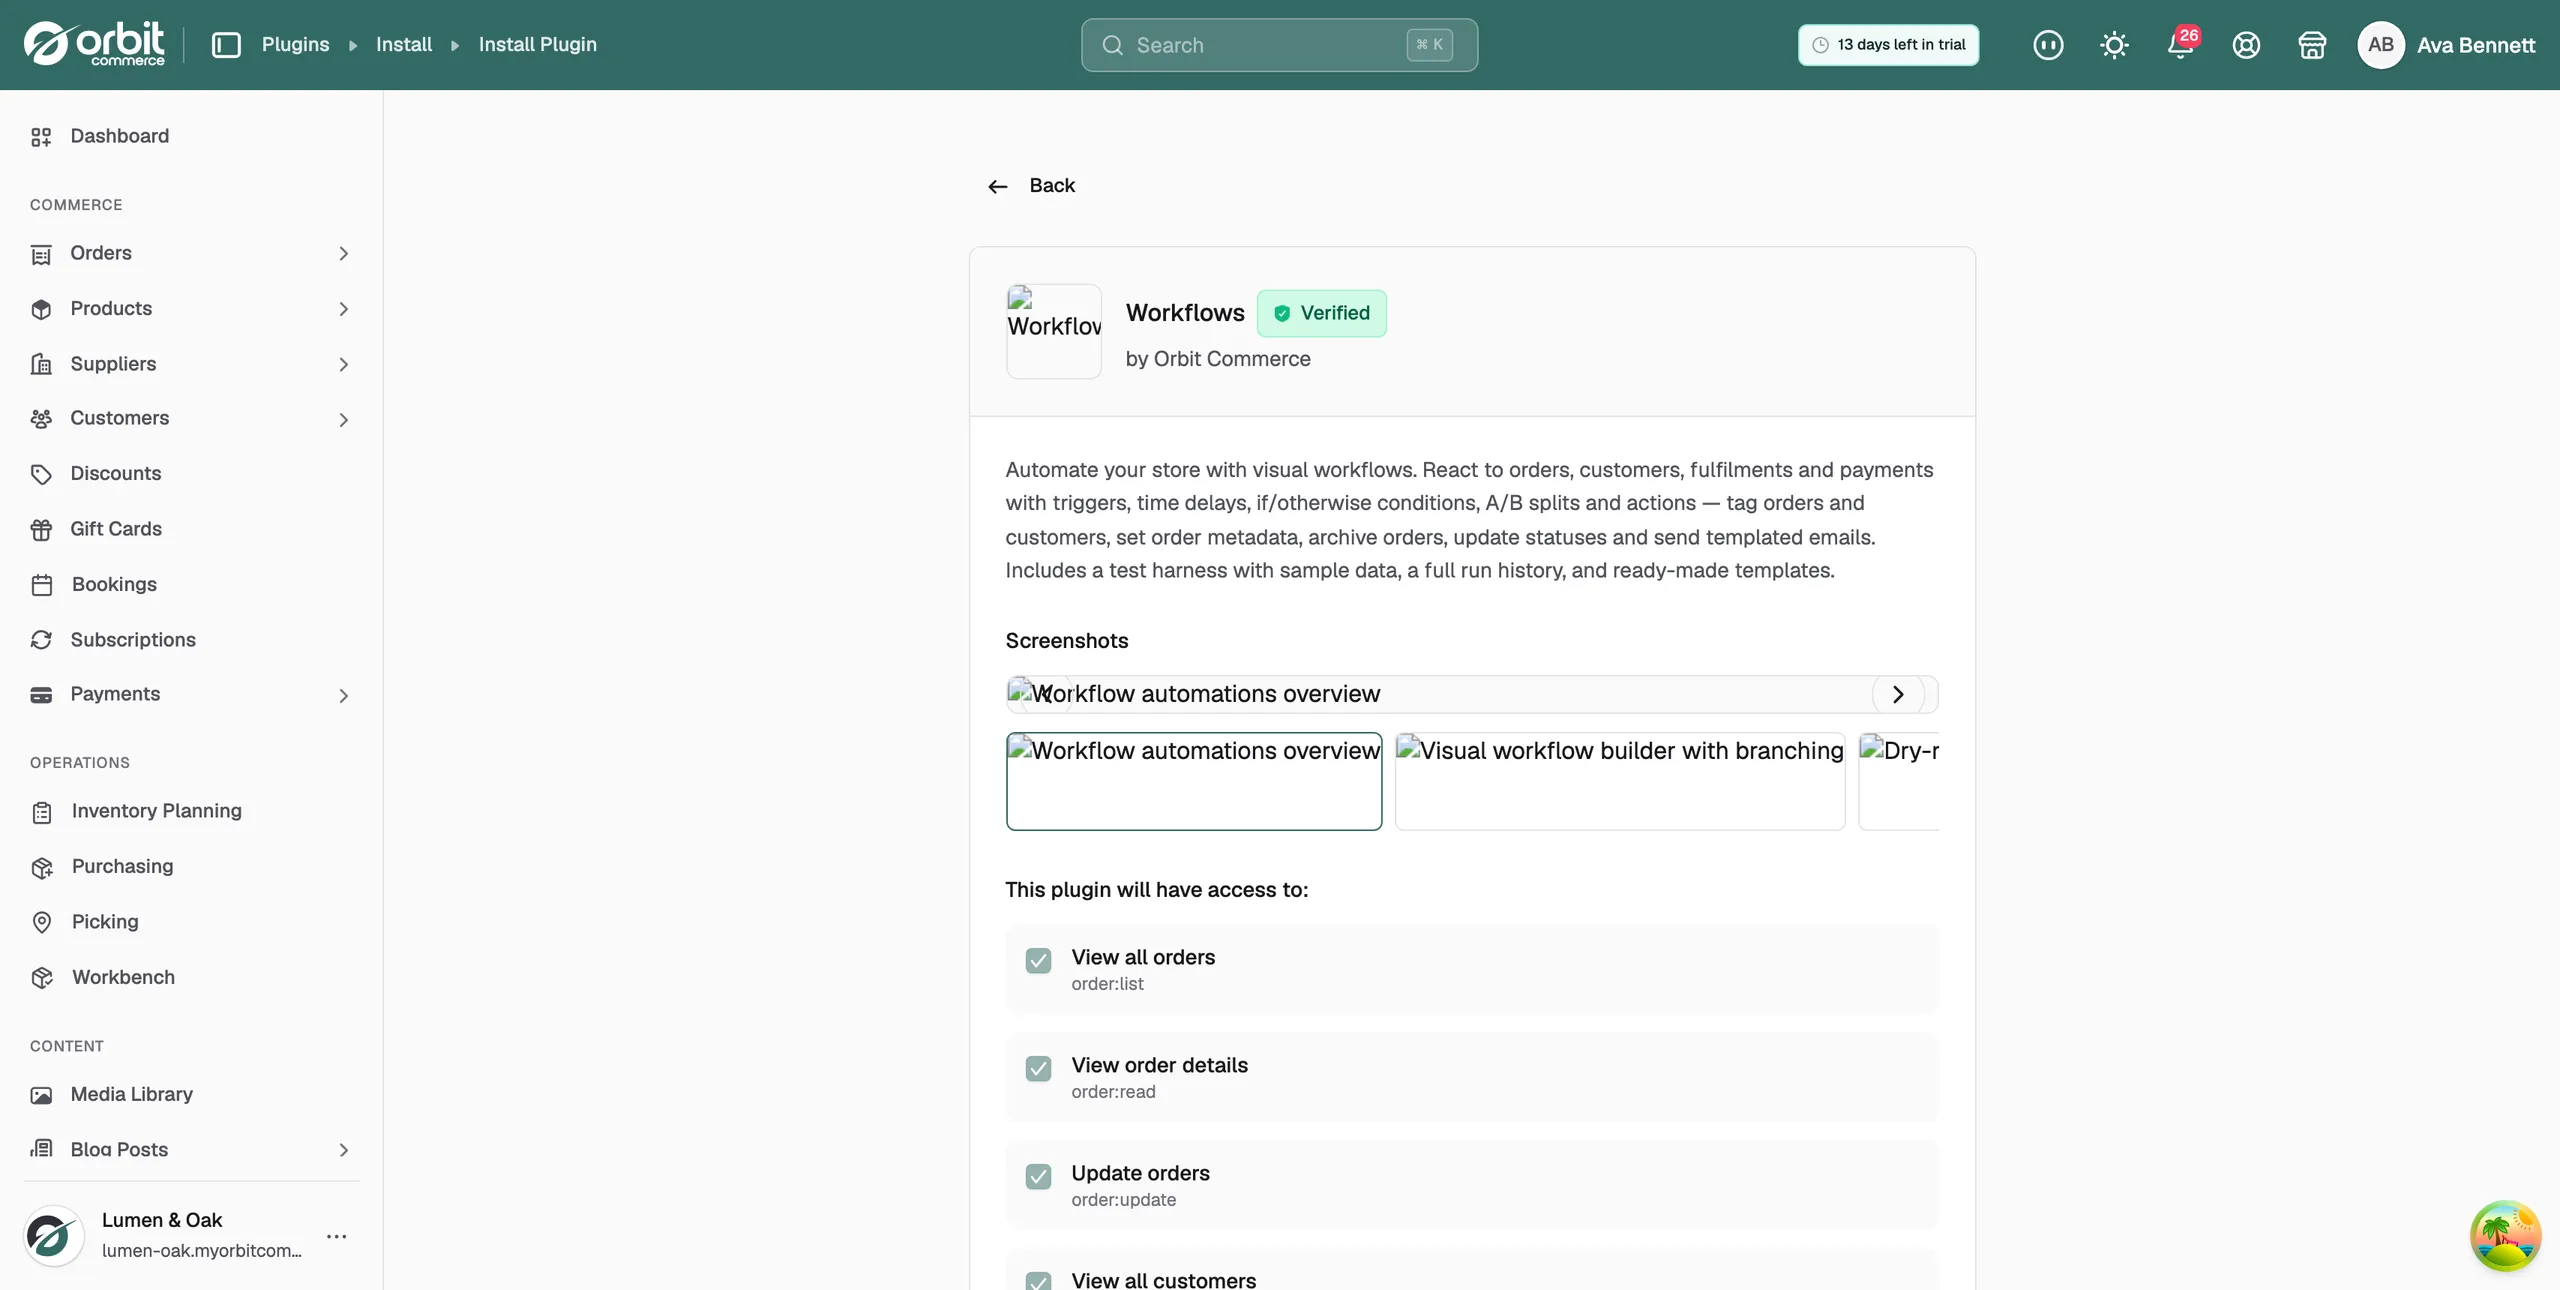
- Read the permissions under This plugin will have access to: and check the price under Pricing.
- Click the button at the bottom of the page to start the trial. The plugin opens on its Workflows tab, and Workflows appears in your left menu under Installed Plugins.
For the full install steps, see Installing and managing plugins.
Create a workflow
- From your Orbit dashboard, go to Plugins, then click Open on the Workflows row.
- On the Workflows tab, click the plus button labelled Create workflow.
- Choose Start from a template to install a ready-made workflow, or Start from scratch to build your own.
- For a new workflow, type a Name, for example Tag wholesale orders, and choose a Trigger from the Orders, Customers or Products group.
- Click Create. The message Workflow created appears and the builder opens.
Templates you can start from include New customer notification, Archive order after dispatch, Customer delivery note, Customer order reference and Remove all order tags after 2 months. When you pick one, the message Template installed appears.
Add steps
- In the builder, click the Add step button on the line below the trigger.
- Choose Delay, Condition, A/B split or Action. Actions are grouped, for example Order actions.
- Click the new step to open its settings on the right. Fill them in, then click Close.
- Repeat for each step. The builder saves as you go and shows Saved at the top.
To remove a step, open it and click Delete step. Deleting a condition keeps the Then branch and discards every step on the Otherwise branch. Deleting an A/B split keeps branch A and discards branch B. This cannot be undone.
Delay settings
- Wait for: a number.
- Unit: Minutes, Hours or Days.
Condition settings
- Match: All conditions (AND) or Any condition (OR).
- Field: what to check, for example Order total, Order tags, Payment status, Customer tags or Product status. Under Advanced you can type a field path of your own.
- Value: what the field must match. For tags, type the tag name.
Click Add condition to check more than one thing, and Remove condition to take one away.
Action settings
Each action has its own fields. The actions are:
- Add order tags and Remove order tags: comma-separated tags, for example vip, wholesale.
- Add customer tags and Remove customer tags: the same, on the customer.
- Set order note and Set customer note: the note text.
- Set order metadata and Remove order metadata: a Field such as Gift message or Dispatch note, and its Value.
- Set order status and Set payment status: choose the new status.
- Archive order, Unarchive order and Cancel order: no settings.
- Send email: To, Subject and HTML body.
- Change counter: a Counter name and Change by, positive to increase, negative to decrease.
- Log output: a Message written to the run log. Useful when testing.
Tip: Text fields accept variables in double curly brackets, such as {{ order.orderNumber }} or {{ customer.name }}. The value is filled in when the workflow runs.
Test a workflow
- In the builder, click Run test. The Run test drawer opens.
- Pick a Sample order or Sample customer. If you pick nothing, the most recent one is used. For a product trigger, paste a product ID.
- Click Run. Your choice of sample is saved on the workflow for next time.
- Open the Runs tab to see what happened at each step.
Switch a workflow on or off
- In the builder, click the switch at the top right. The label changes from Off to On and the message Workflow turned on appears.
- Click it again to stop it. The message Workflow turned off appears.
On the Workflows tab, the All, On, Off and Archived filters show workflows by status. The dots menu on each row holds Edit, Duplicate, Archive and Delete.
Warning: Deleting a workflow also deletes its whole run history. This cannot be undone. Archive it instead if you might want it back.
Check the run history
Open the Runs tab. Each row shows the Workflow, the Subject it ran for, its Status, the Trigger, when it Started and its Duration. Use Search by subject to find one order or customer. Click a run to see its step log. A run that is Waiting is paused on a delay. Deleting a run cancels that delay.
Settings
Open the Settings tab.
- Timezone: used when scheduling delays and formatting dates in emails. The default is Europe/London.
- Email me when a run fails: switch it on and add at least one address with Add address. Click Save; the message Settings saved appears.
- Counters: every counter your workflows have changed, with its Name, its current value and when it was last Updated.
Example workflows
- VIP tagging: trigger Order paid, condition Order total greater than 500, actions Add customer tags vip and Send email to your team.
- Post-delivery check-in: trigger Order fulfilled, Delay 3 days, action Send email asking for a review.
Related guides
Was this helpful?
0 people found this helpful