Automating deals and tasks in Orbit CRM
Create rules in Orbit CRM that make a deal or a task when an order is paid or a customer signs up, narrow them with conditions, and switch them off when needed.
Automations do the routine CRM work for you. When something happens in your store, such as an order being paid, Orbit checks your conditions and then creates a deal or a task. You manage them on the Automations tab of Orbit CRM.
Considerations
- Automations only create deals and tasks inside Orbit CRM. To tag customers, send emails or change orders, use Automating your store with Workflows instead.
- A rule with no conditions fires on every matching event. A rule for orders over £500 is more useful than a rule for every order.
View your automations
- From your Orbit dashboard, go to Plugins.
- Under My Plugins, find Orbit CRM and click Open.
- Click the Automations tab.
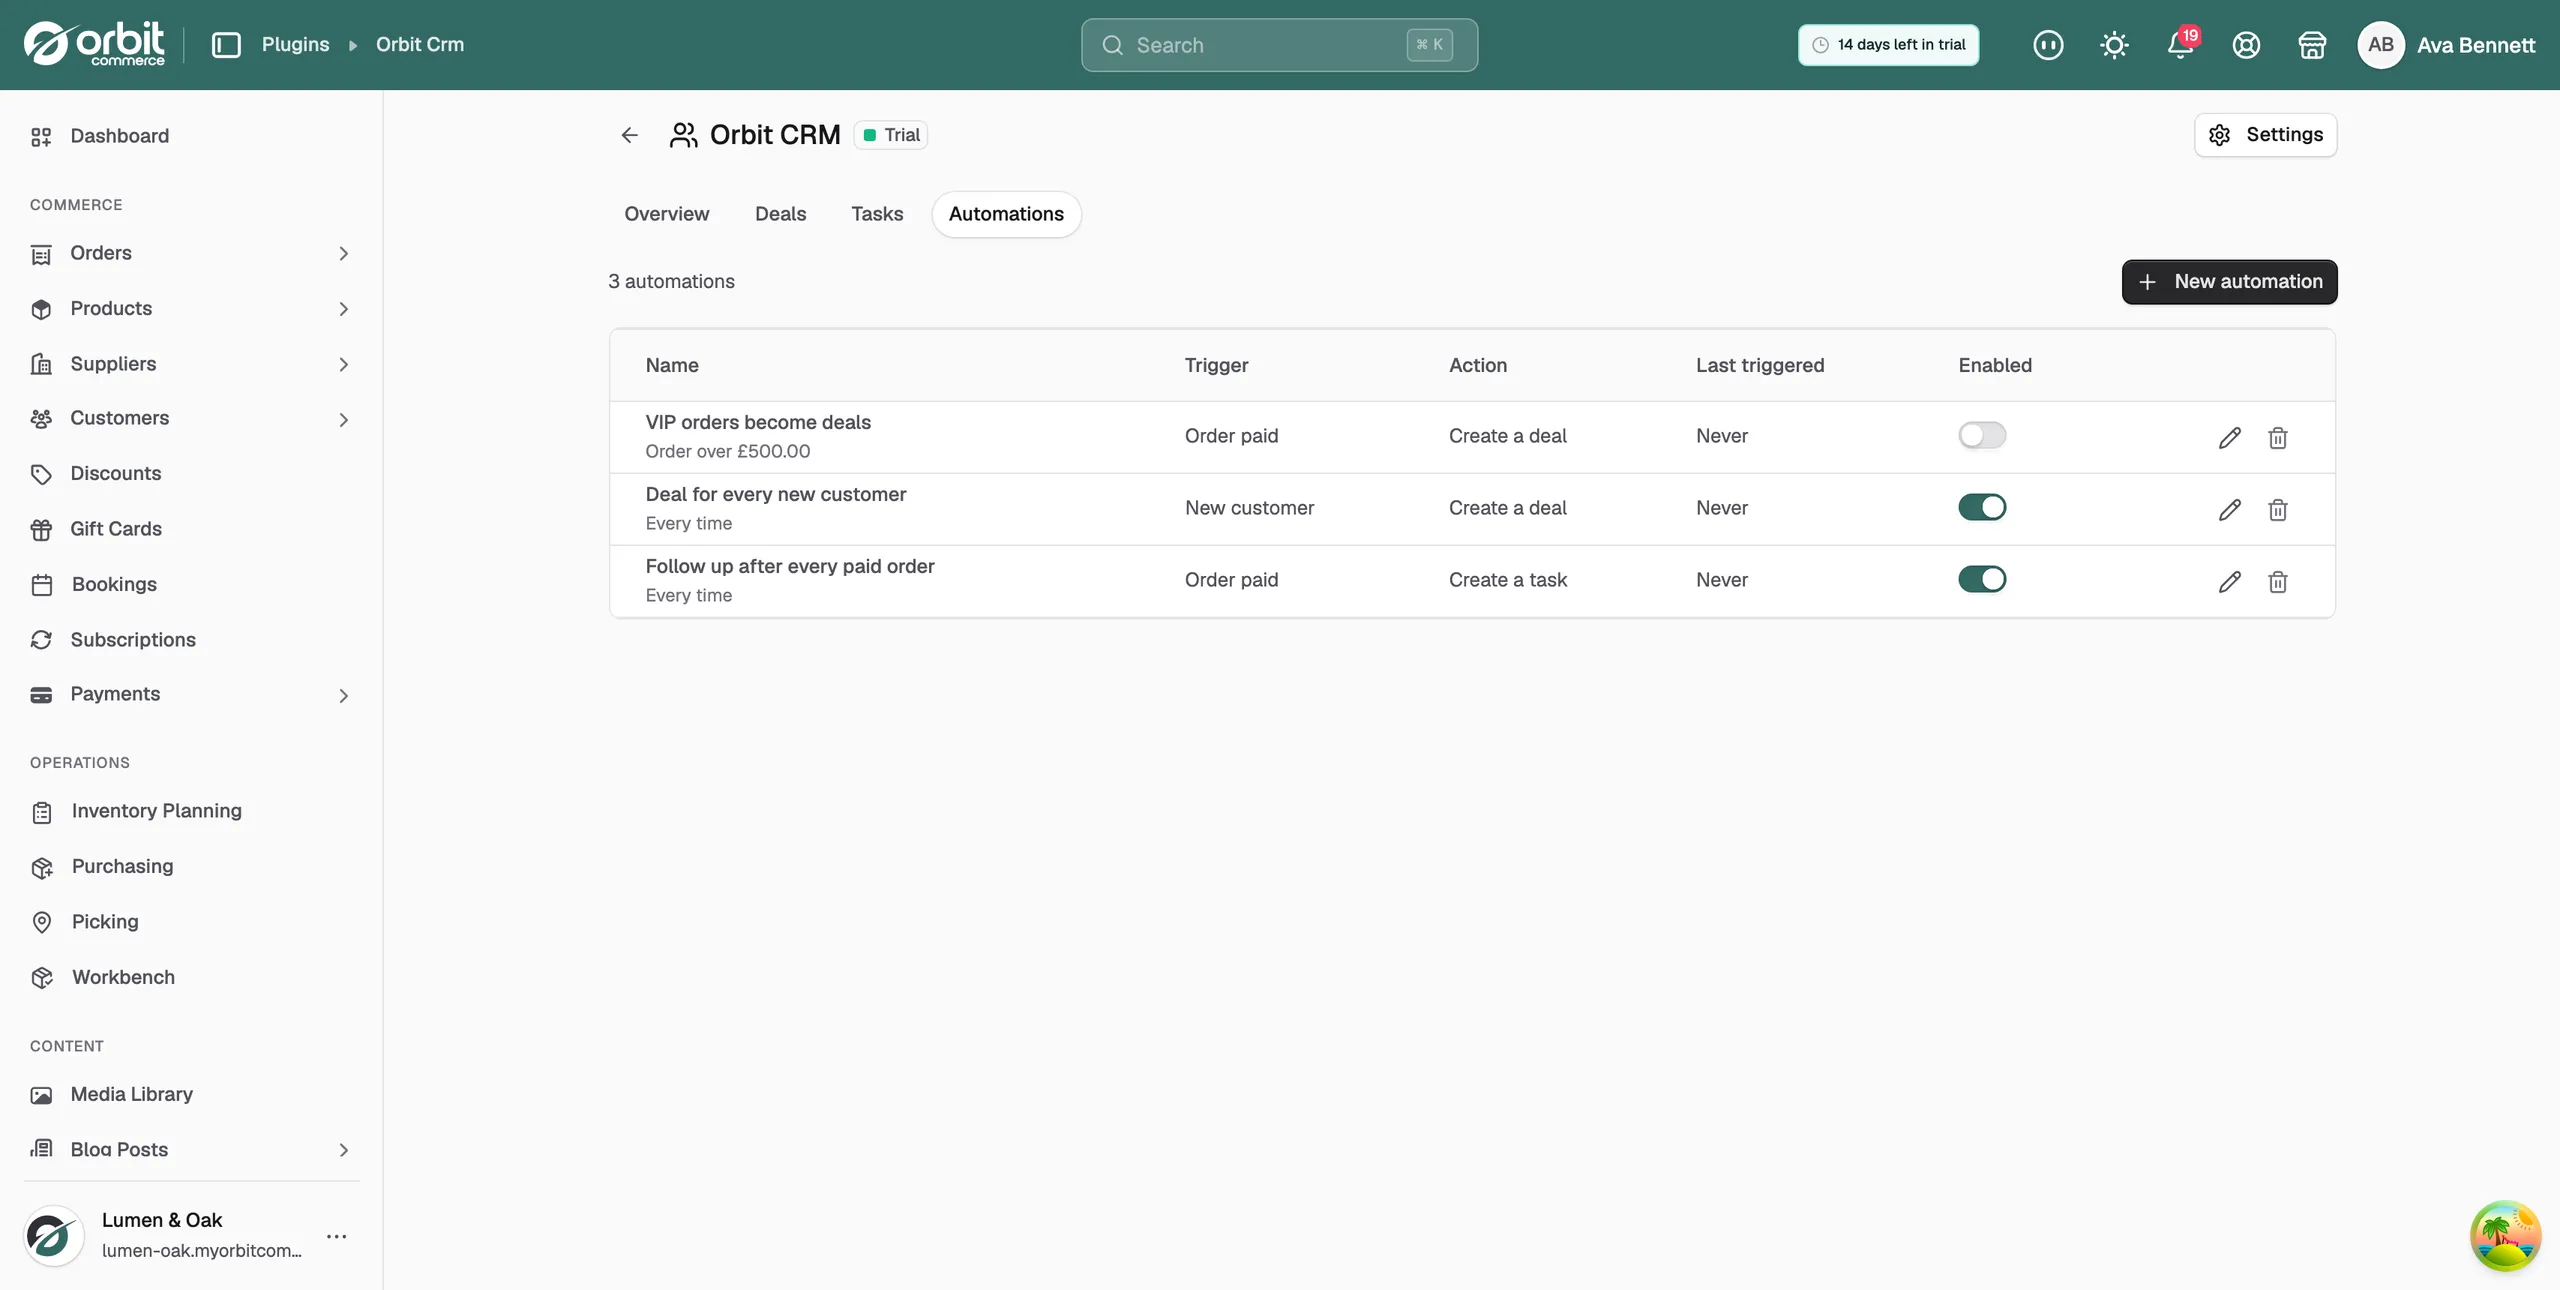
Each rule is listed with these columns:
- Name: what you called the rule.
- Trigger: the event that starts it.
- Action: what it creates.
- Last triggered: when it last ran, or Never.
- Enabled: a switch that turns the rule off without deleting it.
Use the icons on a row to edit or delete a rule.
Create an automation
- On the Automations tab, click New automation.
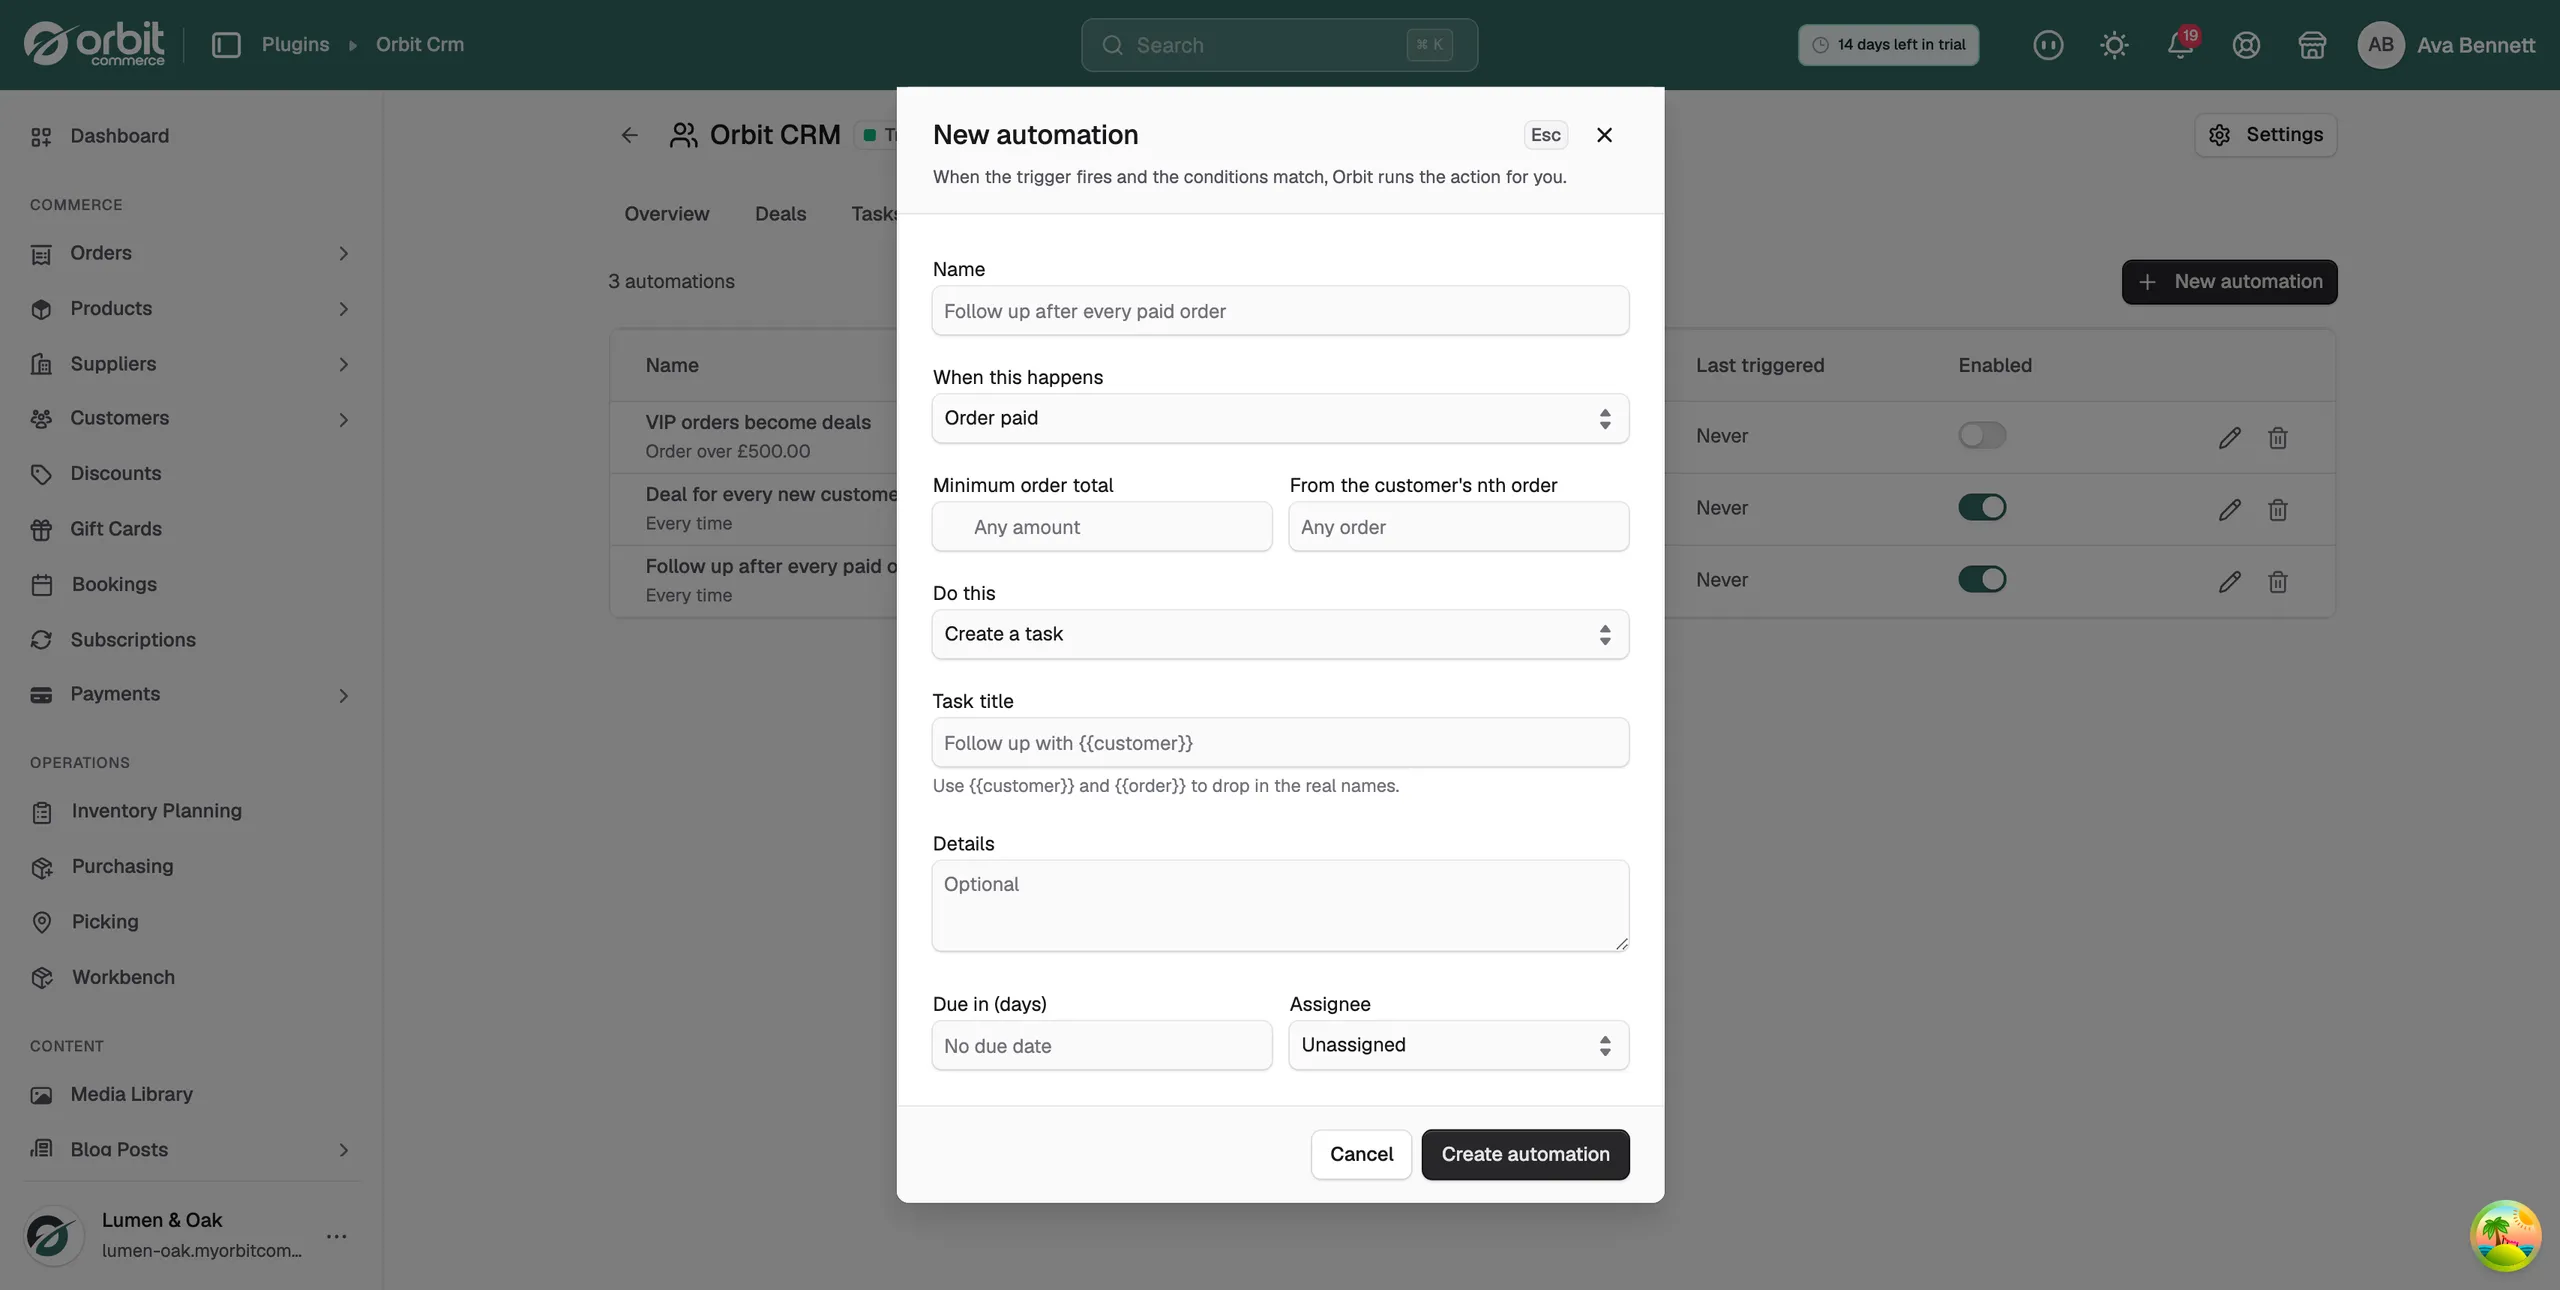
- Under Name, describe what the rule does, for example "Follow up after every paid order".
- Under When this happens, choose the trigger, such as Order paid or New customer.
- Narrow the trigger with conditions. Set a minimum order total to catch only large orders, or choose which of the customer's orders counts, such as only first orders or only repeat orders. Leave them blank to match any amount and any order.
- Under Do this, choose Create a task or Create a deal.
- Fill in the details. For a task: the Task title, optional details, how many days until it is due, and an Assignee. For a deal: the Deal title, the pipeline to create it in, and whether to use the order total as the deal value.
- Click Create automation. The rule is enabled straight away.
Tip: Type {{customer}} or {{order}} in a title. When the rule runs, Orbit swaps them for the real customer name and order number.
Turn an automation off or on
- On the Automations tab, find the rule.
- Click its Enabled switch. The rule stops running but keeps its settings.
- Click the switch again to turn it back on.
Example automations
- Large orders become deals: trigger Order paid, minimum order total £500, action Create a deal. Big orders land on your pipeline for a personal follow-up.
- A deal for every new customer: trigger New customer, action Create a deal. Every sign-up becomes a tracked opportunity.
- Follow up after every paid order: trigger Order paid, action Create a task due in a few days. A thank-you that always happens.
Start with one or two rules. After a week, check the Last triggered column to see whether each rule is firing as you expected.
Related guides
Was this helpful?
0 people found this helpful