Adding seasonal effects to your storefront
Install the free Snowflakes, Falling Hearts, Easter Confetti, Halloween or Birthday Confetti plugin, switch it on, tune the look and pick the days it shows.
Seasonal effect plugins add a moving decoration to your storefront: falling snow, hearts, confetti or Halloween icons. Each effect is its own free plugin. You install it from Plugins, then switch it on, tune it and schedule it from the plugin's own page.
Considerations
- There are five effects, each a separate plugin: Snowflakes, Falling Hearts, Easter Confetti, Halloween and Birthday Confetti. All are free.
- When an effect is on, it shows on every page of your storefront.
- Changes on the plugin page save on their own. There is no Save button.
- Birthday Confetti works differently by default: each logged-in customer sees it on their own birthday only.
- Check the effect on a phone as well as a laptop. An effect that looks light on a big screen can get in the way on a small one.
Install a seasonal effect
- From your Orbit dashboard, go to Plugins.
- Under Explore Plugins, find the effect you want, for example Snowflakes, and click Install. If it is not in the list, click View all to open the Plugin Store.
- On the plugin details page, click Install & Authorize. The message Plugin installed successfully! appears and the plugin's page opens.
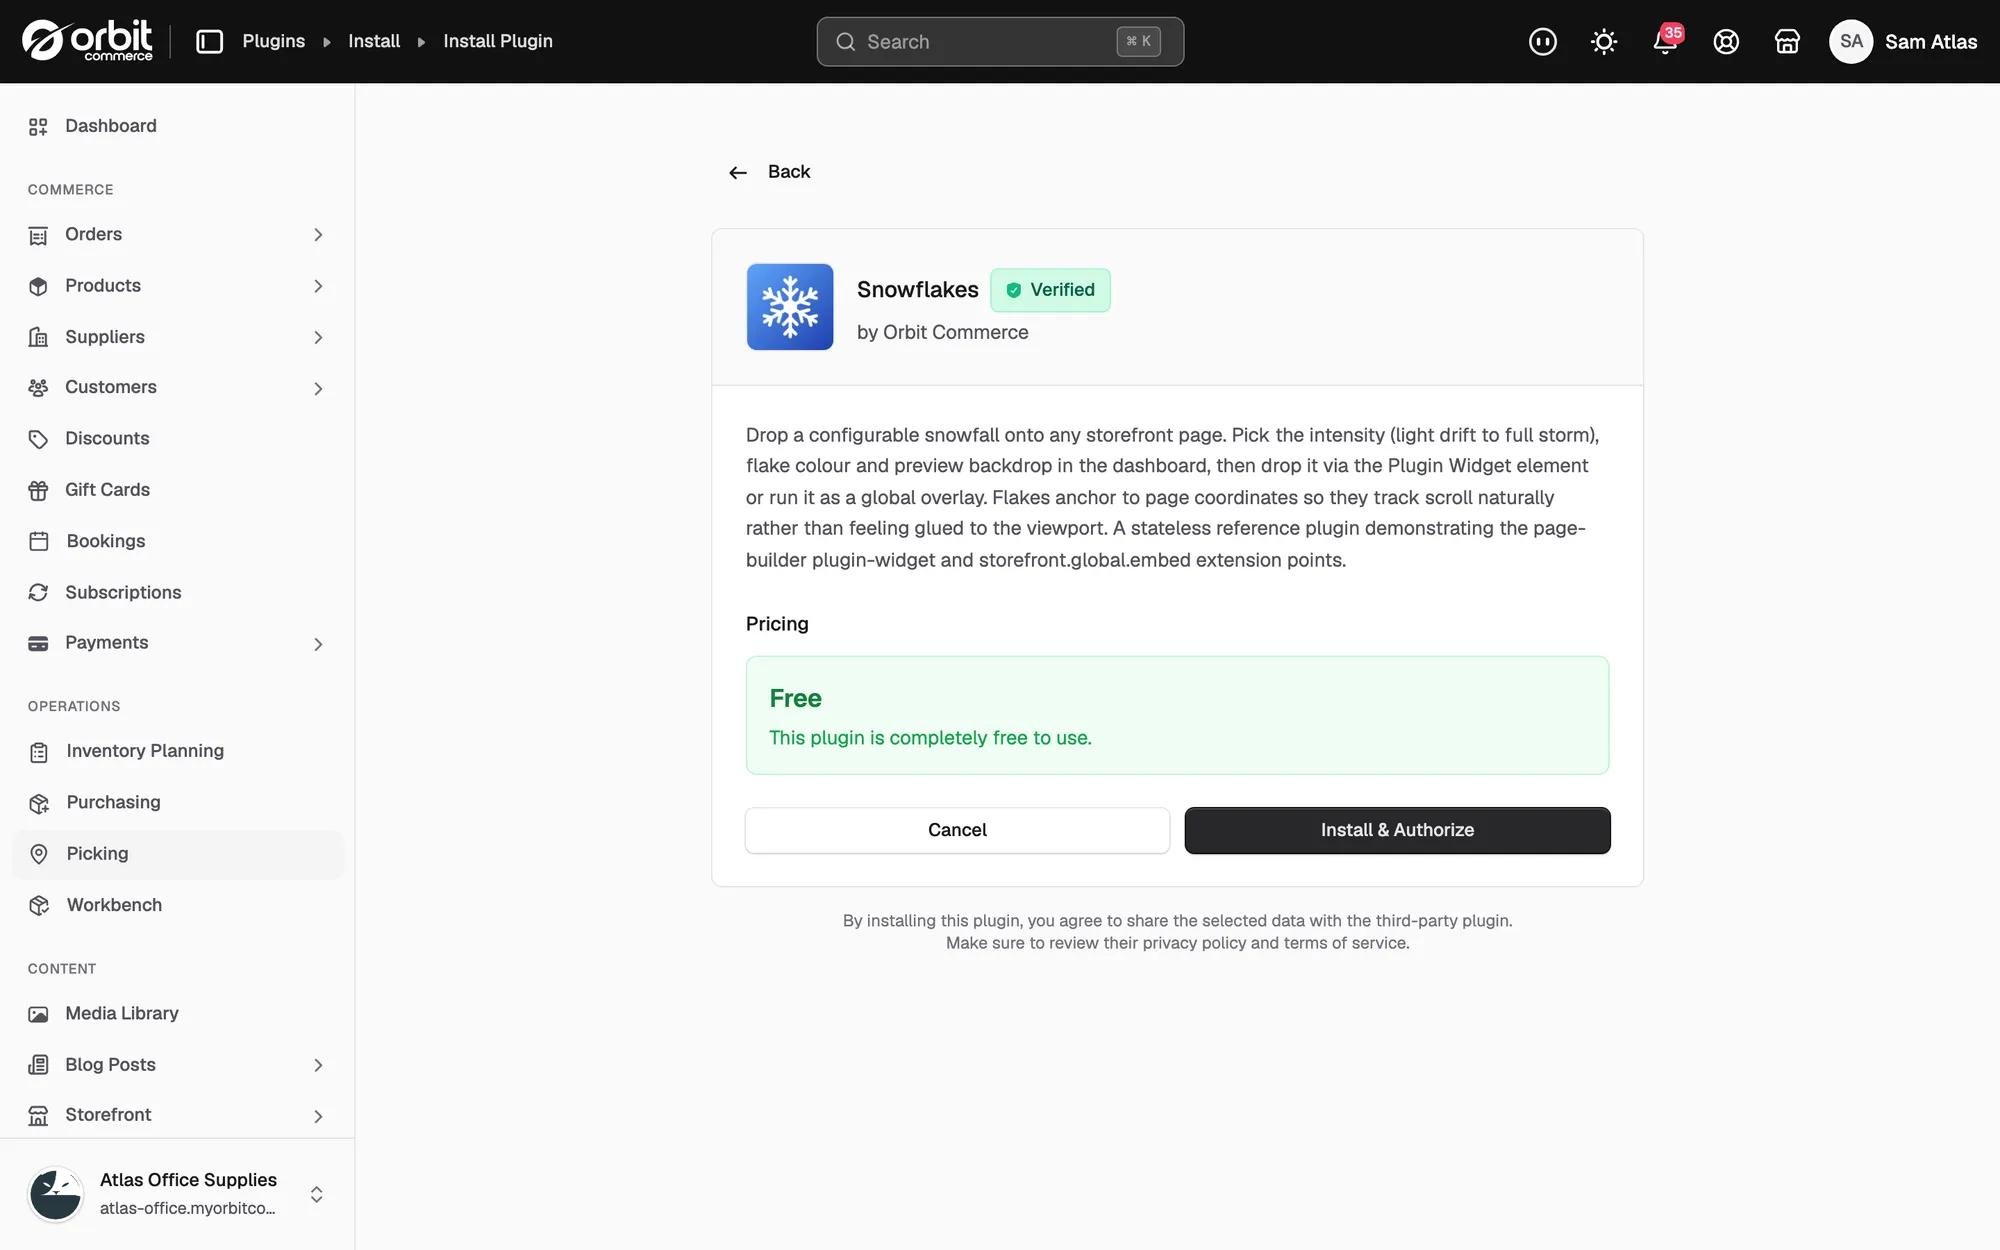
The plugin now sits under My Plugins, and in the left menu under Installed Plugins. For the full install steps, see Installing and managing plugins.
Turn the effect on
- From your Orbit dashboard, go to Plugins.
- Under My Plugins, click Open on the effect's row.
- At the top of the page, click the switch. The label changes from Snow is OFF to Snow is ON. Each plugin uses its own name here, for example Halloween is ON or Confetti is ON.
- Wait a moment. The message All changes saved appears and the effect is live on your storefront.
The preview on the left of the page shows the effect as you change it.
Adjust the look
The settings sit on the right of the preview. Each change saves on its own.
- Intensity: Light for a gentle drift, or Medium for a steady fall. Medium is the default.
- Flake colour or Heart colour: pick one of the colour swatches. Snowflakes and Falling Hearts only.
- Icon style: Halloween only. Classic is pumpkins, ghosts and bats. Spooky is skulls, bats and spiders. Sweet is pumpkins, sweets and little devils.
- Confetti style: Easter Confetti only. Choose the shapes that fall.
- Icon size: a slider. Drag left for smaller icons, right for bigger ones.
- Duration: a slider from 1 to 60 seconds. The effect runs for this long after a page loads, then fades out.
- Preview backdrop (preview only): Light backdrop or Dark backdrop. This changes the preview panel only, so you can check the effect against a colour like your theme's. It does not change your storefront.
Tip: Start with Light and a short duration. A gentle effect draws the eye. A heavy one covers your buttons and product photos.
Schedule the effect
Use When to show to limit the effect to certain days, so you do not have to remember to switch it off.
- Under When to show, click On chosen dates only. A calendar appears.
- Use the arrows to move between months, then click each day you want. Picked days are listed under the calendar.
- To remove a day, click the cross next to its date. To start again, click Clear all.
- To show the effect every day again, click Always on. This clears your chosen dates.
Birthday Confetti has three choices instead of two:
- On shoppers' birthdays: each logged-in customer sees the confetti on their own birthday. This is the default.
- On chosen dates: a storewide celebration on the days you pick, for example a launch day.
- Always on: every visitor sees it, every day.
Note: Snow in March looks like a store nobody is looking after. If you choose Always on, set yourself a reminder to switch the effect off when the season ends.
Turn the effect off
- Open the plugin from My Plugins.
- Click the switch at the top of the page. The label changes to Snow is OFF and the text below reads Nothing shows on your storefront.
Your settings are kept, so you can switch it back on next year without setting it up again. You can also deactivate or uninstall the plugin from the dots menu on its row under My Plugins. See Installing and managing plugins.
Put the effect in one part of a page
Each effect also comes with a page builder widget. Use it when you want the effect inside one section of a page, such as a hero banner, rather than across the whole storefront. Add a Plugin Widget element to the page and choose the effect under Plugin. See Adding a plugin widget.
Related guides
Was this helpful?
0 people found this helpful