Setting up Live Chat
Reply to storefront chats from the Live Chat inbox, set your availability, and control the widget's placement, colour, opening hours and text.
Live Chat adds a chat widget to your storefront so visitors can message you while they shop. Conversations land in an inbox in your Orbit dashboard, where you reply in real time. You open it under Plugins, then Live Chat.
Considerations
- Live Chat is a paid plugin with a free trial. Until the trial starts, the widget stays offline and you cannot reply.
- If your subscription ends, past conversations stay readable, but the widget goes offline until you renew.
- New messages notify you wherever you are in the dashboard. You do not need to keep the inbox open.
The inbox
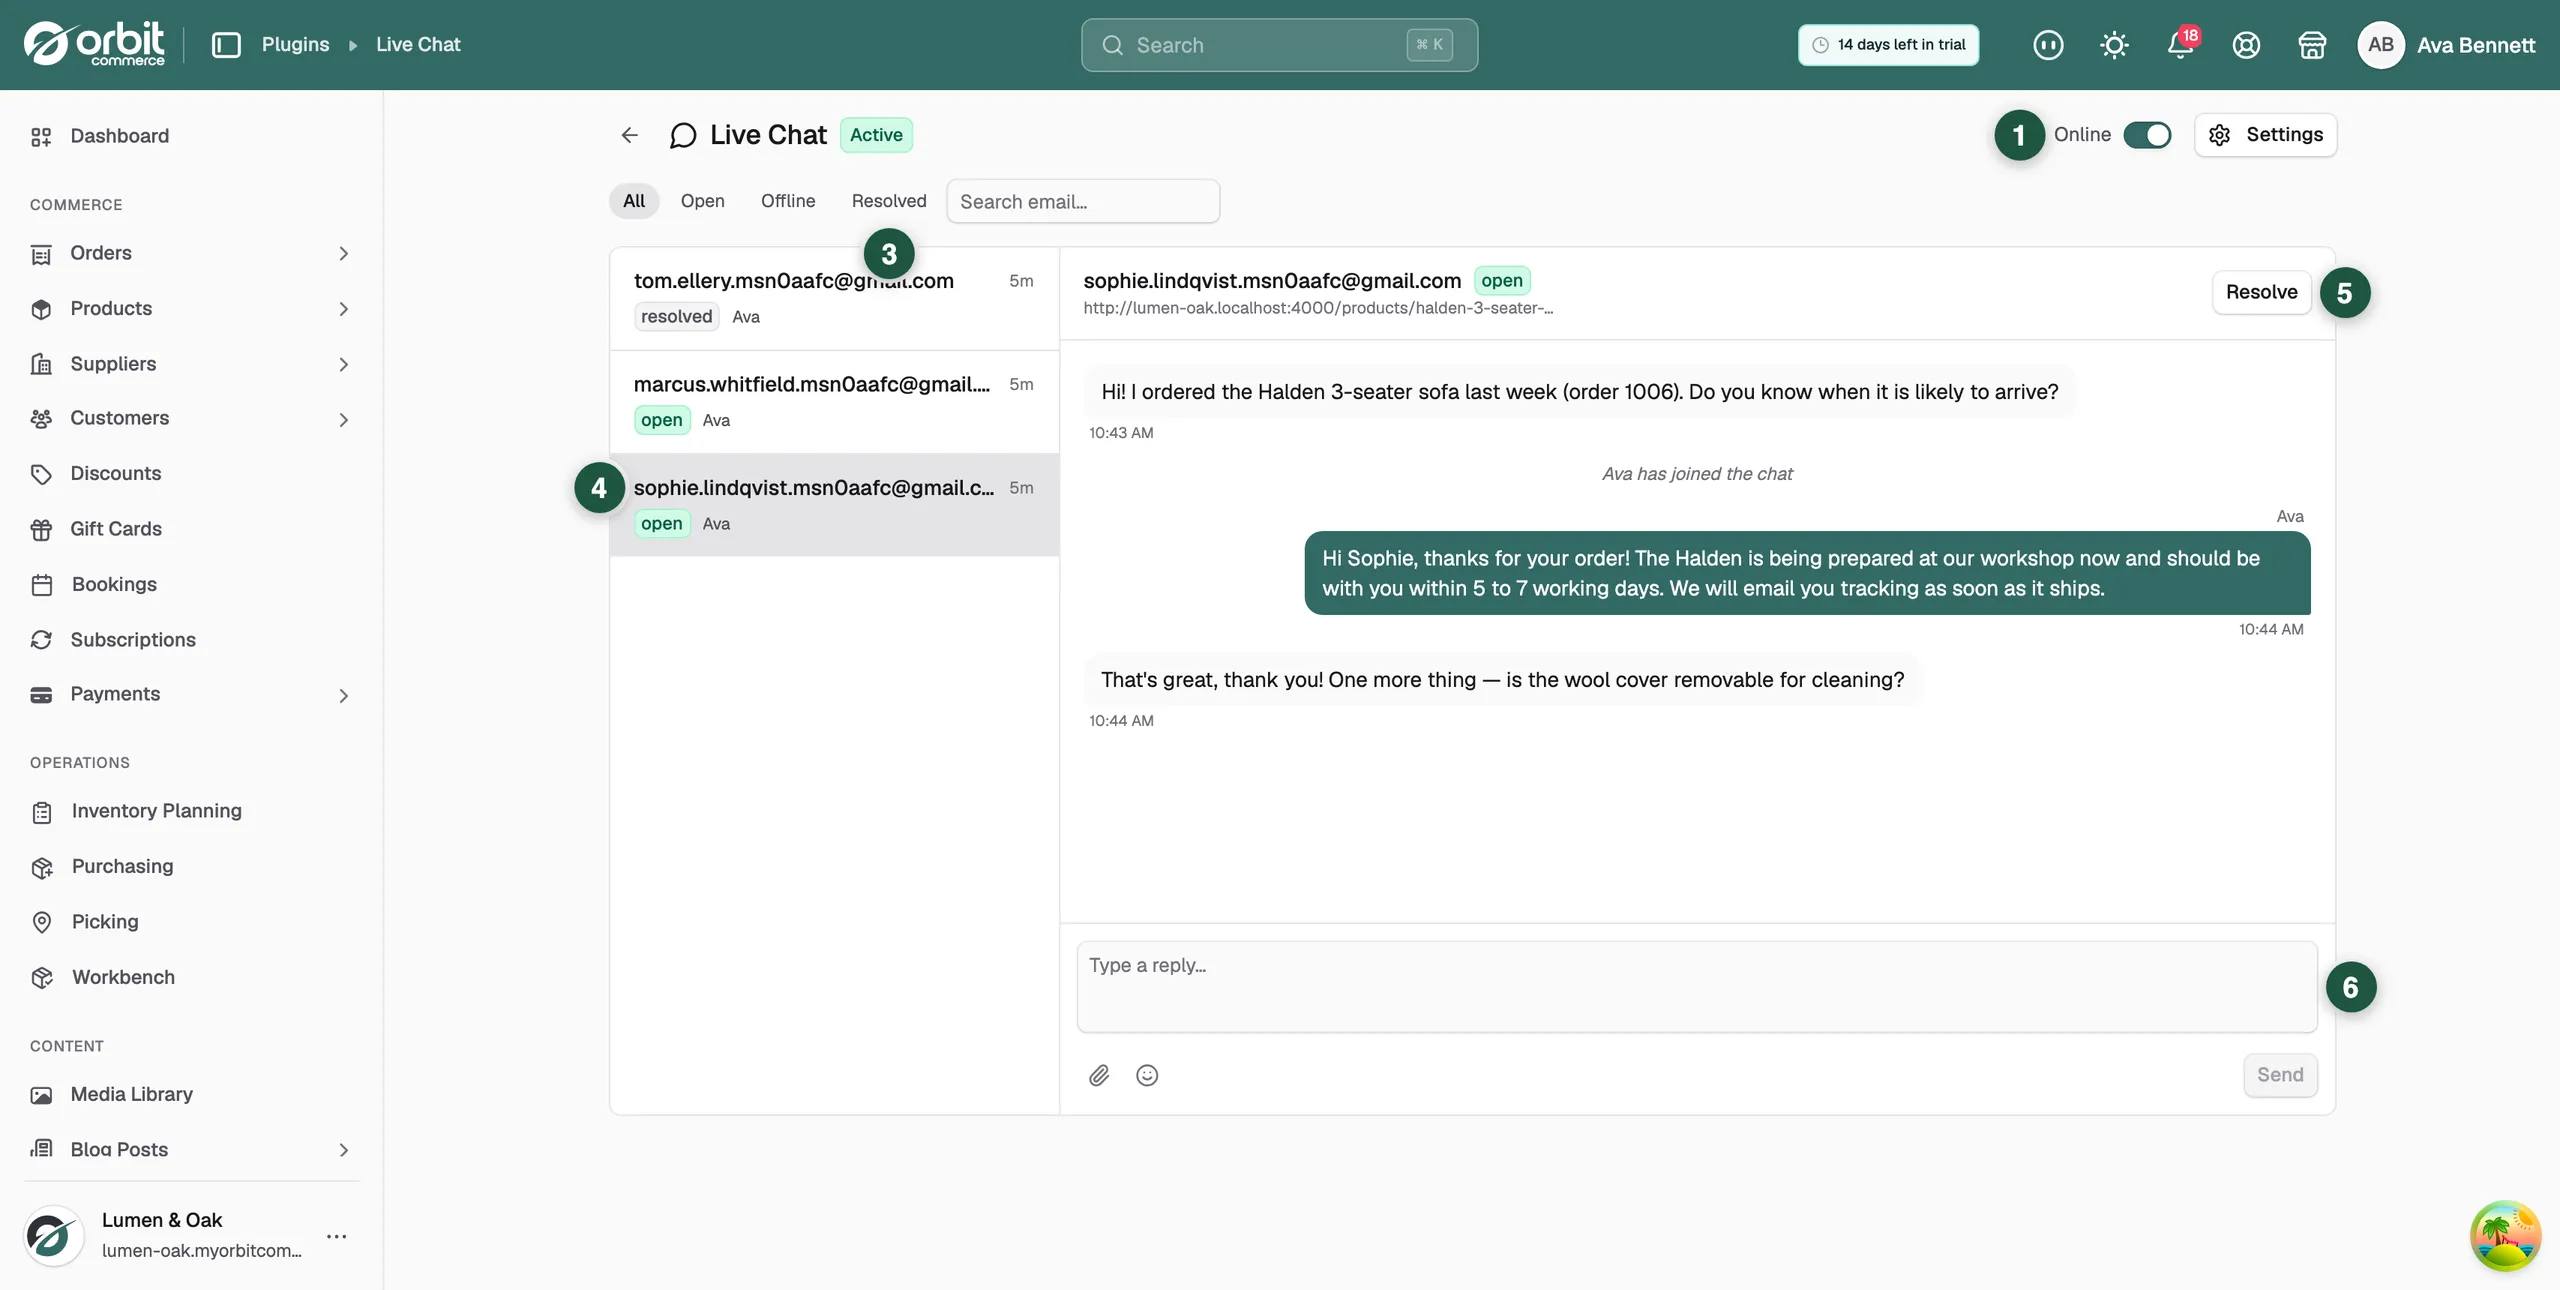
From your Orbit dashboard, go to Plugins, then Live Chat. The inbox opens.
- Online / Away: your availability. See Set your availability below.
- Settings: opens the widget settings.
- All, Open, Offline and Resolved: filters for the conversation list. Offline holds messages visitors left while you were away.
- Search email…: finds a conversation by the visitor's email address.
- Conversations: each row shows the visitor's email, the conversation status, the assigned agent and when the last message arrived. A conversation waiting on you is marked Needs reply.
- Thread: click a row to open the full thread on the right, including the page the visitor was on when they started the chat.
Reply to a conversation
- In the inbox, click a conversation to open it.
- Type your reply in the Type a reply… box at the bottom of the thread. Use the icons under the box to Attach a file, add an Emoji or send a GIF.
- Click Send. Your reply appears in the thread and in the visitor's chat widget straight away.
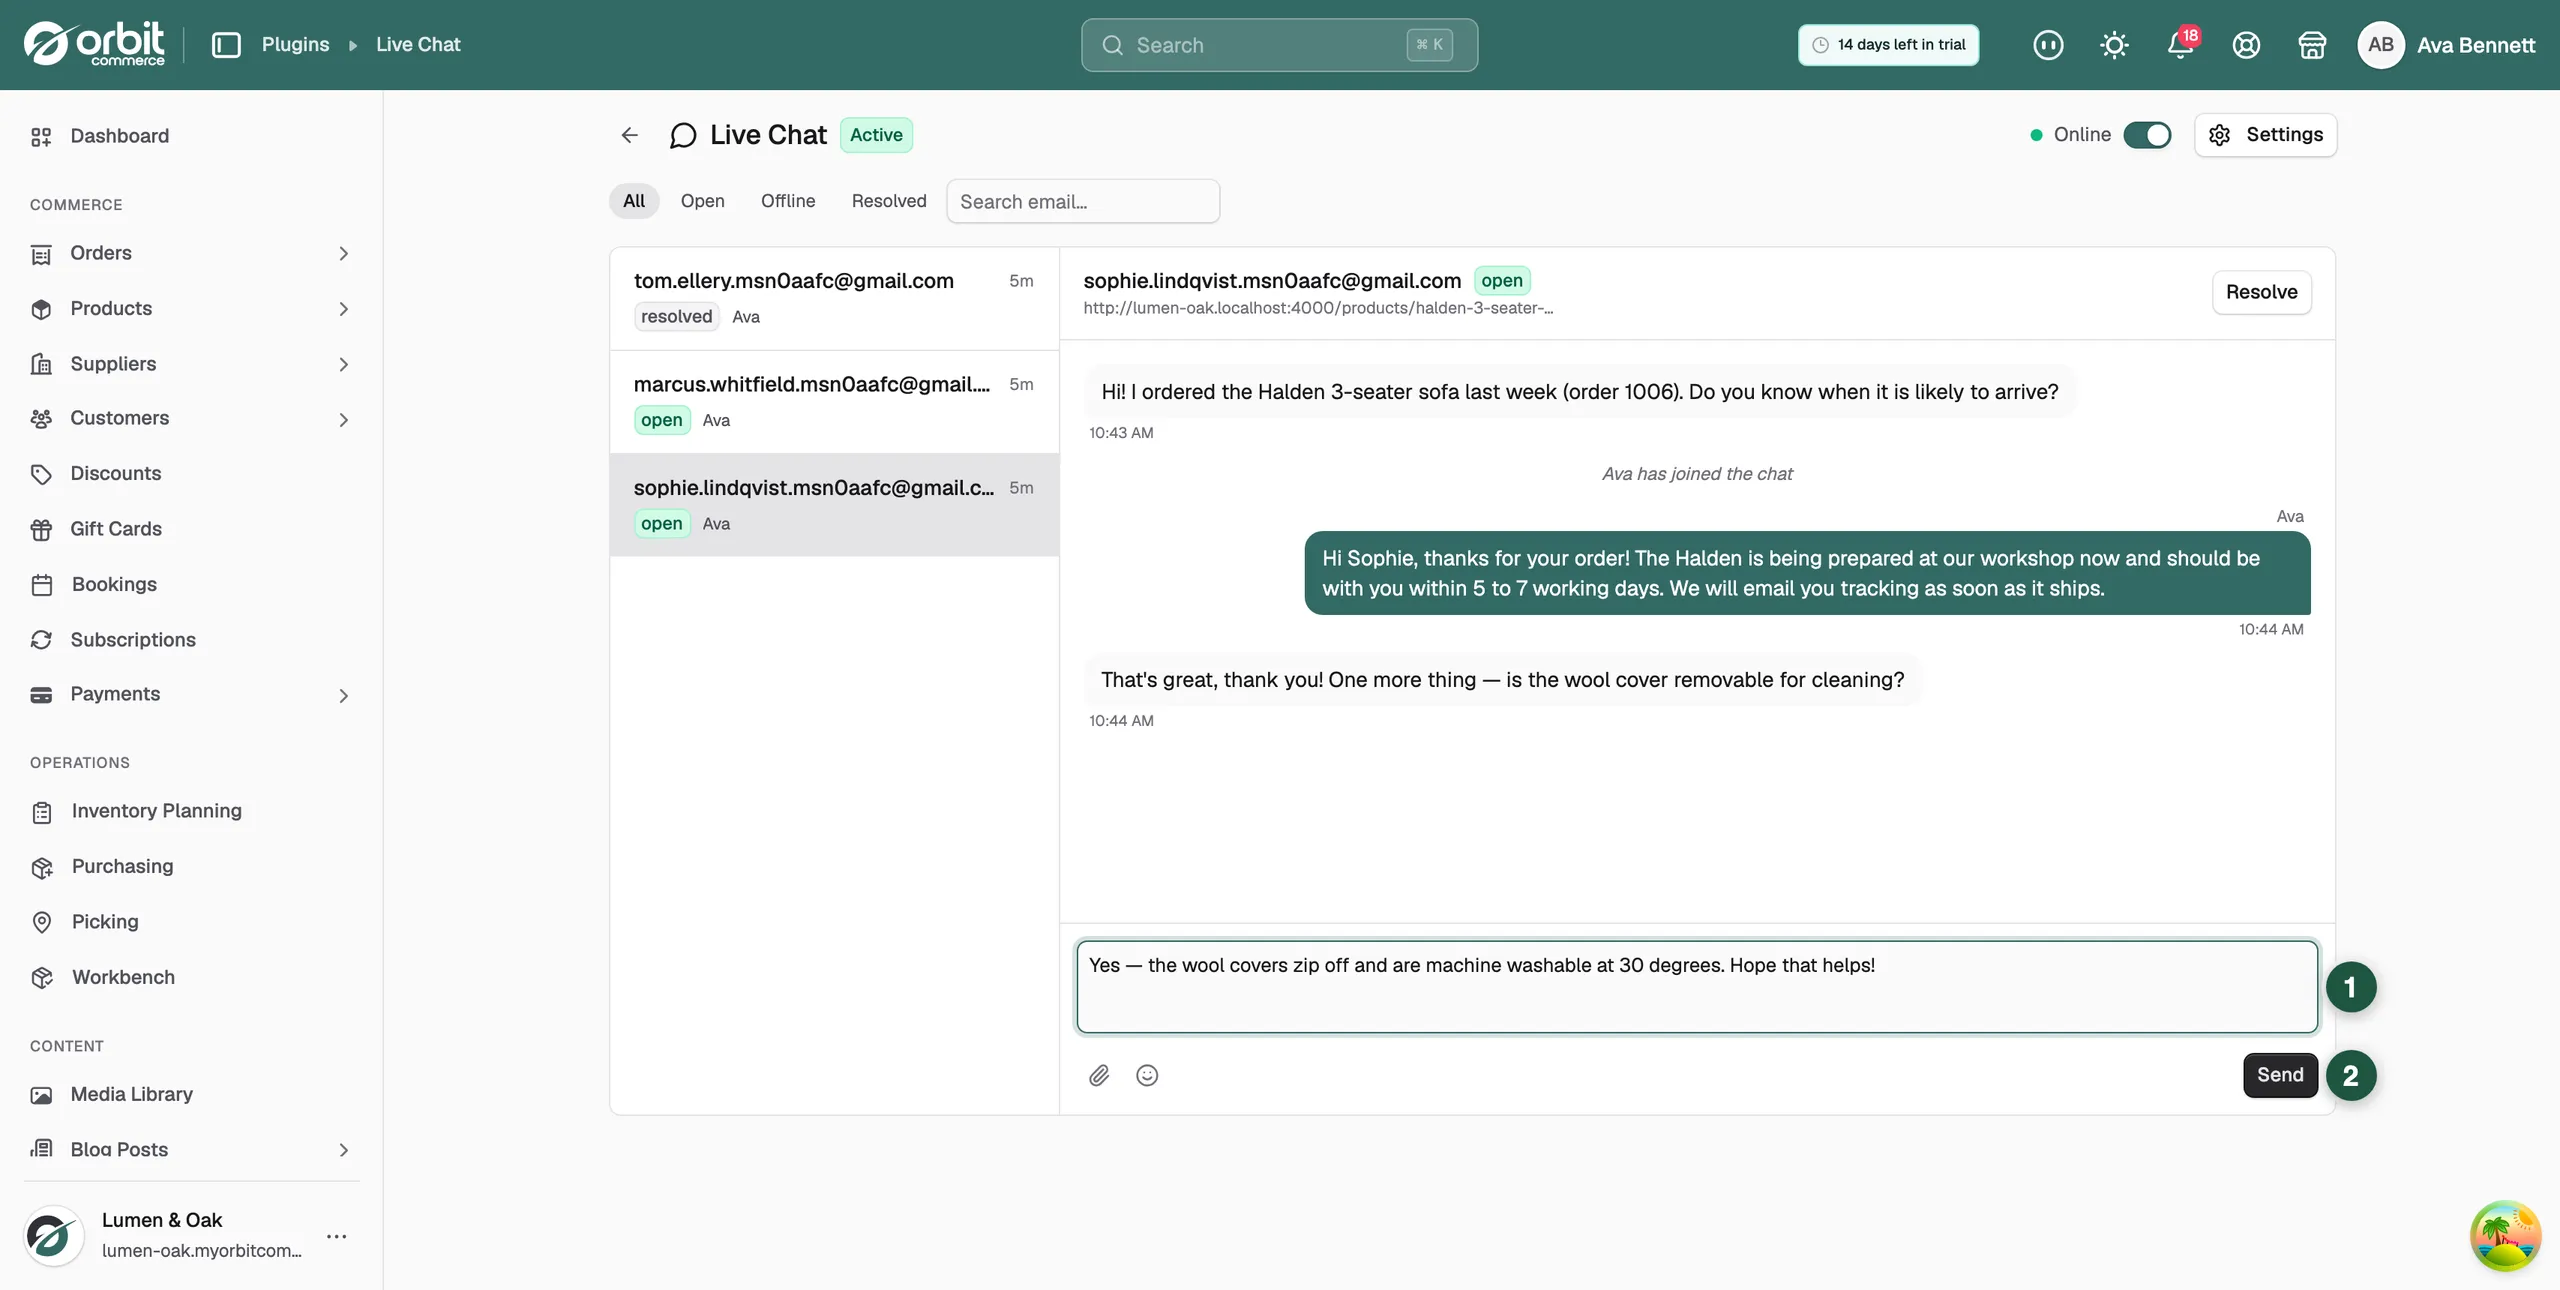
Typing in a resolved conversation reopens it. There is no need to change its status first.
Resolve a conversation
- Open the conversation.
- Click Resolve. The conversation is marked as done. It stays readable under the Resolved filter.
Set your availability
- In the inbox, switch Online to Away when you step out.
- Visitors now see your away message and can leave their email address instead of chatting. Their messages land under the Offline filter.
- Switch back to Online when you return.
Tip: Use Away rather than turning the widget off. You keep collecting messages, with the visitor's email, instead of vanishing from your storefront.
Change how the widget looks
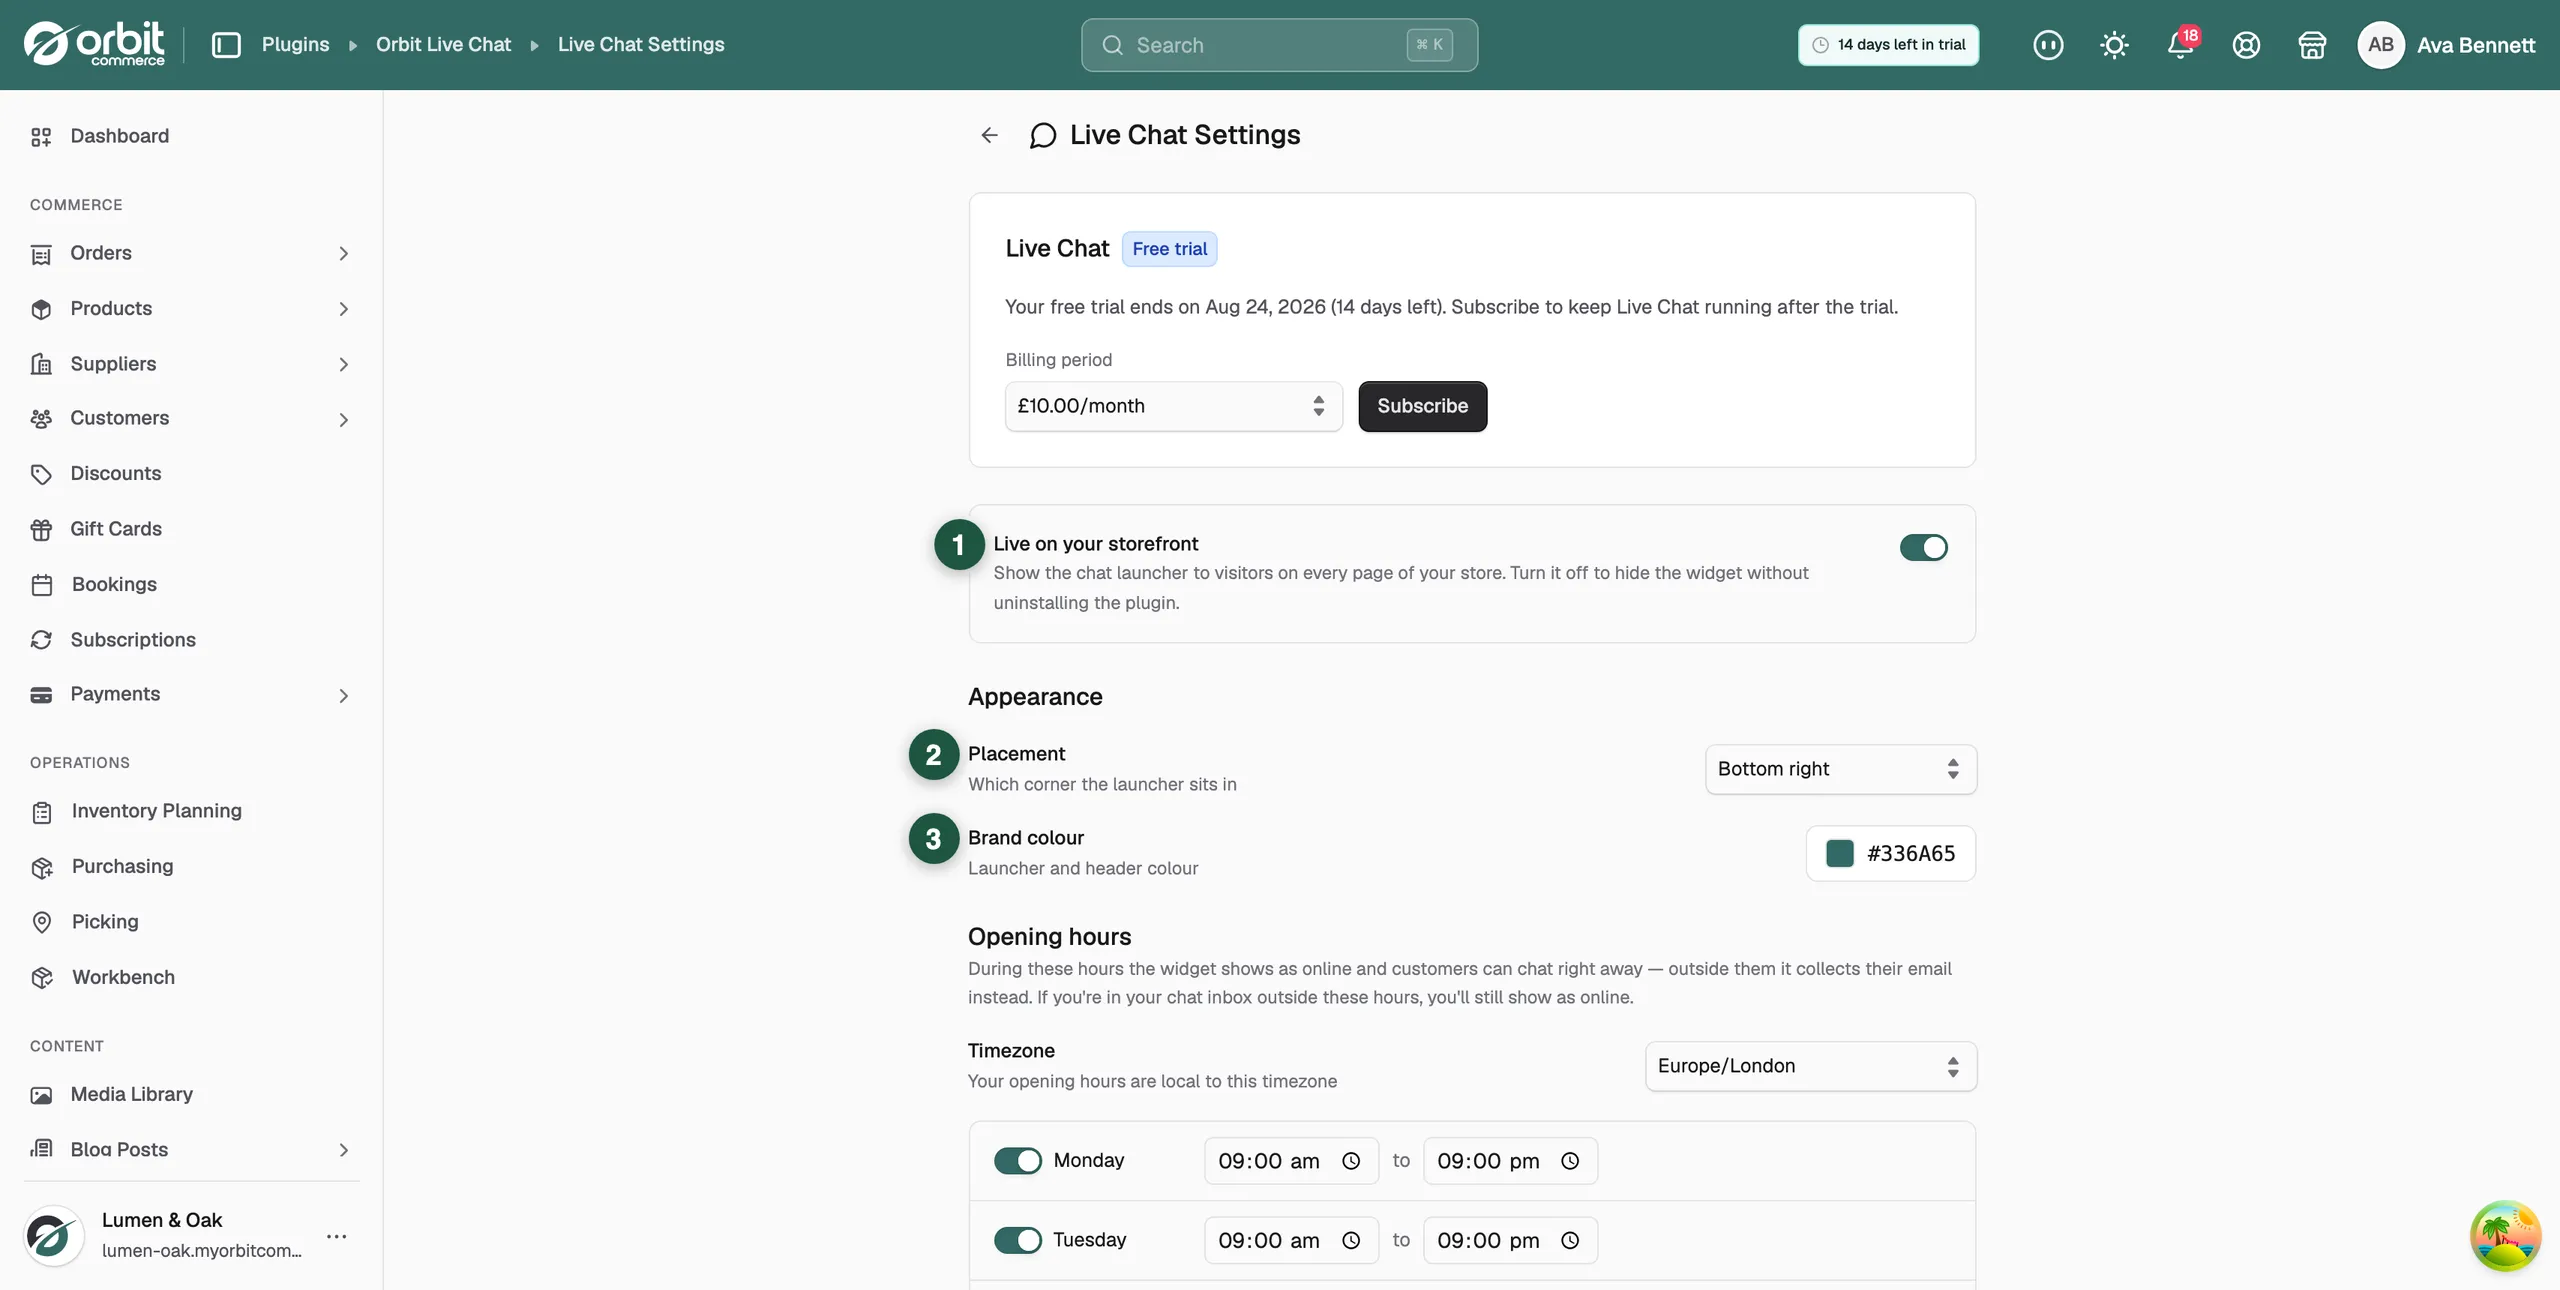
- In the inbox, click Settings. Your plan and trial status sit at the top of the page.
- Use Live on your storefront to show or hide the chat launcher. Turn it off to hide the widget on every page without uninstalling the plugin.
- Under Appearance, set the options below.
- Click Save changes. The message Live chat settings saved appears.
- Placement: which corner the launcher sits in. Bottom right, Bottom left, Top right or Top left.
- Notification sound: plays a sound for the shopper when you reply to their chat.
- Brand colour: the colour of the launcher and the chat window header. Click the swatch to pick a new one.
Set opening hours
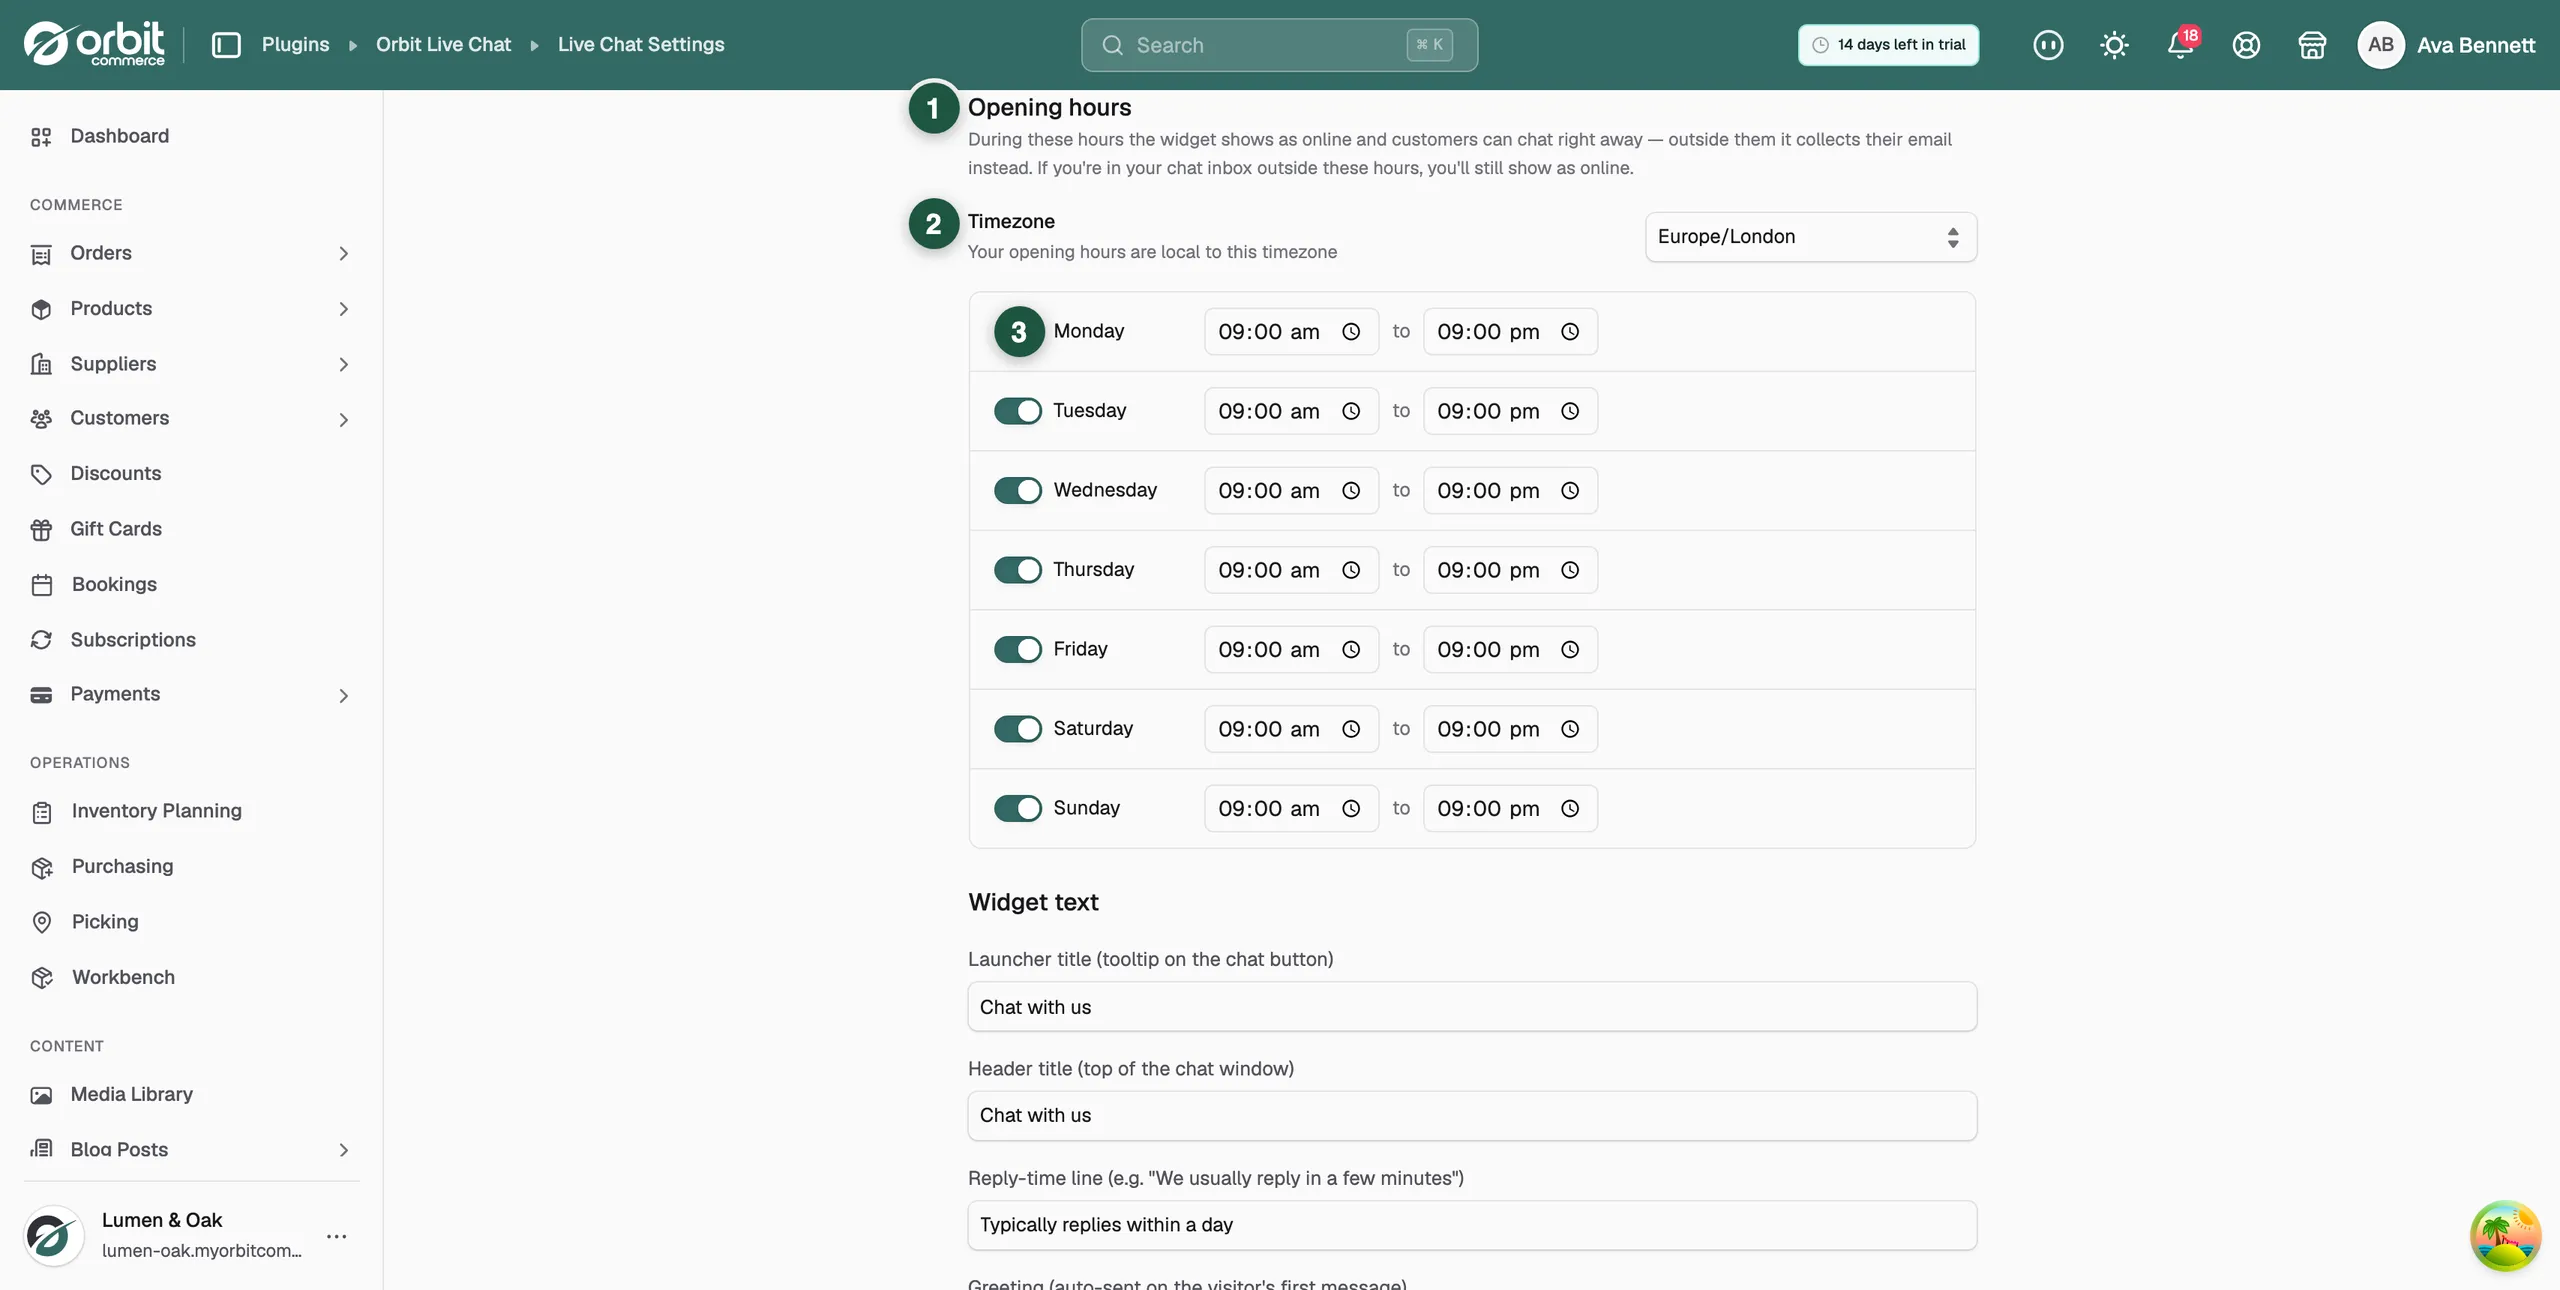
During your opening hours the widget shows as online and customers can chat right away. Outside them it collects the visitor's email instead. If you are in your inbox outside these hours, you still show as online.
- On the settings page, under Opening hours, choose your Timezone. Your hours are local to it.
- Switch on each day you are open and set its start and end times. Days left switched off show as Closed.
- Click Save changes.
Change the widget text
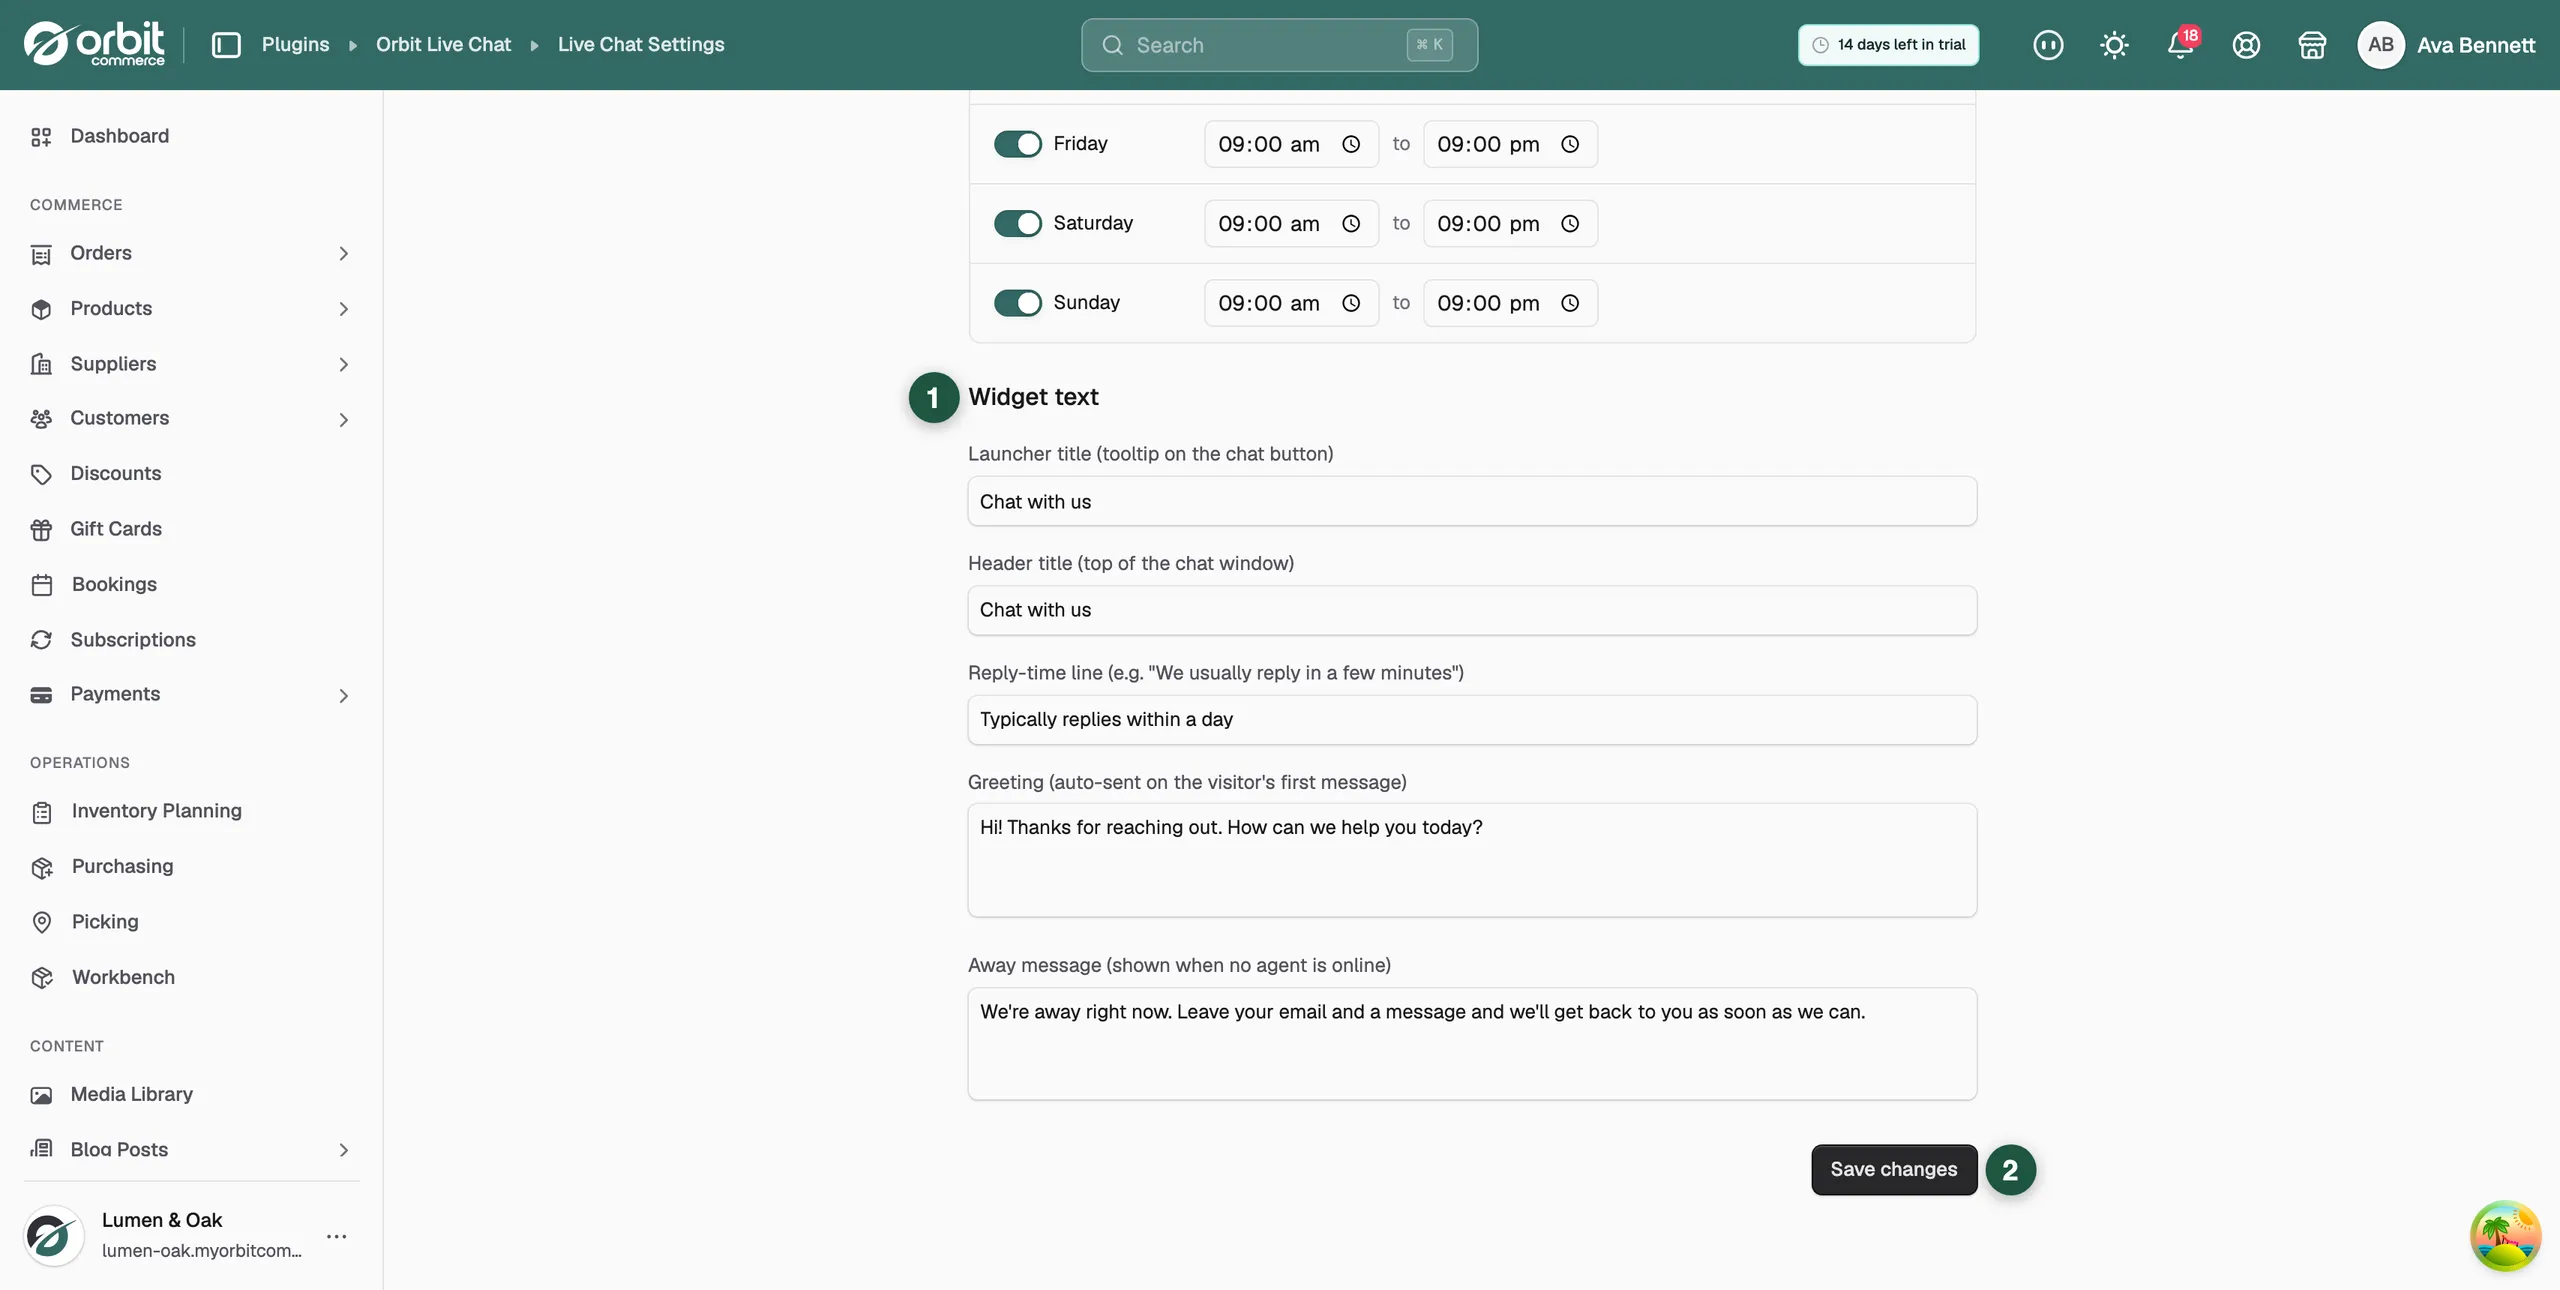
Under Widget text on the settings page, you can change everything the visitor reads. Click Save changes when you are done.
- Launcher title: the tooltip on the chat button.
- Header title: the title at the top of the chat window.
- Reply-time line: how quickly you usually reply, for example "We usually reply in a few minutes".
- Greeting: sent automatically on the visitor's first message.
- Away message: shown when no agent is online.
Note: Write the greeting like a real first reply. It goes out on its own as soon as a visitor sends their first message, so it sets the tone for the whole conversation.
Related guides
Was this helpful?
0 people found this helpful