Creating and managing blogs
Blogs group your posts. Create one from the Blogs page or from the post you are writing, then edit, view or delete it.
A blog is a container for your blog posts. Each blog has its own title, description and web address, so you can keep company news apart from buying guides. You manage them under Blog Posts, then Blogs.
Considerations
- A post cannot be saved until it belongs to a blog. Your store needs at least one.
- Orbit gives every new store a blog called News.
- Deleting a blog affects the posts inside it and how they show on your shop. Delete a blog only when you are sure it is no longer needed.
View your blogs
- From your Orbit dashboard, go to Blog Posts.
- Click Blogs.
- The list shows one row per blog, with Title, Handle, Description, Updated and Created.
- Use Search to find a blog by name. The All and Trash tabs switch between live blogs and deleted ones.
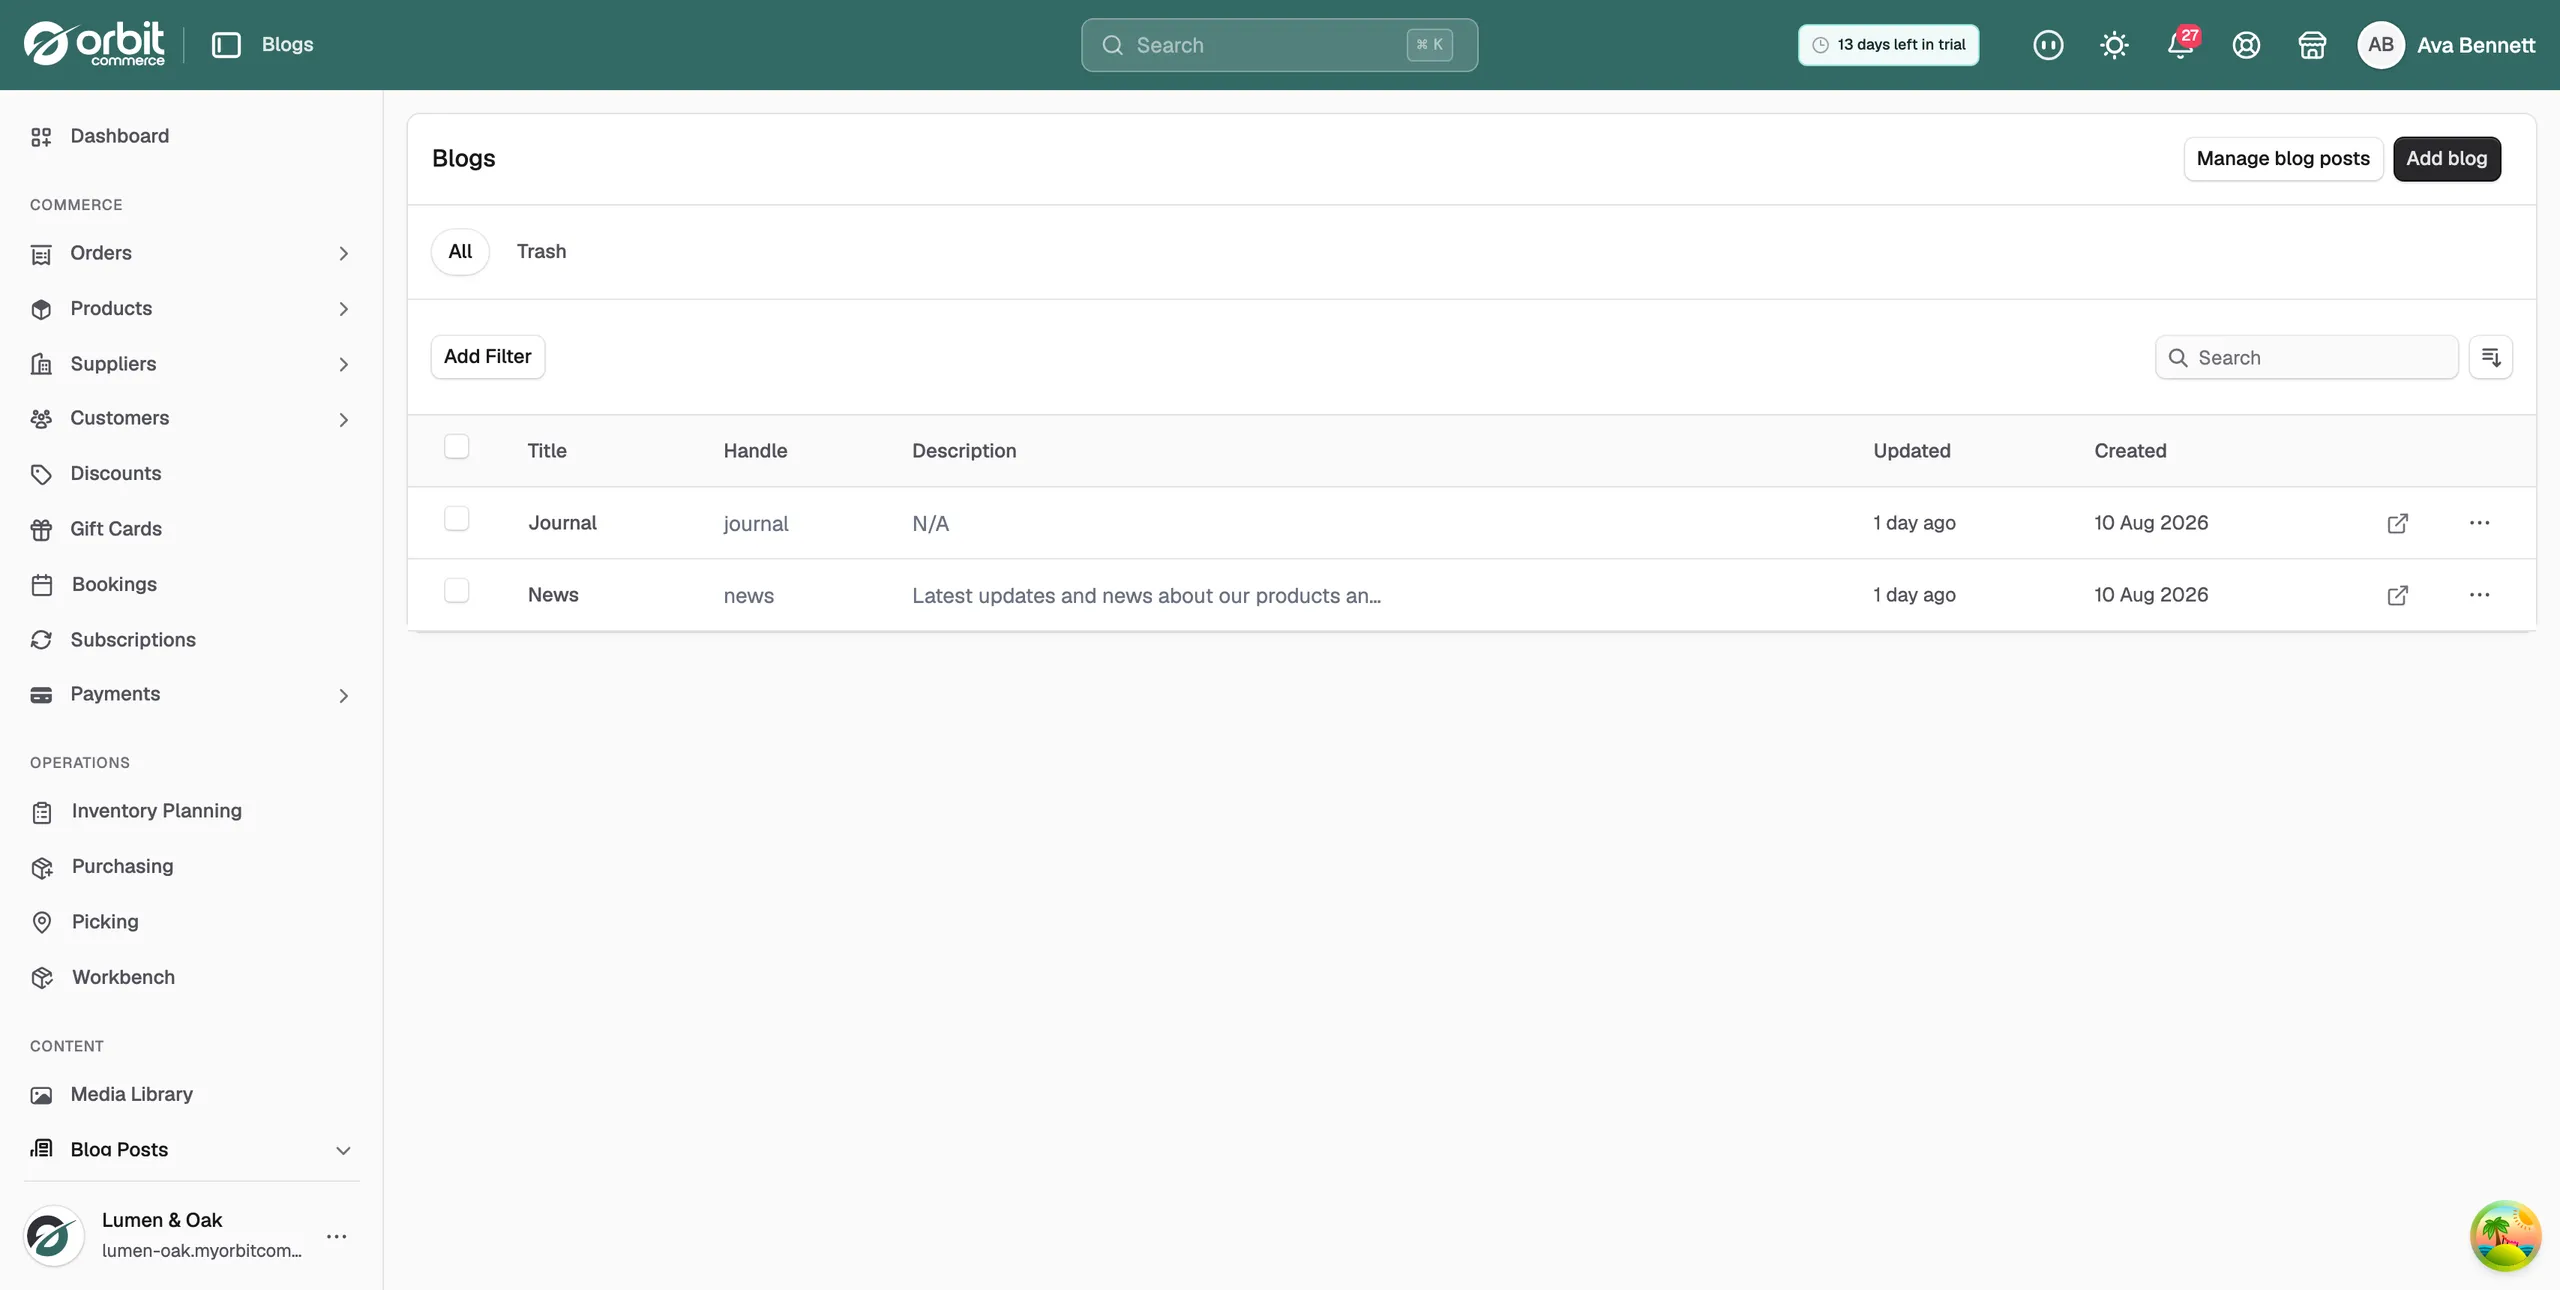
Create a blog
- From your Orbit dashboard, go to Blog Posts, then Blogs.
- Click Add blog.
- In Title, type the name of the blog, such as Company News. This is the only field you have to fill in.
- In Description, say what the blog is for. This is optional and helps your team.
- Under URL and handle, set the Handle. The line under the field shows the web address the blog will use.
- Click Create blog. The message Blog created appears.
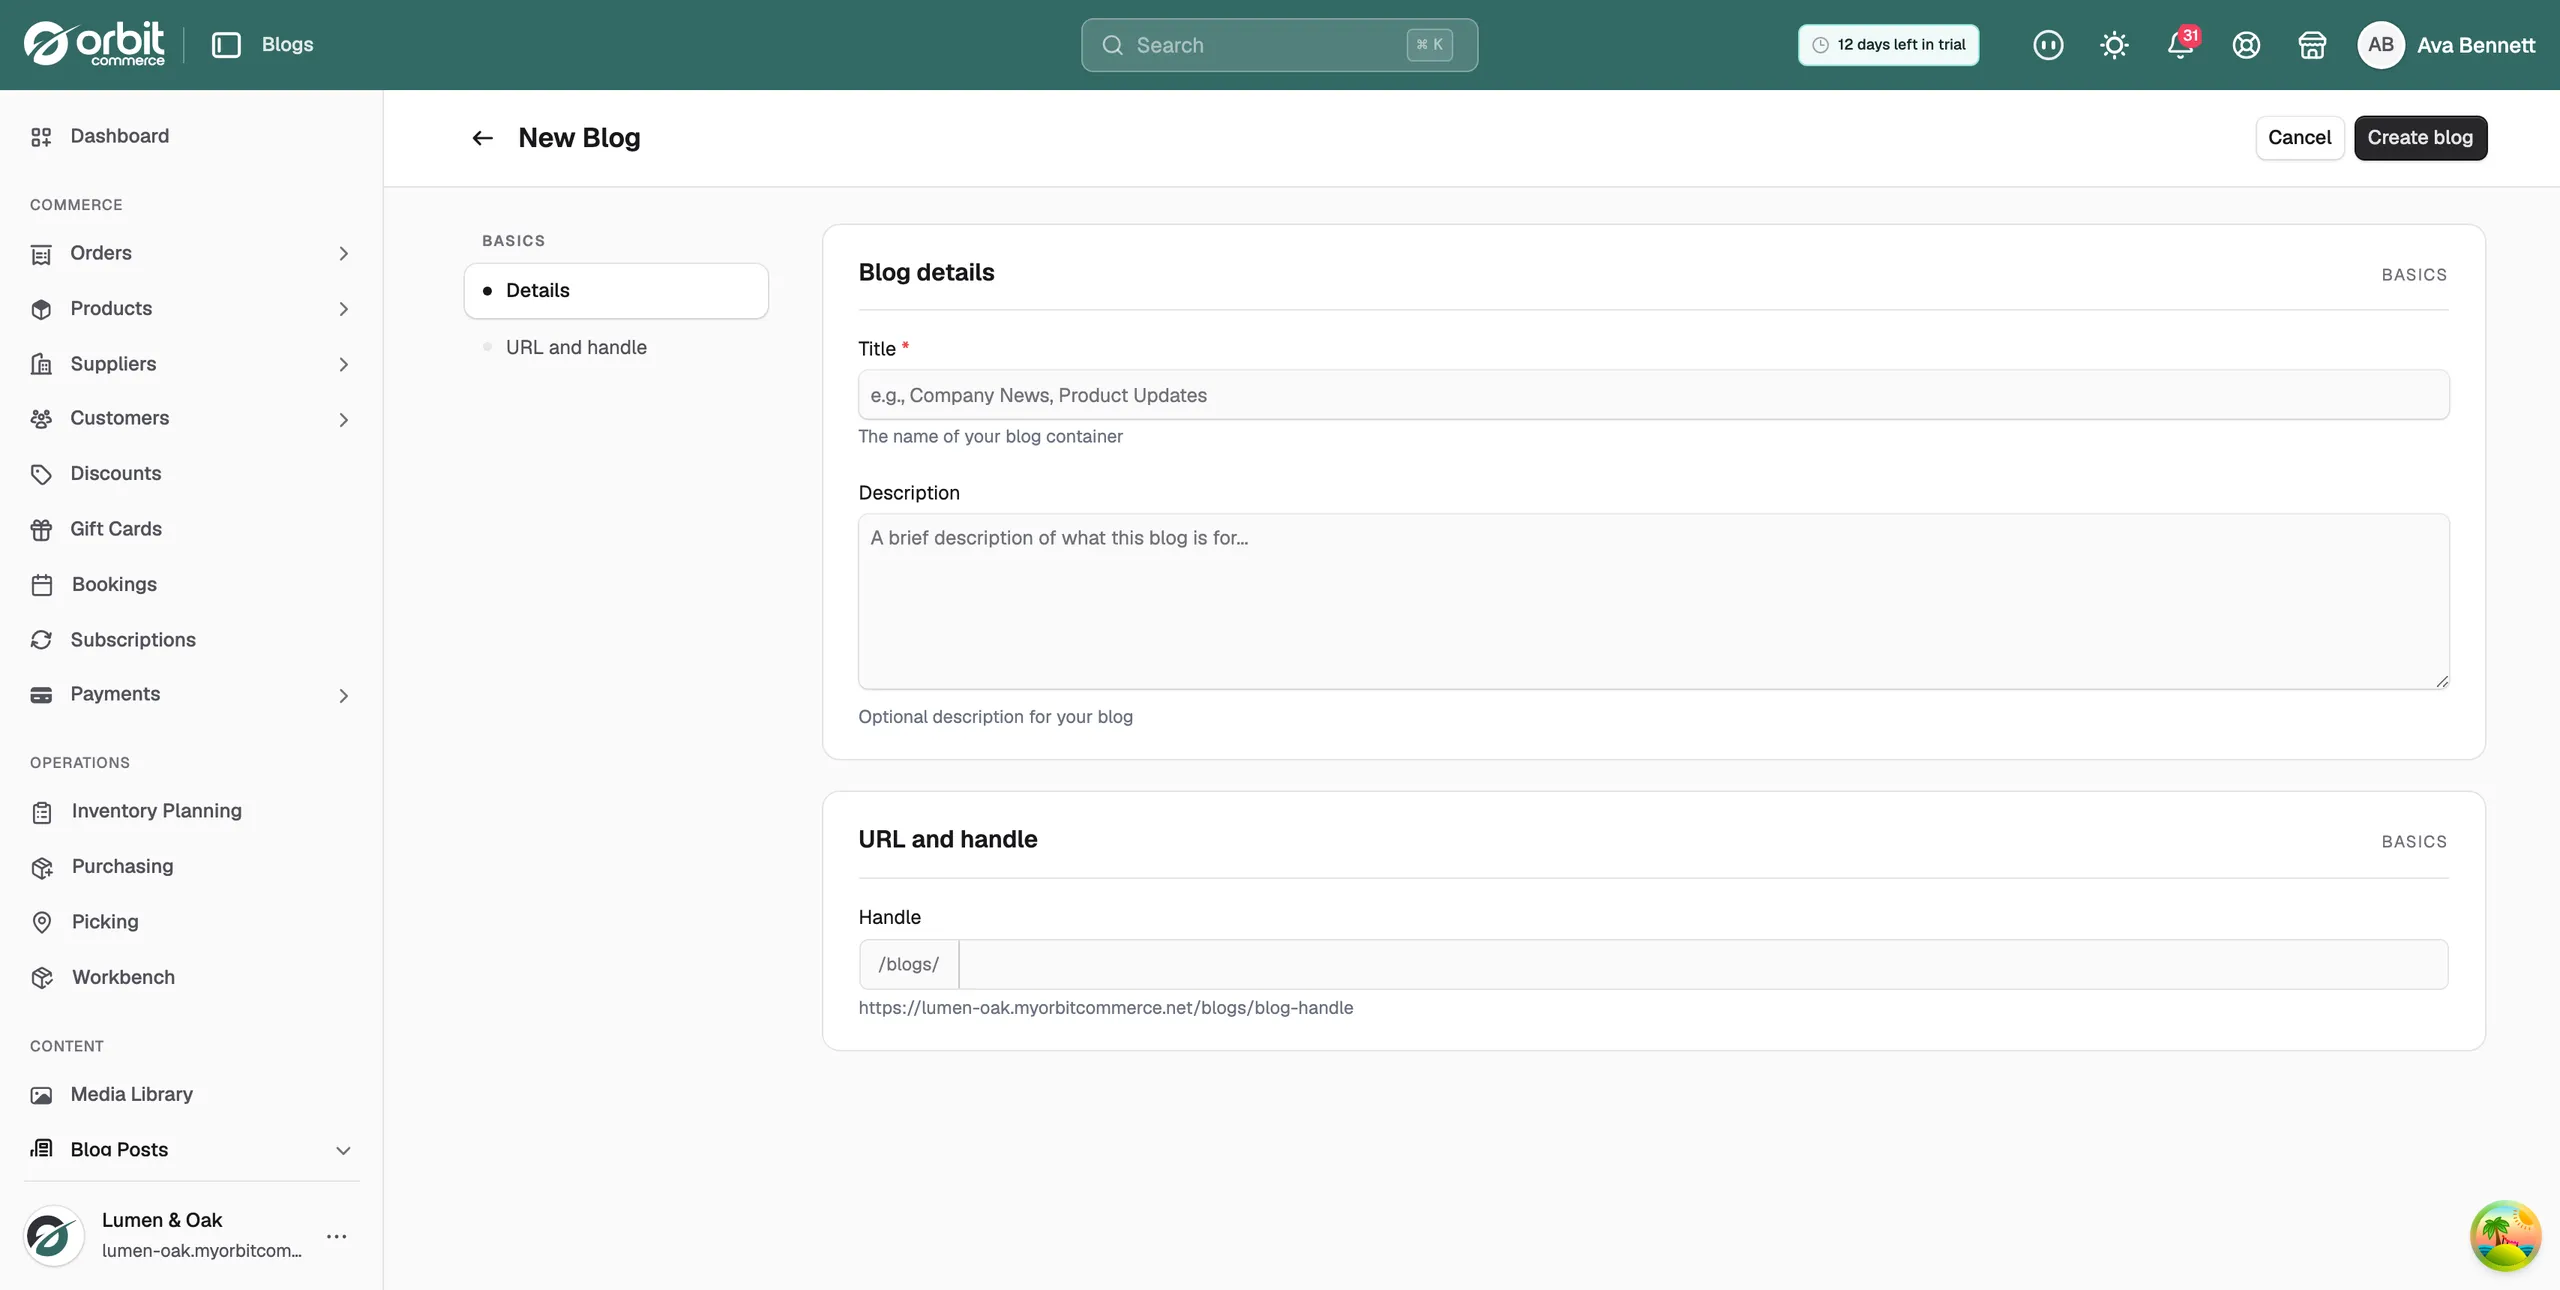
Note: Leave Handle blank and Orbit makes one from the title.
Create a blog while writing a post
You do not have to leave the post you are writing.
- If your store has no blog, a message at the top of the post form reads Your store doesn't have a blog yet. Click Create a blog. Orbit fills the title in as News.
- If your store already has blogs, go to the Organization card, open the Blog list and click Create new blog.
- Fill in Title, and Description and Handle if you want them.
- Click Create blog. The new blog is picked for this post straight away.
Edit a blog
- From your Orbit dashboard, go to Blog Posts, then Blogs.
- Find the blog you want to change.
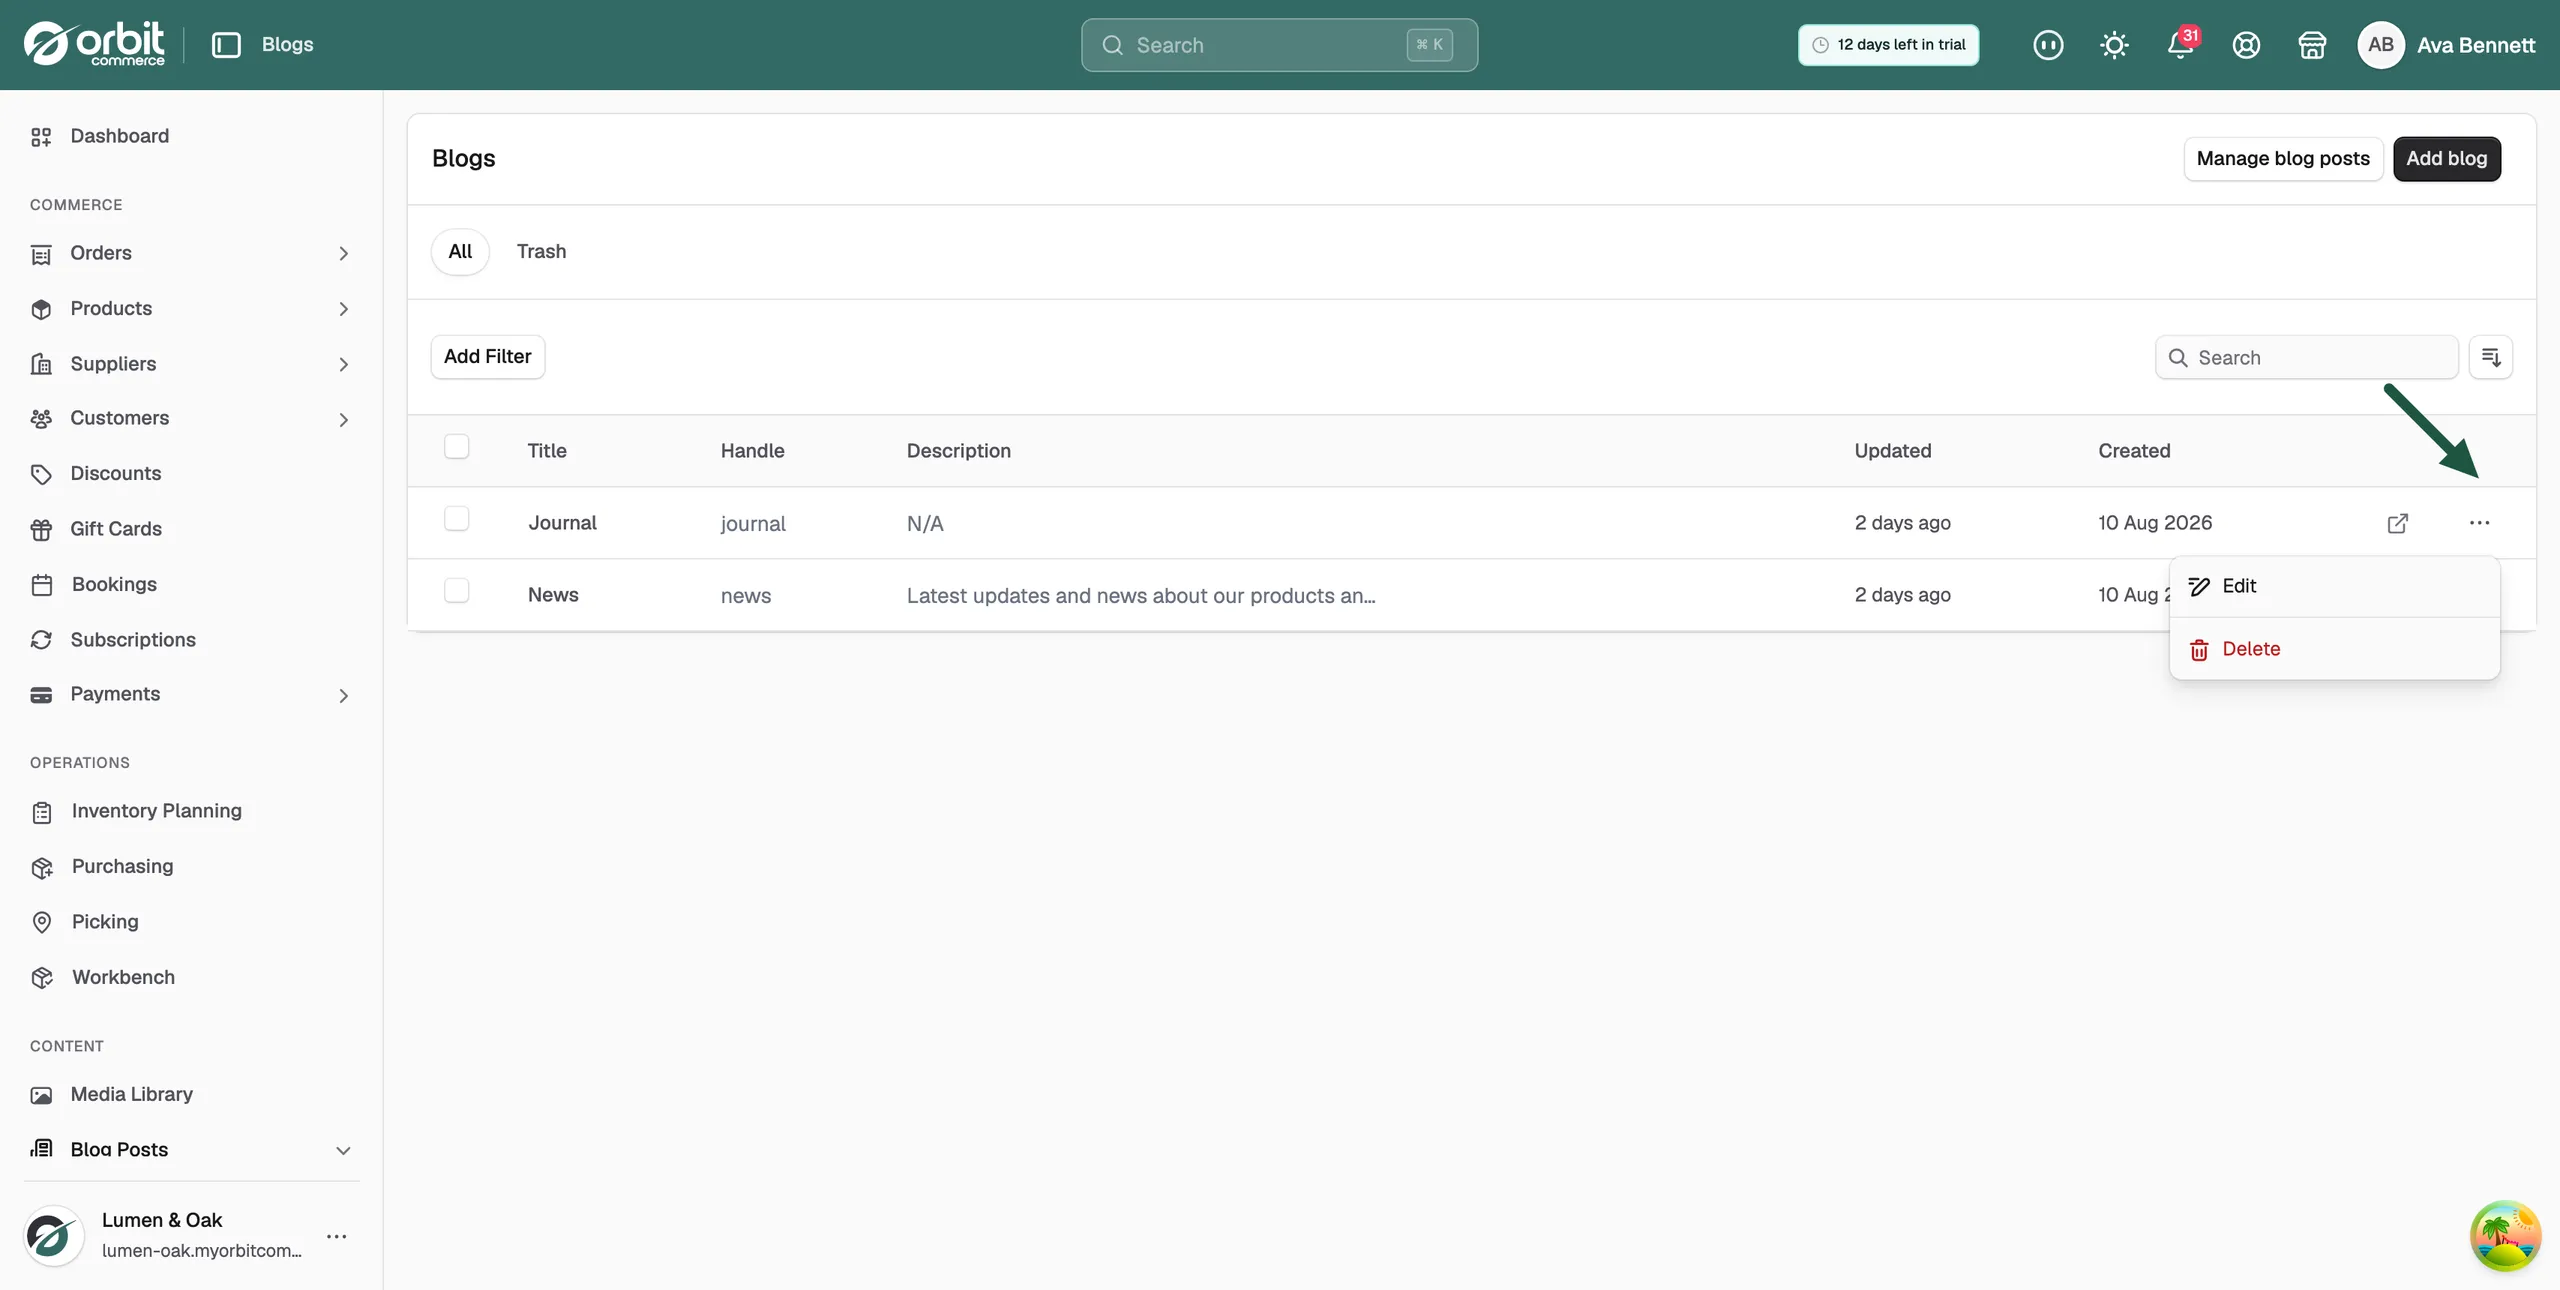
- Click the three dots at the end of its row, then click Edit.
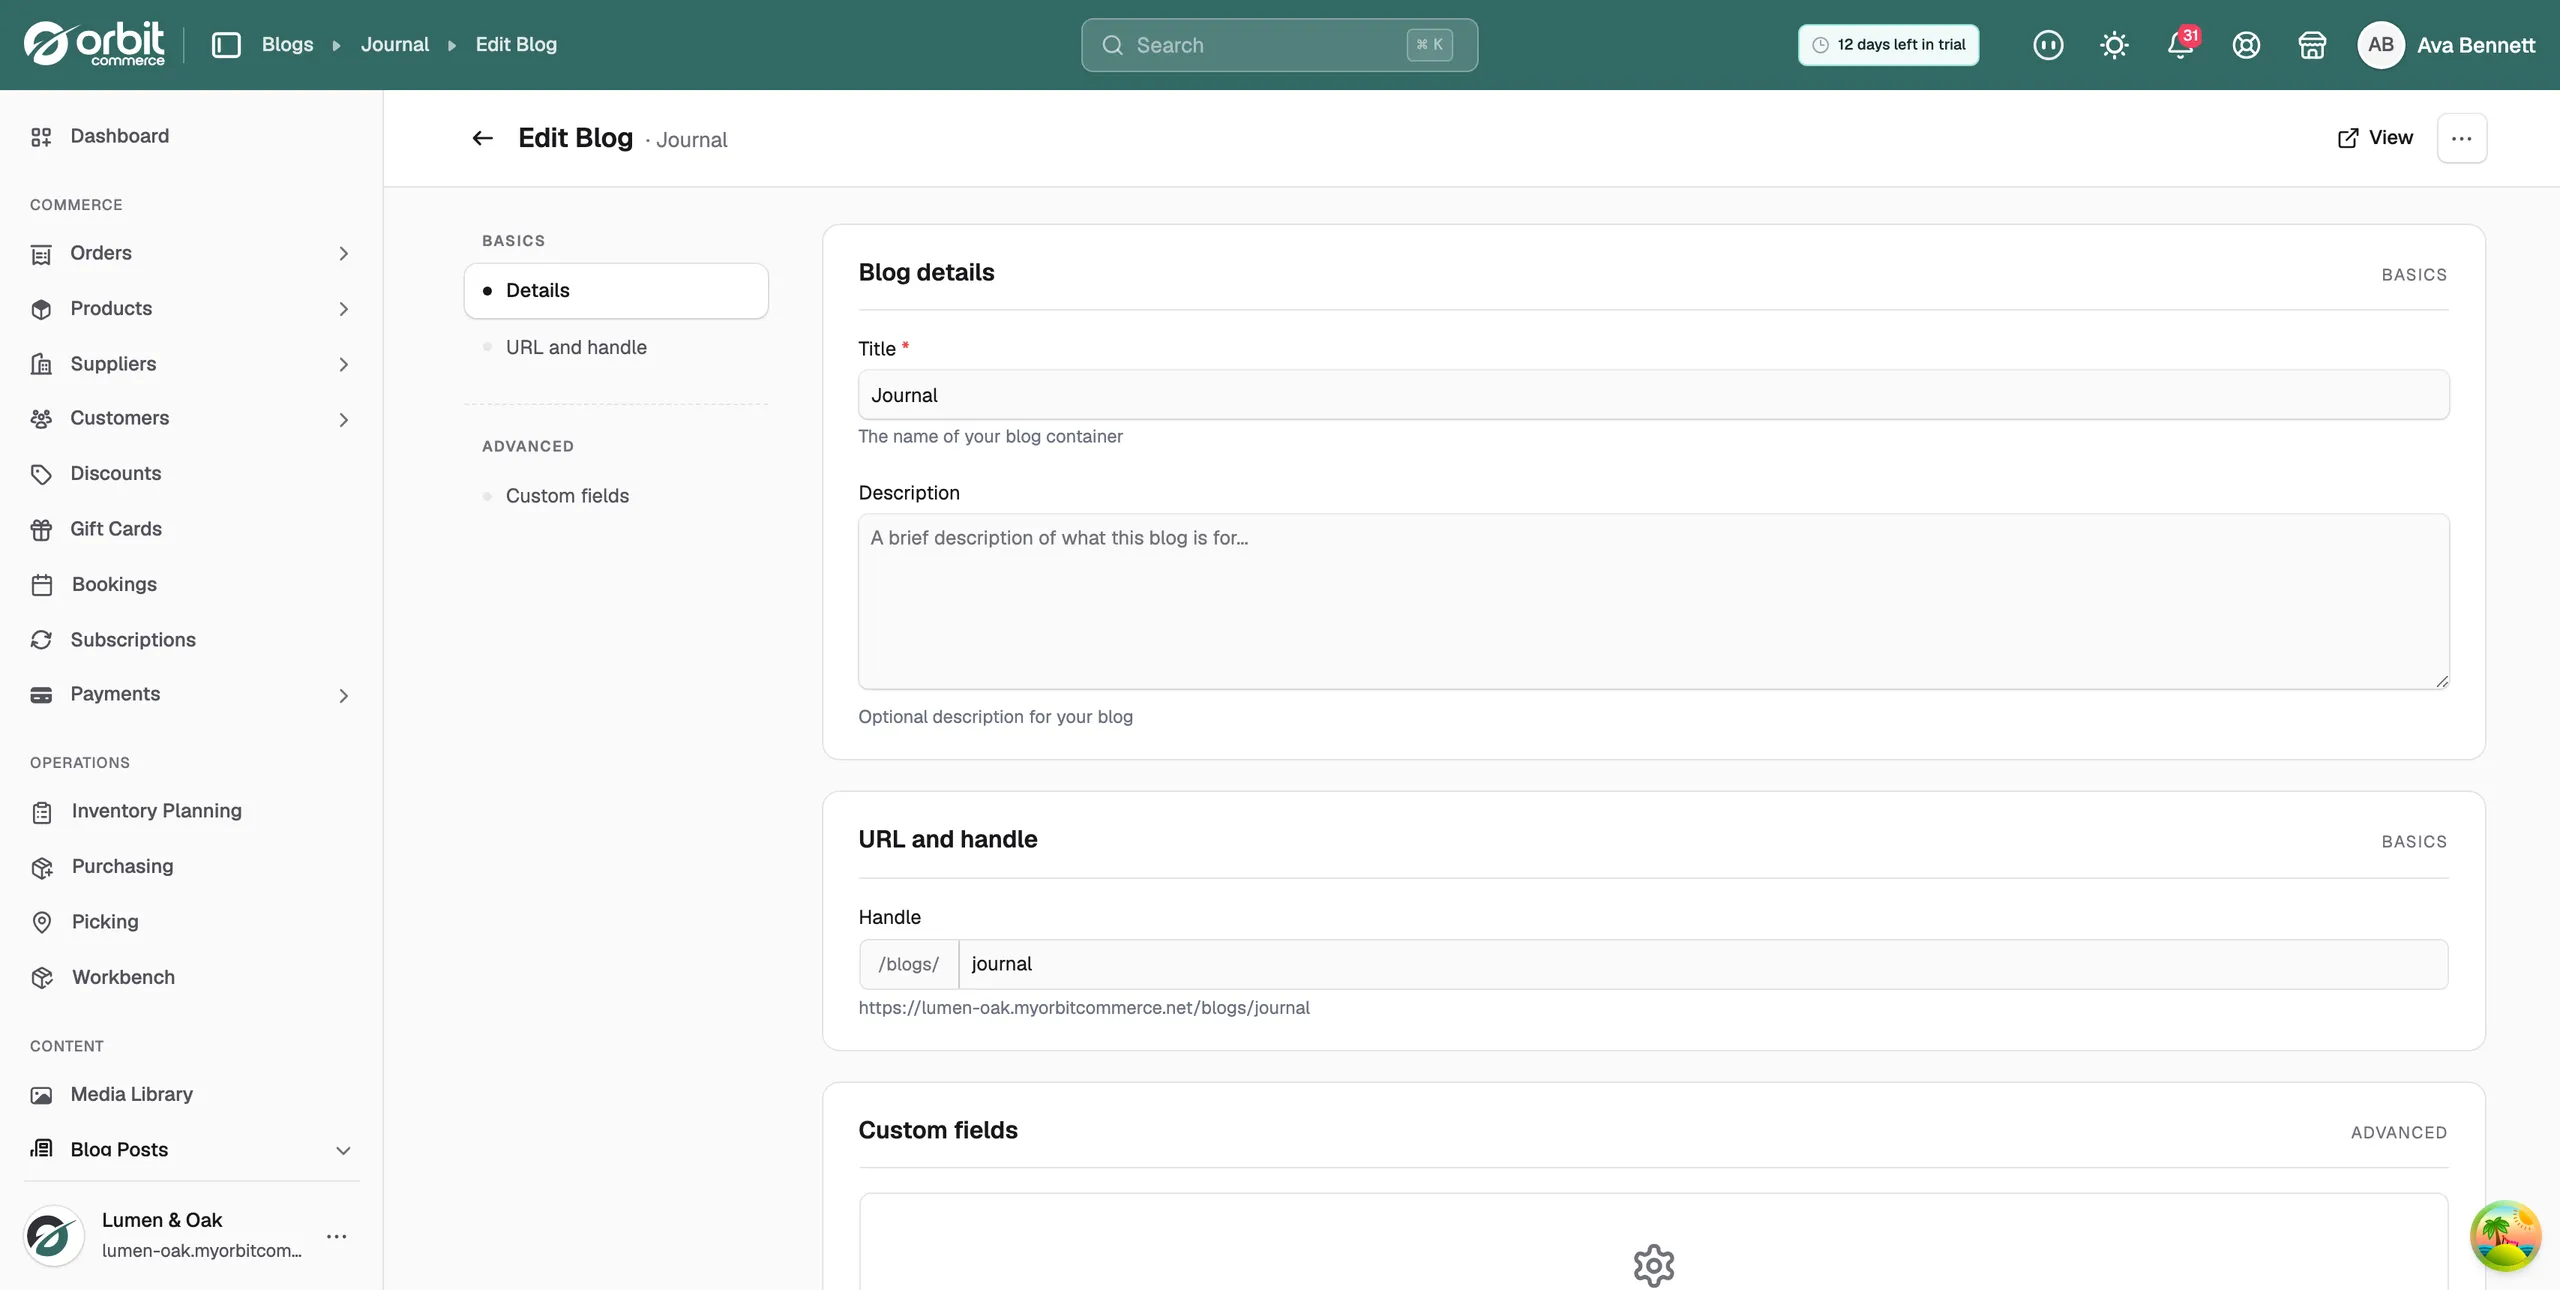
- Change the Title, Description or Handle.
- Save the blog. The message Blog updated appears.
Custom fields
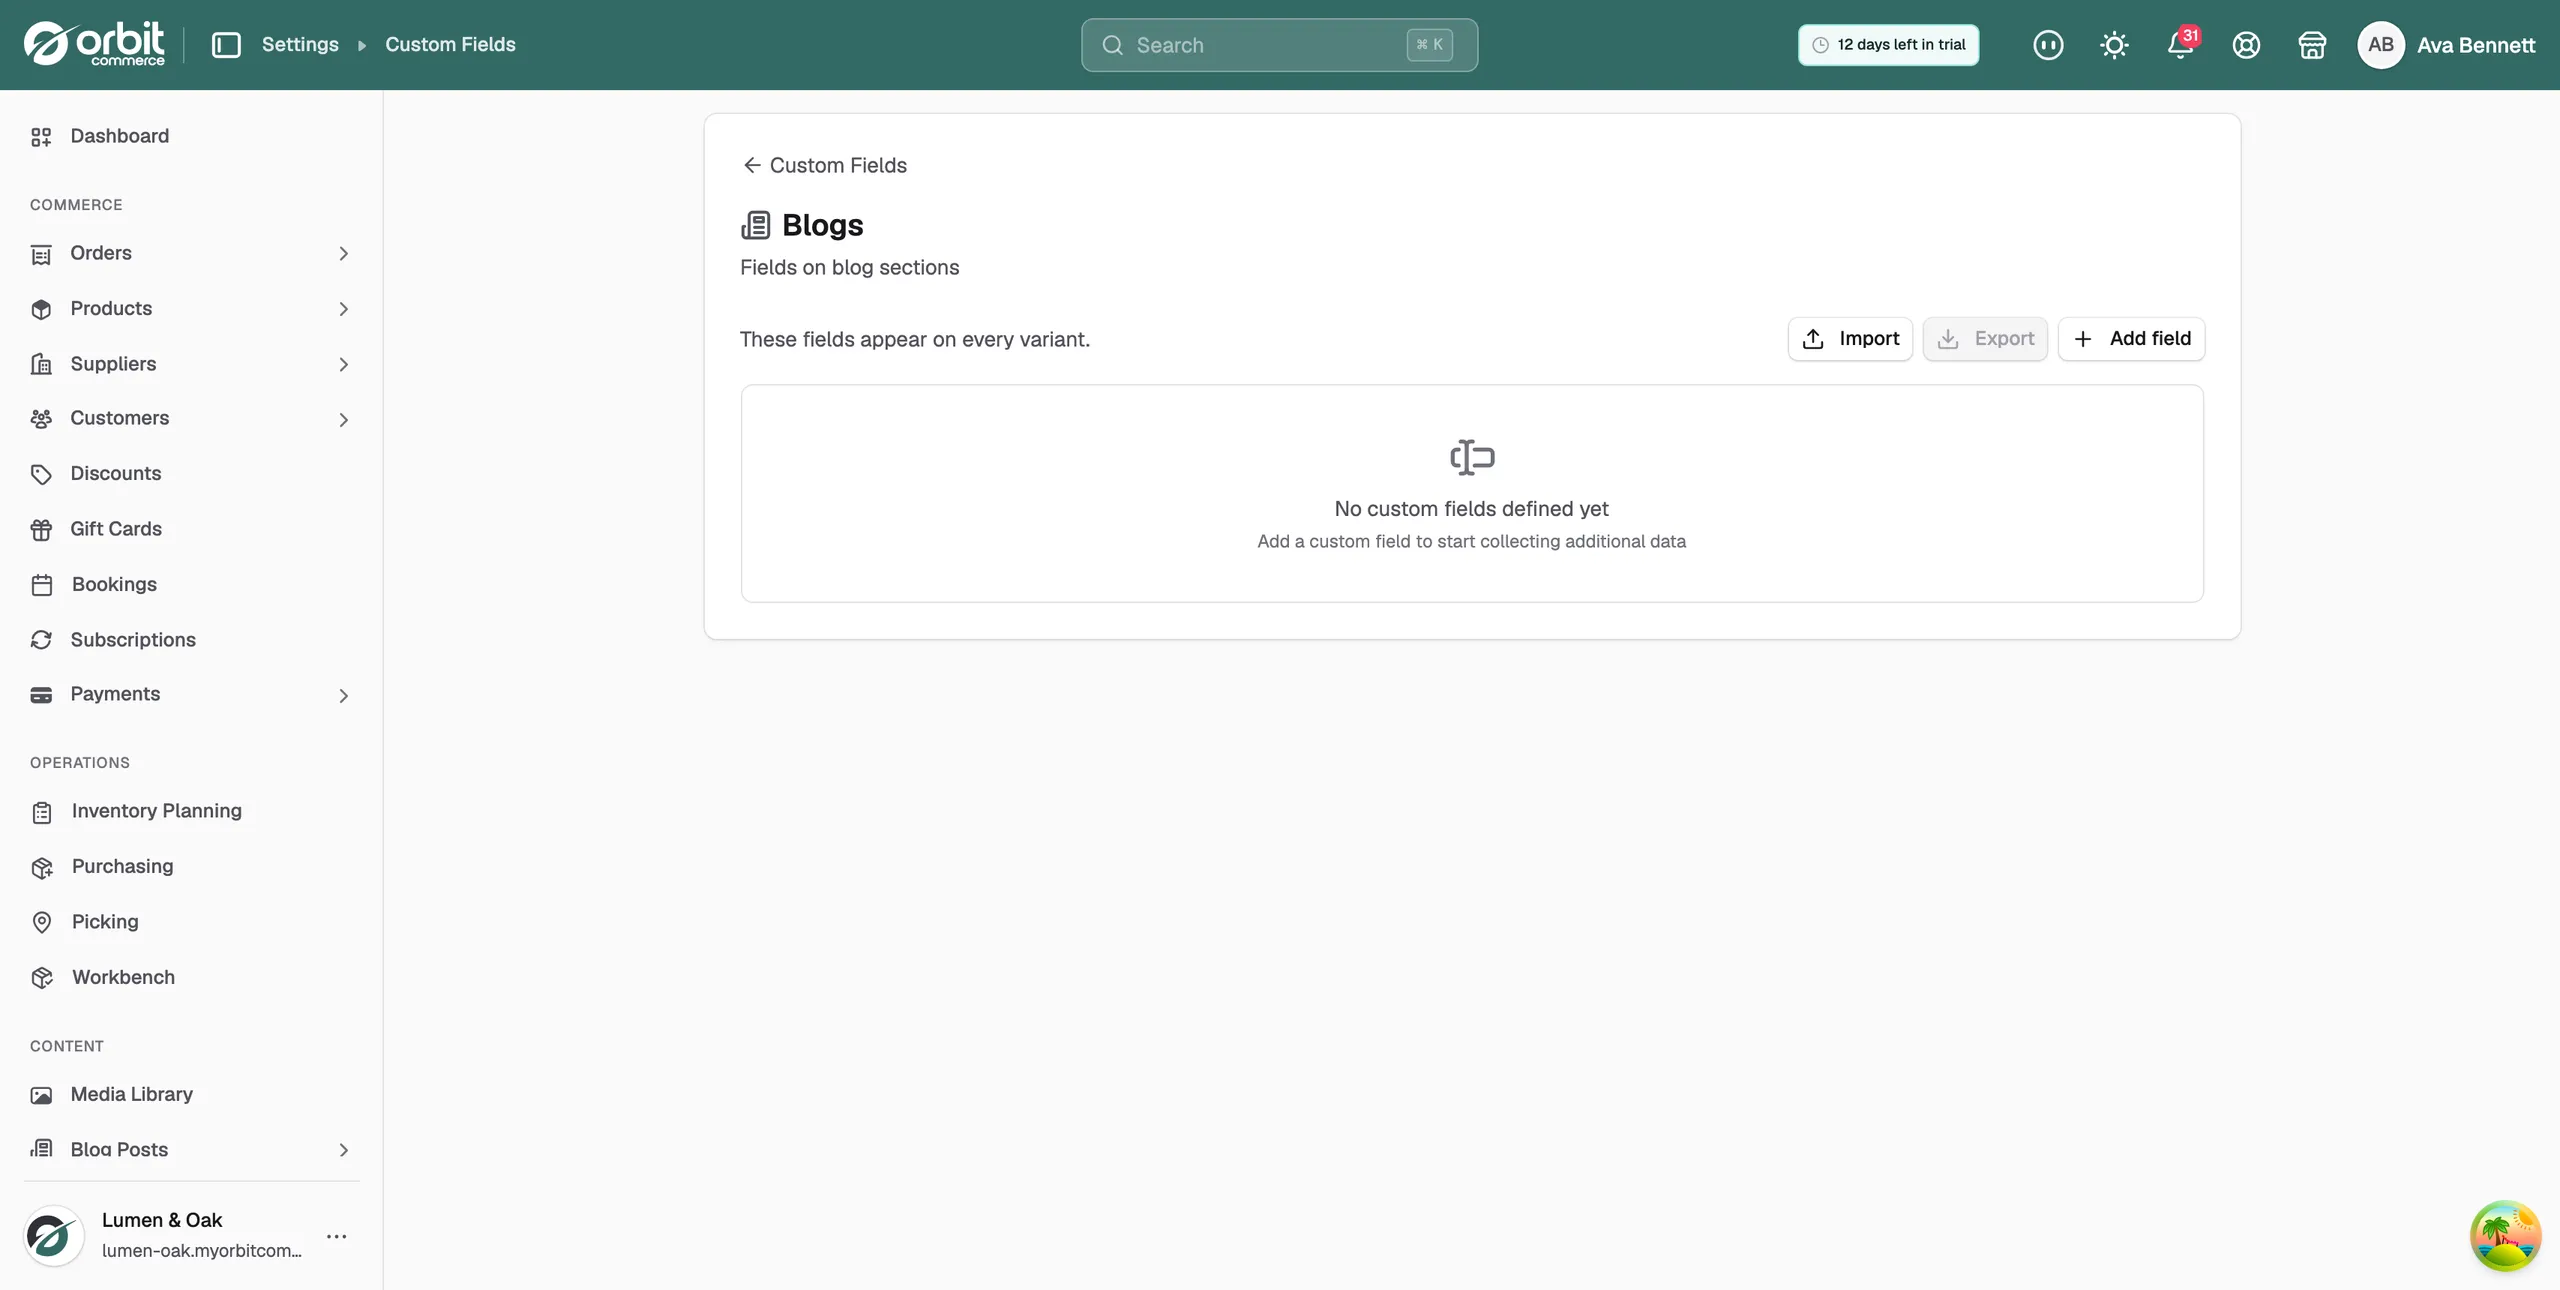
The edit page holds a Custom fields section. It carries any extra fields your store has set up for blogs. If none have been created, the section says so. Custom fields are managed from your settings.
See a blog on your shop
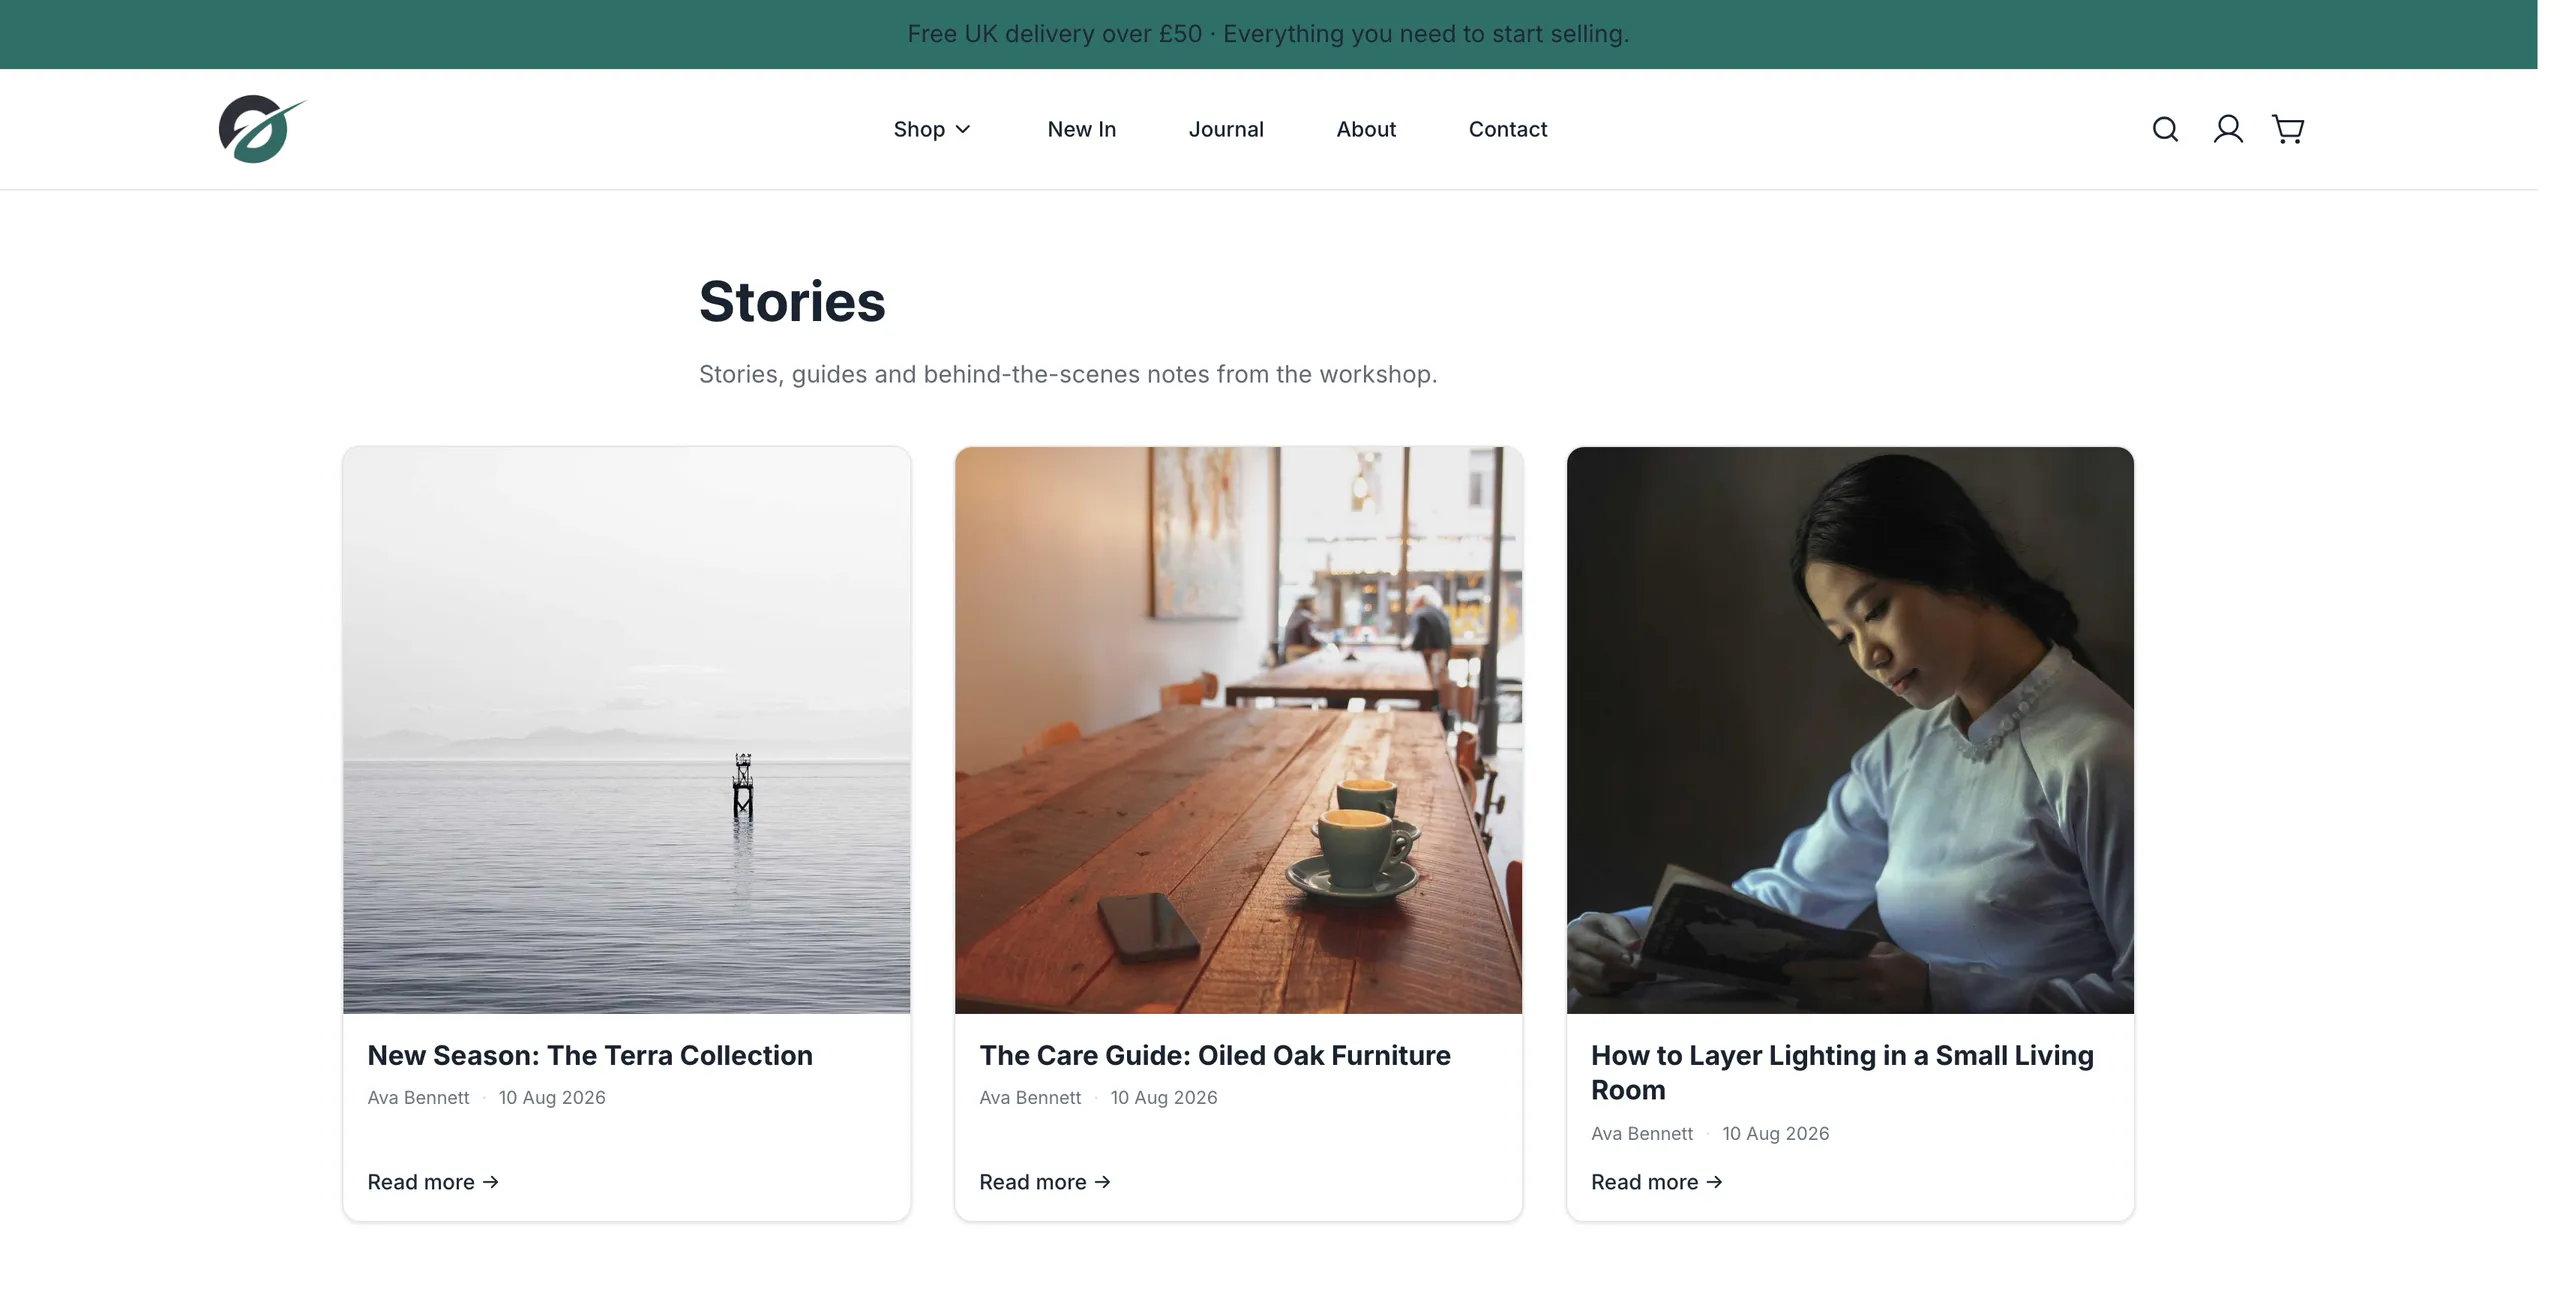
Click View on the blog edit page. The blog page opens the way a customer sees it, listing the published posts in that blog with their title, description, date, author and blog.
Delete a blog
- From your Orbit dashboard, go to Blog Posts, then Blogs.
- Find the blog you want to remove.
- Click the three dots at the end of its row, then click Delete. You can also open the blog and click Delete blog in the three-dot menu at the top right.
- A message asks you to confirm. The blog moves to Trash and can be restored later.
Warning: Deleting a blog changes how its posts appear on your shop. Move the posts to another blog first if you want to keep them live.
Related guides
Was this helpful?
0 people found this helpful