Marketing

Blog Posts | General Overview

The Blog Posts section in Orbit allows you to create, manage, publish, schedule, and organise blog content for your online store.

5 min read1viewsUpdated 17 June 2026Orbit Support Team

The Blog Posts section in Orbit allows you to create, manage, publish, schedule, and organise blog content for your online store.

Blog posts are useful for sharing company updates, product guides, announcements, buying advice, and other content that can help customers learn more about your business and products.

Accessing Blog Posts

To access your blog posts:

  1. From the left-hand menu, go to Content.

  2. Select Blog Posts.

This will open the Blog Posts page, where you can view and manage your existing posts.

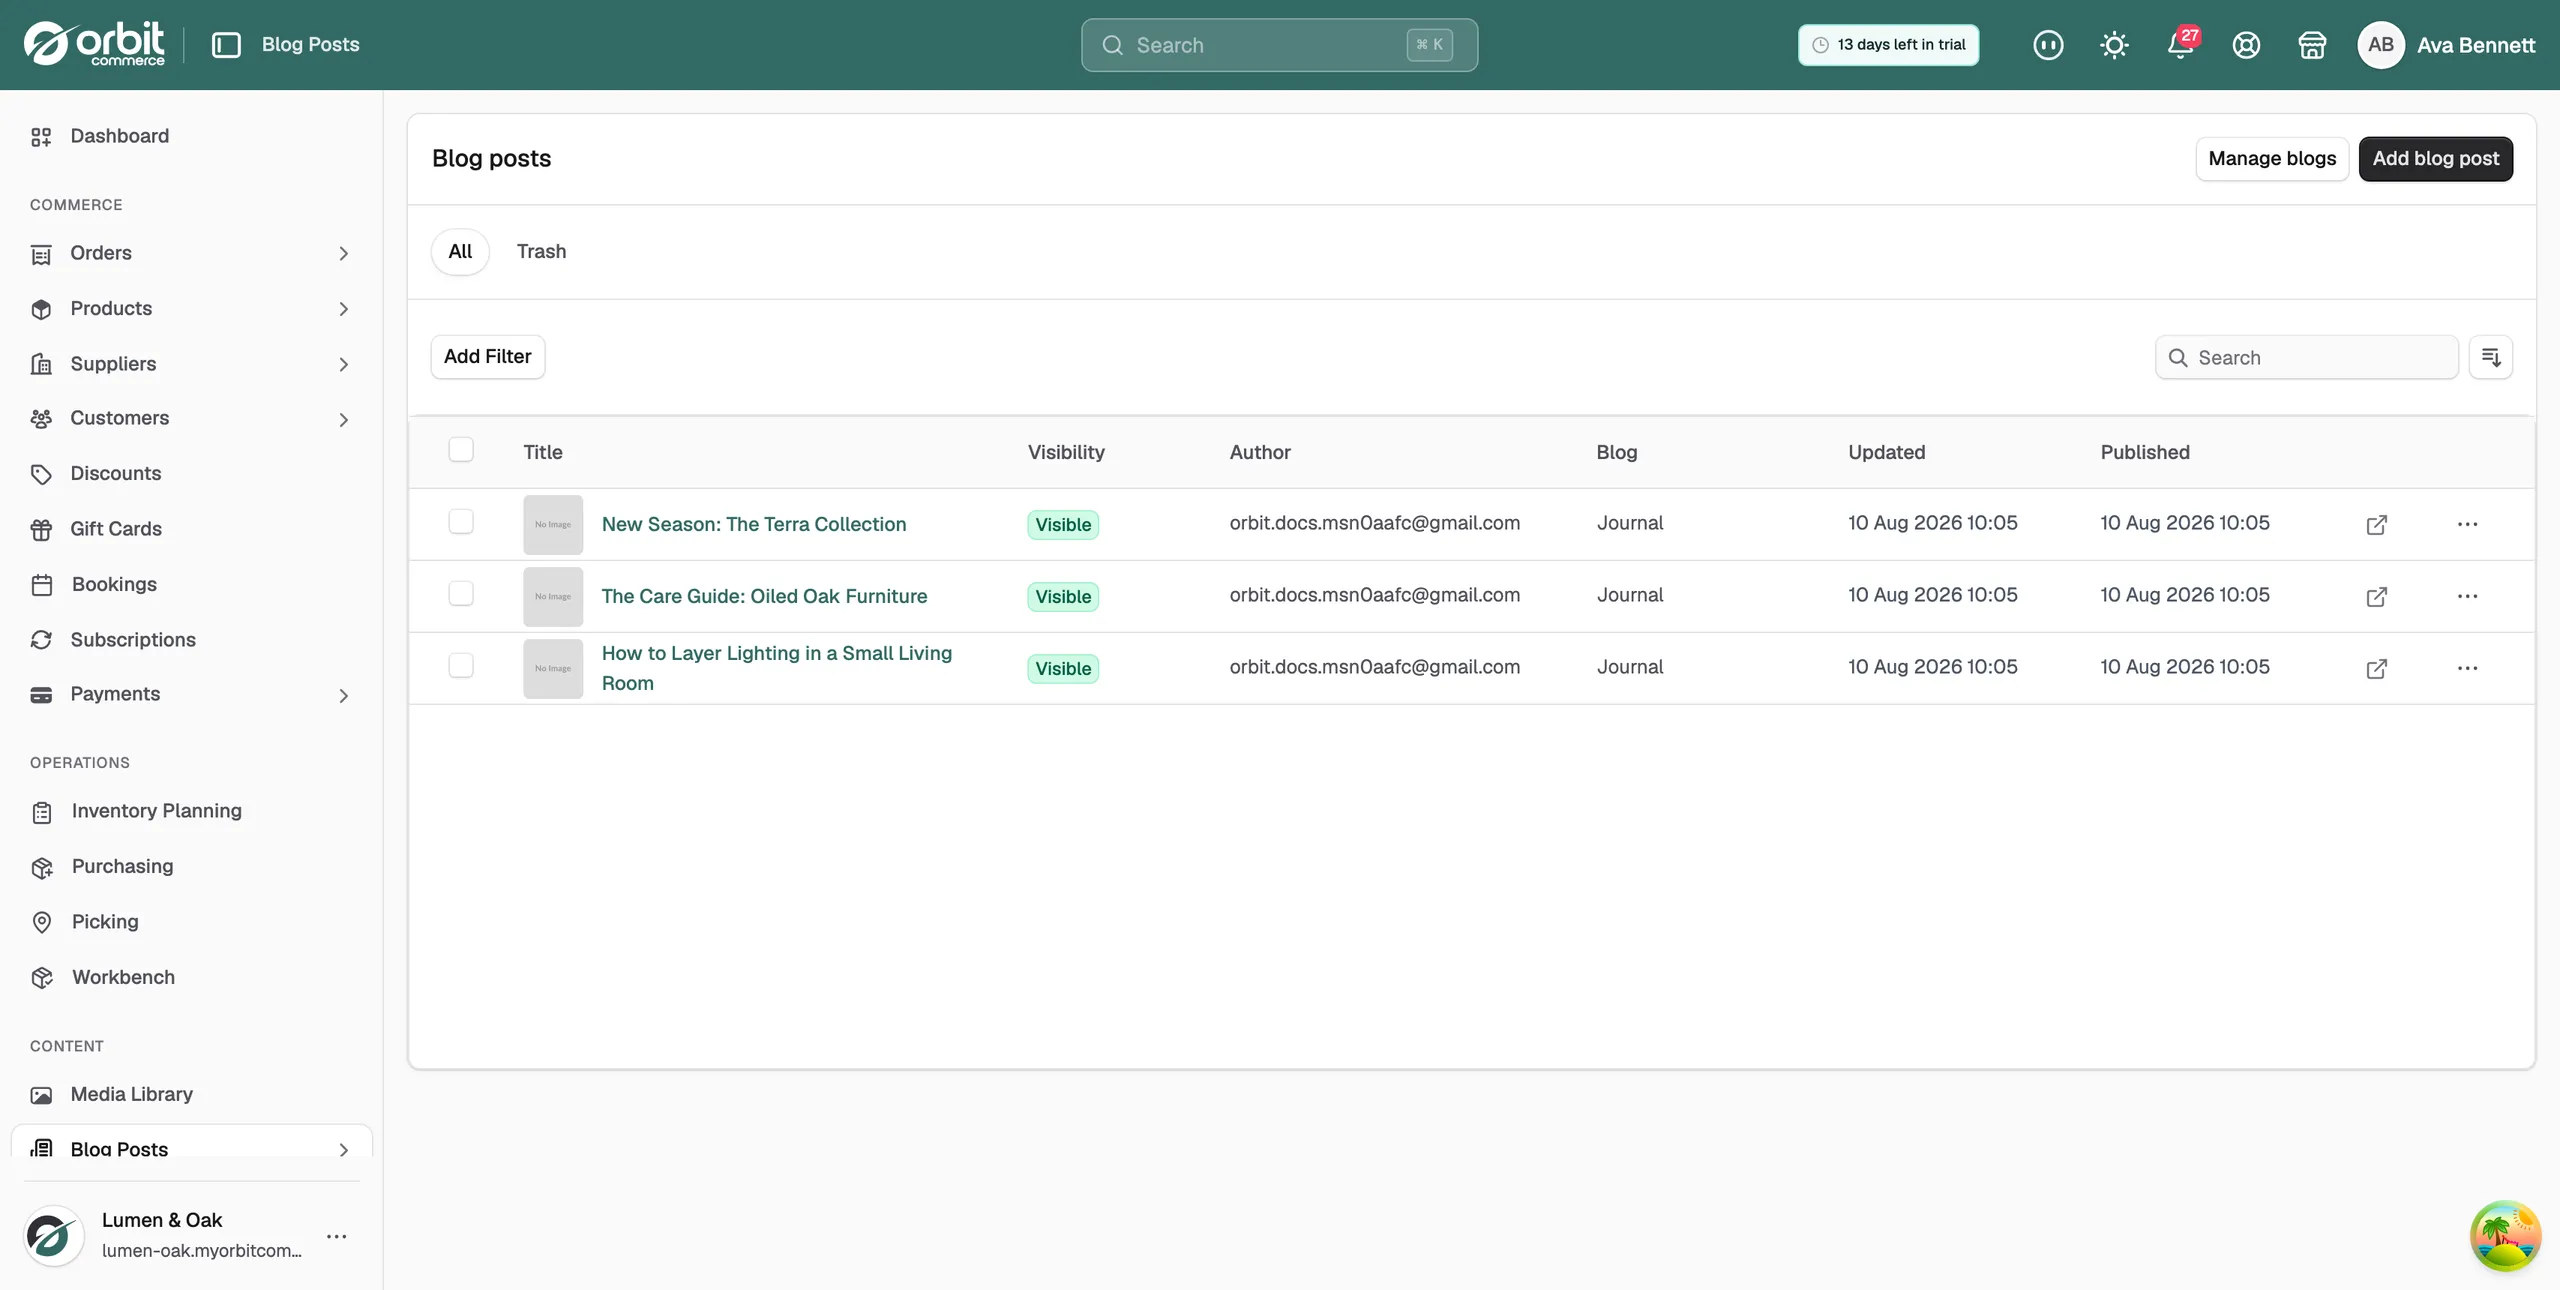
Blog Posts overview

The Blog Posts page shows a list of your existing blog posts.

From this page, you can view key details such as:

  • Title – the name of the blog post.

  • Visibility – whether the post is currently visible or hidden.

  • Author – the author assigned to the blog post.

  • Blog – the blog category or container the post belongs to.

  • Updated – when the post was last updated.

  • Published – when the post was published.

You can also use the search field to quickly find a specific blog post.

Filtering blog posts

You can filter your blog posts using the Add Filter button.

This is useful if you have many blog posts and want to narrow the list down by specific criteria.

You can also switch between:

  • All – shows all blog posts.

  • Trash – shows deleted blog posts.

Creating a new blog post

To create a new blog post:

  1. Go to Blog Posts.

  2. Click Add blog post.

  3. Enter the blog post details.

  4. Add the blog content.

  5. Add an image if required.

  6. Configure the organisation and search engine listing settings.

  7. Choose whether to save, preview, publish, or schedule the post.

Adding blog post content

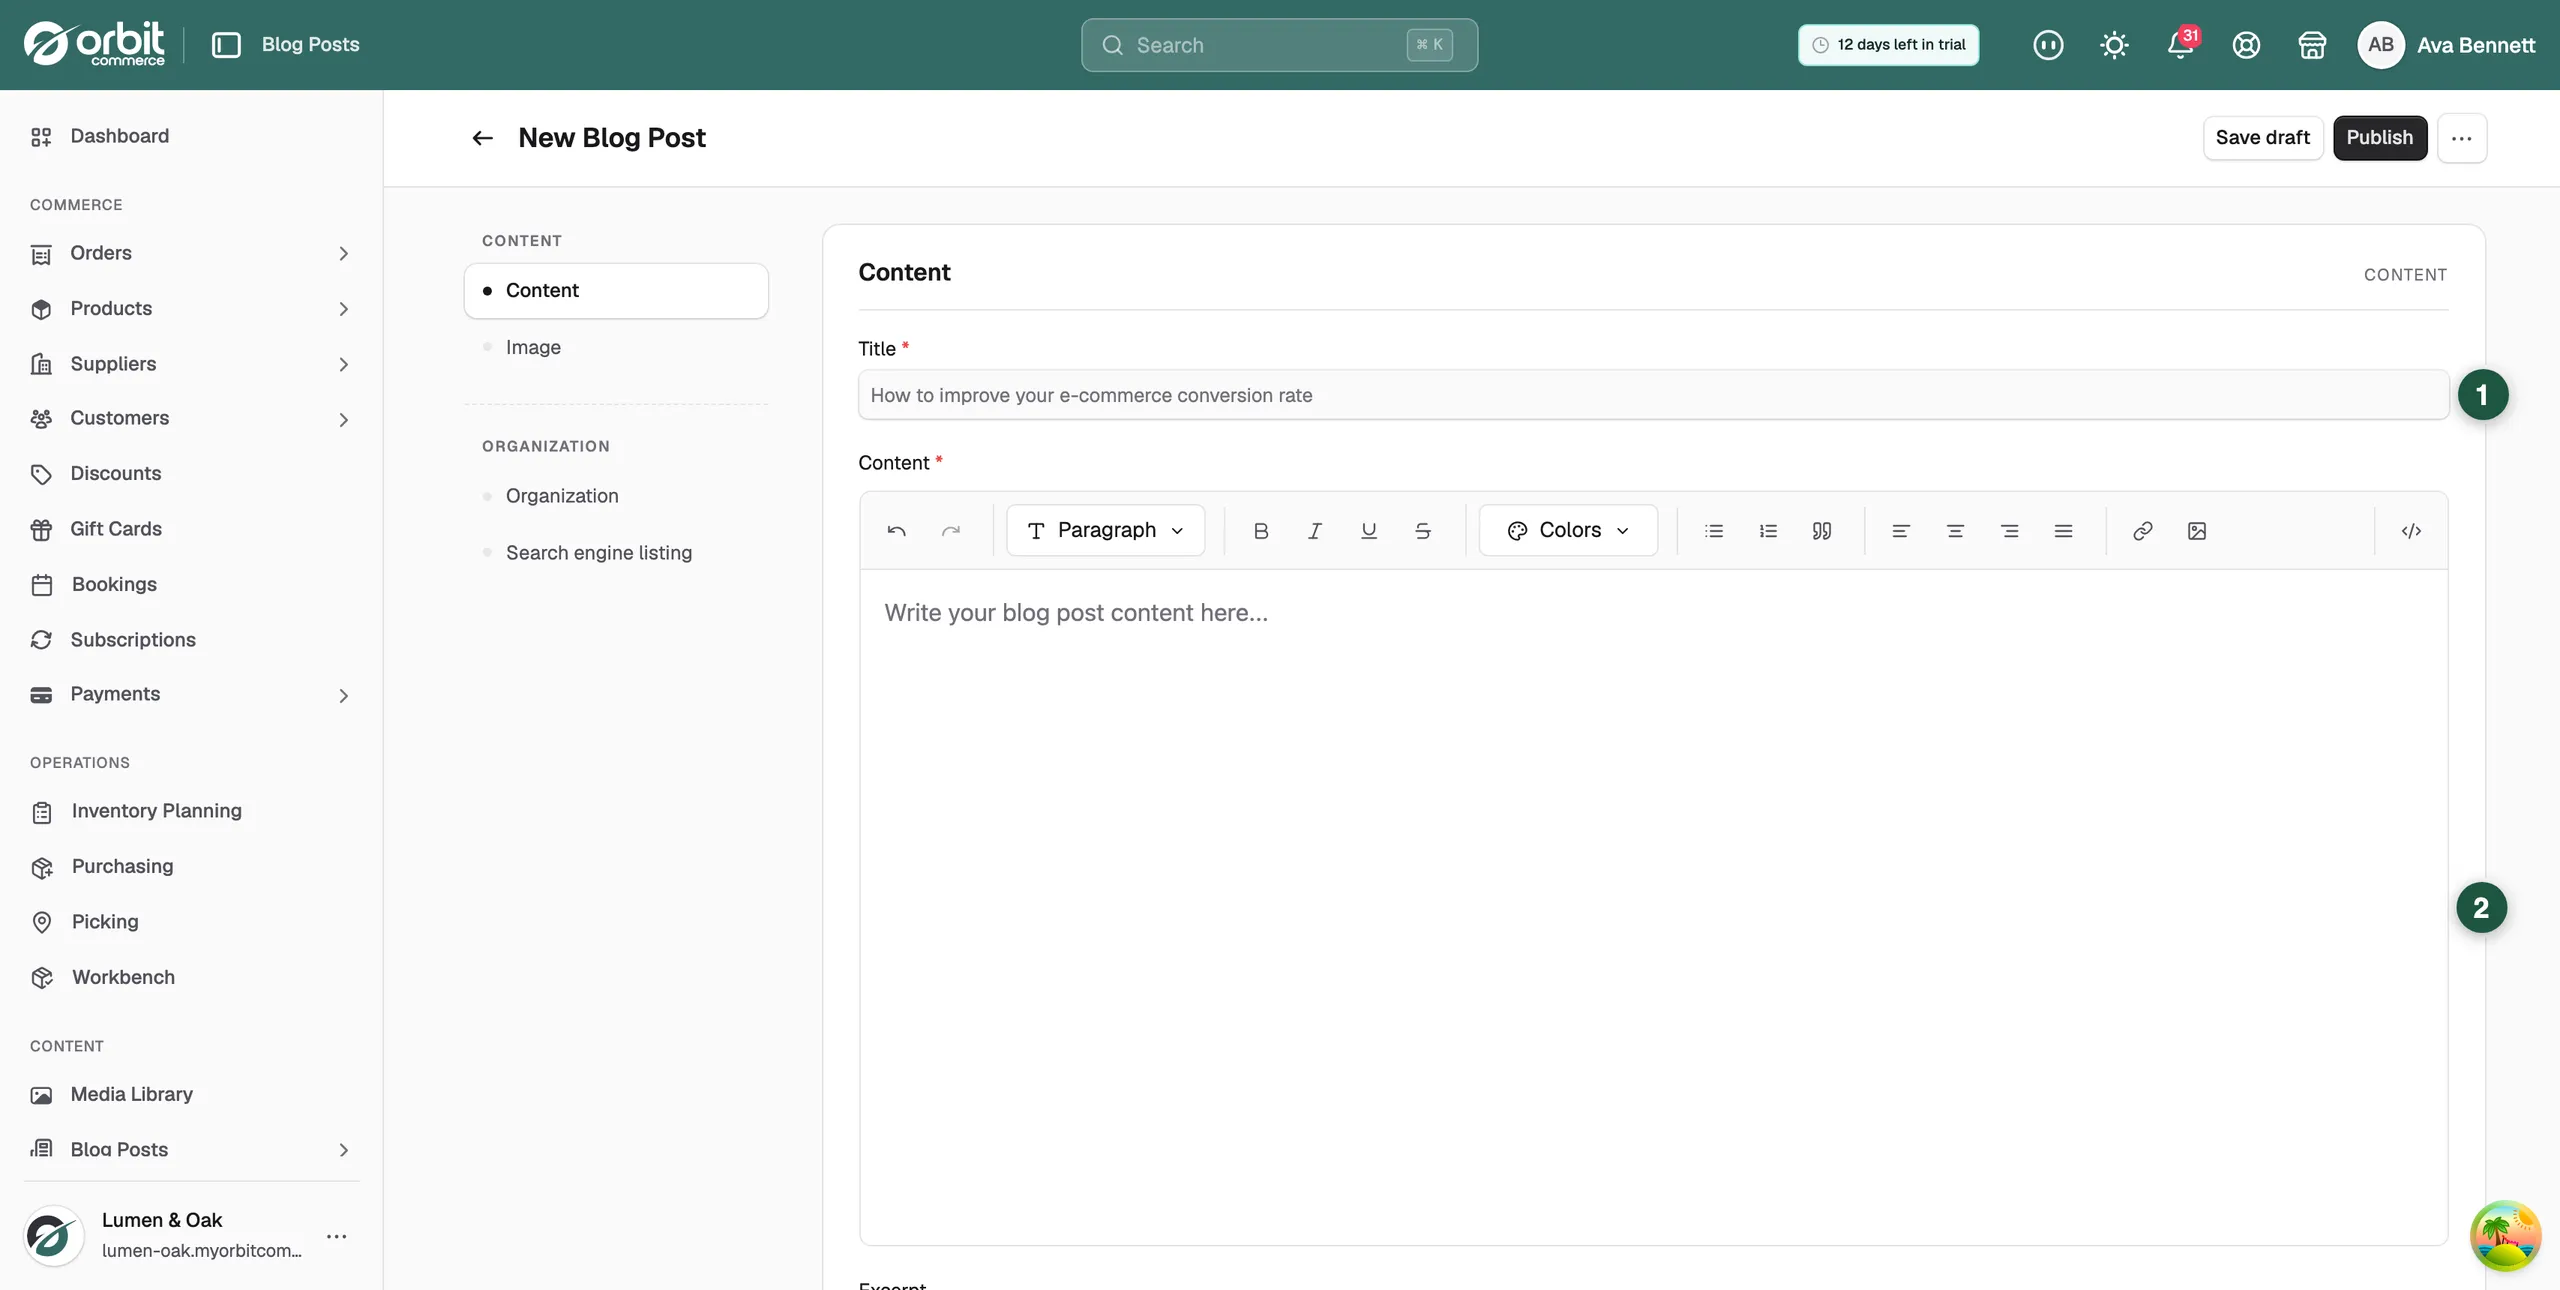
In the Content section, you can enter the main details for the blog post.

  1. Title

Enter the title of the blog post.

This is the main heading customers will see when viewing the post.

  1. Content

Use the content editor to write the main body of the blog post.

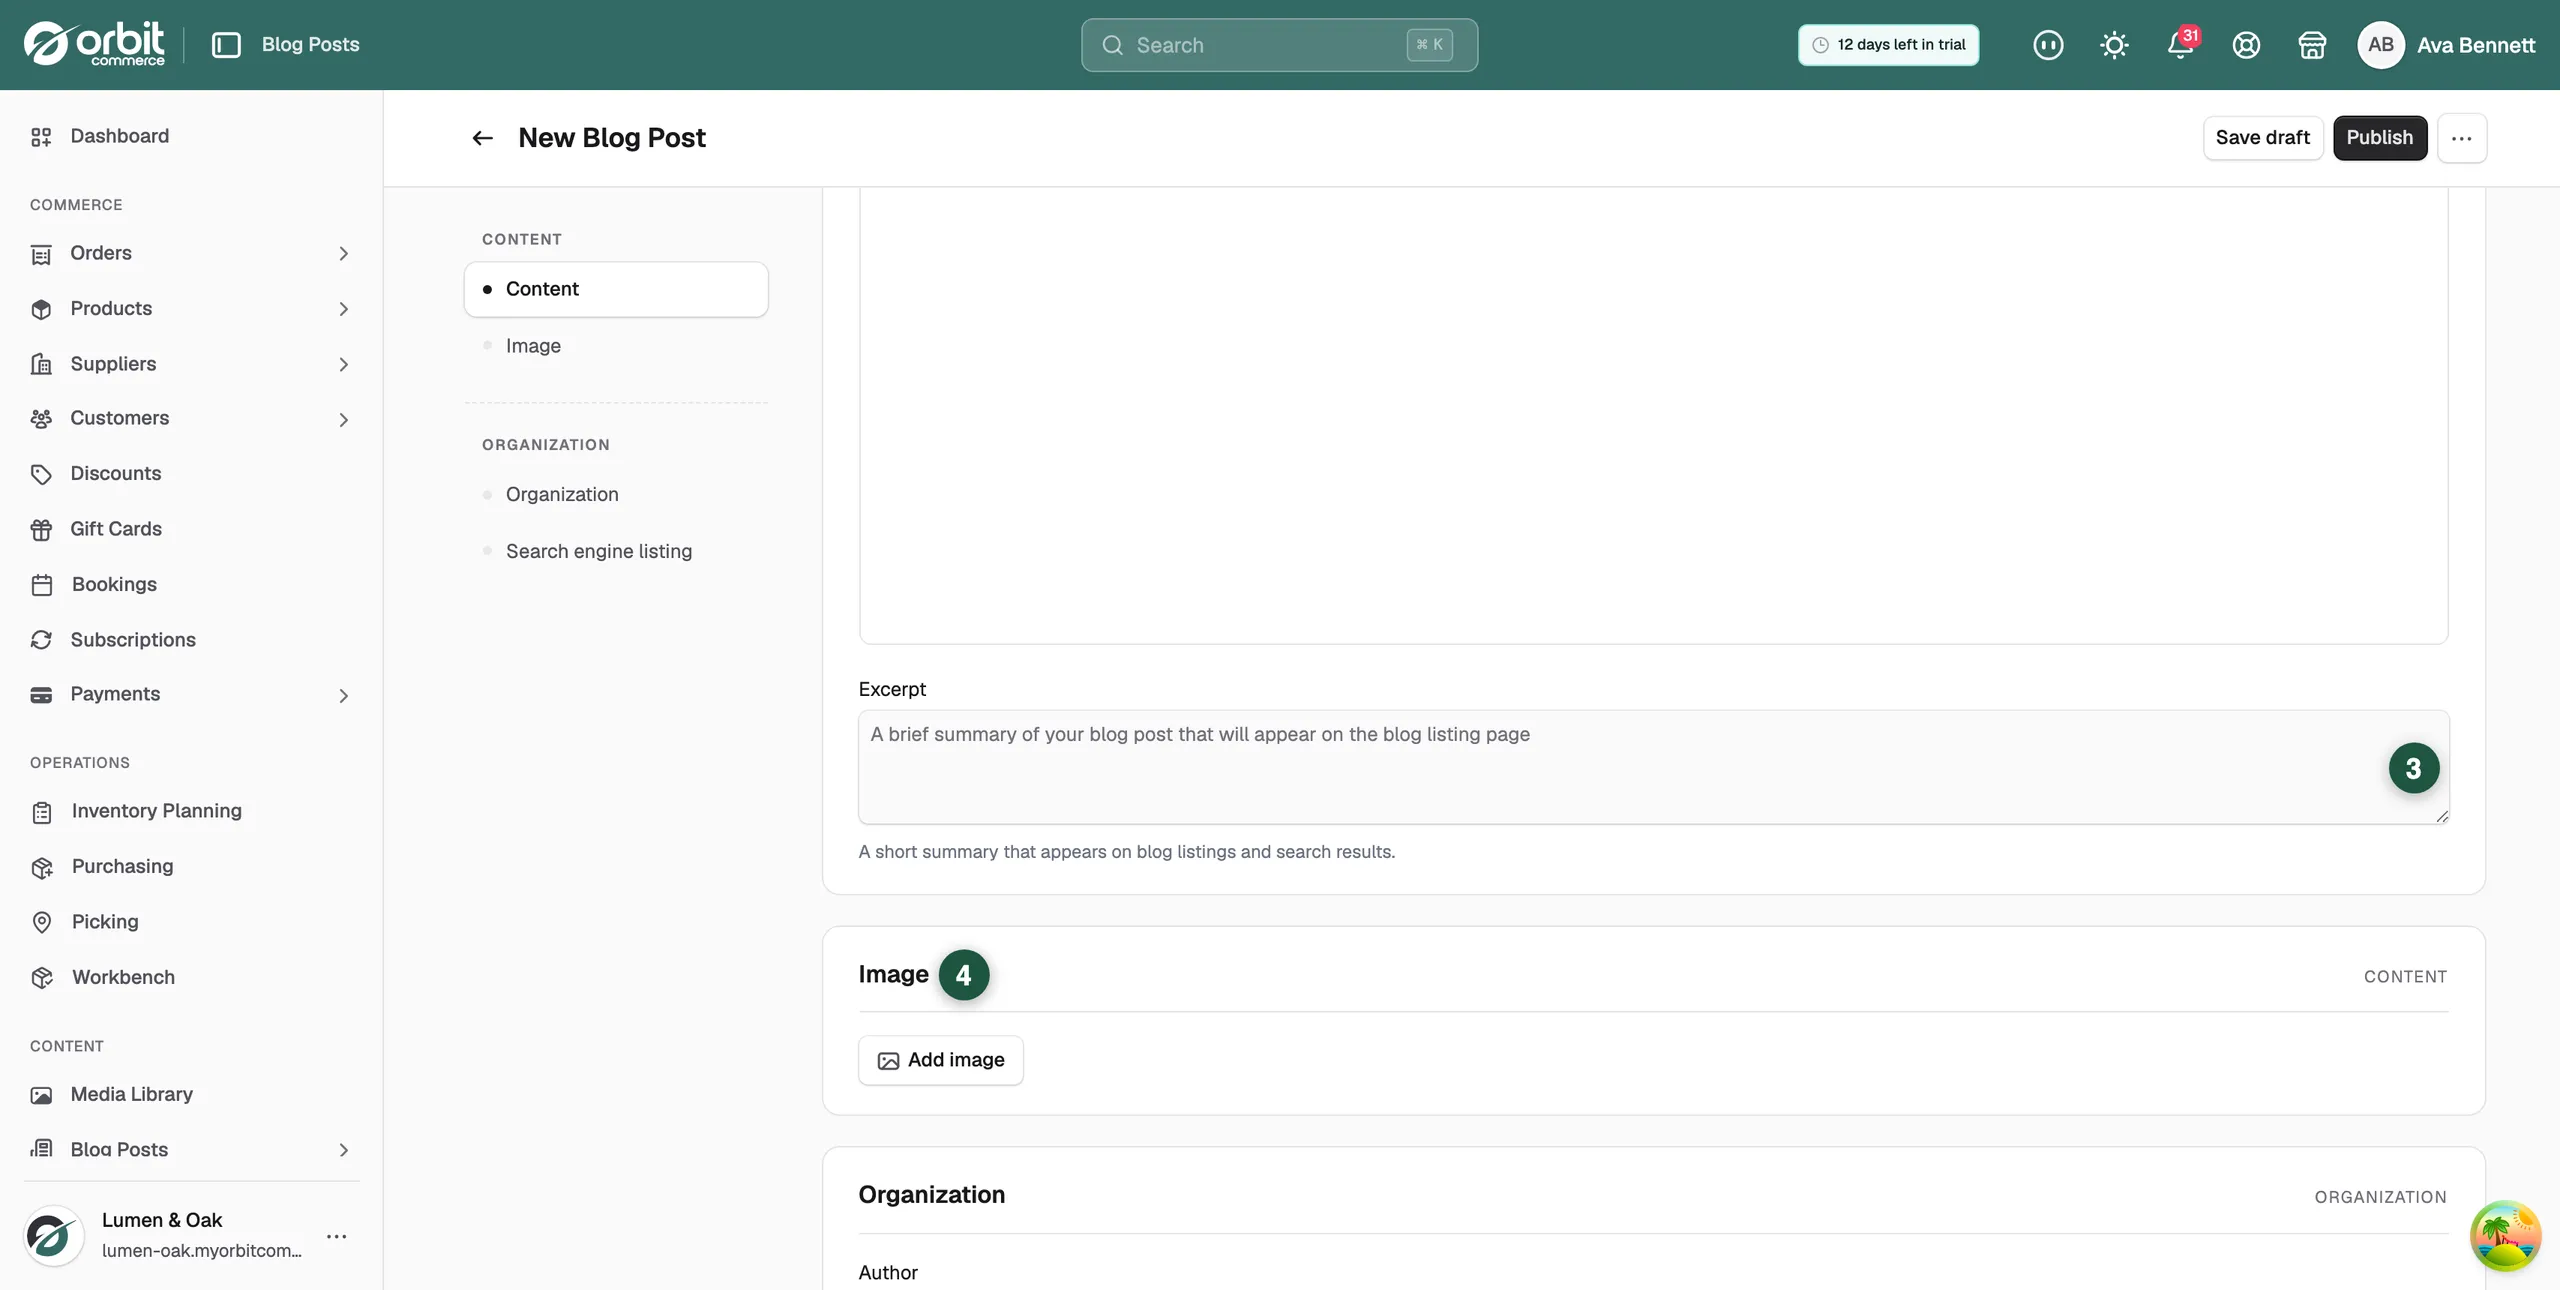
  1. Excerpt

The Excerpt is a short summary of the blog post.

This appears on blog listing pages and search results, so it should briefly explain what the post is about.

  1. Adding an image

In the Image section, you can add a featured image for the blog post.

A good blog image helps make the post more visually appealing and can improve how the post appears on blog listing pages.

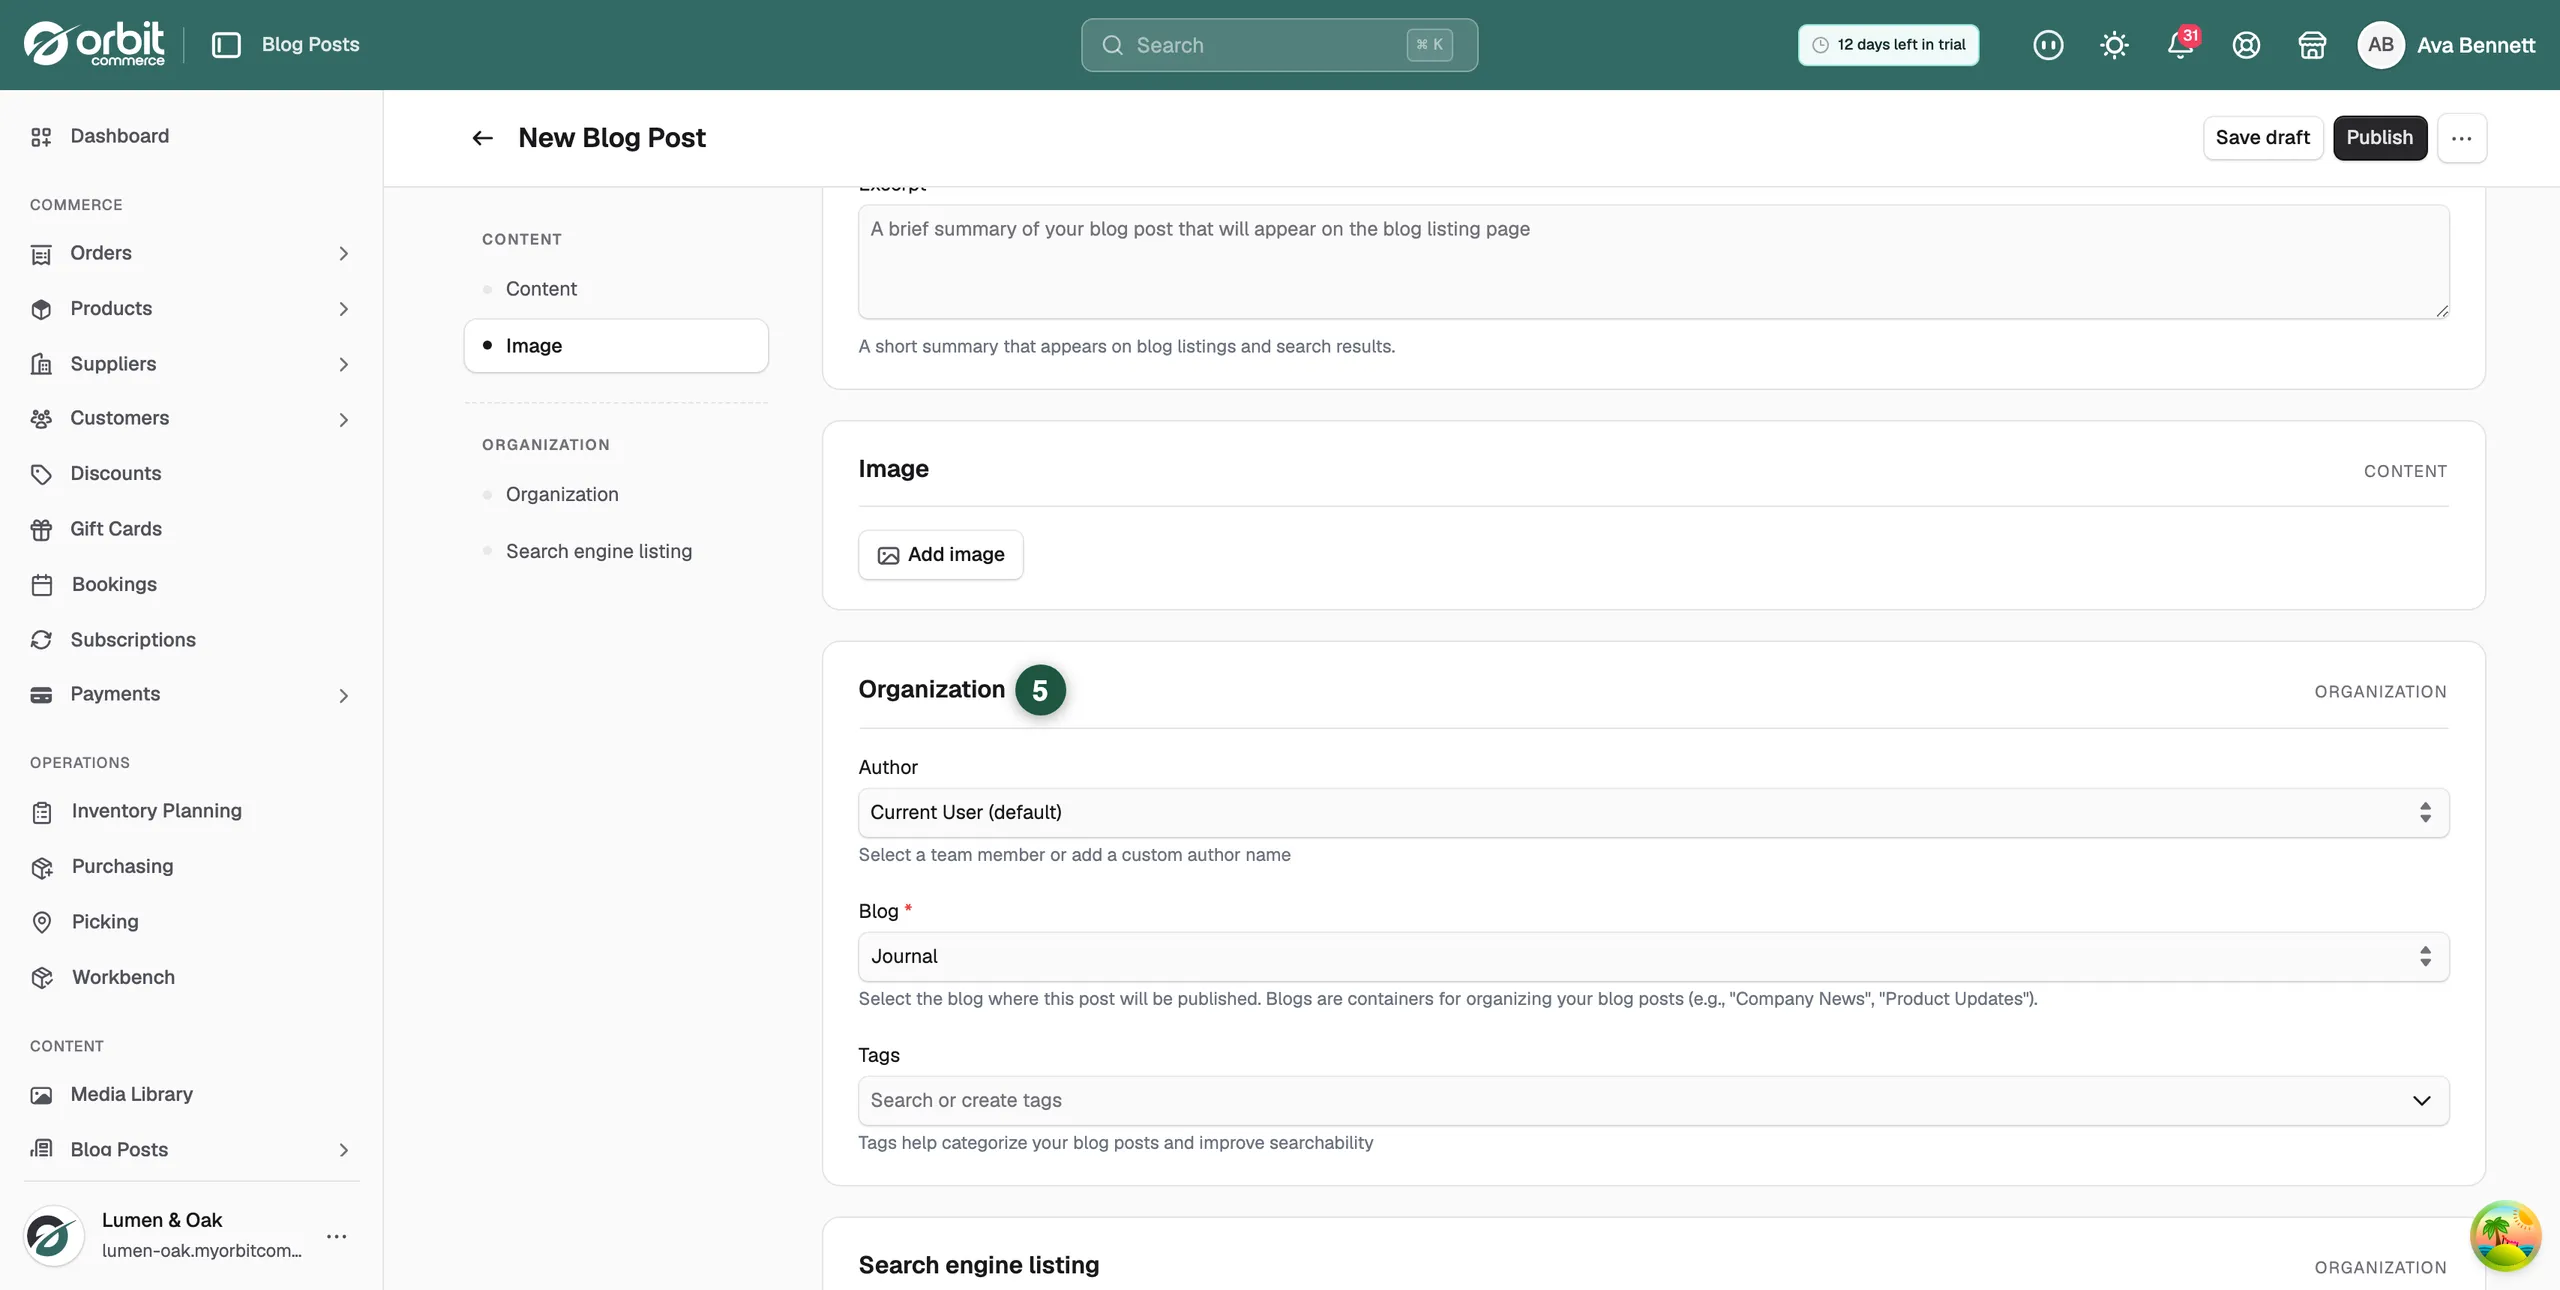
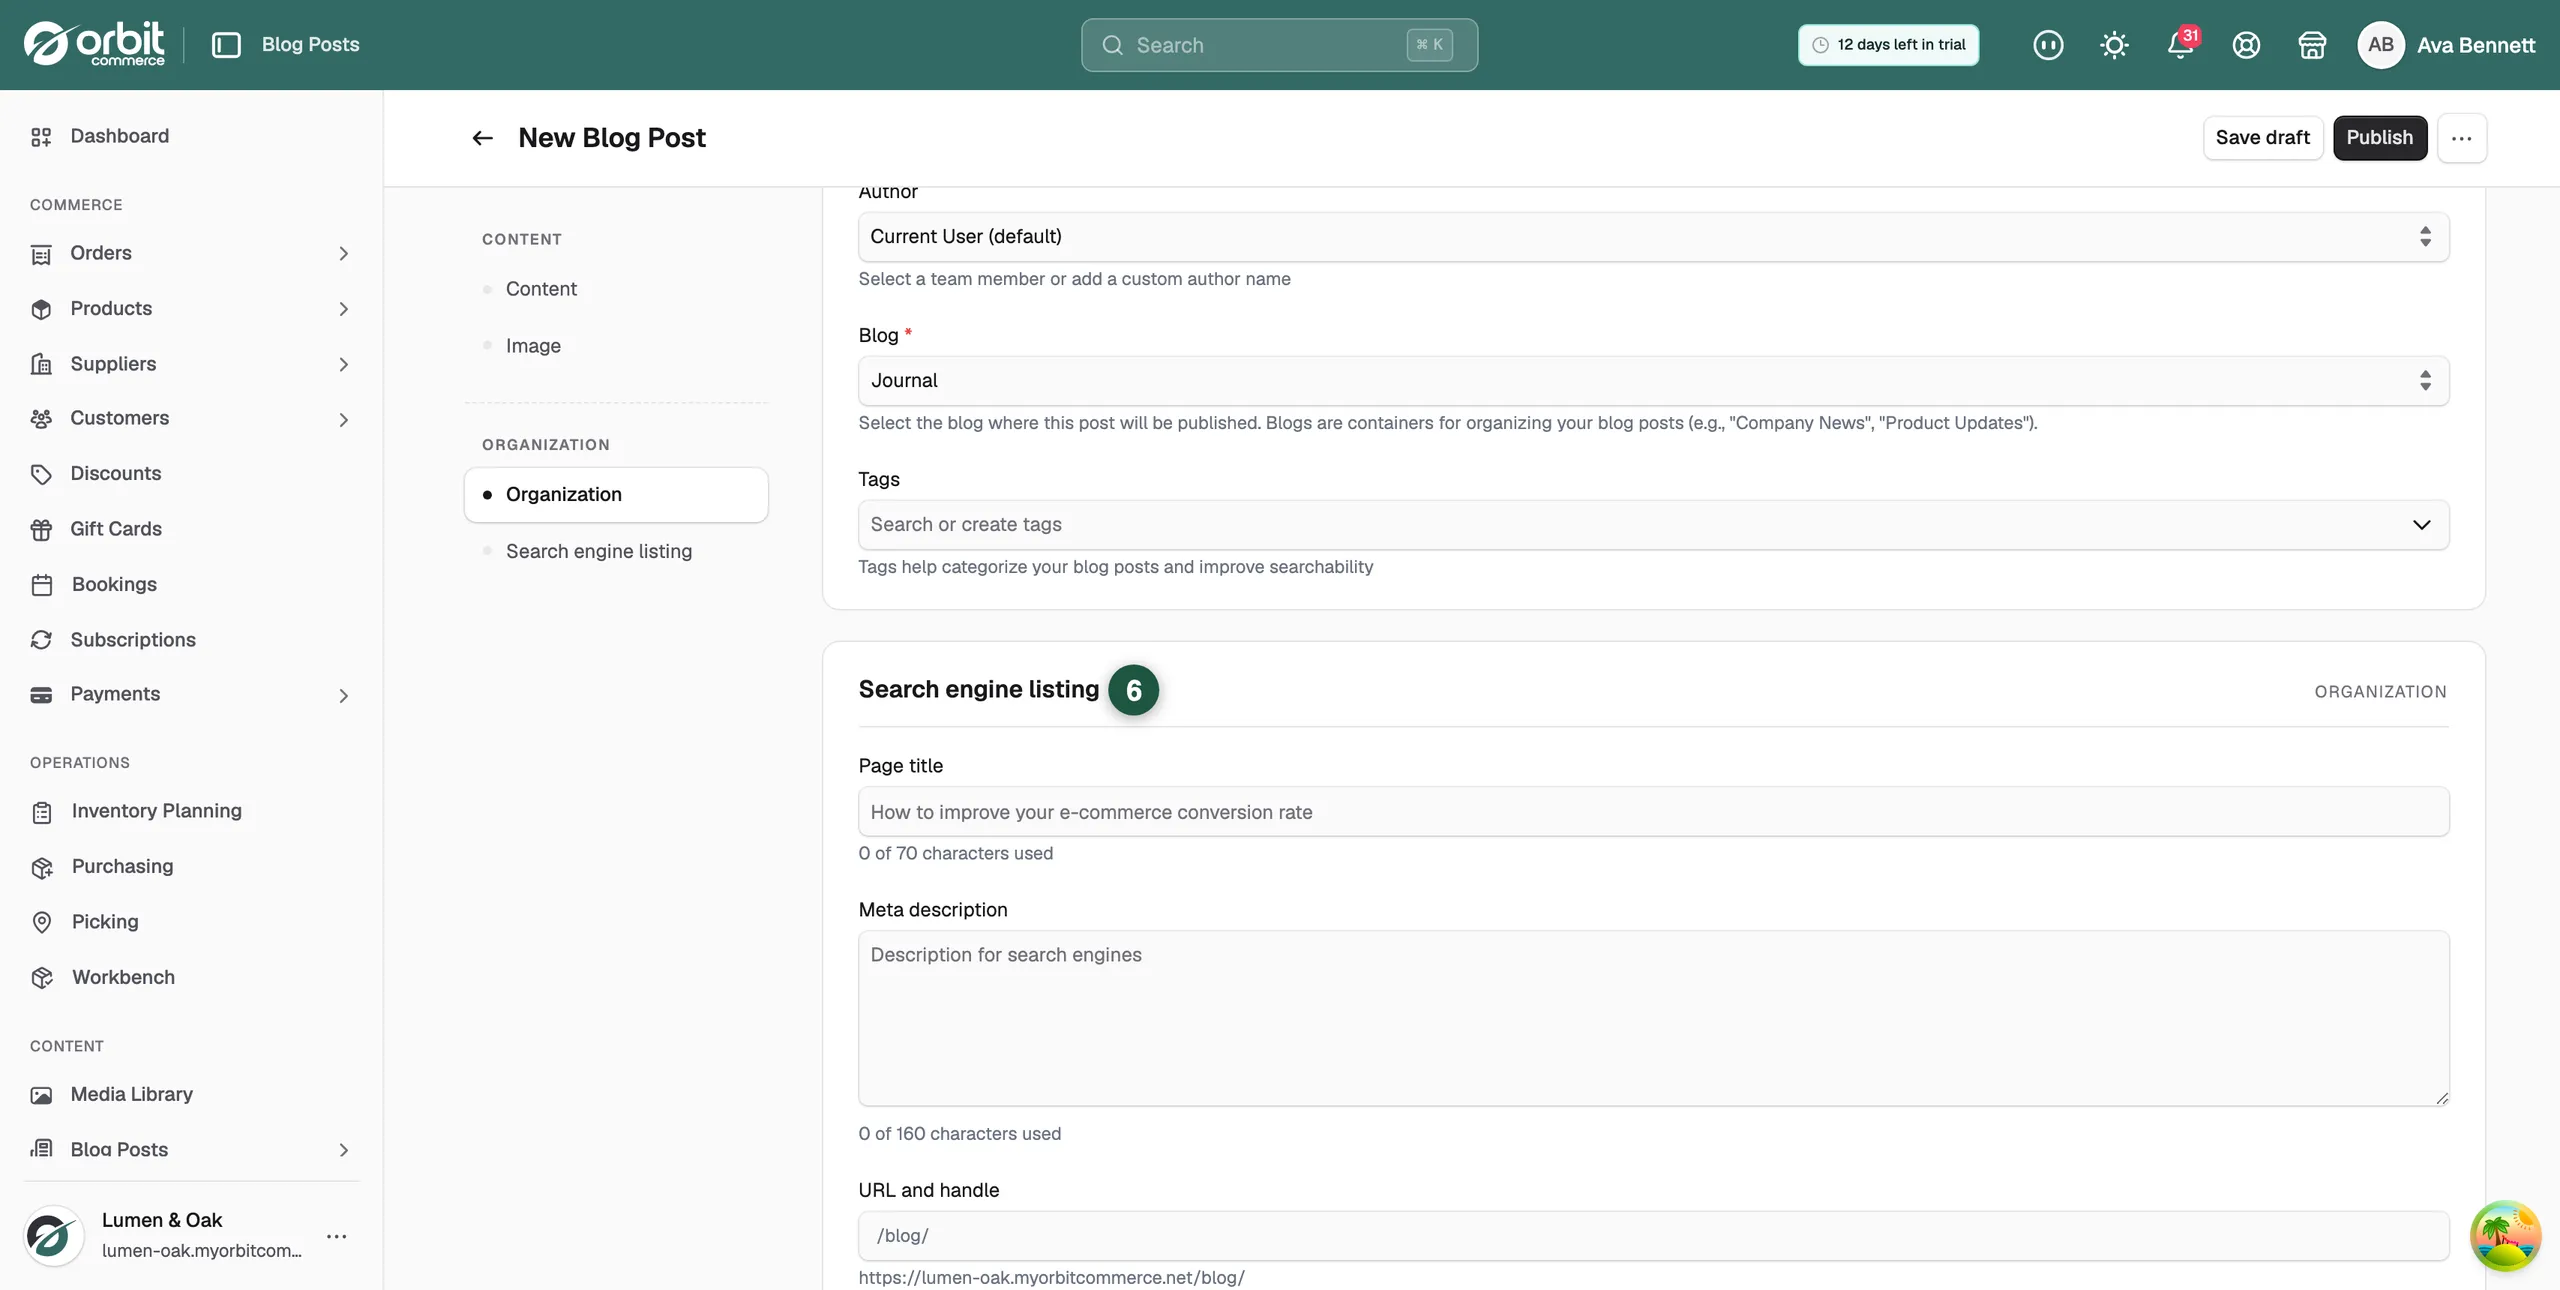
  1. Organisation settings

The Organisation section controls how the blog post is categorised and attributed.

  1. Author

Use the Author field to choose the author of the blog post.

By default, this may be set to the current user, but you can select a different team member or add a custom author name if required.

  1. Blog

Use the Blog field to select which blog the post should belong to.

Blogs act as containers for organising blog posts.

  1. Tags

Tags can be added to help categorise blog posts and improve searchability.

  1. Search engine listing

The Search engine listing section lets you control how the blog post may appear in search engine results.

  1. Page title

The Page title is the title used for search engines.

Orbit shows a character counter to help you keep the title within the recommended length.

  1. Meta description

The Meta description is a short description of the page for search engines.

This should summarise the blog post clearly and encourage users to click through.

  1. URL and handle

The URL and handle controls the blog post URL.

Orbit will show the blog URL structure and allow you to define the final part of the blog post link.

Saving a draft

If you are not ready to publish the blog post yet, click Save draft.

Drafts are useful when the post still needs to be reviewed, edited, or approved before publishing.

Previewing a blog post

Click Preview to see how the blog post will look before publishing.

This allows you to check the layout, formatting, image, and content before making the post visible to customers.

Publishing a blog post

When the blog post is ready, click Publish.

Once published, the post becomes available according to its visibility settings.

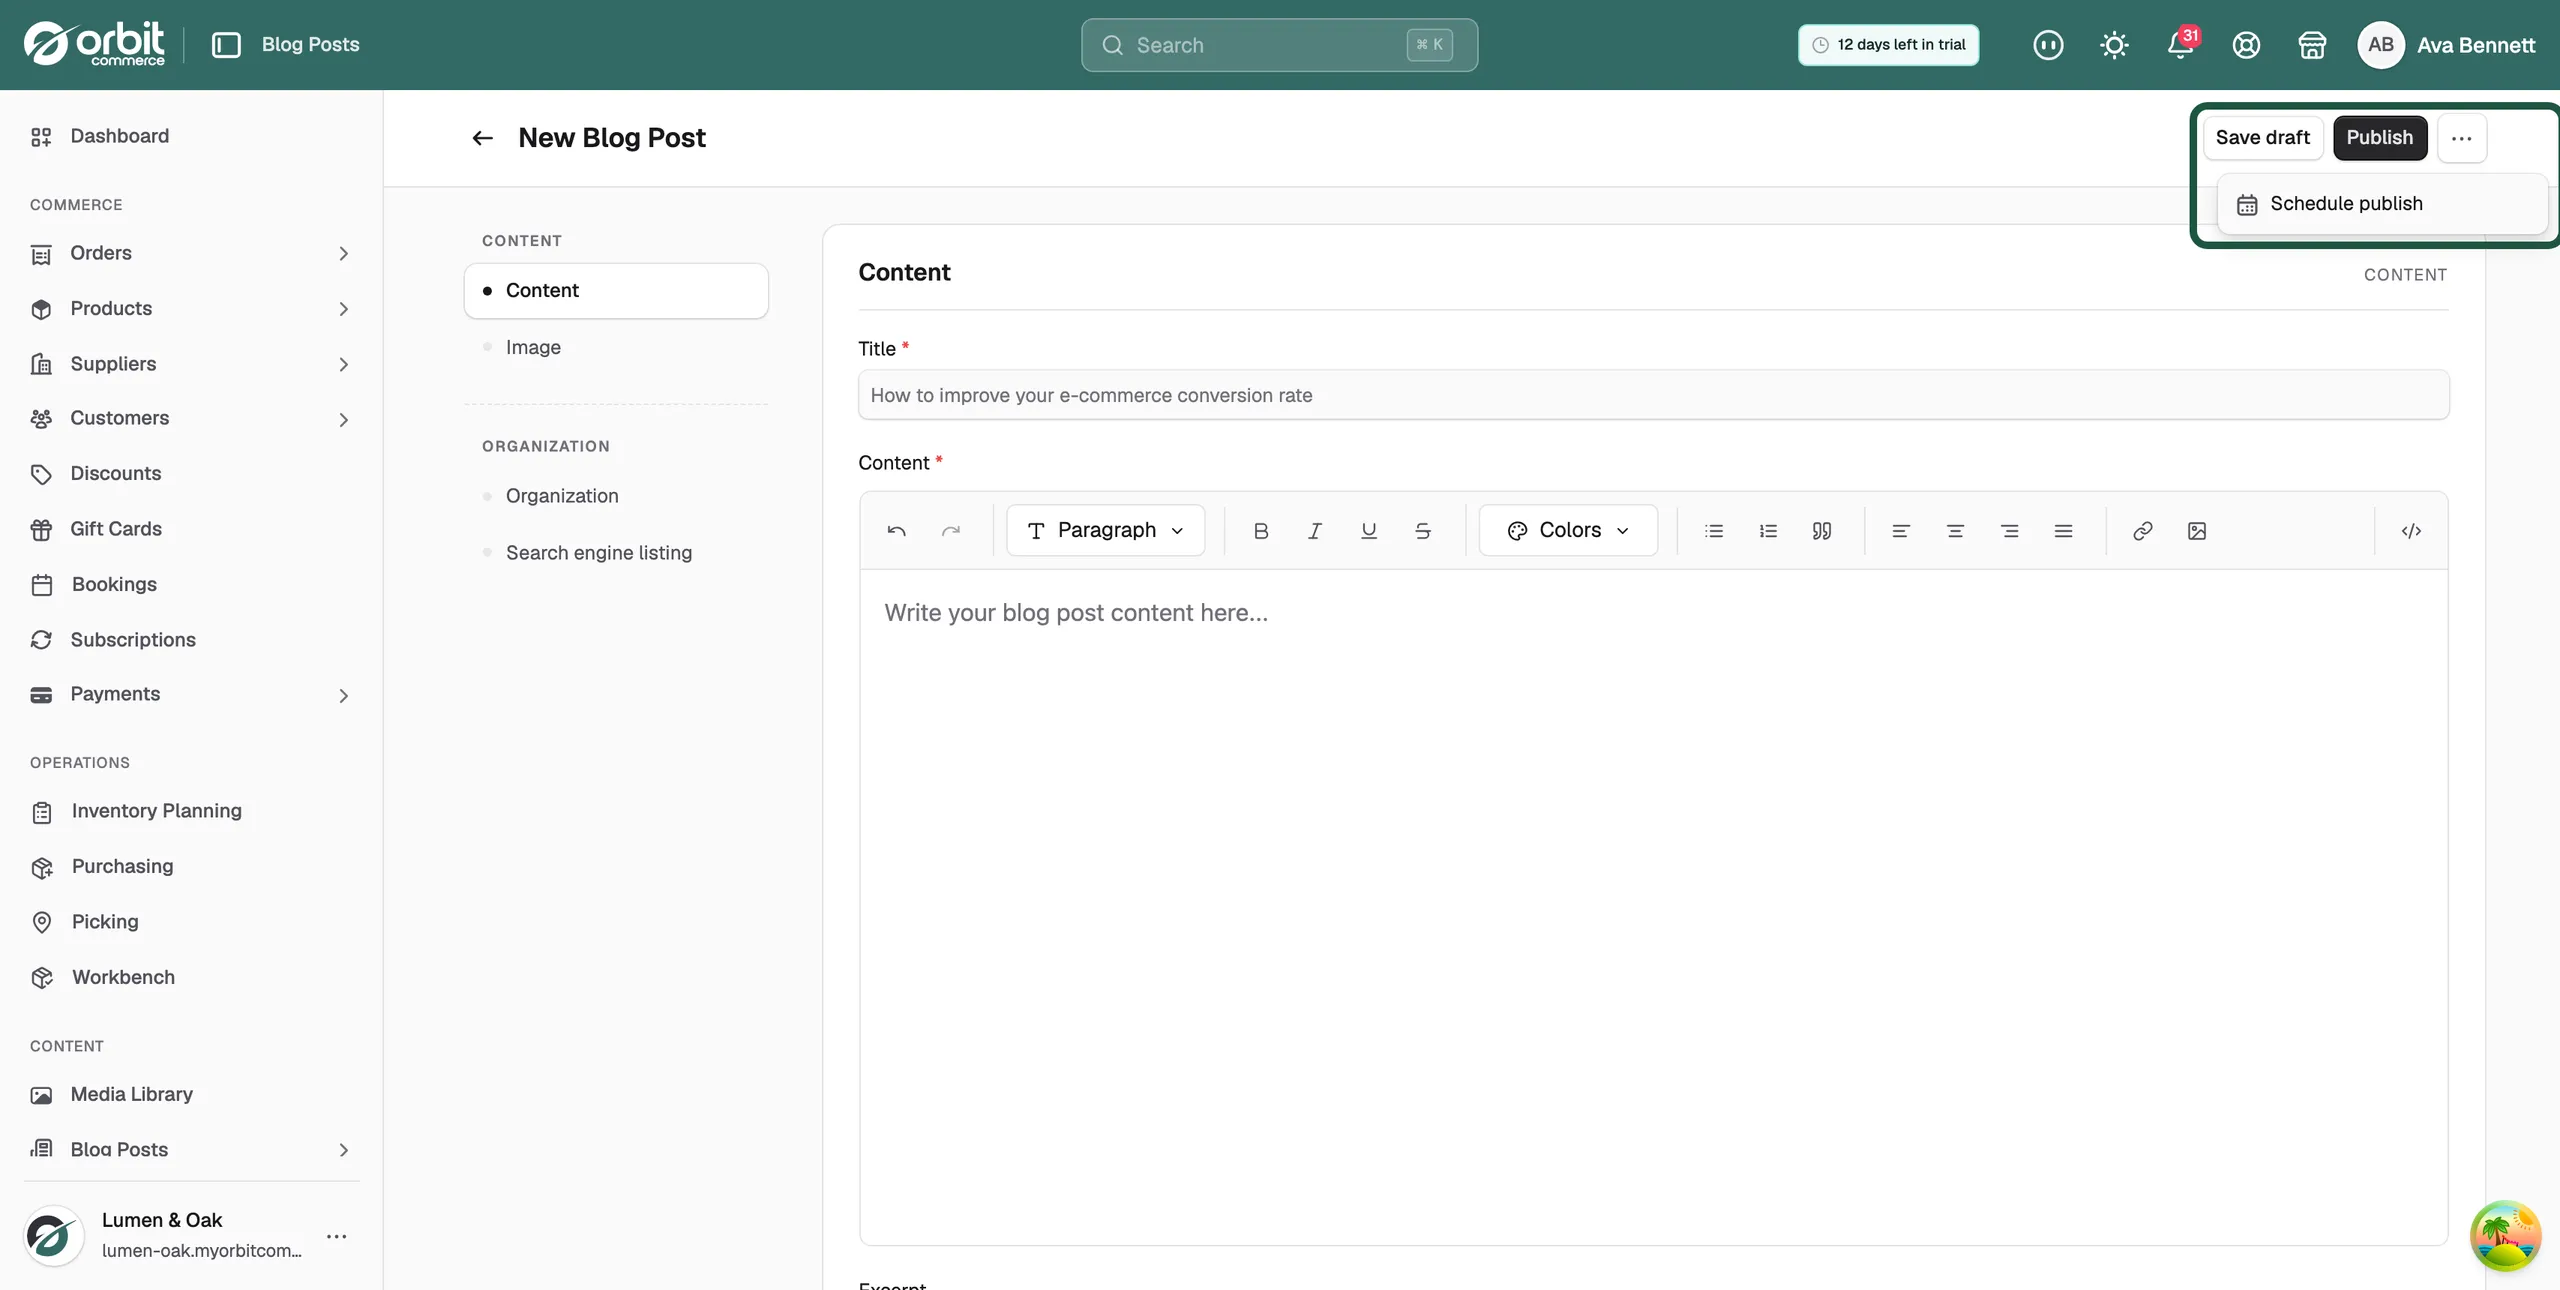
Scheduling a blog post

You can also schedule a blog post to publish at a later date.

To schedule a post:

  1. Click the three-dot menu next to the publish options.

  2. Select Schedule publish.

  3. Choose the required date and time.

Managing existing blog posts

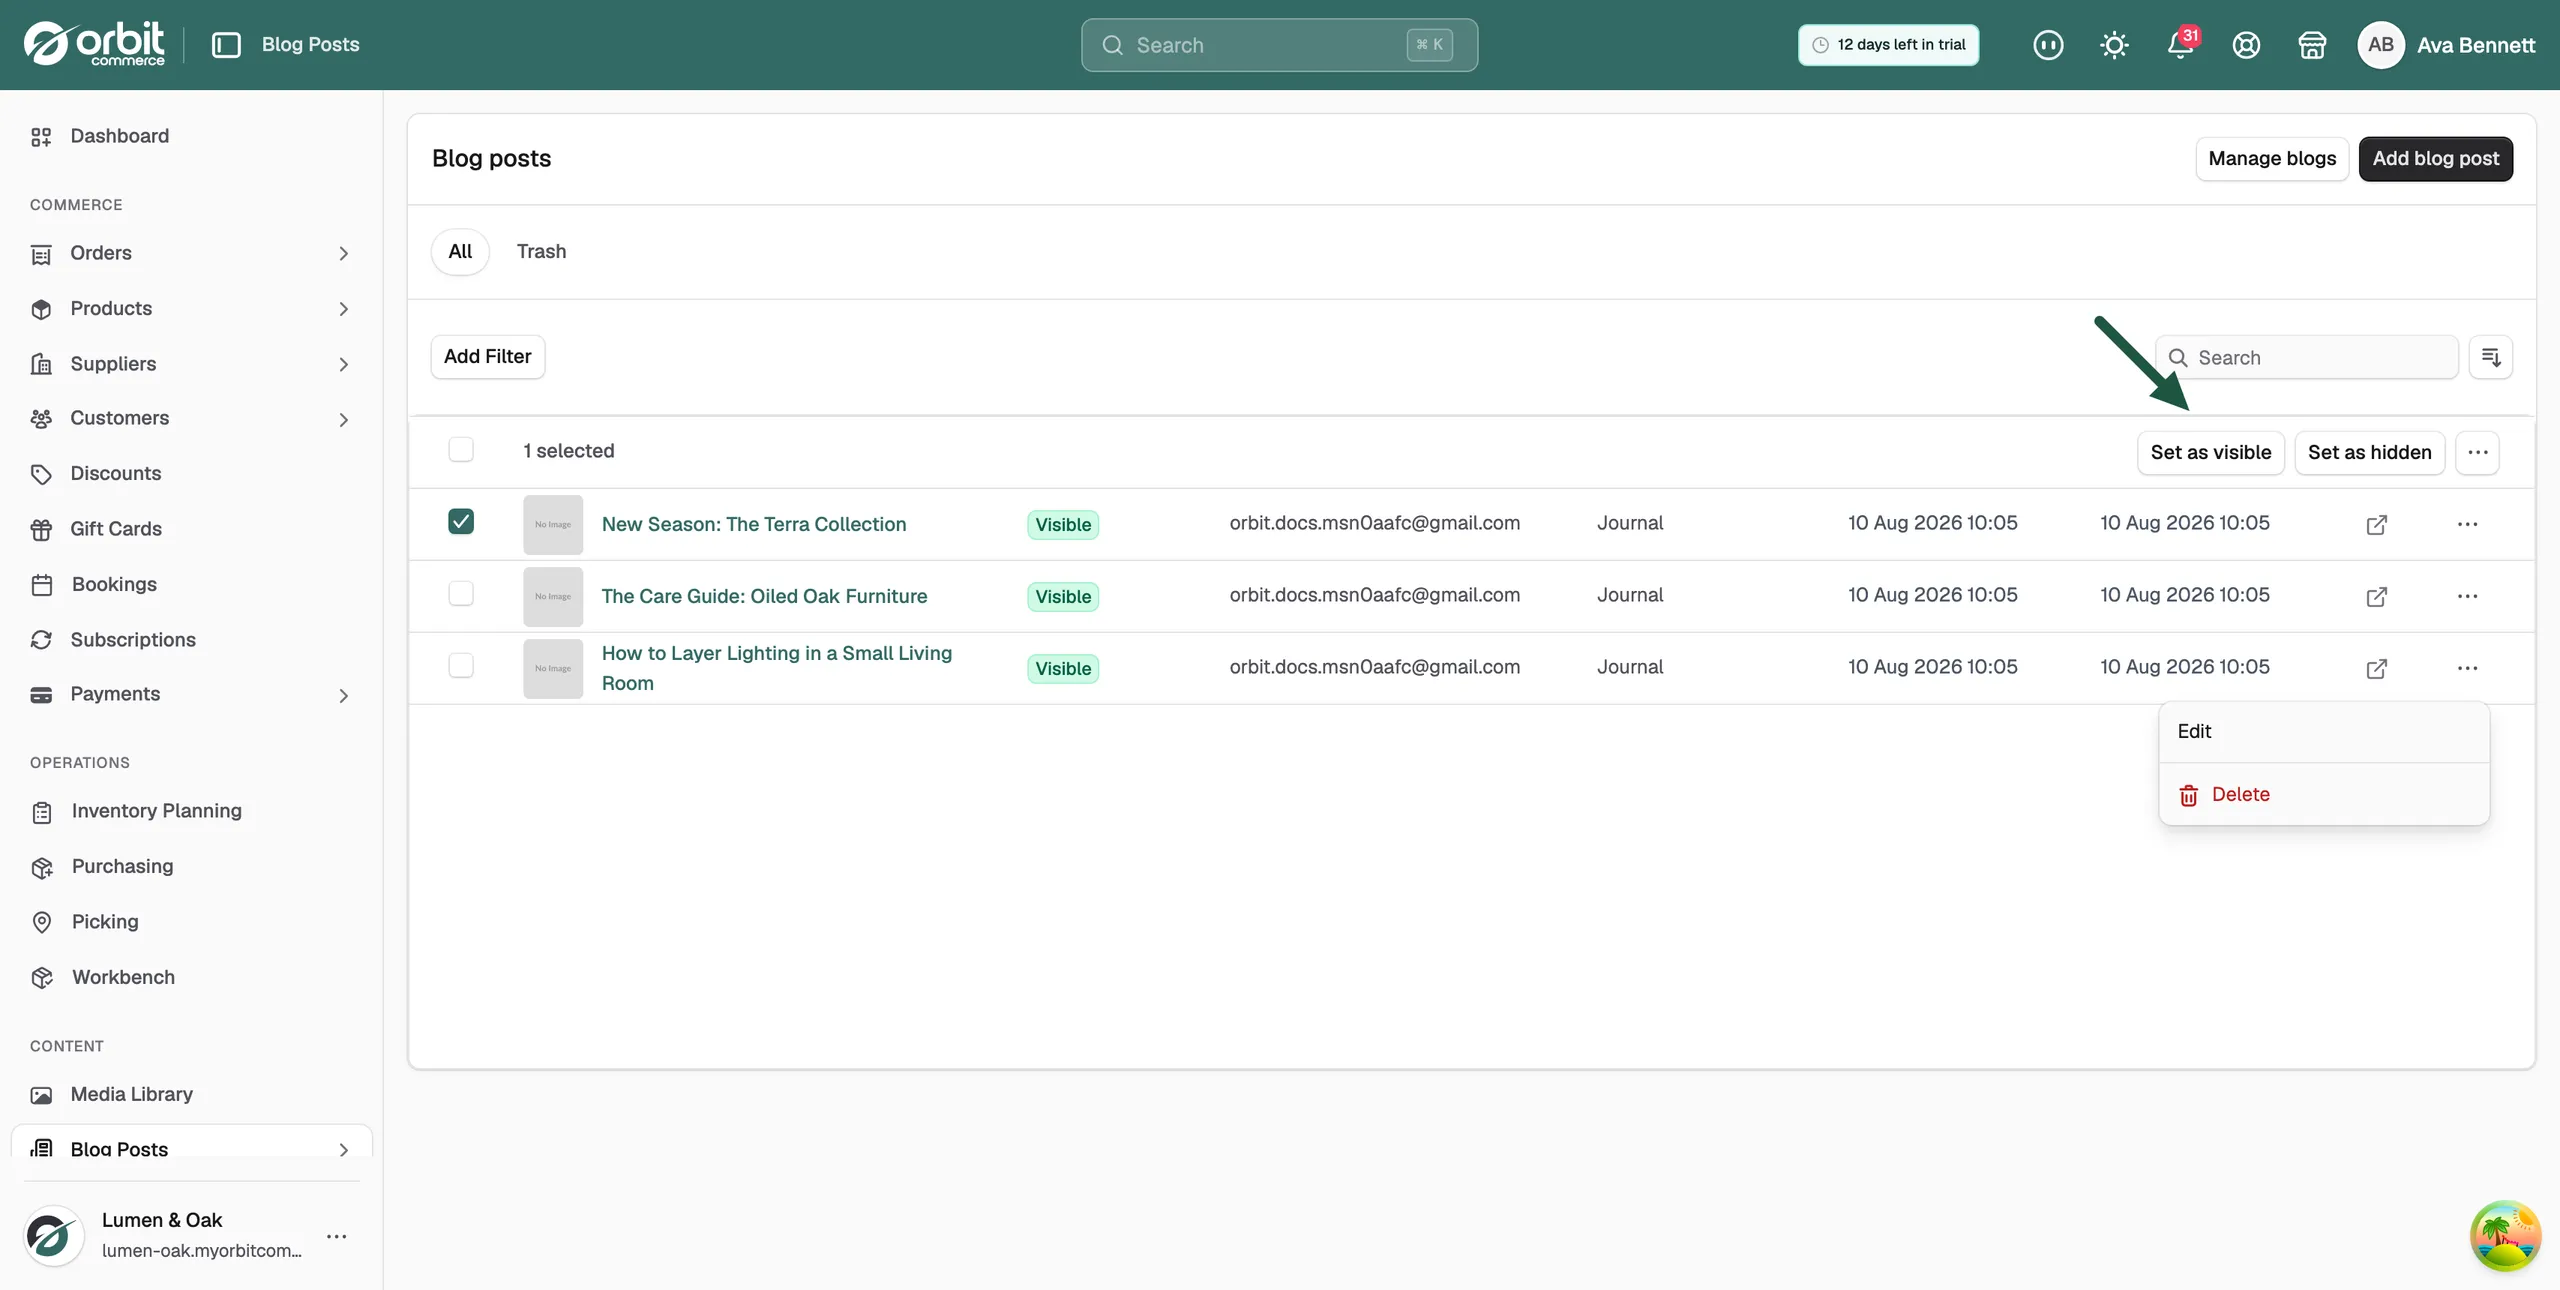
From the Blog Posts list, you can select one or more posts using the checkbox.

Once selected, you can perform bulk actions such as:

  • Set as visible

  • Set as hidden

  • Delete posts

Setting a blog post as visible or hidden

Blog posts can be marked as either visible or hidden.

Visible means the blog post can be shown on your storefront.

Hidden means the blog post is not publicly visible.

Deleting a blog post

To delete a blog post:

  1. Select the checkbox next to the blog post.

  2. Click the three-dot menu.

  3. Select Delete posts.

Deleted blog posts can be found under the Trash tab.

Managing blogs

The Manage blogs button allows you to manage the blog containers used to organise your posts.

Why blog posts are important

Blog posts help you add useful content to your storefront outside of your product and category pages. They can be used to support marketing activity, improve customer engagement, and provide helpful information that may influence purchasing decisions.

They can also help improve search visibility when used with clear page titles, meta descriptions, tags, and relevant content.

If you have any questions, please contact us at support@orbitcommerce.net

Was this helpful?

0 people found this helpful