Building your navigation menus
Create the menus shoppers use to get around your storefront, link items to pages, categories, products or any web address, and nest sub-items for drop-downs.
Navigation menus are the links shoppers use to move around your storefront, such as the main menu in your header. You build them under Storefront, then Navigation. Each menu holds items that link to a page, a category, a product, a brand, a blog or any web address.
Considerations
- A menu can be up to three levels deep: items, sub-items and sub-items of those.
- Items show on your storefront in the order you add them. Add them in the order you want shoppers to see.
- The handle is the reference your theme uses to place the menu, for example in your header or footer. Change it only if you need to.
- Deleting a menu cannot be undone. A menu your theme is using will stop showing on your storefront.
Create a menu
- From your Orbit dashboard, go to Storefront, then Navigation. The list shows your menus.
- Click Create navigation at the top right.
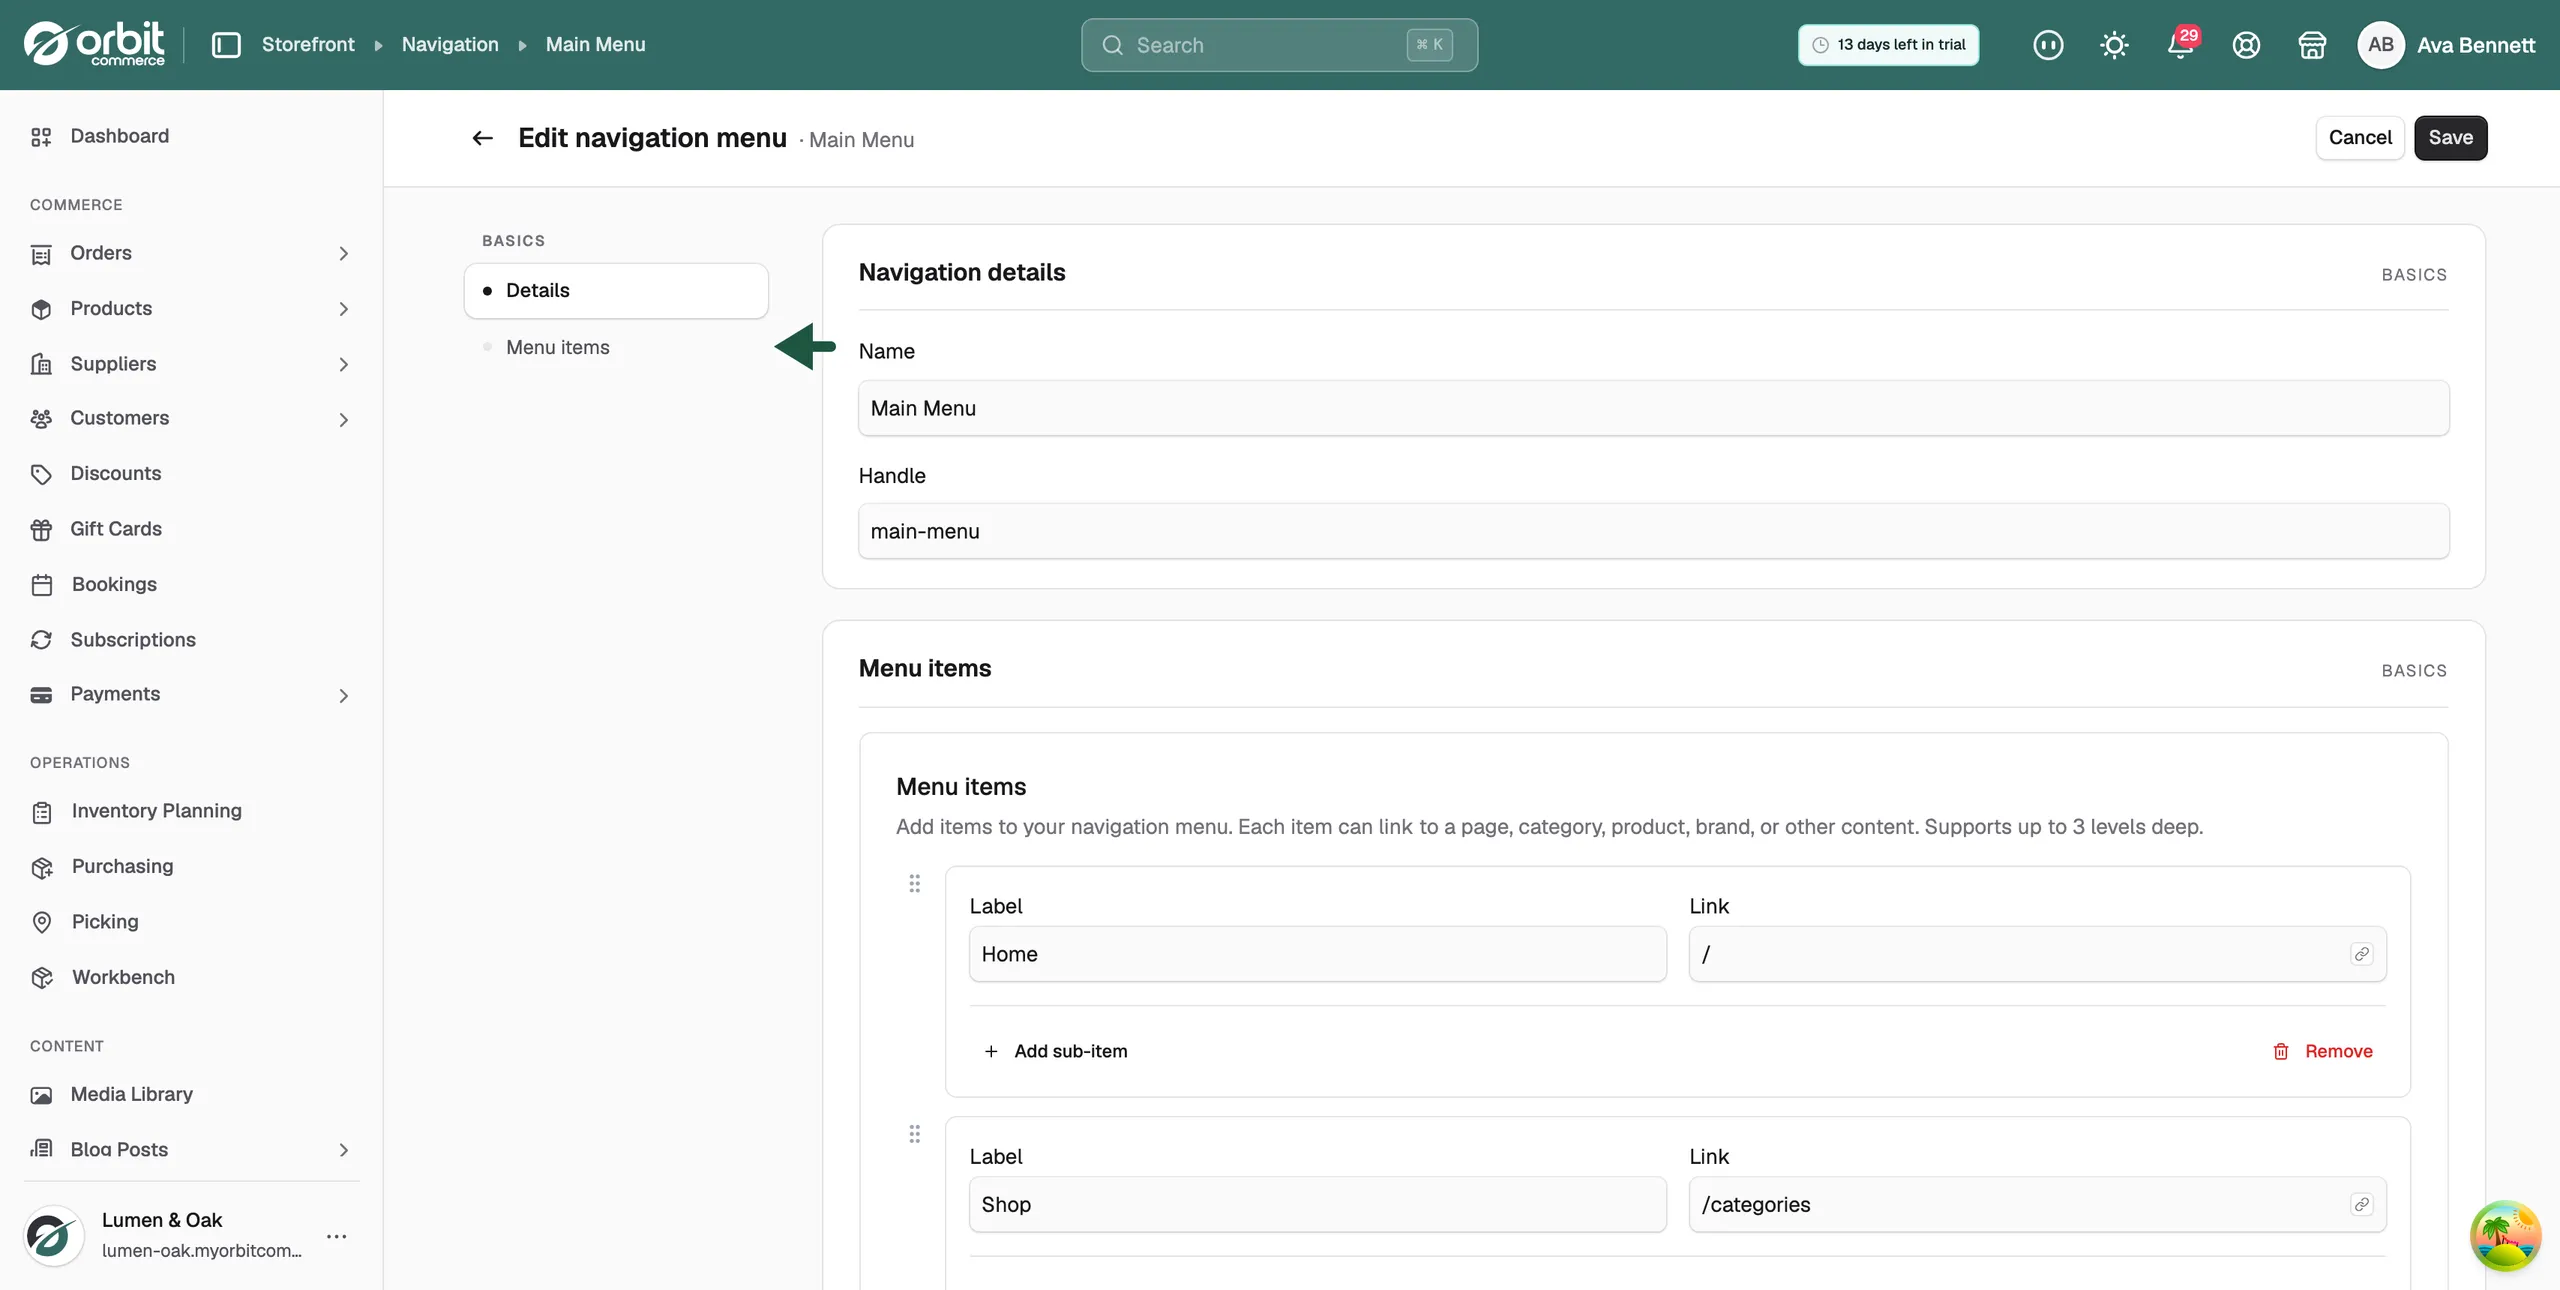
- Under Navigation details, enter a Name, for example Main menu. The Handle fills in for you.
Add menu items
Under Menu items, the first item card is already there for you.
- In Label, type the words shoppers will see, for example Home.
- Click the Link field. A list of places the link can go opens.
- Pick where the item goes:
- Home page or Search: click the row.
- Categories, Products, Brands, Blogs, Blog posts or Pages: click the row to open a list of your own, then click the one you want. Click Back to return to the main list.
- Any other web address: type or paste it into the field, then click Custom link.
- Click Add menu item to add the next link. Repeat these steps for each item.
The list also has an Account group with Orders, Profile and Settings, for shoppers who are signed in.
Add sub-items for drop-down menus
- On the parent item's card, click Add sub-item. A new card appears, indented under the parent.
- Give the sub-item its own Label and Link.
A sub-item can hold its own sub-items. Add sub-item disappears at the third level, which is the deepest a menu can go.
Remove an item
- On the item's card, click Remove. Any sub-items under it are removed too.
Note: Remove only shows once the menu has more than one item.
Save the menu
- Click Save at the top right. You return to the Navigation list and the message Navigation created successfully appears.
To leave without saving, click Cancel.
Edit, duplicate or delete a menu
- Go to Storefront, then Navigation.
- Click a menu to open it in the editor. Or click the ... button in the Actions column and choose Edit navigation, Duplicate or Delete.
- For Duplicate, confirm the copy. Use it when you want a new menu that is close to one you already have.
- For Delete, confirm in the Delete Navigation dialog. This cannot be undone.
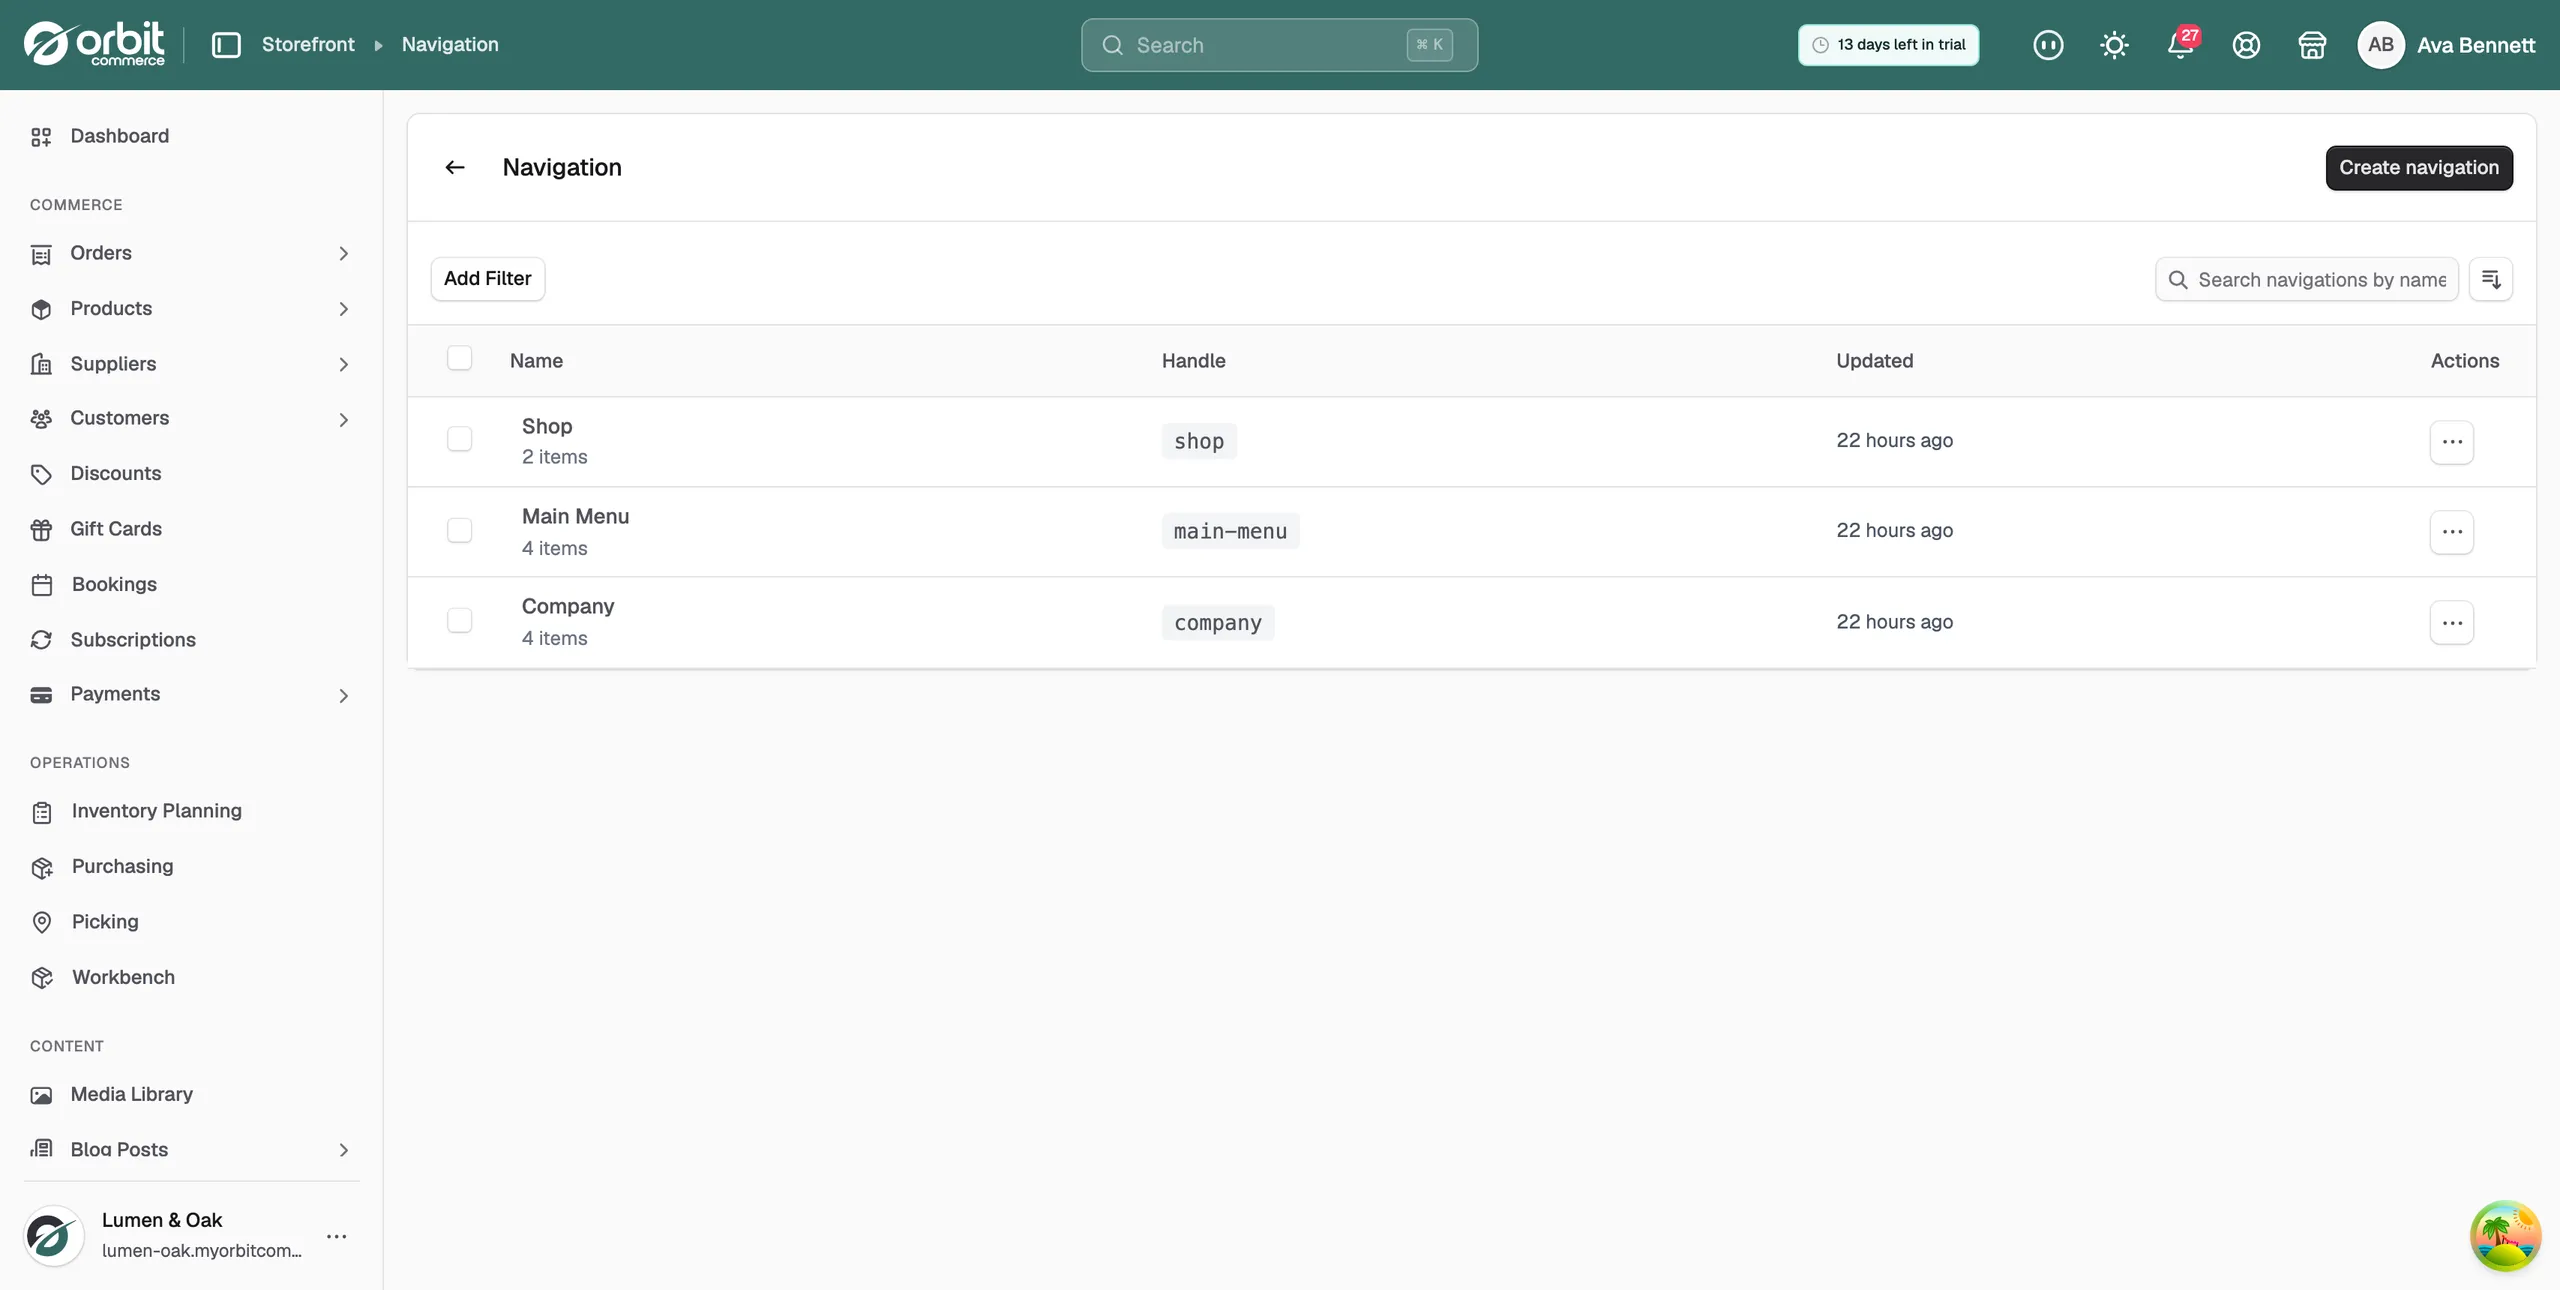
Each row in the list shows:
- Name: the menu's name and how many items it has.
- Handle: the reference your theme uses to place the menu.
- Updated: when the menu last changed.
- Actions: edit, duplicate or delete the menu.
Use Add Filter or the search box to find a menu by name or handle.
Related guides
Was this helpful?
0 people found this helpful