Adding and switching between stores
Run several stores on one Orbit account. Add a store from the store card, buy its plan, and switch between stores without logging out.
One Orbit account can run more than one store. Use it for separate brands, separate regions, or a wholesale shop beside a retail one. Each store has its own products, orders, settings and plan, and you switch between them without logging out.
Considerations
- Your first store comes with a free trial. Every store after that needs its own plan from the start.
- A new store's dashboard stays closed until you buy a plan for it.
- Store currency is permanent. You cannot change it once the store exists.
- Team members are invited per store, so staff see only the stores you give them.
- Each store is billed on its own. Plan & Billing inside a store covers that store only.
Open the store menu
The card at the bottom of the sidebar names the store you are working in. Click the three dots on it for:
- Store settings: the settings for this store.
- Visit store: your storefront, as a customer sees it.
- Add store: create another store under your account.
- Switch store and Visit all stores: these appear once you have more than one store.
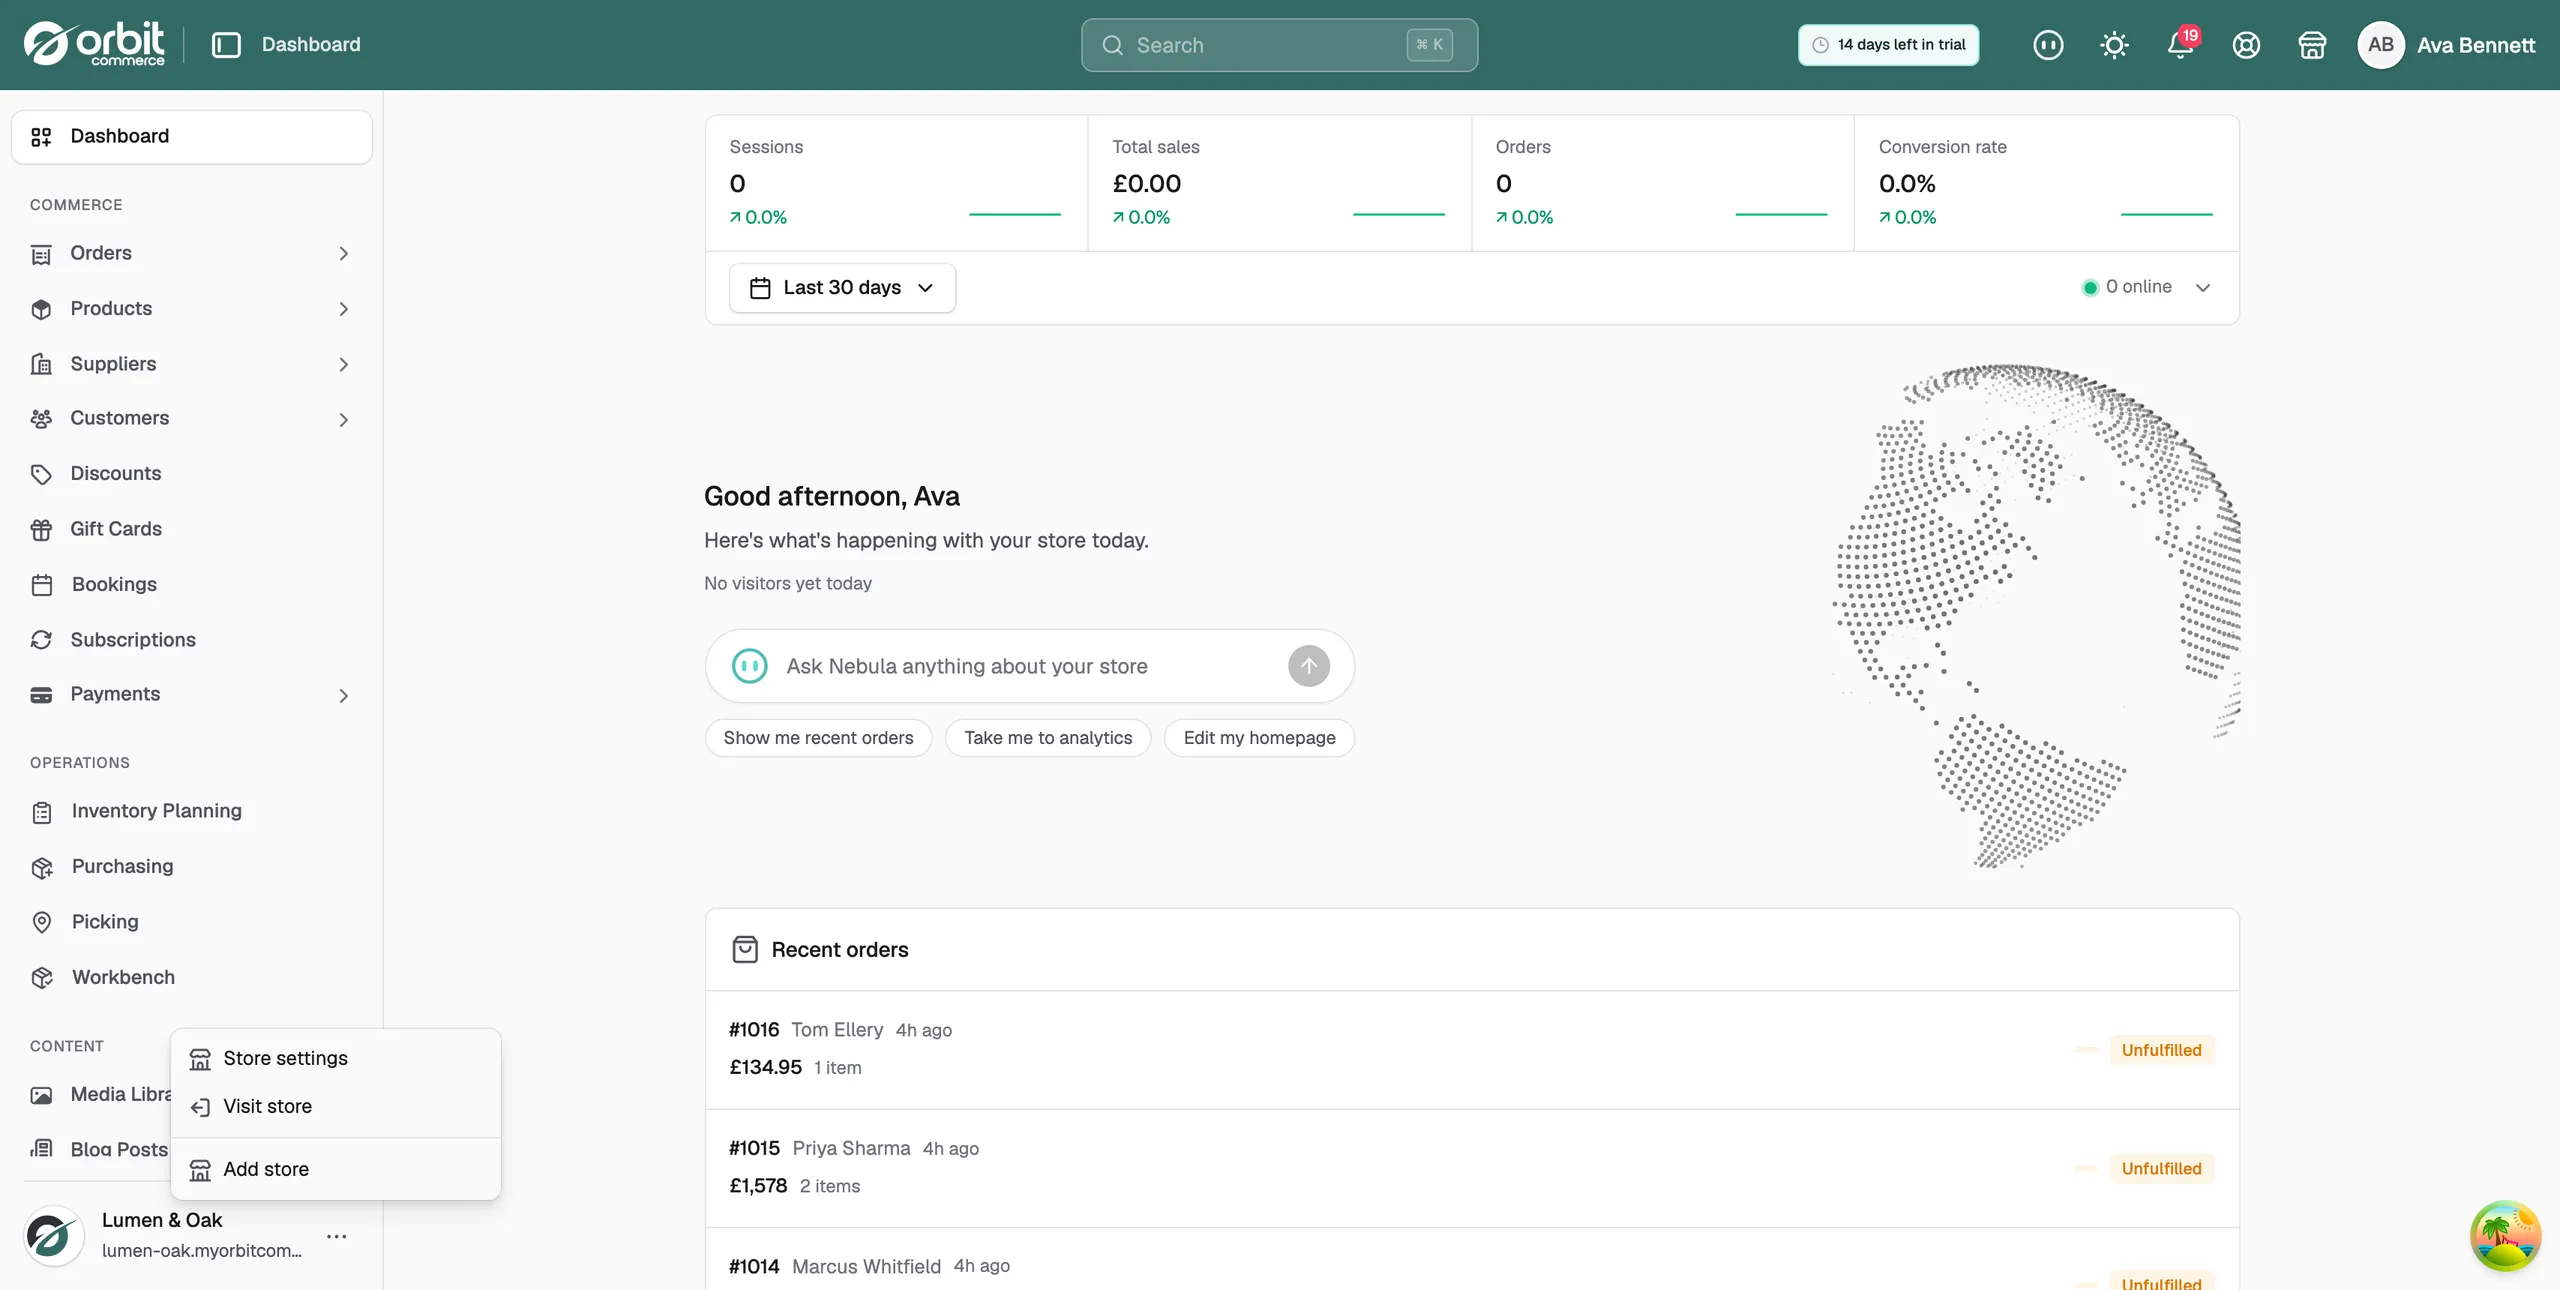
Add a store
- Click the three dots on the store card, then Add store. The Add a new store page opens.
- Enter a Store name. It becomes your new shop's web address.
- Fill in Store description if you want to. It is optional.
- Start typing in Address and pick your address from the list. That fills in the street, the postcode, the country, the county, the town and the timezone for you.
- Check Country, State/Province/County, City/Town, Postcode / Zip Code and Timezone. Choose the country first, because the county and town lists depend on it.
- Choose your Store currency.
- Click Create store.
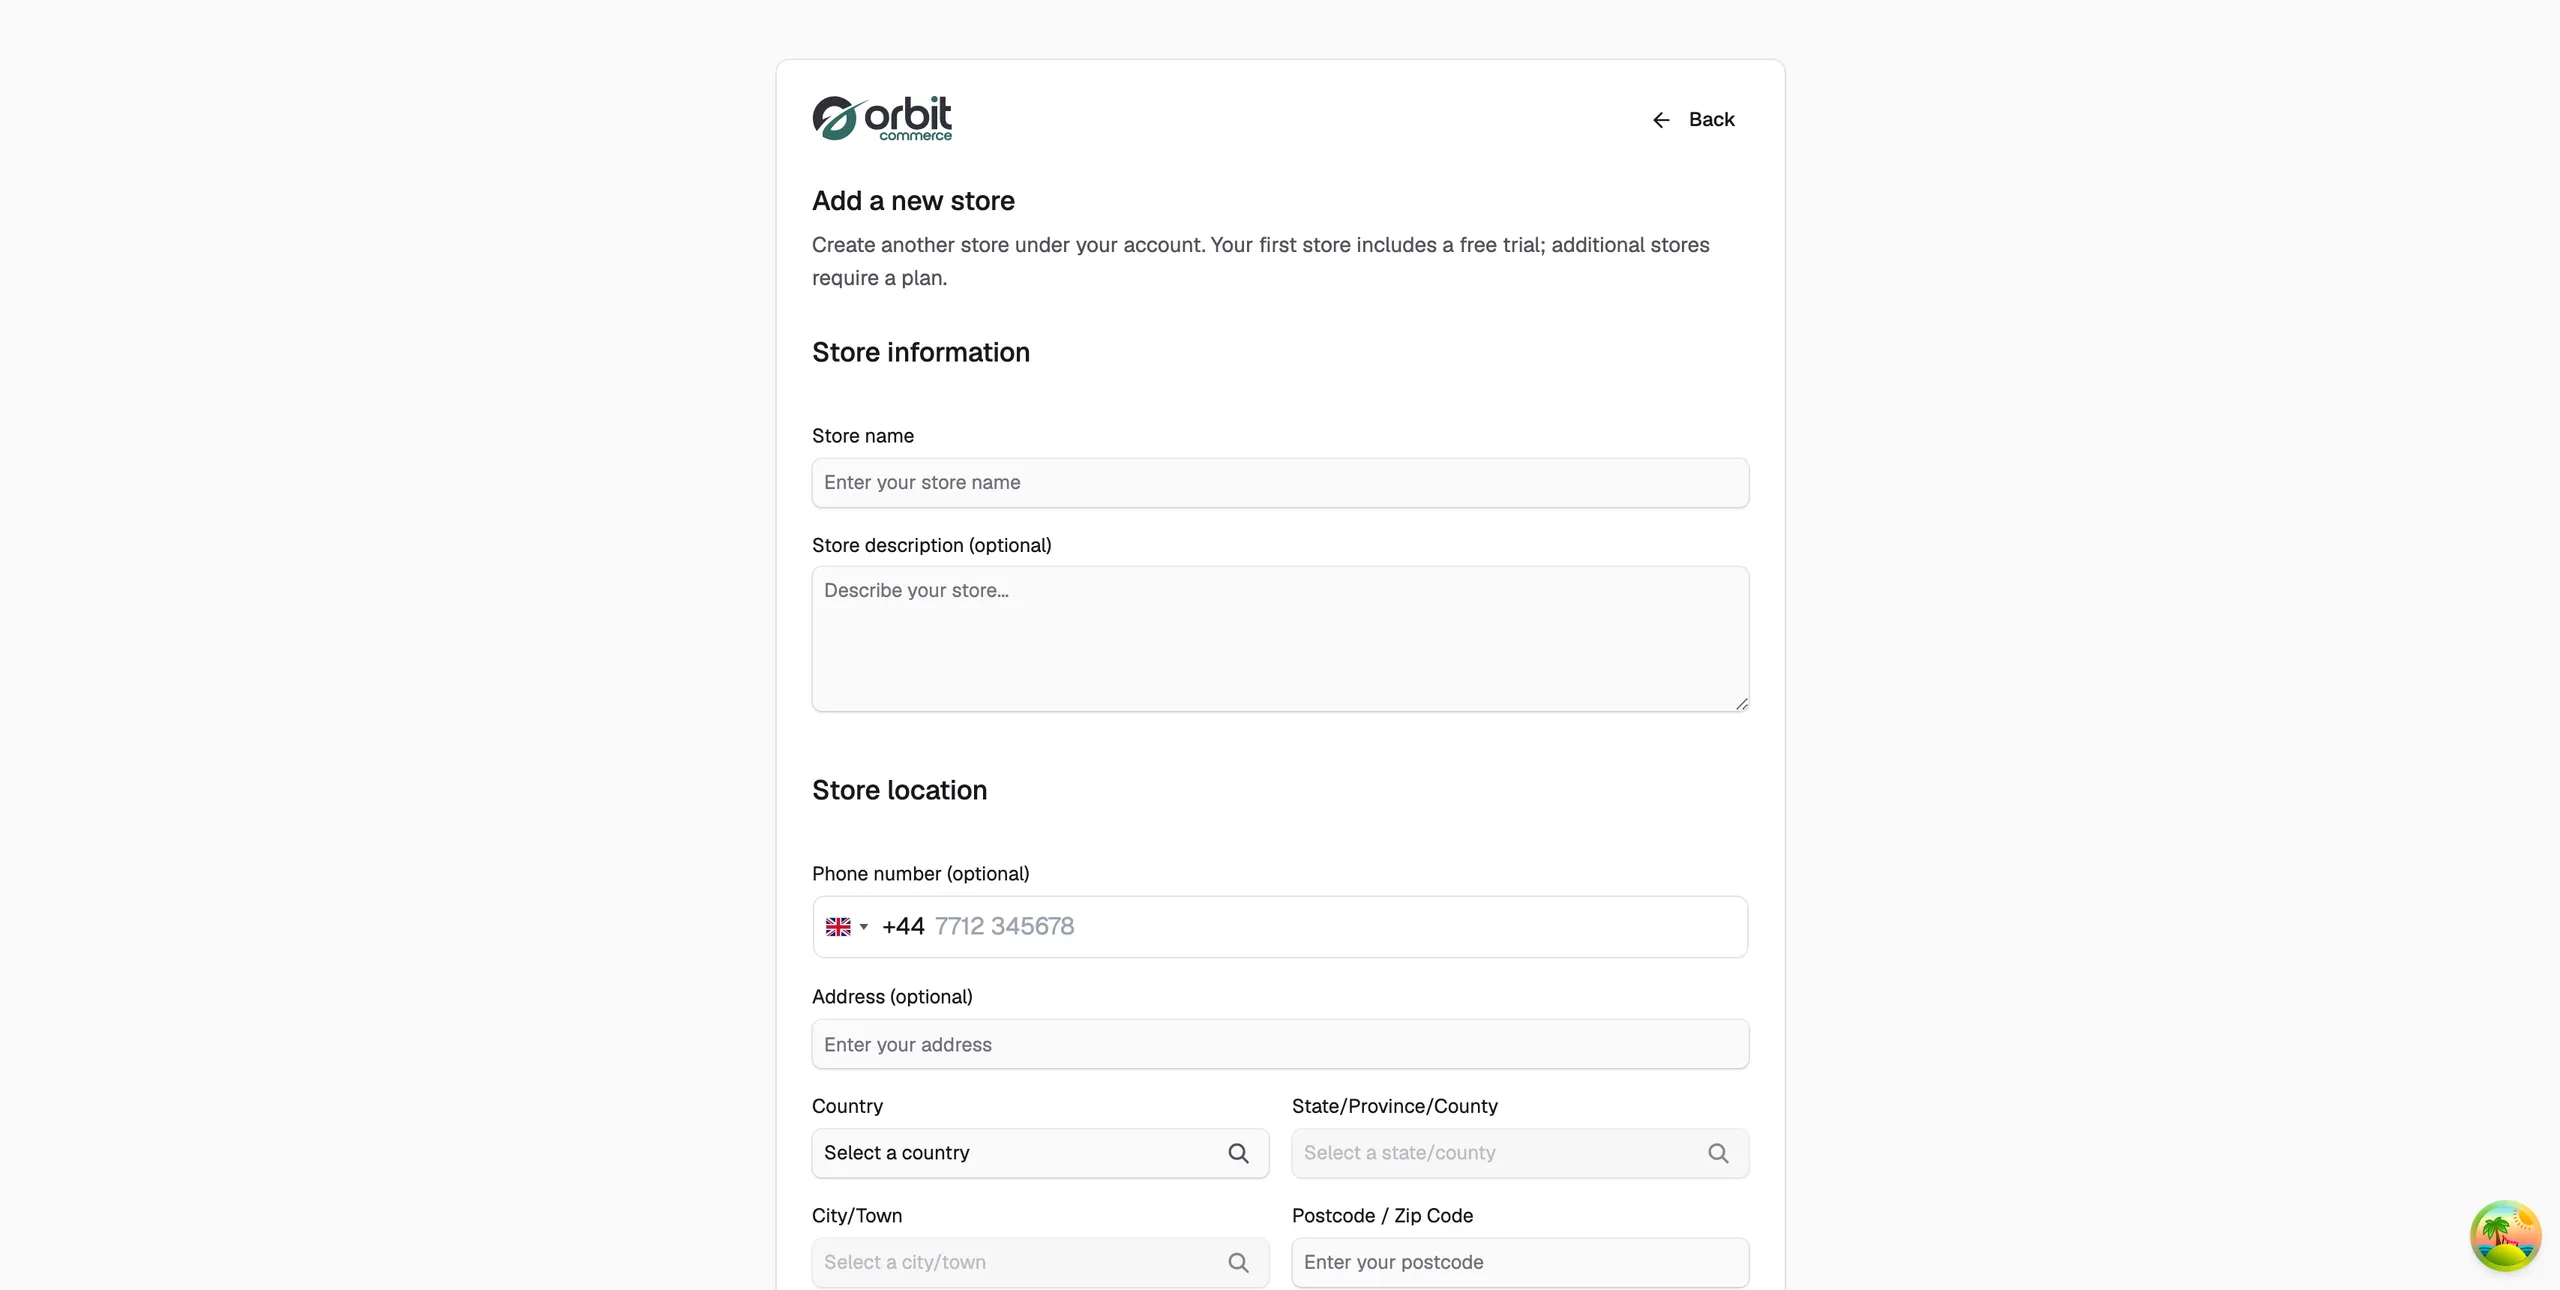
Warning: Store currency is set once. You cannot change it afterwards, so check it before you click Create store.
The message Store created appears and Orbit takes you to the plan picker, not to the new dashboard. Pick a plan to open the store. The new store then has its own dashboard, its own setup wizard and its own settings.
Switch between stores
- Click the three dots on the store card.
- Click Switch store.
- Click the store you want.
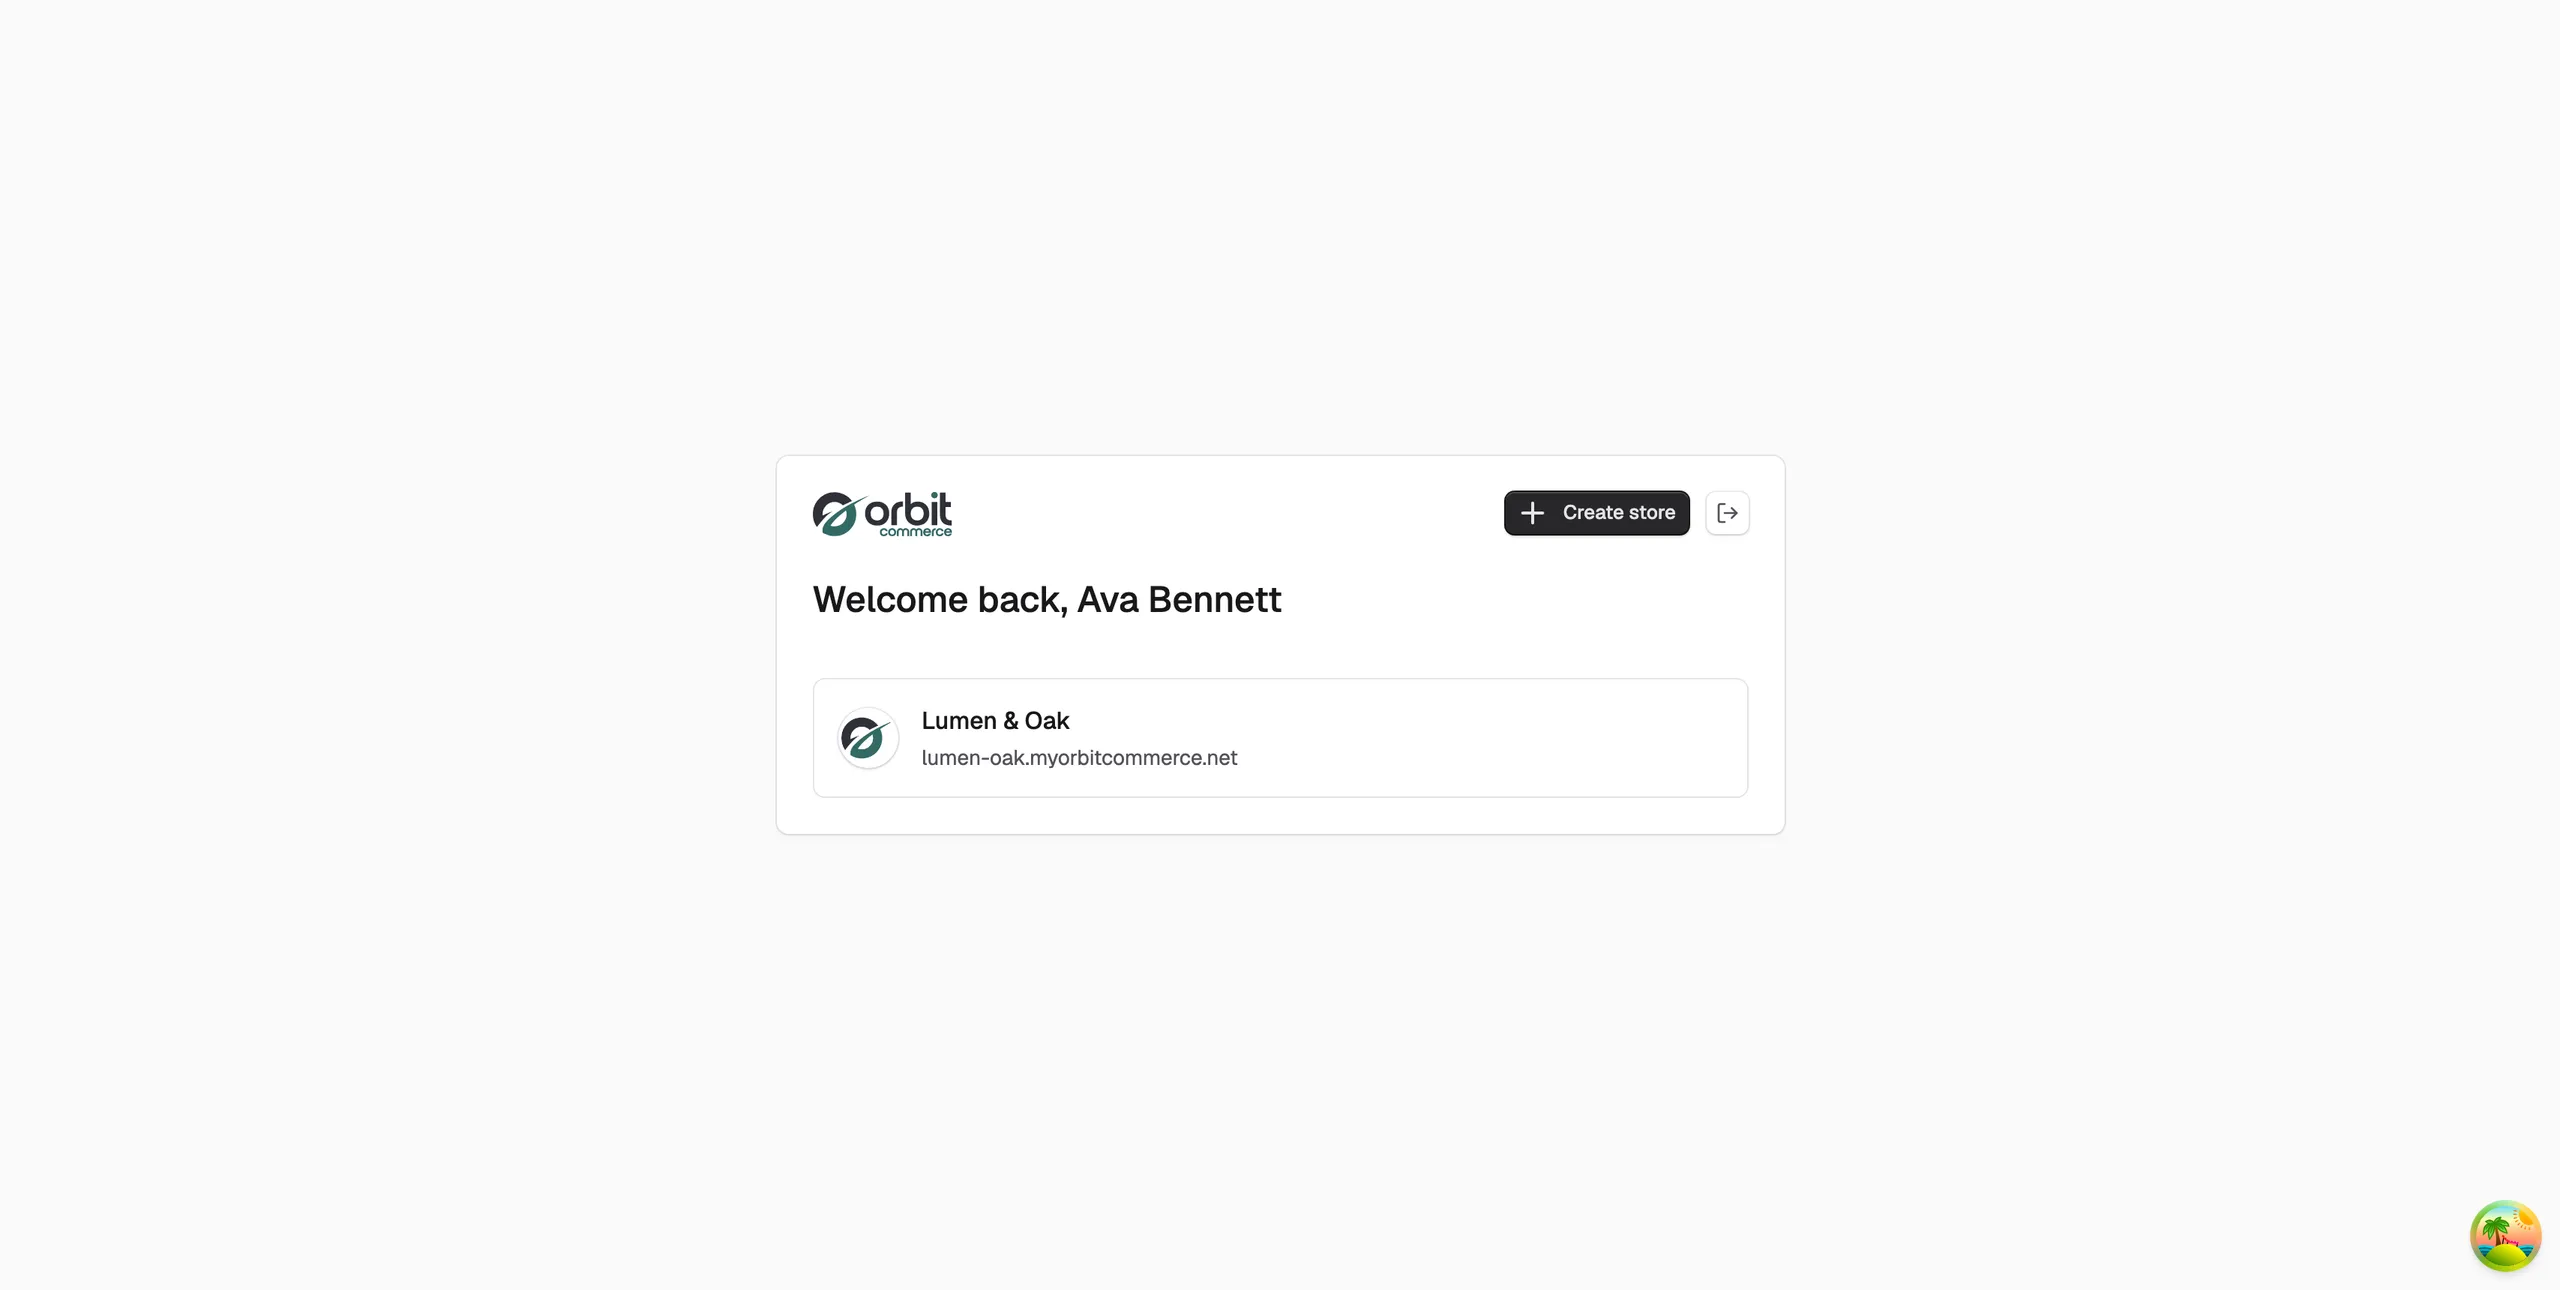
With more than one store, signing in lands you on a store picker first. After that, check the store card before you work. Everything in the dashboard, including orders, products, analytics and settings, belongs to the store named there.
Related guides
Was this helpful?
0 people found this helpful