Setting up your cookie consent banner
Choose where the cookie banner sits, set its colours and wording, manage cookie categories and services, and ask visitors to consent again after a change.
The cookie consent banner asks visitors which cookies they allow. UK and EU law requires it whenever you run analytics or marketing scripts. Orbit turns the banner on for every store. On the Cookie Consent page you make it your own: where it sits, its colours, its wording, and the cookie categories visitors can choose from.
Considerations
- The banner is already on. You do not need to enable it. The on and off switch lives on Storefront > Preferences, not on the Cookie Consent page.
- That switch saves the moment you flip it. It does not wait for a Save button.
- Keep the Reject all and Accept all buttons equal. The UK ICO requires both options to carry the same weight, and Orbit styles them the same.
- Visitors change their mind through a Cookie Preferences element in your footer. If your footer does not have one, the Cookie Consent page shows a warning until you add it.
Open the Cookie Consent page
- From your Orbit dashboard, go to Storefront > Preferences.
- Scroll to the bottom of the page and find the Cookie consent card. The Enable cookie consent banner switch is already on.
- Click Configure cookie consent. The Cookie Consent page opens on the Banner tab.
The page has three tabs: Banner, Categories & services and Preview. The Status card at the top of the Banner tab shows whether the banner is on. It is read-only here.
Note: There is no Cookie Consent entry in the Storefront menu. The only way to the page is the Configure cookie consent button on the Preferences page.
Choose where the banner sits and its colours
- On the Banner tab, under Layout, open the list and pick a position. You can choose a bar at the bottom or top of the page, a Centered modal, or a corner card at the bottom left or bottom right. The modal dims the page behind it.
- Under Theme, set the colours. Type a hex code in each field or click the swatch. The defaults match your brand colours, so change them only if the banner does not sit well on your store.
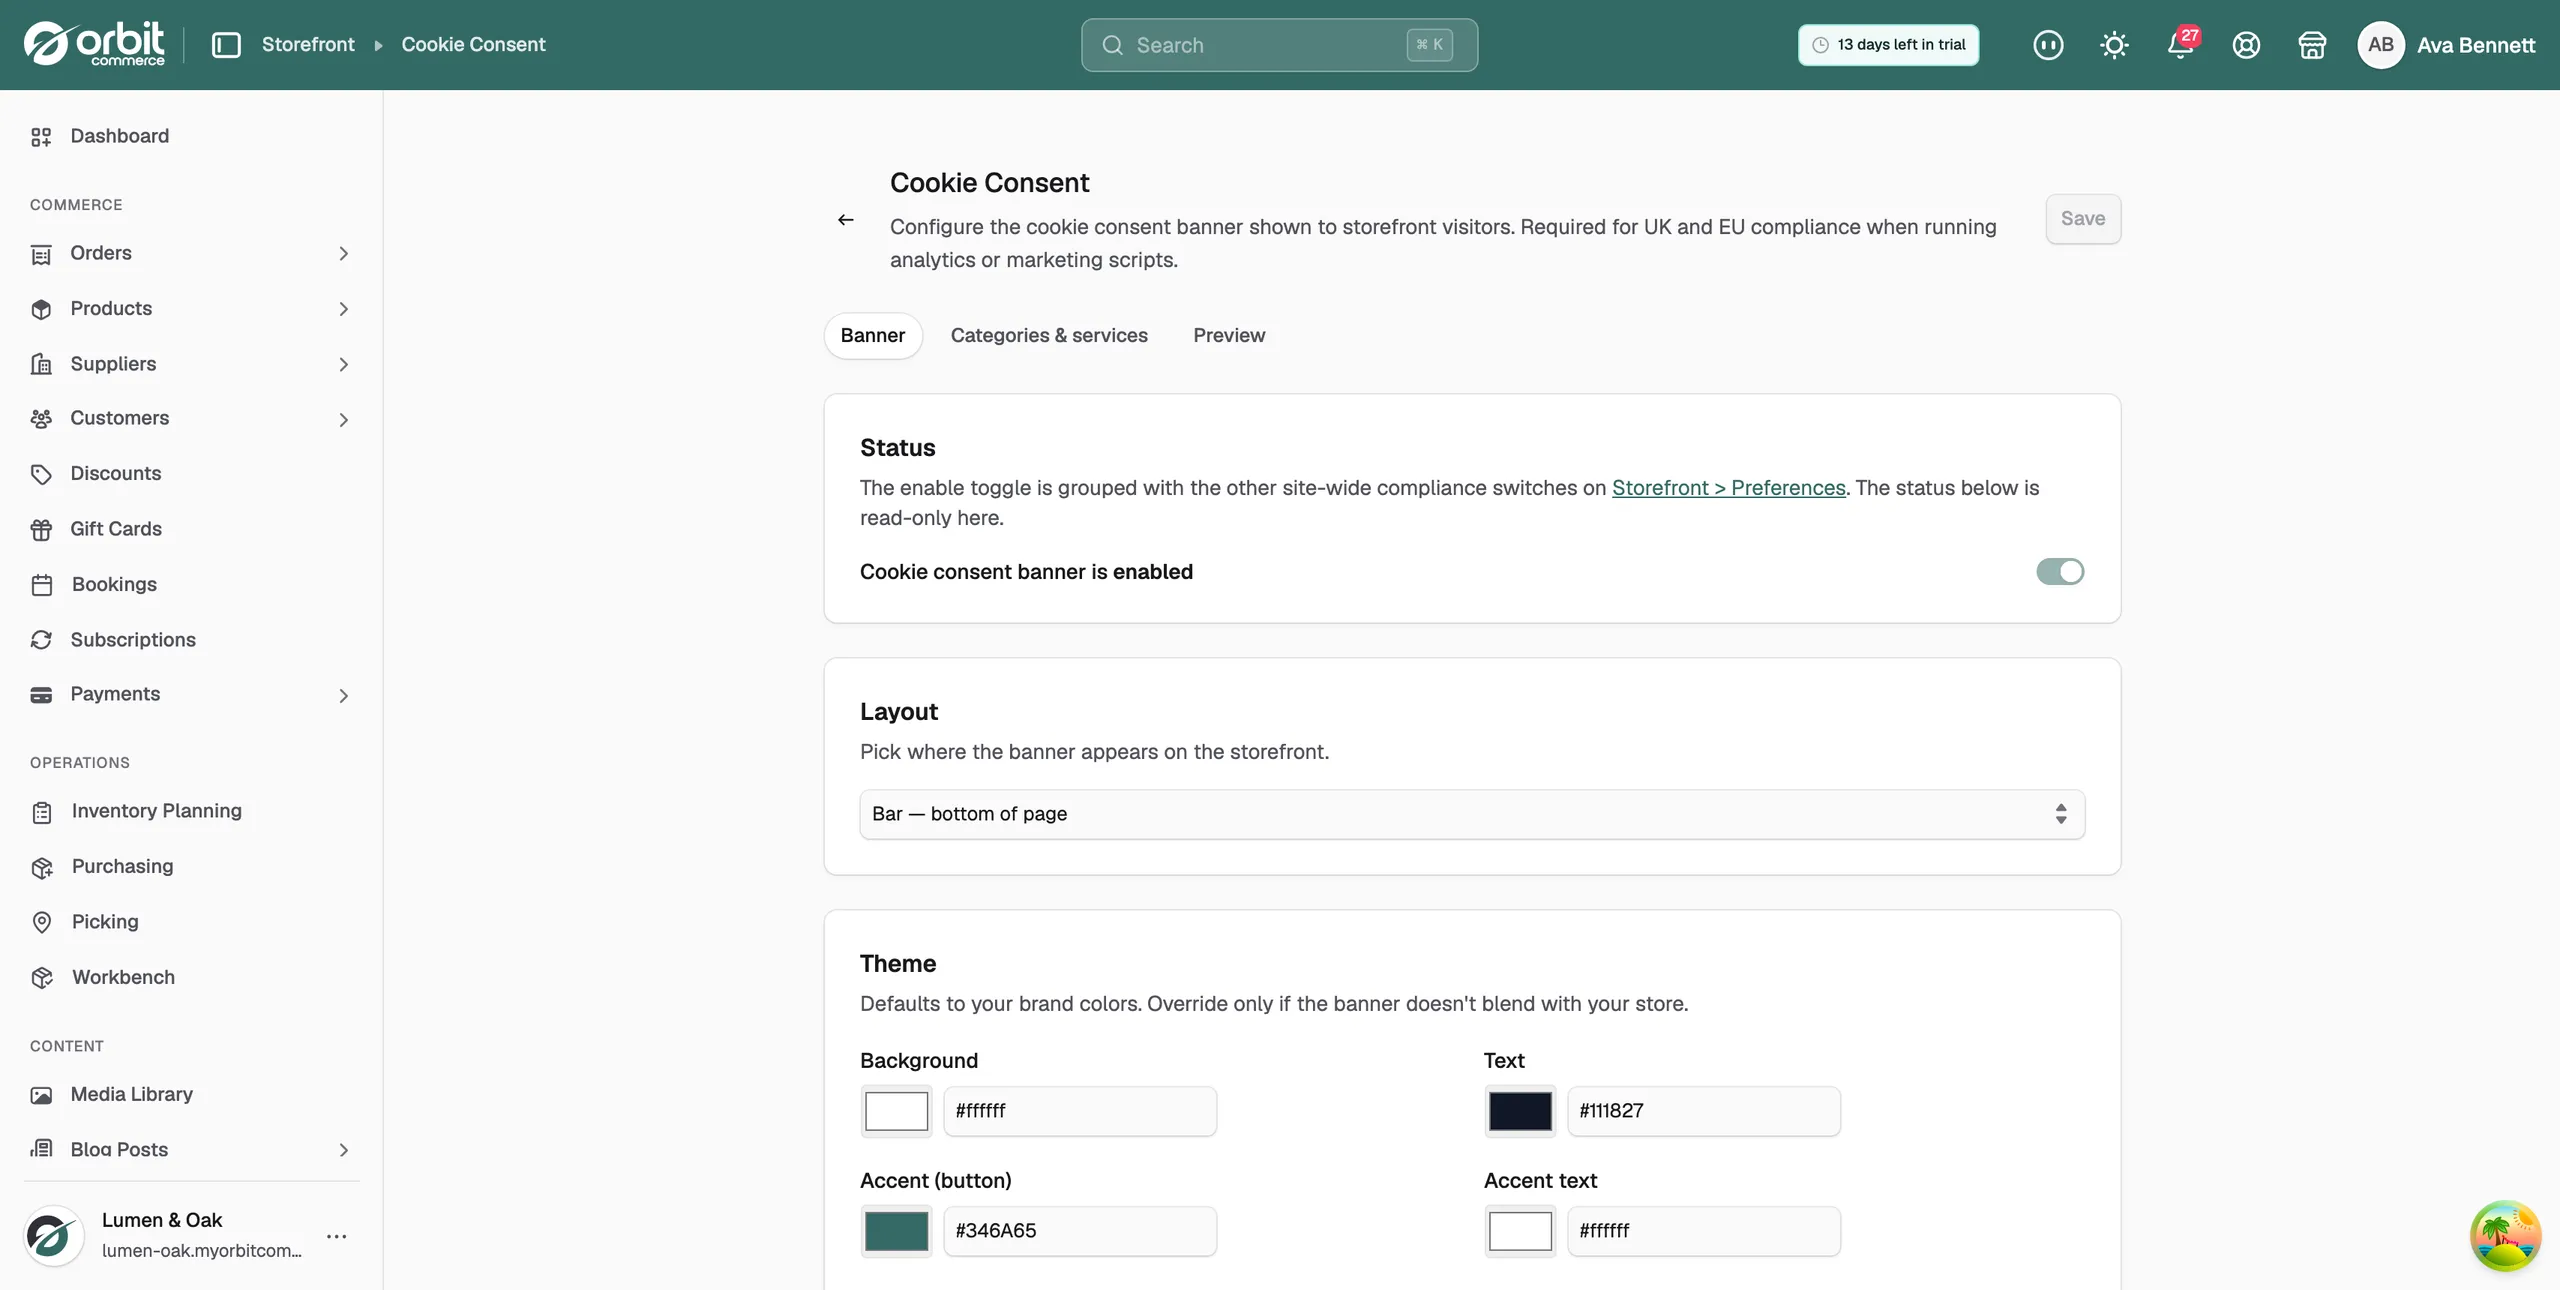
The Theme fields are:
- Background: the banner background colour.
- Text: the colour of the banner text.
- Accent (button): the colour of the Accept and Reject buttons.
- Accent text: the colour of the text on those buttons.
- Border: the colour of the banner border.
- Corner radius (px): how rounded the banner corners are.
Edit the banner text
The Copy card on the Banner tab holds every word visitors see.
- Title: the banner heading.
- Body: the short explanation under the heading.
- Accept all, Reject all, Manage preferences, Save preferences: the button labels.
- Policy link label: the text of the link to your cookie policy.
- Cookie policy URL: where that link goes. The default is /cookie-policy.
Keep the Reject and Accept wording neutral and equal. Do not use the Reject label to discourage visitors from rejecting.
Manage cookie categories and services
Visitors choose what to allow by category. Open the Categories & services tab to edit them. Orbit ships four categories:
- Strictly necessary: cookies the store needs to work, such as security, cart and checkout. This category is marked Locked. Visitors cannot turn it off and you cannot delete it.
- Functional: extras such as language choice, recently viewed products and live chat.
- Analytics: cookies that help you see how visitors use your store.
- Marketing: cookies used to show personalised ads and measure them.
To list the tools that set cookies in a category:
- Find the category card and change its Label or Description if you want.
- Under Services in this category, click Add service. A row appears with the name New service.
- Fill in Name, Provider and Description for the tool, for example Google Analytics.
- Click Save at the top of the page.
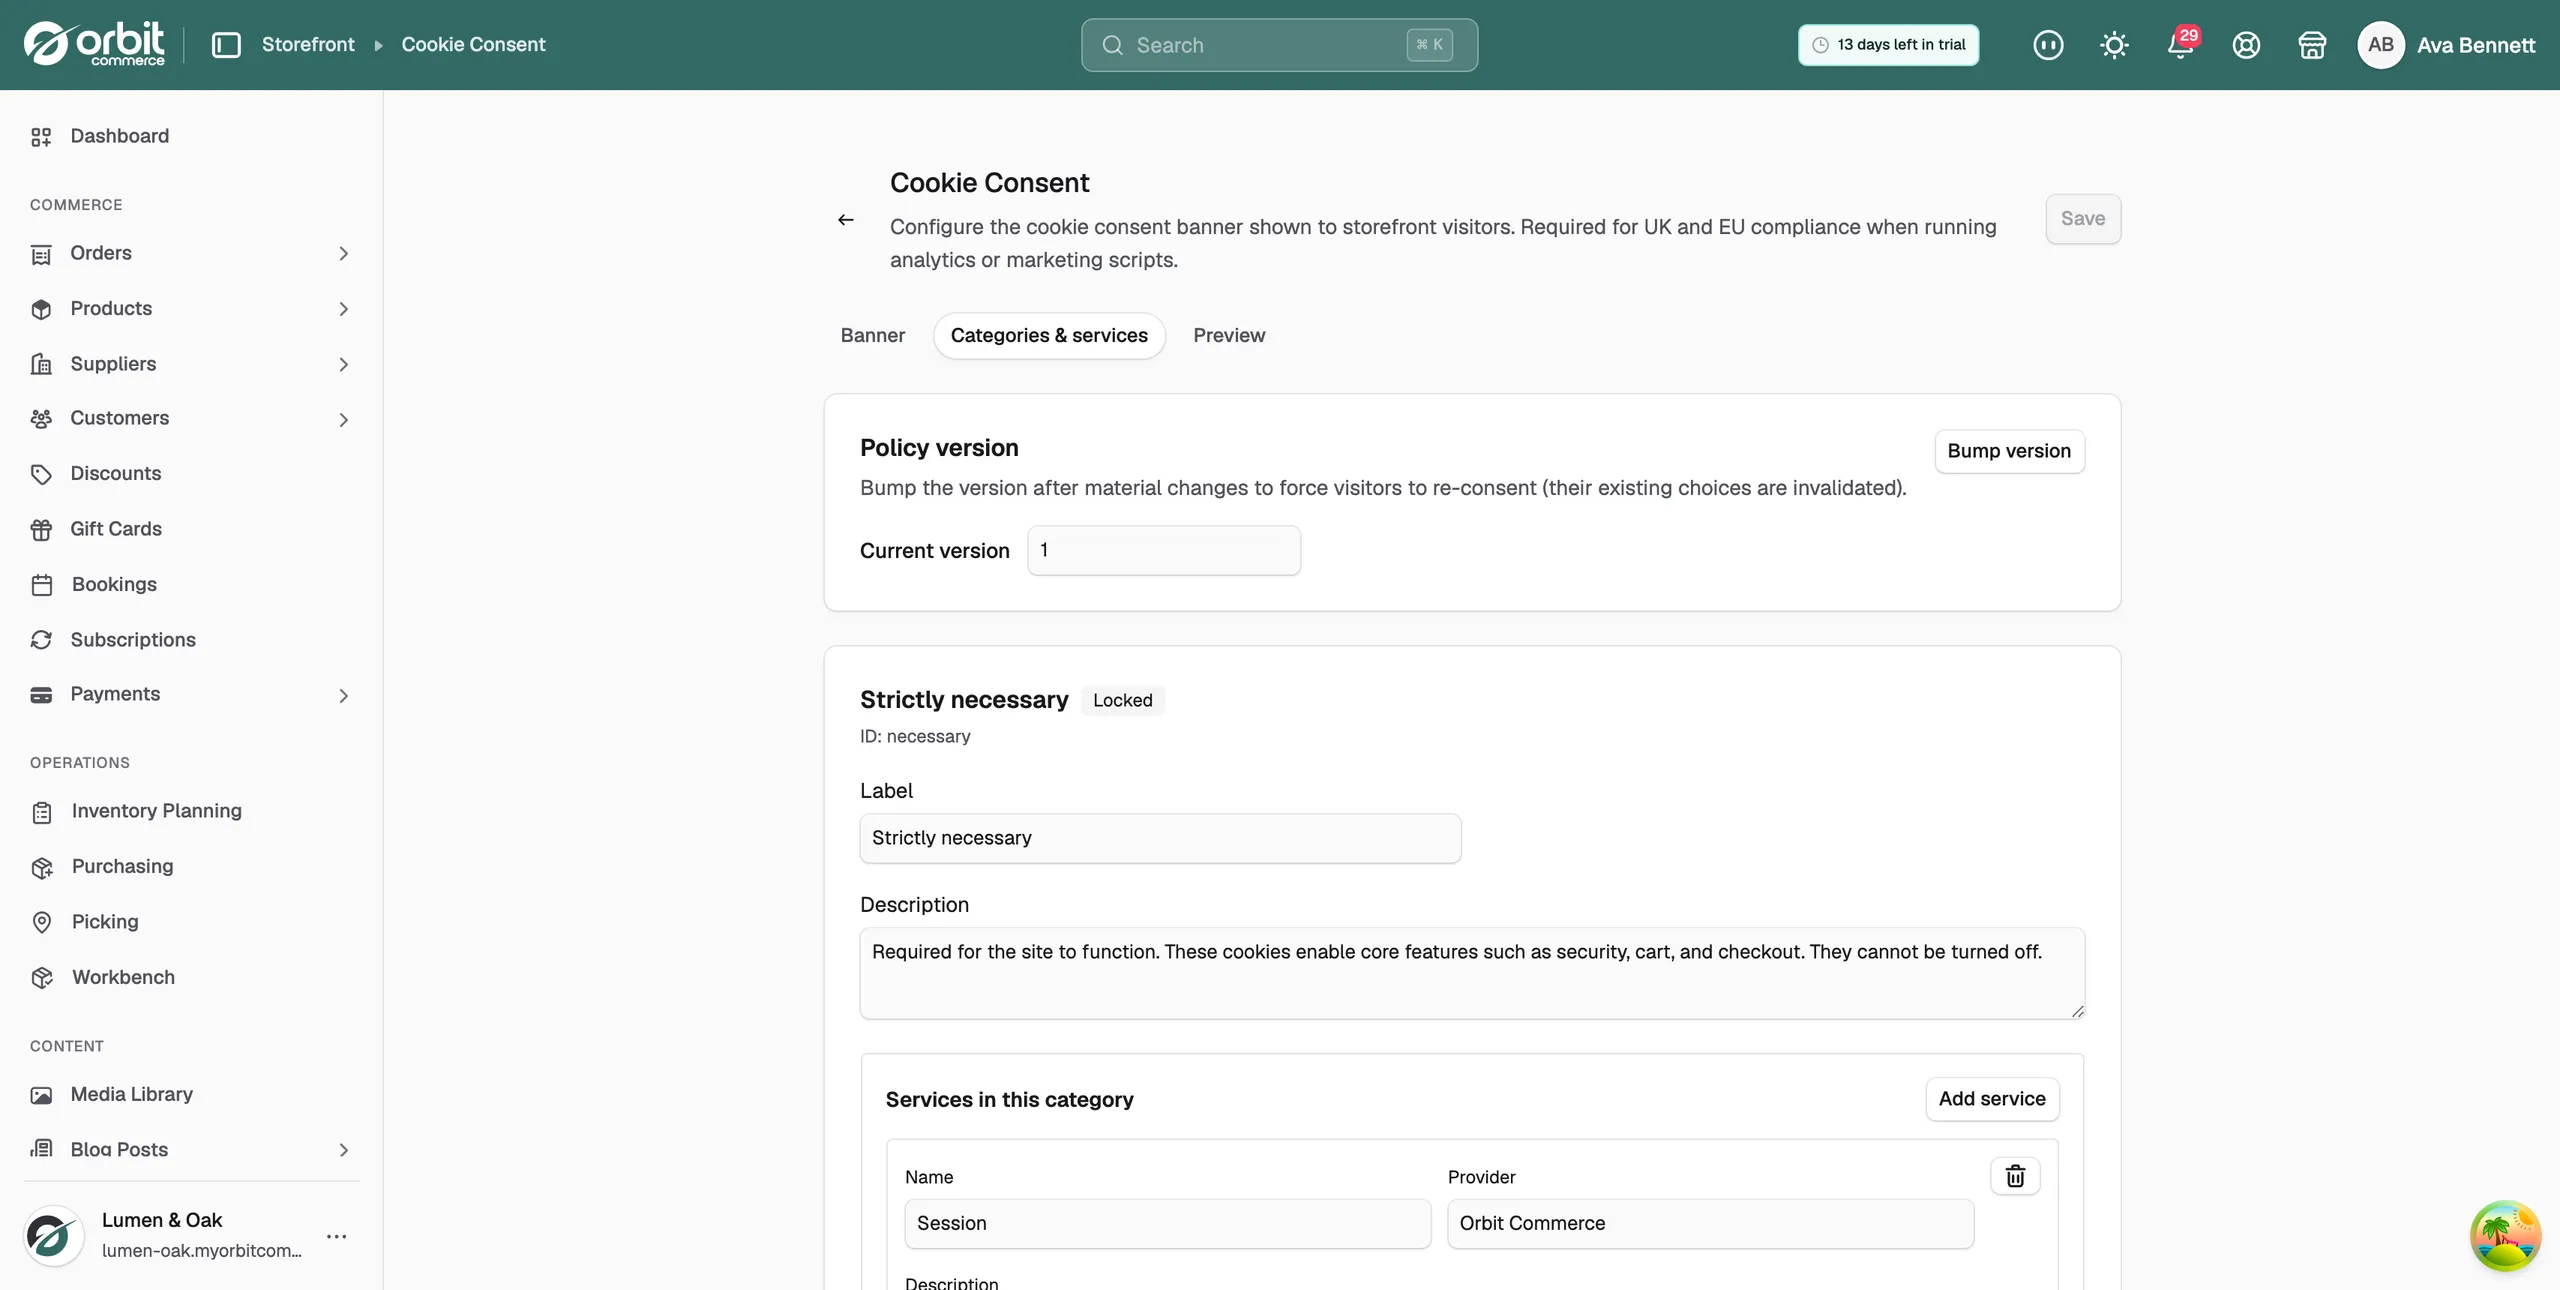
If a category has no services, visitors see only the category description. To add your own category, click Add category at the bottom of the tab. To remove a category you added, click the bin icon on its card.
Ask visitors to consent again
When your cookies change in a way that matters, ask every visitor to choose again.
- On the Categories & services tab, under Policy version, click Bump version. The Current version number goes up by one.
- Click Save. Existing choices are cleared. Every visitor sees the banner again on their next visit.
Warning: Bumping the version throws away every stored consent choice. Do it once, after a real change, not every time you edit the wording.
Preview and save
- Click the Preview tab. You see a static picture of the banner with your layout, colours and text.
- Check the wording and colours. Reject all and Accept all should look the same.
- Click Save at the top right. The button reads Saving..., then the message Cookie consent settings saved appears. Your banner is live.
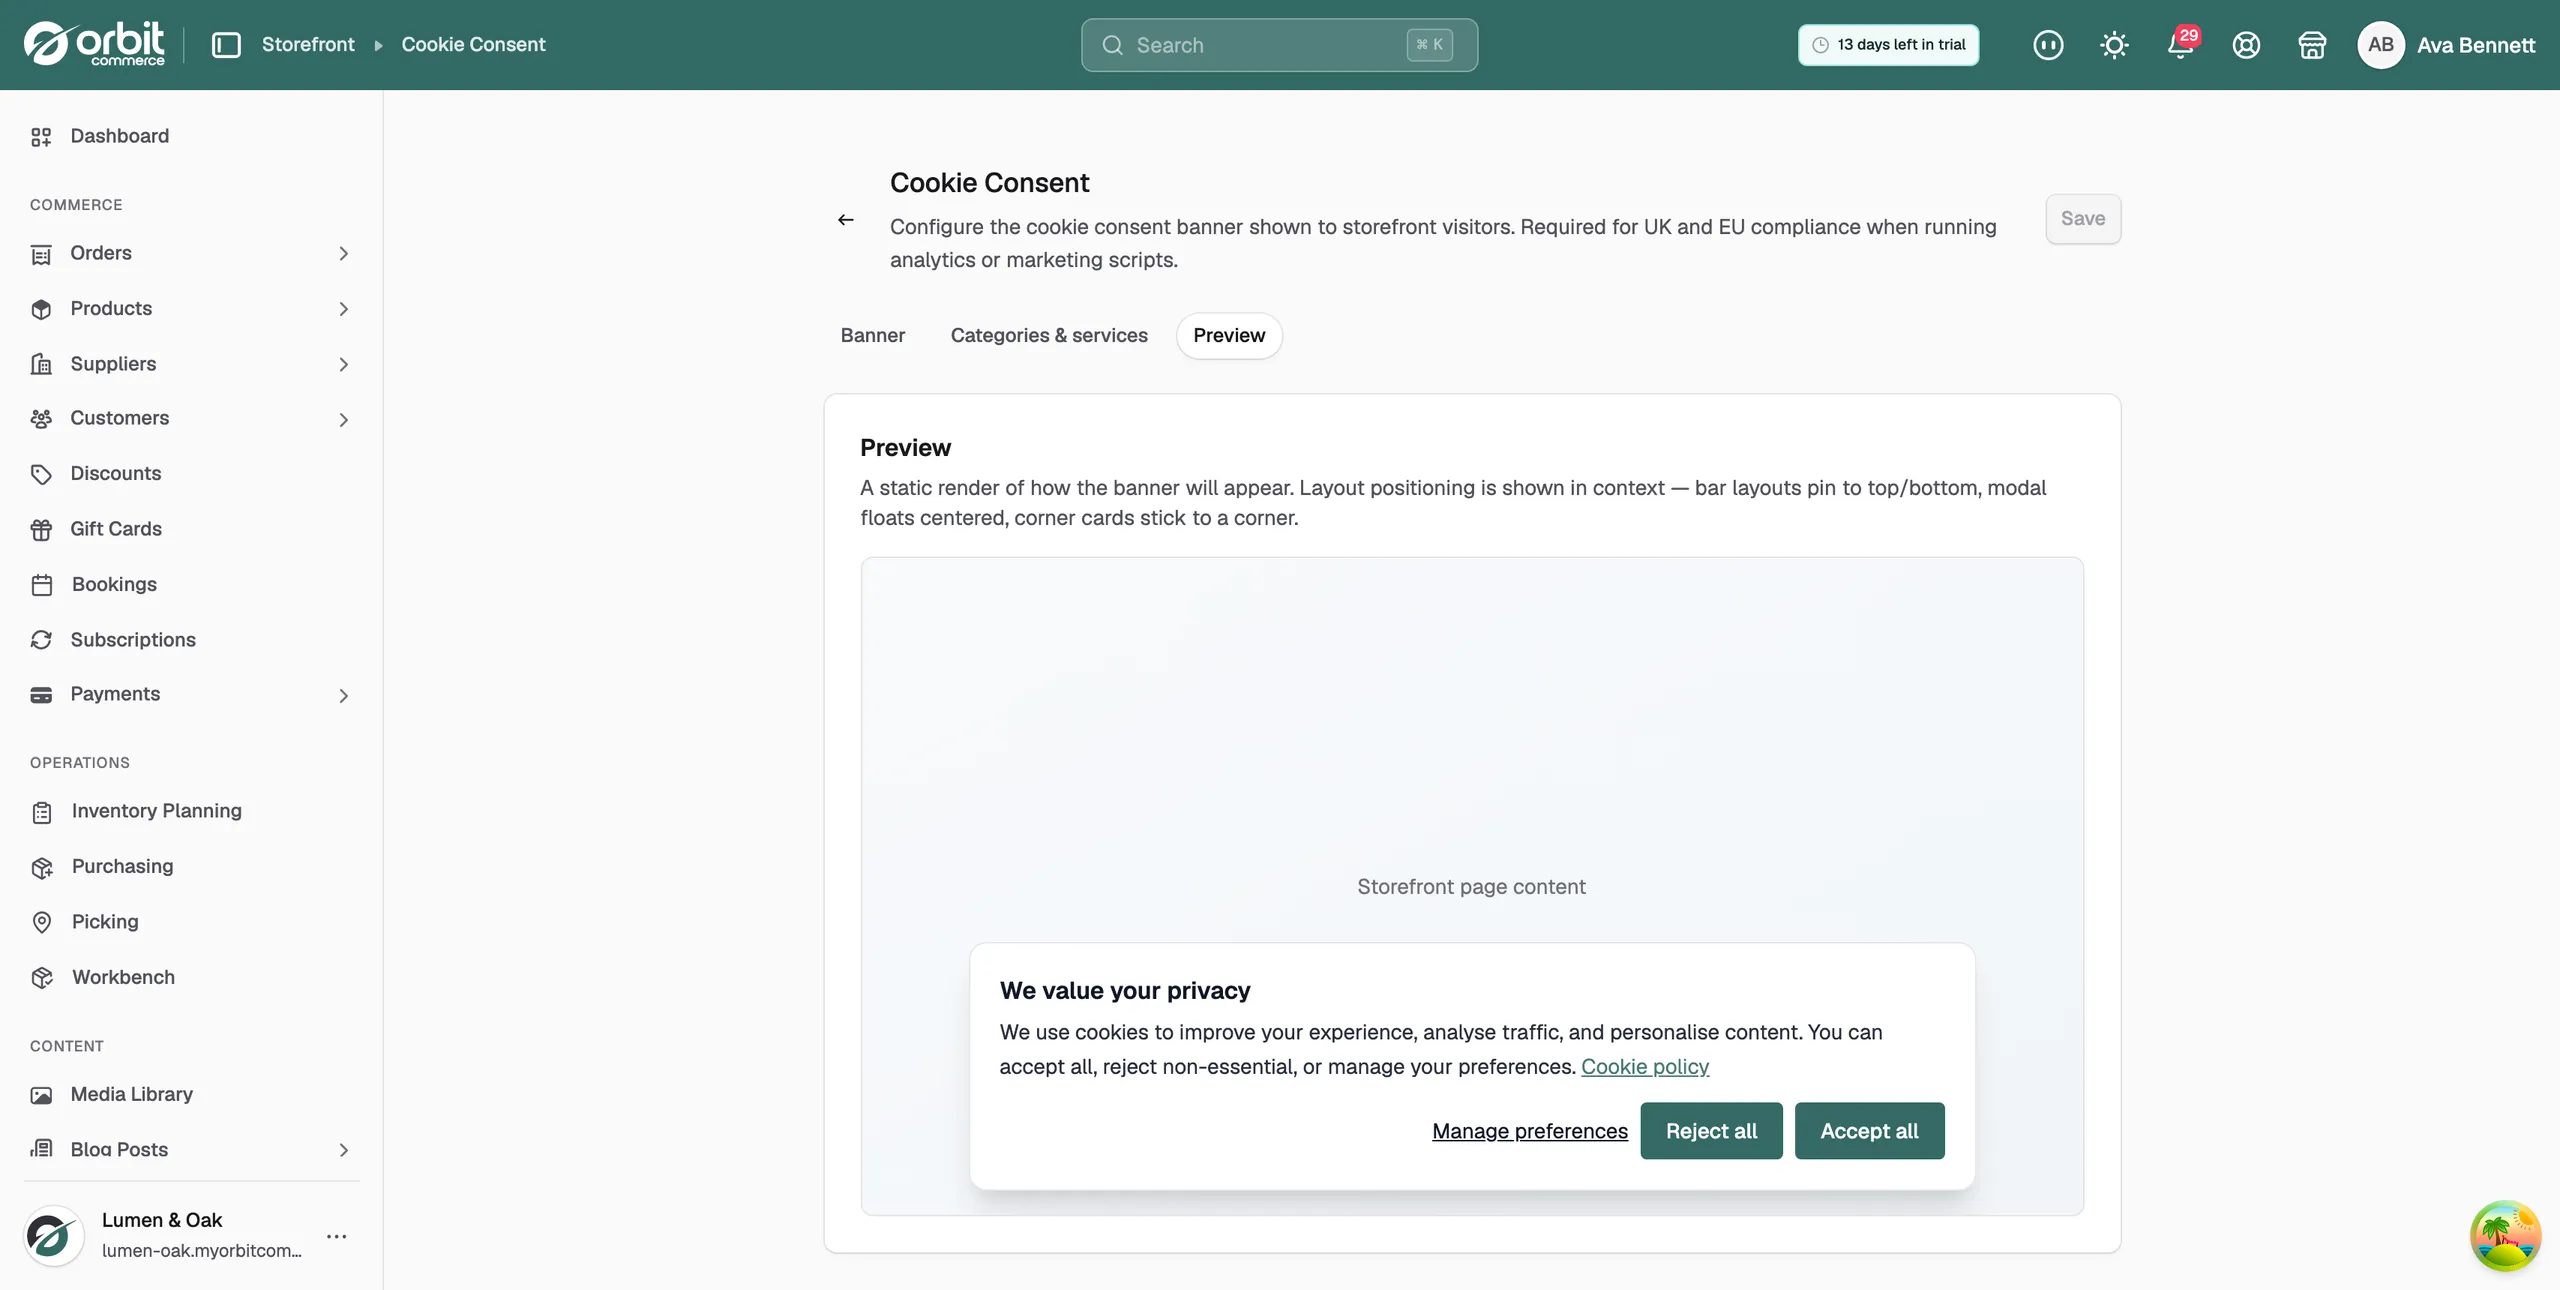
Save is greyed out until you change something. The preview does not show the preferences panel, the category list or the footer link.
Let visitors change their mind
UK PECR says withdrawing consent must be as easy as giving it. In Orbit, visitors do this through the Cookie Preferences element in your footer. If your footer template does not have one, a warning appears above the tabs on the Cookie Consent page: Visitors can't change their cookie choices, with the name of the footer it is missing from.
- Click Add it in the page builder in the warning. Your footer templates open.
- Open your footer in the builder and add the Cookie Preferences element.
- Save and publish the footer. The warning goes away.
Turn the banner off
If you do not sell to UK or EU customers and run no analytics or marketing scripts, you can switch the banner off.
- Go to Storefront > Preferences.
- Scroll to the Cookie consent card and switch off Enable cookie consent banner. The change saves at once.
Related guides
Was this helpful?
0 people found this helpful